
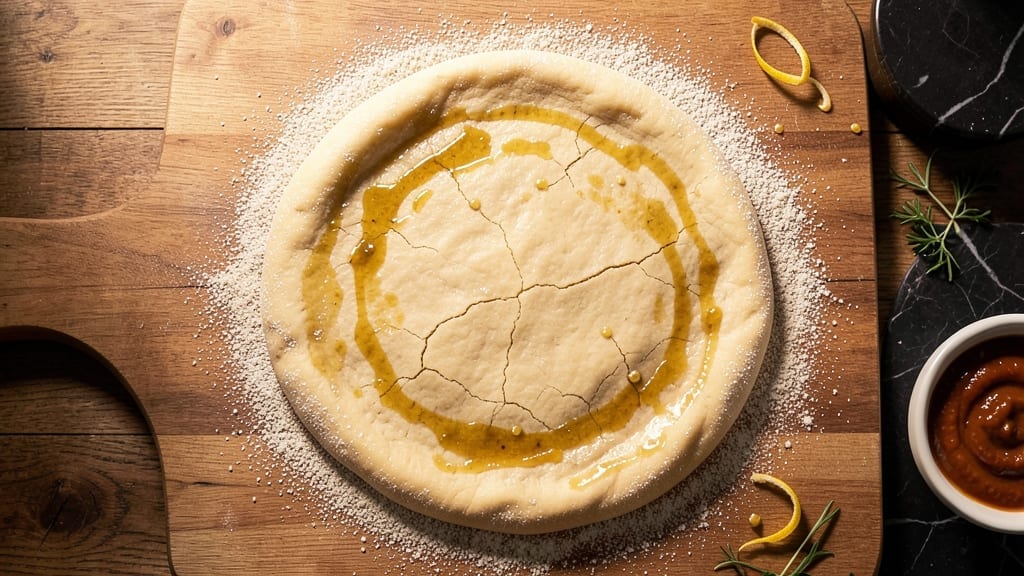
Mastering a 4-hour pizza dough recipe with cold-rise fermentation transforms your homemade pizza into restaurant-quality perfection. The secret lies in slow fermentation—developing flavor and texture while you sleep or work. This method creates a chewy, airy crust with open, leopard-spotted bubbles that store-bought dough can’t match, all with minimal effort.
The process begins with simple ingredients: high-protein flour, active yeast, water, and salt—mixed and kneaded into a smooth dough. After the initial rise, the dough spends 4 hours in the refrigerator, where cold temperatures slow fermentation, enhancing gluten development and flavor complexity.
This patient approach yields a crust that’s both tender and crispy, with a depth of taste you won’t find in quick-prep recipes.
What you’ll achieve is a dough that’s easy to shape, holds toppings perfectly, and bakes into a golden, blistered crust with a satisfying chew. The cold rise also means you can prepare the dough ahead of time, making pizza night effortless.
Whether you’re making classic Margherita or loaded deep-dish, this technique ensures professional results every time.
For best results, let the dough come to room temperature before shaping, and preheat your oven to its highest setting for that signature crisp. The 4-hour cold proof is the game-changer—it’s what separates good pizza from extraordinary. Ready to make dough that impresses? Here’s how to begin.
Ingredients for 4 hour pizza dough
High-protein flour and yeast kick off this slow-fermented pizza dough for restaurant-quality crust.
| Ingredient | Amount | Notes |
|---|---|---|
| High-Protein Bread Flour 🌾 | 3 ½ cups | 14% protein for chewy texture |
| Active Dry Yeast 🍞 | ¼ tsp | Fresh yeast if preferred |
| Warm Water 💧 | 1 ¼ cups | 105-110°F for activation |
| Diamond Crystal Kosher Salt 🧂 | 1 tsp | Fine grain preferred |
| Extra-Virgin Olive Oil 🫒 | 1 tbsp | For dough handling |
| Semolina Flour 🌾 | ½ cup | For dusting work surface |
| Cornmeal 🌽 | ¼ cup | For pizza peel |
| Granulated Sugar 🍚 | ½ tsp | Optional for yeast activation |
The flour is non-negotiable here—King Arthur or Caputo Tipo 00 are my go-tos, but any high-protein bread flour (14%+) will work. Yeast freshness matters: if your packet’s past its expiration, test it first in warm water with a pinch of sugar—should foam in 5-10 minutes. I buy yeast in bulk from Penzeys and store it in the freezer for maximum freshness. The olive oil isn’t just for flavor; it keeps the dough supple during the long cold rise. For the sugar, it’s optional but helps activate the yeast faster if you’re short on time.
No high-protein flour? All-purpose plus 1 tbsp vital wheat gluten gets you close. Fresh yeast? Use double the amount**> of active dry yeast. The olive oil can be swapped for vegetable or avocado oil—just avoid anything with strong flavor. For the sugar, honey or maple syrup work too, but they’ll add subtle sweetness. If you’re gluten-sensitive, Bob’s Red Mill 1-to-1 gluten-free flour blend works surprisingly well, though texture will differ. And yes, you can make this dough without a stand mixer—just knead for 10 minutes by hand.
This dough is designed to be made ahead. Shape and refrigerate the 4-hour cold proof in a sealed container for up to 3 days**>—perfect for meal prep. Once shaped, let it sit at room temp for 1-2 hours before baking for best results. The cold rise actually improves with time, so 5 days max in the fridge is fine. For longer storage, freeze shaped dough balls wrapped in plastic for 3 months**>—thaw overnight in the fridge before baking.
Why You’ll Love This Recipe
- Four-Hour Flexibility: I swear by this schedule—mix it in the morning, let it rise while I’m at work, and boom, dinner’s ready. No last-minute scrambling, just a dough that’s patiently waiting for me to turn it into something amazing.
- No-Fuss Flavor Bomb: That high-protein flour gives it a chewy, satisfying bite, while the olive oil keeps every slice rich and tender. Honestly, the saltiness balances out the yeasty punch perfectly—no fancy toppings needed to make it sing.
- Weeknight Workhorse: Double the batch, freeze half for lazy nights. Whether it’s a quick weeknight dinner or a game-day spread, this dough handles it all without fuss. My kids even beg for “plain cheese” nights now.
- Budget Magic: Five ingredients, zero waste—this dough stretches my grocery budget further than store-bought ever could. And since it keeps for days in the fridge, I’m always ready for pizza cravings without breaking the bank.
Step-by-step instructions for cold-rise pizza dough
Here’s how to make restaurant-quality dough that develops flavor overnight without any fuss.
Activate the Yeast for Maximum Rise
In a small bowl, combine the 1.25 cups warm water, 0.5 tsp granulated sugar, and 0.25 tsp active dry yeast. Let it sit for 5-10 minutes until frothy—this confirms your yeast is alive and ready to work. The mixture should bubble vigorously and smell subtly sweet.
If it doesn’t bubble after 10 minutes, your yeast might be dead. Start fresh with new yeast—this is the foundation of your dough. I always check this step first because skipping it leads to flat, dense pizza crust later. Once active, proceed immediately to avoid overproofing.
Mix the Dough with Minimal Handling
In a large bowl, whisk together the 3.5 cups high-protein bread flour and 1 tsp Diamond Crystal kosher salt. Create a well in the center and pour in the yeast mixture along with the 1 tbsp extra-virgin olive oil. Use a wooden spoon to gradually incorporate the flour from the edges, mixing just until a shaggy dough forms.
Here’s the thing—overmixing develops gluten too early, which can make your crust tough. Once the dough comes together, turn it out onto a lightly floured surface and knead gently for 2-3 minutes until smooth. You’re not looking for silky elasticity here, just a cohesive mass that holds together. The cold rise will do most of the gluten development work for you.
Cold-Rise for 4 Hours (The Secret Weapon)
Shape the dough into a loose ball, then place it in a lightly oiled bowl. Cover it tightly with plastic wrap or a damp towel to prevent drying. Refrigerate for exactly 4 hours. This slow fermentation develops complex flavors and creates that signature chewy, airy texture that separates great pizza from good pizza.
Don’t skip this step—I know it’s tempting to rush, but the cold rise is what makes this dough special. The low temperature slows yeast activity just enough to prevent overproofing while allowing time for flavor development. After 4 hours, your dough will have risen noticeably but still feel slightly firm to the touch.
Shape and Rest Before Baking
Remove the dough from the refrigerator and let it sit at room temperature for 30 minutes to relax. On a surface dusted with 0.5 cup semolina flour, gently divide the dough into 4 equal portions (about 8 ounces each) and shape them into balls. The semolina creates just enough friction to help with handling without sticking.
Cover the shaped dough balls with a clean kitchen towel and let them rest for another 30 minutes at room temperature. This final rest allows the gluten to relax, making it easier to stretch without tearing when you’re ready to shape your pizzas. The dough should be slightly tacky but not sticky—this is your perfect working texture.
Prepare Your Pizza Peel
Lightly dust your pizza peel with 0.25 cup cornmeal (or semolina if you prefer). The cornmeal creates just enough texture to help the dough release cleanly without sticking. I like to use cornmeal because it gives that classic pizza flavor and prevents the dough from sticking to the peel during baking.
Here’s a pro tip: If you don’t have a pizza peel, a well-seasoned baking sheet works in a pinch. Just make sure it’s hot before you transfer your pizza to it. The key is to have your peel ready and hot while your dough is resting—this ensures you can bake immediately after shaping, which is crucial for that perfect crispy crust.
Pro Tips For Making 4 Hour Pizza Dough
- Measure Salt Precisely: Diamond Crystal kosher salt clumps like a drama queen if you don’t weigh it—use 18 grams (about 1½ tablespoons) for the full recipe. I learned this the hard way when my dough turned out bland because I eyeballed it, and now I swear by a kitchen scale for this step.
- Hydrate Yeast Properly: Mix the yeast with warm water (105–110°F) and let it foam for 5–10 minutes before adding flour—this guarantees it’s active. Cold water kills it, and skipping this test means your dough might not rise, no matter how long you wait.
- Avoid Over-Kneading: The high-protein flour in this recipe is strong—stop kneading once the dough springs back slowly when poked (about 8–10 minutes by hand). Overworking it makes gluten tough, and your pizza will taste like chewy shoe leather instead of airy cloud.
- Use Olive Oil Sparingly: The recipe calls for 2 tablespoons of extra-virgin olive oil, but don’t drown it—too much makes the dough sticky and hard to shape. Brush the bowl lightly instead of dumping it all in; the dough will still be flavorful without turning into a greasy mess.
Dietary considerations for this dish
Gluten-Free Adaptations
For gluten-free pizza lovers, swap the high-protein bread flour for a 1:1 gluten-free blend like Bob’s Red Mill or King Arthur. Add 1 tbsp xanthan gum to mimic gluten’s elasticity.
The dough will be slightly denser but still delicious. Let the cold rise for 6-8 hours—gluten-free dough needs extra time to develop flavor. 🌾
Dairy-Free Options
Skip the cheese entirely or use nutritional yeast for a cheesy flavor without dairy. For toppings, try olive oil instead of butter when brushing the crust.
Dairy-free mozzarella alternatives like Miyoko’s or Violife work well when baked. The cold rise process remains the same, ensuring a crispy texture even without cheese.
Nut-Free Considerations
Standard pizza dough is naturally nut-free, but always check your toppings. Use sunflower seed butter instead of almond-based spreads if needed. For extra flavor, add garlic-infused olive oil or herb blends to compensate. The cold rise technique enhances flavor, making nut-free pizzas just as satisfying. 🧂
Low-Carb Modifications
Replace 3 cups of flour with almond flour or coconut flour (adjust liquid as needed—these flours absorb differently). Add 1 extra egg for binding. The dough will be crumbly, so handle gently.
Bake at higher heat (550°F+) for a crispy result. The cold rise still improves texture, though low-carb dough benefits from less time (3 hours max).
Allergen-Friendly Tips
For egg-free dough, replace the egg with 1 tbsp ground flaxseed + 3 tbsp water (let sit for 5 minutes). For soy-free, ensure your yeast and toppings are certified.
Always double-check labels—hidden allergens lurk in sauces and seasonings. The cold rise method works for all adaptations, ensuring safe yet delicious results. ✨
Nutrition facts
Frequently asked questions
Can I use all-purpose flour instead of high-protein bread flour?
The recipe calls for high-protein flour (14%+) to achieve that perfect chewy, airy texture. If you must substitute, mix 3.5 cups all-purpose flour with 1 tbsp vital wheat gluten to boost protein content. The gluten helps create the ideal structure for cold-rise dough. Without it, your crust may be thinner or less flavorful.
What happens if I skip the 4-hour cold rise?
Skipping the cold rise won’t ruin your pizza, but you’ll miss out on the signature chewy texture and enhanced flavor. The dough will rise faster at room temperature, risking overproofing and a denser crust. For best results, stick to the 4-hour cold proof—it’s what gives this dough its restaurant-quality texture. If short on time, a 2-hour cold rise still improves flavor over no rise at all.
How do I know when the dough is properly rested before shaping?
After removing dough from the fridge, let it sit at room temperature for 30 minutes before shaping. The dough should feel slightly tacky but not sticky to the touch—this indicates proper relaxation. If it’s still firm, let it rest another 10-15 minutes. Over-rested dough becomes sticky; under-rested dough tears easily. The 30-minute rest> is crucial for stretchable, tear-free pizza crusts.
Can I make this dough ahead of time?
Yes! This dough is designed for meal prep. Shape the dough into balls after the 4-hour cold rise> and refrigerate in an airtight container for up to 3 days>. For longer storage, freeze shaped dough balls for 3 months>. Thaw overnight in the fridge before using. The cold rise actually improves with time, so making dough ahead enhances flavor.
Why does my dough smell yeasty after the cold rise?
A strong yeasty aroma after cold proofing is normal—it means fermentation is working! The cold slows yeast activity, so the smell develops more gradually than with room-temperature rises. If the odor is overly sour or rotten, your dough may have overproofed. For best results, stick to the 4-hour window**> and avoid opening the fridge door too often. The dough should smell pleasantly tangy, not sharp.

- 6 Oz Chocolate Chip Cookie Recipe: Perfectly Balanced Crispy Edges and Chewy Hearts - September 25, 2026
- 6-Inch Coffee Cake Recipe: Vanilla Bean Swirls and Buttery Streusel Topping - September 25, 2026
- 1 Hour Soup Recipe: Velvety Richness Without the Wait - September 25, 2026