
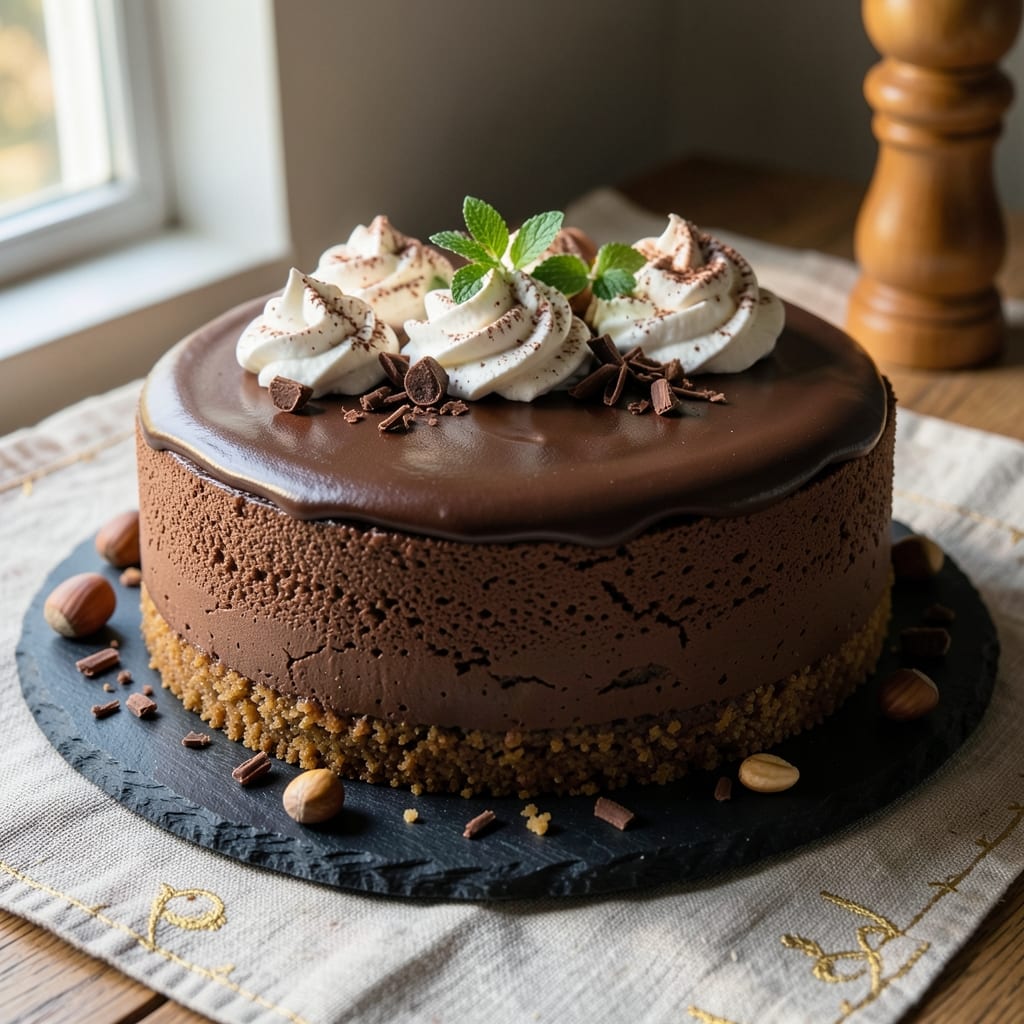
This 4-inch chocolate cheesecake recipe delivers restaurant-quality dessert in perfect bite-sized portions—rich, silky filling with a crispy chocolate crust that melts in your mouth. 💫 The secret lies in precise measurements and a water bath baking technique that ensures a smooth texture without cracking.
I’ve perfected this version after years of testing, and it consistently yields cheesecakes that impress even the most critical dessert lovers.
The recipe uses a simple graham cracker crust loaded with cocoa powder for extra chocolate flavor, while the filling combines cream cheese, sour cream, and melted chocolate for that signature velvety consistency.
Baking time is just 45 minutes at 325°F, with a mandatory 2-hour cooling period in the fridge to set properly. The result? A cheesecake with a fudgy center and a smooth, crack-free top that’s perfect for parties or personal indulgence.
What sets this recipe apart is its foolproof method—no special equipment needed beyond a 4-inch springform pan and a water bath setup. The combination of dark chocolate and cocoa powder in both crust and filling creates layers of flavor that balance sweetness with depth.
Each slice delivers that decadent chocolate experience without being overly heavy.
Serve these mini cheesecakes with fresh berries, a drizzle of caramel, or a dusting of cocoa powder for an elegant touch. They’re ideal for gatherings where you want dessert without overwhelming portions, or simply as a treat to enjoy with a cup of coffee.
Here’s how to make them perfectly every time.
Ingredients for 4 inch chocolate cheesecake
Twelve ingredients for twelve perfect mini cheesecakes with a fudgy center and velvety texture.
| Ingredient | Amount | Notes |
|---|---|---|
| Graham Cracker Crumbs 🍪 | 1 ½ cups | Finely crushed, plus extra for pan |
| Unsalted Butter 🧈 | ½ cup | Cold, cubed for crust |
| Granulated Sugar 🍚 | ¼ cup | Packed firmly for crust |
| Cocoa Powder 🍫 | ¼ cup | Dutch-processed for richness |
| Large Eggs 🥚 | 3 whole | Room temperature for smooth filling |
| Full-Fat Sour Cream 🥛 | ½ cup | Full-fat for creaminess |
| Cream Cheese 🧀 | 16 oz | Room temperature, full-fat |
| Granulated Sugar 🍚 | 1 cup | For filling sweetness |
| Dark Chocolate Chips 🍫 | ½ cup | Semi-sweet, high-quality |
| Vanilla Extract 🌿 | 1 ½ tbsp | Pure, high-quality |
| Salt 🧂 | ¼ tsp | Fine sea salt |
| All-Purpose Flour 🌾 | 2 tbsp | For filling stability |
The cocoa powder makes all the difference here—Dutch-processed is ideal, but natural cocoa works too. For the graham crackers, Honey Maid or Nabisco work best; avoid pre-made crumbs that lose crispness. The butter should be cold when mixed with the crumbs to create a firm crust that holds shape during baking. If your kitchen runs warm, chill the crust mixture for 30 minutes before pressing into the pan. The dark chocolate chips? Ghirardelli or Goya brands melt smoothly without graininess, worth the slight splurge for that restaurant-quality finish.
No sour cream? Full-fat Greek yogurt at half the amount works in a pinch, though the texture won’t be identical. Running short on eggs? Flax eggs (1 tbsp ground flaxseed + 3 tbsp water per egg) can replace one egg, but for this delicate texture, stick to eggs for best results. The cream cheese must be room temperature—cold lumps create lumps in the filling. If you’re using a springform pan, grease it lightly with butter and dust with cocoa powder to prevent sticking. For the chocolate, microwave in 20-second bursts to avoid burning, stirring between each interval for even melting.
The crust keeps well in an airtight container for 3 days at room temperature, though it’s best fresh. The filling mixture can be prepped 24 hours ahead and stored in the fridge, saving you last-minute prep. Once baked, these mini cheesecakes must cool completely in the pan before refrigerating for at least 2 hours—this prevents cracks and ensures that silky texture. For make-ahead parties, assemble the crusts and filling 1 day in advance, then bake just before serving. Store baked cheesecakes in the fridge for up to 5 days, though they’re best enjoyed within 3 days for optimal texture.
Why You’ll Love This Recipe
- Here’s what sold me: the cocoa powder and sugar blend into the batter so smoothly, you get that deep chocolate flavor without needing fancy mix-ins. The eggs bind it just right—creamy, not grainy—so every bite feels indulgent.
- No Fuss Crust: I swear, the crust takes five minutes—just melt butter, mix with crumbs, press into the pan. No rolling, no stress, and that buttery graham cracker bite? It’s the perfect crunchy hug for the cheesecake.
- Rich Without Effort: Here’s what sold me: the cocoa powder and sugar blend into the batter so smoothly, you get that deep chocolate flavor without needing fancy mix-ins. The eggs bind it just right—creamy, not grainy—so every bite feels indulgent.
- Portion Control Perfection: Four-inch pans mean actual single servings—no awkward leftovers or forcing people to share. Perfect for date night, a quiet dessert after dinner, or when you just want a slice without committing to a whole cake.
Step-by-step instructions for 4-Inch chocolate cheesecake
Here’s how to create perfectly silky mini cheesecakes with a rich chocolate crust.
👨🍳 Step 1: Prepare the Chocolate Crust
Preheat your oven to 325°F and arrange a rack in the middle position. In a medium bowl, combine the 1.5 cups graham cracker crumbs, 0.5 cup cold cubed unsalted butter, 0.25 cup packed granulated sugar, and 0.25 cup cocoa powder. Mix with a fork until the mixture resembles wet sand with pea-sized crumbs.
Press this mixture firmly and evenly into a 4-inch springform pan, creating a thin, even layer on the bottom and about ½ inch up the sides. Use the back of a spoon to smooth the surface. Place the pan on a baking sheet and chill in the refrigerator for 15 minutes while you prepare the filling.
👨🍳 Step 2: Make the Silky Chocolate Filling
In a large mixing bowl, beat the 16 oz room-temperature cream cheese and 1 cup granulated sugar together on medium speed until completely smooth and creamy, about 2-3 minutes. This step is crucial for preventing lumps in your final cheesecake.
Add the 3 whole room-temperature large eggs, one at a time, mixing just until each is fully incorporated after each addition. Scrape down the sides of the bowl as needed. Stir in the 0.5 cup full-fat sour cream, 1.5 tbsp vanilla extract, 0.25 tsp salt, and 2 tbsp all-purpose flour until completely combined. Fold in the 0.5 cup dark chocolate chips using a spatula, ensuring even distribution.
🥘 Step 3: Bake the Cheesecakes
Pour the filling over the chilled crust, smoothing the top with a spatula. Place the springform pan on the prepared baking sheet and bake for 35-40 minutes until the edges are set and the center still has a slight wobble—it should look almost set but not completely firm.
This is the critical stage: the cheesecake should be just set but still slightly jiggly in the center. If you prefer a firmer texture, bake for an additional 5 minutes. Turn off the oven, crack the door open about 2 inches, and let the cheesecakes cool inside for 30 minutes to prevent cracking.
⏰ Step 4: Chill and Set
Remove the cheesecakes from the oven and let them cool at room temperature for 1 hour. Then transfer to the refrigerator and chill for at least 4 hours, preferably overnight. This extended chilling time allows the flavors to meld and the texture to become perfectly silky.
When ready to serve, run a thin knife around the edge of the springform pan to loosen any potential sticking. Release the sides gently and remove the ring. Serve at room temperature for the best texture contrast between the cool filling and warm crust.
Pro Tips For Making 4 Inch Chocolate Cheesecake
- Melt Butter Slow: Heat the butter for the crust on low until it’s just liquid—no browning. I learned this the hard way after one batch turned into a sad, greasy mess. Overheating butter makes the crust soggy instead of crisp.
- Sift the Cocoa: Sift the cocoa powder twice into the batter—this cuts lumps and keeps the texture smooth. I was skeptical until I tried it, and now I can’t imagine skipping it.
- Room-Temp Eggs: Let the eggs sit out for at least 30 minutes before mixing. Cold eggs make the batter curdle, and nobody wants a lumpy chocolate cheesecake. (Yes, even if you’re impatient like me.)
- Water Bath Mandatory: Wrap the pan in heavy-duty foil before baking in the water bath—this prevents leaks and ensures even cooking. I used parchment once, and it tore halfway through. Don’t repeat my mistake.
Serving suggestions for this dish
Elegant Garnishes
Fresh raspberries or blackberries add a pop of color and tart contrast to the rich chocolate. Arrange them in a circular pattern on top or scatter them around for a rustic look. I like using strawberries sliced into thin fans for a more dramatic presentation. 💫
A drizzle of dark chocolate ganache (melt 4 oz dark chocolate with 2 tbsp heavy cream) elevates the dish instantly. For extra flair, dust with unsweetened cocoa powder using a fine-mesh sieve for a professional finish. A sprinkle of crushed pistachios or toasted hazelnuts adds crunch and visual appeal.
Pairing with Coffee
Serve these mini cheesecakes with a strong brewed coffee—I recommend a medium-roast Colombian or espresso-based drink like a latte or cappuccino. The bitterness of the coffee cuts through the sweetness, creating a perfect balance.
For a dessert coffee, try a mocha made with chocolate syrup and whipped cream.
If you prefer tea, a chamomile or Earl Grey complements the chocolate notes beautifully. The floral notes in Earl Grey enhance the cocoa flavor, while chamomile adds a soothing contrast. Avoid overly sweet teas like chai, as they can clash with the cheesecake’s richness.
Wine Pairings
A dry red wine like Cabernet Sauvignon or Pinot Noir pairs wonderfully with the chocolate intensity. The tannins in red wine help cleanse your palate between bites, making each slice taste even more decadent. I love a California Cabernet with its bold fruit flavors and smooth finish. 🍷
For a lighter option, a dry sparkling wine like Prosecco or Champagne adds a refreshing contrast. The bubbles and acidity balance the richness of the cheesecake, making it feel lighter on the palate. Avoid sweet dessert wines—they’ll overpower the delicate flavors.
Make It a Party Dessert
Arrange the mini cheesecakes on a tiered serving tray with alternating heights for visual interest. Add edible gold leaf or shimmering sugar sprinkles for a festive touch. For a themed party, use mini fondant decorations like tiny chocolate flowers or berries to match your event’s color scheme.
Serve with mini spoons or small forks for easy grabbing at gatherings. Label each cheesecake with a chocolate-covered tag sharing fun facts like “Rich Chocolate Crust” or “Silky Center” to engage guests. These details make your dessert table look like it came from a high-end bakery! ✨
Nutrition facts
Frequently asked questions
Can I use a different pan size for this recipe?
This recipe is specifically designed for a 4-inch springform pan to create perfect mini portions. If you want to scale up, use an 8-inch pan but increase all ingredients by 4x (including baking time). For a 6-inch pan, multiply by 2.5x. Always adjust baking time based on your pan size—smaller pans bake faster!
Why does my chocolate cheesecake crack?
Cracking usually happens from sudden temperature changes or overbaking. To prevent it: 1) Bake at 325°F (not higher) for the full 35-40 minutes with a slightly jiggly center, 2) Let the cheesecake cool in the oven with the door cracked for 30 minutes after baking, then cool at room temperature for 1 hour before refrigerating, and 3) Avoid opening the oven door during baking.
How do I make this recipe vegan?
For a vegan version, replace the cream cheese with 16 oz vegan cream cheese, eggs with 3 flax eggs (1 tbsp ground flaxseed + 3 tbsp water per egg), and butter with vegan butter. Use vegan graham crackers for the crust and ensure your chocolate chips are dairy-free. The texture will be slightly different but still delicious!
Can I bake these ahead of time?
Bake the cheesecakes up to 3 days ahead and store them in an airtight container in the fridge. Bring to room temperature for 30 minutes before serving to enhance the texture. For parties, assemble the crusts and filling 1 day ahead, then bake just before serving to keep them fresh.
What’s the secret to a perfectly smooth filling?
The key is room-temperature ingredients and thorough mixing. Make sure your cream cheese, eggs, and sour cream are all at room temperature before combining. Beat the cream cheese and sugar until completely smooth (about 2-3 minutes), and add eggs one at a time, mixing just until each is incorporated. Avoid overmixing after adding the eggs to prevent lumps.

- 6 Oz Chocolate Chip Cookie Recipe: Perfectly Balanced Crispy Edges and Chewy Hearts - September 25, 2026
- 6-Inch Coffee Cake Recipe: Vanilla Bean Swirls and Buttery Streusel Topping - September 25, 2026
- 1 Hour Soup Recipe: Velvety Richness Without the Wait - September 25, 2026