
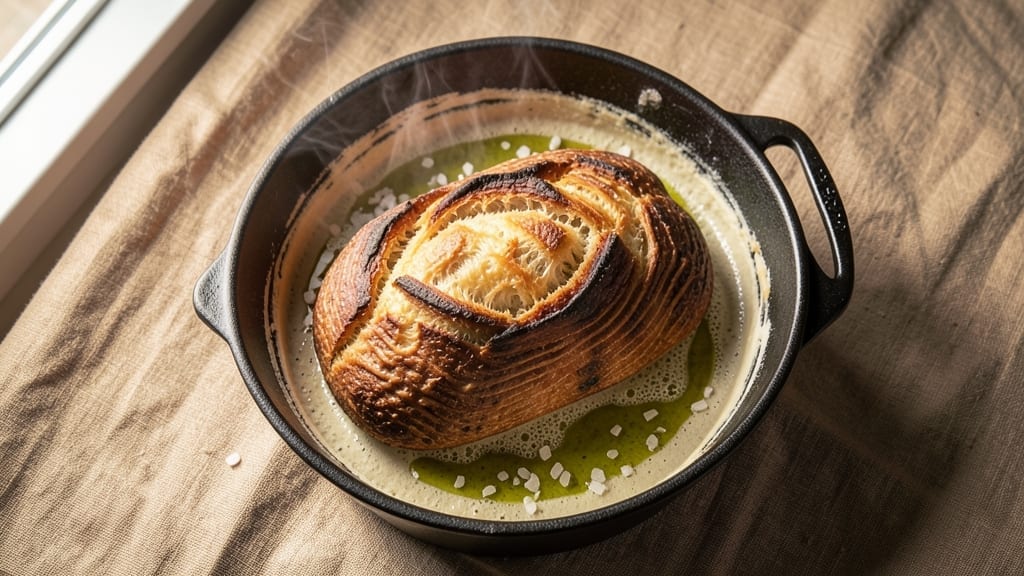
A 4-quart Dutch oven bread recipe delivers the perfect balance of crispy crust and airy interior with minimal effort. The secret lies in the Dutch oven’s ability to trap steam, creating that iconic bakery-style texture without requiring a steam-injected oven.
I’ve baked hundreds of loaves, and this method consistently produces results that rival artisanal bread—no fancy equipment or years of experience required.
This recipe simplifies the process with a hands-off rise, allowing the dough to develop naturally while you handle other tasks. The dough comes together with just five simple ingredients—flour, water, yeast, salt, and a touch of sugar—but the technique transforms them into something extraordinary.
Baking at 425°F ensures a golden, crackling crust while keeping the interior soft and pillowy, every time.
What you’ll achieve is a loaf with a crusty exterior that snaps satisfyingly and an interior so light it practically floats. The aroma alone will have everyone gathering around the kitchen, and the texture—crisp yet tender—is the hallmark of great bread.
This method works beautifully for sandwich loaves, boules, or even dinner rolls, with optional add-ins like seeds or herbs for customization.
Whether you’re a beginner or an experienced baker, this recipe delivers restaurant-quality results with minimal fuss. The Dutch oven does most of the work, leaving you with a loaf that’s crispy on the outside, soft on the inside, and impossible to resist.
Let’s get started on making bread that tastes like it came from a professional bakery.
Ingredients for 4 quart dutch oven bread
Five core ingredients transform into bakery-style bread with Dutch oven magic.
| Ingredient | Amount | Notes |
|---|---|---|
| Bread Flour 🌾 | 4 cups | High-protein for structure and chew |
| Warm Water 💧 | 1 ¼ cups | 105-110°F for optimal yeast activation |
| Active Dry Yeast 🍞 | ½ tsp | Ensure freshness (test in warm water) |
| Granulated Sugar 🍚 | ½ tsp | Feeds yeast for proper fermentation |
| Diamond Crystal Kosher Salt 🧂 | 1 ½ tsp | Adjusts for salt volume differences |
| Extra-Virgin Olive Oil 🫒 | 1 tbsp | For dough elasticity and crust shine |
| Cornmeal 🌽 | ¼ cup | For dusting Dutch oven and baking sheet |
| Ice Water ❄️ | ⅛ cup | For final dough temperature adjustment |
The bread flour is non-negotiable here—its high protein content creates that perfect chewy texture. King Arthur or Caputo are my go-tos for consistent results, but any bread flour with 12-14% protein works. The yeast should be active dry (not instant) for this method, and check expiration dates—old yeast won’t activate properly. For the water, temperature matters: too hot kills yeast, too cold slows fermentation. I use a thermometer to hit 105-110°F every time. The olive oil isn’t just flavor—it creates tension in the gluten network for that signature oven spring. California Avocado Ranch has the best-priced extra-virgin in bulk.
No bread flour? All-purpose plus 1 tbsp vital wheat gluten gets you close, though texture won’t be identical. Running short on yeast? Nutritional yeast at double the amount works in a pinch, though results vary. The salt measurement is critical—Diamond Crystal is lighter than Morton, so use 1.5 tsp instead of 1 tsp if you’re substituting. For the olive oil, avocado oil works but lacks the fruity notes. And that ice water? Don’t skip it—it cools the dough just enough to prevent overproofing during the hands-off rise. The cornmeal isn’t just for dusting; its slight sweetness enhances the crust’s flavor.
Store your flour in an airtight container away from light for up to 6 months, though fresh is always better. Yeast keeps in the fridge for 3 months but loses potency over time—test a pinch in warm water before using. The cornmeal lasts indefinitely in the pantry. For the dough itself, once shaped, it can proof at room temperature for 1-2 hours or in the fridge overnight for deeper flavor. Baked loaves stay fresh for 3 days wrapped at room temperature or 1 week frozen. For reheating, 5 minutes at 350°F restores that bakery-fresh crunch.
Why You’ll Love This Recipe
- No-Knead Magic: I mix the dough in 5 minutes—just flour, water, yeast, and salt—and let the Dutch oven do the rest. Honestly, the hands-off rising makes it my go-to when I’m exhausted but still want fresh bread.
- Crust That Cracks: That golden, shatter-hard crust? It’s all thanks to the Dutch oven’s steam trap, while the inside stays soft and airy. I’ll be real: it’s the kind of bread that makes you pause mid-bite just to admire it.
- Weeknight Workhorse: Toss in a loaf for breakfast sandwiches, freeze half for lazy mornings, or serve it warm with soup. Between us, this recipe keeps my pantry stocked without extra effort—just proof that simple ingredients win.
- Budget Crust: A single batch costs me pennies but feels like a bakery loaf. The yeast and salt do all the flavor work, so I’m not chasing fancy ingredients. (Yes, even on a Tuesday night.)
Step-by-step instructions for artisan Dutch oven bread
Master this method and you’ll achieve bakery-quality bread with a crisp crust and open crumb every time.
Activate the Yeast and Mix the Dough
In a large mixing bowl, combine the 1.25 cups warm water, 0.5 tsp granulated sugar, and 0.5 tsp active dry yeast. Let this mixture sit for 5-10 minutes until it becomes foamy and bubbly—this confirms your yeast is active. If it doesn’t bubble, your yeast may be stale and should be replaced.
Add the 4 cups bread flour and 1.5 tsp diamond crystal kosher salt to the bowl. Using a wooden spoon or dough whisk, stir until a shaggy mass forms. Then, drizzle in the 1 tbsp extra-virgin olive oil and mix until the dough begins to come together. The dough should be sticky but manageable—this high hydration creates that signature open crumb structure.
Knead by Hand for Optimal Gluten Development
Turn the dough onto a lightly floured surface and knead for 8-10 minutes by pressing down, folding, and turning. You’re looking for smooth, elastic dough that springs back when poked. The high protein content in bread flour requires this thorough kneading to develop proper gluten structure—this is what gives your bread its chewy texture and ability to hold shape.
If the dough feels too sticky, wet your hands slightly and continue kneading. Avoid adding extra flour at this stage—it will affect hydration and final texture. When you’re done, the dough should pass the “windowpane test”: stretch a small piece thin enough to see light through without tearing.
Bulk Ferment at Room Temperature
Lightly oil a large bowl, place the dough inside, and cover with a damp kitchen towel or plastic wrap. Let it rise at room temperature (70-75°F) for 1.5-2 hours until it has nearly doubled in size. You’ll see bubbles forming on the surface and the dough will feel light and airy when pressed gently with one finger.
This bulk fermentation is crucial for flavor development and proper crumb structure. Don’t rush this step—under-fermented dough will result in dense bread. If your kitchen is cold, extend the time to 2.5 hours. The dough should jiggle slightly when the bowl is moved, indicating proper gas production.
Shape and Cold Proof for Structure
Turn the dough onto a lightly cornmeal-dusted surface (using the 0.25 cup cornmeal) and gently deflate it by pressing down. Shape into a round loaf by pulling the edges toward the center and tucking them under. Place the shaped dough, seam-side up, in a lightly greased bowl and cover again. Refrigerate for 12-16 hours—this cold proofing enhances flavor and improves oven spring.
The cold proof creates a more stable gluten structure that resists collapse during baking. When ready, the dough should feel firm and springy. If you’re short on time, you can skip the cold proof and do a second room-temperature rise for 1 hour after shaping, but the flavor won’t be as developed.
Bake in Preheated Dutch Oven for Maximum Crust
Preheat your 4-quart Dutch oven in the oven at 475°F for 45 minutes. Meanwhile, turn the dough out onto a piece of parchment paper and score the top with a sharp razor or serrated knife in a crosshatch pattern. This helps control expansion and creates that beautiful crust pattern.
Carefully transfer the dough (with parchment) into the hot Dutch oven. Bake covered for 20 minutes, then remove the lid and bake uncovered for an additional 15-20 minutes until the crust is deep golden brown and sounds hollow when tapped on the bottom. The internal temperature should reach 205-210°F when measured with an instant-read thermometer.
Cool Properly for Best Texture
Remove the bread from the Dutch oven and transfer to a wire rack. Let it cool completely for at least 1 hour before slicing. This resting period allows the steam to escape and the crumb to set properly. Cutting too soon will result in a gummy interior and poor texture.
The bread will continue to firm up as it cools, developing that perfect balance of crisp crust and tender crumb. Store wrapped at room temperature for up to 3 days or freeze for longer storage. The flavor actually improves over the first 24 hours as the starch retrogrades.
Pro Tips For Making 4 Quart Dutch Oven Bread
- Measure Salt by Weight: Diamond Crystal kosher salt clumps like a liar at a poker game. Use a scale for the 2% of your flour weight—20g per 1000g flour—because eyeballing it means your bread will taste either bland or like a salt lick. I learned this after making a batch that tasted like it was missing its soul.
- Hydrate Yeast Properly: Skip the “sprinkle and mix” approach—yeast needs a warm bath, not a dry heave. Dissolve sugar in 1/4 cup warm water (110°F) first, then add yeast and let it foam for 5-10 minutes. Cold water kills it, and hot water cooks it. Test the water with your finger—should feel like bathwater, not a sauna.
- Don’t Overproof the Dough: Your dough’s ready when it springs back slowly when poked—not instantly like a trampoline. In a 4-quart Dutch oven, aim for 1.5–2 hours total rise time (including bulk and shape rise). Overproofing turns chewy bread into a sad, dense brick. I once let mine go overnight because I forgot—don’t be me.
- Preheat Lid and Pot: Your Dutch oven isn’t a cold storage unit. Preheat the lid inverted on the rack for 15 minutes while the oven cranks to 475°F. A hot lid traps steam better, giving you that oven-spring magic. Cold lids = flat bread. Trust me, your future loaf will thank you.
Regional styles of these flavors
Italian Rustic Panettone
For a festive twist, transform your Dutch oven loaf into a panettone-style bread by adding ½ cup candied citrus peel and ½ cup raisins to the dough after mixing. Shape it into a round boule, then bake as directed.
The Dutch oven’s steam creates that signature tender crumb while the citrus and raisins add sweet complexity. Serve with a dusting of powdered sugar for holiday gatherings. 🎄
French Fougasse
Create a Provençal fougasse by shaping the dough into an oval with dimples pressed into the top using your fingers. Add 2 tbsp chopped fresh rosemary and 1 tbsp flaky sea salt to the dough before shaping.
Bake covered for 25 minutes, then uncovered for 10-15 minutes until golden. The Dutch oven’s steam enhances the herby aroma, perfect for picnic lunches. 🌿
German Pretzel Boule
For a pretzel-inspired loaf, dissolve 1 tbsp baking soda in ½ cup warm water and brush the shaped dough with this solution before baking. Sprinkle with 1 tbsp coarse sea salt and 1 tbsp sesame seeds after scoring.
The Dutch oven’s trapped steam creates a crispy, salty crust with a soft interior—ideal for breakfast sandwiches. 🥨
Mexican Corn & Herb
Replace 1 cup of the bread flour with 1 cup fine cornmeal and add 1 tbsp chopped fresh cilantro and 1 tsp ground cumin to the dough. Shape into a round loaf and bake as usual.
The Dutch oven’s steam highlights the corn’s sweetness, while the cumin adds warmth. Serve with black beans and salsa for a fusion twist. 🌶️
Scandinavian Cardamom
Infuse the dough with 1 tsp ground cardamom and 1 tbsp honey for a Nordic-inspired loaf. Shape into a round boule and bake in the Dutch oven for an extra 5 minutes uncovered to deepen the caramelization. The cardamom’s floral notes pair beautifully with butter, perfect for Scandinavian-inspired breakfasts. 🌸
Southern Cornbread Loaf
Swap 1 cup of the bread flour for 1 cup fine cornmeal and add 1 cup shredded sharp cheddar to the dough. Shape into a round loaf and bake as directed.
The Dutch oven’s steam keeps the interior moist while the cheese adds richness. Slice and serve with honey butter for a Southern-style bread. 🧀
Nutrition facts
Frequently asked questions
Why does my Dutch oven bread turn out dense instead of airy?
Dense bread usually means underproofed dough or improper kneading. Make sure your yeast is active (it should foam within 5-10 minutes in warm water), and knead for the full 8-10 minutes to develop gluten. Also, don’t skip the cold proof—it’s key for proper oven spring. If your kitchen is cold, extend the bulk rise to 2.5 hours.
Can I use all-purpose flour instead of bread flour?
Yes, but your bread will have a slightly less chewy texture. Replace the 4 cups bread flour with 4 cups all-purpose flour plus 1 tbsp vital wheat gluten to improve structure. The gluten boost helps mimic bread flour’s protein content. For best results, stick with bread flour if possible—it’s worth the small investment for that signature artisan texture.
How do I know when the bread is fully baked?
Your bread is done when it reaches an internal temperature of 205-210°F and sounds hollow when tapped on the bottom. The crust should be deep golden brown, and the edges should pull away slightly from the Dutch oven. If unsure, bake 5 more minutes—underbaked bread will continue cooking as it cools and may turn gummy.
Can I make this recipe in a smaller Dutch oven?
Yes, but you’ll need to adjust the dough quantity. A 3-quart Dutch oven works well with 3 cups bread flour and 0.9 cups warm water, reducing all other ingredients proportionally. The baking time remains similar, but the smaller size may require slightly more attention to prevent burning. The steam effect will still create that great crust, just on a smaller scale.
What’s the best way to store leftover bread?
Wrap cooled bread tightly in plastic wrap or aluminum foil and store at room temperature for up to 3 days. For longer storage, freeze for up to 3 months. To reheat, wrap in foil and warm at 350°F for 5-10 minutes until crispy. The bread actually tastes better the next day as the starch retrogrades, creating that perfect balance of crisp and soft.

- Baked Potatoes in Crock Pot Recipe: Buttery Interiors and Crispy Top Magic - November 1, 2026
- Braised Beef Short Ribs Recipe: Crock Pot Fall-Off-Bone Magic in 6 Hours - November 1, 2026
- Crock Pot Cocoa Recipe: Velvety Warmth With Hidden Spice Magic - November 1, 2026