
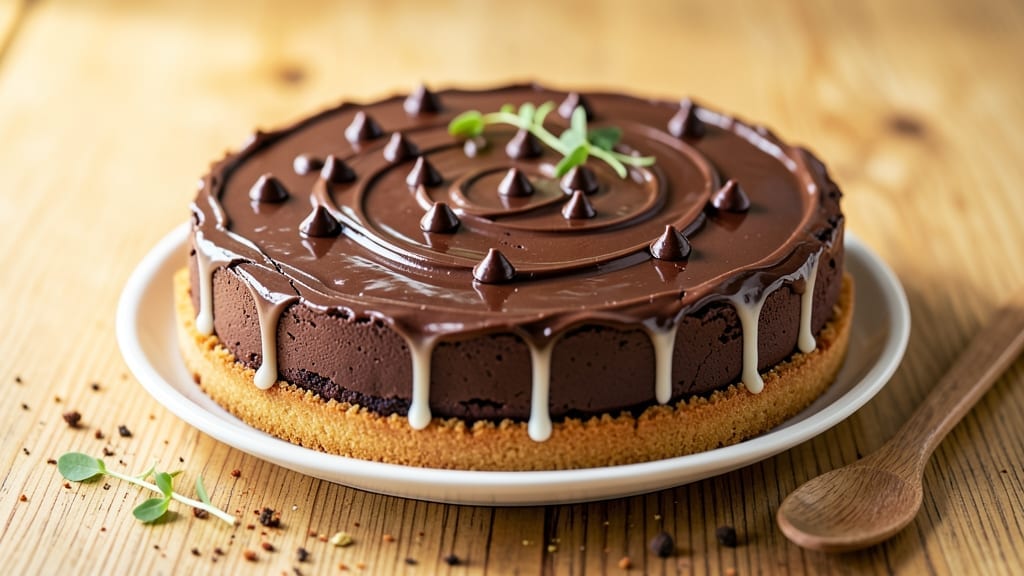
This 7-inch chocolate cheesecake recipe delivers the perfect balance of a crispy graham crust and a silky smooth center—no cracks, no jiggle, just pure decadence in every bite. 💫 The secret lies in precise ingredient ratios and a gentle baking technique that ensures a creamy texture without overcooking.
I’ve perfected this recipe after years of testing, and it’s become a crowd-pleaser at every gathering. What sets this recipe apart is the foolproof method for achieving that restaurant-quality finish at home.
The crust gets perfectly golden and crunchy, while the filling remains velvety and rich, with just the right amount of chocolate intensity. No special equipment is needed—just a standard 7-inch pan and a little patience for the cooling process.
By the time you’re done, you’ll have a showstopping dessert that’s easier to make than it looks. The chocolate flavor is deep and satisfying, but not overpowering, and the texture is what dreams are made of—smooth, dense, and just sweet enough.
This isn’t just a cheesecake; it’s a dessert experience. Serve it chilled with fresh berries or a drizzle of caramel for extra flair. Let’s get baking!
Ingredients for 7 inch chocolate cheesecake
Twelve essential ingredients transform into a restaurant-worthy chocolate cheesecake with a flawless crust and velvety center.
| Ingredient | Amount | Notes |
|---|---|---|
| Graham Crackers 🍪 | 1 ½ cups | Finely crushed into crumbs |
| Unsalted Butter 🧈 | ½ cup | Cold, cubed for crust |
| Granulated Sugar 🍚 | ¼ cup | For crust sweetness |
| Large Eggs 🥚 | 2 whole | Room temperature preferred |
| Cream Cheese 🧀 | 16 oz | Full-fat, room temperature |
| Semisweet Chocolate Chips 🍫 | 1 ½ cups | High-quality for richness |
| Powdered Sugar 🍚 | 1 cup | For smooth filling |
| Vanilla Extract 🌿 | 1 tbsp | Pure, no imitation |
| Sour Cream 🥛 | ½ cup | Full-fat for creaminess |
| Heavy Whipping Cream 🥛 | ¼ cup | Cold for stability |
| Salt 🧂 | ¼ tsp | Fine sea salt |
| Cocoa Powder 🍫 | ¼ cup | Dutch-processed preferred |
| Fresh Berries 🍓 | 1 ½ cups | For garnish (optional) |
The graham cracker crust starts with high-quality graham crackers—avoid the pre-crumbled kind; crushing your own ensures maximum crunch. For the butter, European-style unsalted (like Plugrá) adds richness, but any good brand works. The key to a crispy crust is cold butter—don’t let it soften before mixing. Preheat your oven to 350°F and grease your 7-inch pan thoroughly. The cream cheese must be at room temperature for a silky filling, so let it sit for 2 hours before starting. For the chocolate, Ghirardelli or Valrhona chips deliver the deepest flavor, but any high-quality brand will work.
No graham crackers? Oreos or vanilla wafers crushed into fine crumbs make a decent substitute, though texture will differ slightly. Running short on cream cheese? Substitute with equal parts mascarpone and sour cream, but expect a slightly lighter texture. For the chocolate, melted chocolate bars (70% cocoa or higher) can replace chips, but reduce the amount by 1/4 cup to avoid overloading. The vanilla extract should be pure—imitation extracts contain artificial flavors that can overpower the delicate balance. If you’re dairy-sensitive, vegan cream cheese works, though texture may vary. For a deeper chocolate flavor, add 1 tbsp instant espresso powder to the filling.
Assemble the crust and bake it for 10 minutes before adding the filling—this prevents sogginess. The finished cheesecake needs 4-6 hours in the fridge to set properly, so plan ahead. Store leftovers in an airtight container for up to 5 days in the fridge. For a showstopping presentation, fresh berries or a caramel drizzle add elegance. Freeze individual slices wrapped in plastic for up to 3 months—thaw overnight in the fridge before serving. The crust stays crispy if kept at room temperature for 1-2 hours before serving, but the filling will be softer.
Why You’ll Love This Recipe
- No Crust Fuss: I crush graham crackers and butter—that’s it—no baking, no waiting. Five minutes of work, and suddenly you’ve got a buttery, crumbly base that actually holds together. (No sad, crumbling mess here.)
- Rich Without Effort: The secret’s in the cream cheese-to-sugar ratio—smooth, not grainy, with that just-right chocolate tang. Honestly, it’s the kind of dessert where you take the first slice and immediately want to steal the whole pan.
- Portion Control Perfection: A 7-inch pan means single servings or sharing—no awkward leftovers staring at you from the fridge. I make two, freeze one, and suddenly I’ve got a backup for date night or lazy Sunday mornings.
- Budget Cheat Code: Graham crackers and cream cheese stretch farther than you’d think. I’ve fed four people (plus my dog’s judgmental stares) for under $10. Plus, the crust uses pantry staples—no specialty ingredients begging for a trip to the store.
Step-by-step instructions for silky smooth chocolate cheesecake
Here’s the precise method for a flawless chocolate cheesecake with a perfectly crisp crust and velvety center.
👨🍳 Step 1: Prepare the Graham Cracker Crust
Preheat your oven to 350°F and position a rack in the lower third. Pulse the 1.5 cups graham crackers in a food processor until you achieve fine crumbs—think sand-like texture, not coarse pieces. This ensures an even, crisp base.
In a medium bowl, combine the graham crumbs with the 0.5 cup cold cubed unsalted butter and 0.25 cup granulated sugar. Use your fingers to work the mixture until it resembles wet sand—every crumb should be coated. Press this firmly into a 7-inch springform pan, creating an even layer all the way to the edges. Here’s the thing—don’t skimp on pressing. The crust needs to be dense to prevent cracking during baking.
Bake the crust for 10-12 minutes until the edges begin to turn golden. Watch closely after 8 minutes—it should smell nutty and toasted. Remove from the oven and let it cool completely before adding the filling. This prevents the crust from becoming soggy when the warm filling goes in.
🍳 Step 2: Mix the Chocolate Cheesecake Filling
While the crust cools, prepare your mixing station. Place the 16 oz cream cheese in the bowl of a stand mixer fitted with the paddle attachment. Let it sit at room temperature for 30 minutes before starting—cold cream cheese creates lumps. Beat on medium speed until completely smooth, scraping down the sides as needed. This step is critical for that silky texture.
Add the 2 whole large eggs one at a time, mixing just until each is incorporated. Then add the 1 cup powdered sugar, 1 tbsp vanilla extract, 0.5 cup sour cream, 0.25 cup heavy whipping cream, and 0.25 tsp salt. Mix on low speed until just combined—overmixing introduces air bubbles that can cause cracks. Here’s where it gets fun—fold in the 1.5 cups semisweet chocolate chips and 0.25 cup cocoa powder using a spatula. You want even distribution without breaking up the chocolate too much.
🥘 Step 3: Assemble and Bake the Cheesecake
Pour the filling into the cooled crust, smoothing the top with a spatula. Tap the pan gently on the counter a few times to release any air bubbles that may have formed. Place the springform pan on a baking sheet lined with parchment paper—this catches any potential drips. Bake at 325°F for 50-55 minutes until the edges are set but the center still jiggles slightly (about 1/2 inch movement). The key is patience here—underbaking prevents cracks while ensuring that silky center.
Turn off the oven, crack the door open slightly, and let the cheesecake cool inside for 1 hour. This gradual cooling prevents temperature shock that could cause cracks. Then remove the pan from the oven and let it cool completely at room temperature for another 2 hours before refrigerating. This long cooling period is what transforms your cheesecake from a wobbly filling to a perfectly set dessert.
⏰ Step 4: Chill and Garnish for Perfect Texture
Transfer the cheesecake to the refrigerator and chill for at least 6 hours or overnight. This is where the magic happens—the cheesecake firms up while maintaining that luscious, fudgy center. Real talk: I’ve learned the hard way that rushing this step leads to a crumbly disaster. Patience here ensures that knife slides in cleanly when you’re ready to serve.
Before serving, run a thin knife around the edge to loosen it from the pan. Garnish with the 1.5 cups fresh berries if desired—raspberries or strawberries add a beautiful contrast to the rich chocolate. The berries should be fresh and dry to prevent moisture from seeping into the cheesecake. Serve slices at room temperature for the best texture—this allows the cheesecake to soften slightly while maintaining its structure.
Pro Tips For Making 7 Inch Chocolate Cheesecake
- Chill the Crust First: After pressing the graham cracker crust into the pan, pop it in the fridge for 15-20 minutes before adding the filling. I learned this the hard way—skipping it means your crust gets soggy from the warm batter, and nobody wants a mushy base. Even if you’re eager to bake, trust me on this one.
- Whip Cream Cheese Slowly: Beat the cream cheese and butter together at medium speed until just smooth, then add sugar and eggs gradually. I used to dump everything in at once and ended up with lumps every time. Take your time here—it’s the difference between a silky filling and a grainy mess.
- Don’t Overmix the Batter: Once you’ve incorporated all the eggs, mix just until combined—no need to overwork it. Overmixing introduces air bubbles that’ll cause cracks later. Fold gently with a spatula if you’re worried, but stop as soon as it looks uniform.
- Water Bath Without Foil: Place your cheesecake in the oven, then pour hot water into the pan around it—no foil needed. The direct heat helps set the edges faster and prevents a waterlogged crust. Just make sure the water level reaches halfway up the pan’s sides.
Serving suggestions for this recipe
Fruity Toppings
Fresh berries are my go-to for this chocolate cheesecake—they add a vibrant pop of color and a refreshing tartness that cuts through the richness. Use 1.5 cups raspberries or strawberries, halved or quartered depending on size.
Arrange them in a circular pattern on top for an elegant presentation, or scatter them randomly for a rustic look. For extra flair, lightly brush the berries with 1 tsp honey before placing them on the cheesecake to enhance their natural sweetness. 🍓
Caramel Drizzle
A warm caramel drizzle elevates this dessert to restaurant-quality. Heat ½ cup heavy cream with ½ cup granulated sugar and 2 tbsp unsalted butter until the sugar dissolves, then simmer for 3-4 minutes until it thickens to a golden amber color.
Drizzle generously over the chilled cheesecake just before serving. The contrast between the cool cheesecake and warm caramel is pure magic. For a quicker version, use store-bought caramel sauce—just warm it slightly to make it more fluid.
Whipped Cream Swirl
Add a dollop of lightly sweetened whipped cream on each slice for an extra layer of indulgence. Whip ½ cup heavy whipping cream with 1 tbsp powdered sugar until soft peaks form, then pipe or spoon it onto the cheesecake.
For a more dramatic effect, swirl the whipped cream into the filling before baking—this creates a marbled look when sliced. I like to finish with a sprinkle of cocoa powder or crushed chocolate on top for added texture. ✨
Chocolate Ganache
For chocolate lovers, a rich ganache is the ultimate finishing touch. Melt ½ cup semisweet chocolate chips with ¼ cup heavy cream over a double boiler or in short bursts in the microwave. Let it cool slightly until it thickens to a drizzling consistency, then pour it over the cheesecake.
For a glossy finish, chill the cheesecake for 15 minutes after adding the ganache. This technique creates a glossy, professional-looking finish that will impress any guest.
Nutty Crunch
Toasted nuts add a delightful crunch that contrasts beautifully with the creamy cheesecake. Pulse ¼ cup chopped pecans or walnuts in a food processor until finely ground, then lightly toast them in a dry skillet over medium heat for 2-3 minutes until fragrant.
Sprinkle them evenly over the top of the cheesecake just before serving. For extra richness, mix the nuts with 1 tbsp brown sugar** before toasting. This adds a sweet, caramelized flavor that pairs perfectly with the chocolate.
Nutrition facts
Frequently asked questions
Why does my chocolate cheesecake crack?
Cracking usually happens from temperature shifts or overmixing. Always let the cheesecake cool gradually in the oven after baking, then chill slowly in the fridge. Avoid opening the oven door too soon, and never place a hot cheesecake on a cold surface. Overmixing the filling introduces air bubbles that create cracks—mix just until combined.
Can I make this recipe without a springform pan?
Yes, but with precautions. Use a regular 7-inch cake pan and line the bottom with parchment paper. After baking, let it cool completely before running a knife around the edges to loosen. The cheesecake may be slightly more delicate when unmolded, so handle carefully. For extra insurance, grease the pan thoroughly with butter and flour.
How do I know when the cheesecake is fully set?
The center should have a slight ½-inch wobble when gently shaken. Insert a toothpick—it should come out with a few moist crumbs, not liquid batter. If it’s too firm, it may be overbaked. The key is patience: let it cool gradually in the oven after baking, then chill completely before testing.
Can I substitute cocoa powder with melted chocolate?
Yes, but adjust the amount. Use ½ cup melted chocolate (70% cocoa or higher) instead of the 0.25 cup cocoa powder and 1.5 cups chocolate chips. Melt the chocolate gently, then let it cool slightly before folding into the batter. This creates a richer, more decadent flavor but may make the cheesecake slightly denser.
How long can I store individual slices?
Wrap each slice tightly in plastic wrap and store in an airtight container. They’ll stay fresh for 3-4 days in the fridge. For longer storage, freeze slices for up to 3 months. Thaw overnight in the fridge before serving. To maintain texture, let slices sit at room temperature for 10-15 minutes** before serving.

- Pea Soup Instant Pot Recipe: Velvety Green Smoothness in 20 Minutes - November 1, 2026
- Pork Loin Pulled Pork Crock Pot Recipe: Slow-Smoked Tenderness With Zero Dryness - November 1, 2026
- Baked Potatoes in Crock Pot Recipe: Buttery Interiors and Crispy Top Magic - November 1, 2026