
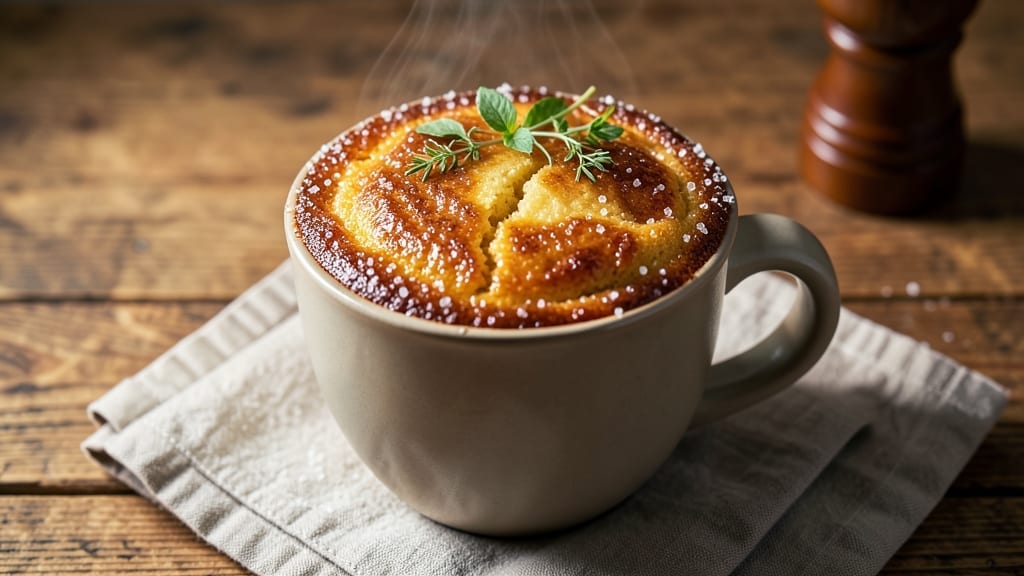
A 4-ingredient mug cake recipe transforms a microwave into your dessert chef’s secret weapon—no oven, no mess, just 3 minutes of magic. 🔥 This isn’t just a shortcut; it’s a game-changer for anyone who’s ever craved cake but didn’t have the time (or patience) to bake.
The beauty? You only need four staples: flour, sugar, oil, and an egg. No fancy tools, no complicated steps—just mix, microwave, and devour.
The secret lies in the microwave’s precision timing and the way these simple ingredients work together. Unlike traditional cake recipes, this version relies on the microwave’s ability to cook evenly in seconds, creating a texture that’s soft, slightly gooey, and perfectly portioned for one.
The flour and sugar create structure, while the oil and egg bind everything into a rich, moist bite—no dryness, no gummy centers. It’s the kind of dessert that proves simplicity can still deliver serious flavor.
What you’ll end up with is a warm, golden cake that’s ready to eat the second it comes out of the microwave. The edges will be just set enough to hold a fork, while the center stays tender and inviting.
This is the kind of dessert that’s perfect for satisfying a late-night craving, impressing a guest with minimal effort, or even turning a boring afternoon into something sweet. The best part?
You can customize it with cocoa powder, vanilla extract, or even a pinch of salt to elevate the flavor without adding ingredients.
Whether you’re a busy parent, a college student, or someone who just doesn’t want to deal with a full oven, this mug cake is your new go-to. It’s foolproof, fast, and—most importantly—it tastes like something from a bakery, not a microwave.
Let’s get started on turning those four ingredients into a dessert that’s equal parts indulgent and effortless.
Ingredients for 4 ingredient mug cake
Four core ingredients plus optional chocolate twist—your microwave dessert game changer starts here.
| Ingredient | Amount | Notes |
|---|---|---|
| All-Purpose Flour 🌾 | ½ cup | Sifted for even texture |
| Granulated Sugar 🍚 | ¼ cup | White or light brown |
| Vegetable Oil 🫒 | ¼ cup | Light or canola preferred |
| Large Eggs 🥚 | 1 whole | Room temperature for best mix |
| Vanilla Extract 🌿 | ½ tsp | Pure extract for flavor |
| Salt 🧂 | ¼ tsp | Fine sea salt preferred |
| Baking Powder 🍞 | ¼ tsp | For light rise |
| Unsweetened Cocoa Powder 🍫 | ¼ cup | Optional for chocolate version |
The flour and sugar are your base, but don’t grab just anything. King Arthur flour or Gold Medal works best for that tender crumb, while Domino sugar adds subtle depth. The oil is non-negotiable—vegetable or canola keeps it light, while coconut oil gives a tropical vibe (though it solidifies faster). Eggs should be room temp—cold ones make mixing harder. Pro tip: Walmart or Target usually have all these staples in the baking aisle, and their generic brands work perfectly for this. Skip the pre-mixed cake flour though—all-purpose is your friend here.
No vanilla? Almond extract at half the amount works in a pinch, though it’s stronger. Short on cocoa? Instant coffee powder adds richness without chocolate. The salt is crucial—it balances sweetness and enhances flavor, so don’t skip it. For the chocolate version, Hershey’s Special Dark or Ghirardelli cocoa powder gives the best flavor. If you’re making multiple mug cakes, measure the dry ingredients first (flour, sugar, cocoa, baking powder) in a small bowl, then whisk in the wet ingredients—saves cleanup and ensures no lumps. The microwave does all the heavy lifting, but prep matters too.
This cake is best eaten immediately, but if you must wait, cover loosely with plastic wrap to keep it moist. Reheating? 10 seconds in the microwave revives it perfectly. The batter keeps for 24 hours in the fridge—just give it a quick stir before microwaving. For chocolate lovers, the cocoa powder can be stored for 6 months in a cool, dark place. And here’s the magic: one mug cake per serving, so scale up if you’re feeding a crowd—just double everything and use two mugs.
Why You’ll Love This Recipe
- No Mixing Madness: I swear by this recipe because it’s literally three spoonfuls and a whisk. The flour, sugar, oil, and egg blend into a batter so smooth you’ll wonder why you ever used a stand mixer—especially when your mug’s already heating.
- Vanilla Kiss Magic: That single drop of vanilla extract? It’s the secret weapon turning a simple cake into something dangerously addictive. The sugar caramelizes just right, giving you a crispy edge with a gooey center—like a tiny, perfect dessert every time.
- Crowd-Pleaser Hack: Between us, this is my go-to for birthdays, study snacks, or when I forget to buy cake. It’s fast enough for one but scales for a dozen—just multiply the mugs. (My roommates still ask for seconds, even after the third helping.)
- Pantry Staple Savior: Honestly, I keep these ingredients stocked just for this. No fancy ingredients, no last-minute grocery runs—just flour, sugar, and an egg from my fridge. It’s budget-friendly, foolproof, and saves me from ordering takeout when I’m too tired to cook.
Step-by-step instructions for 4-Ingredient mug cake
Here’s how to transform simple pantry staples into a perfect single-serving cake in minutes.
👨🍳 Step 1: Mix Dry Ingredients in a Microwave-Safe Mug
In a large microwave-safe mug (at least 12-ounce capacity), combine the 0.5 cup all-purpose flour, 0.25 cup granulated sugar, 0.25 tsp salt, and 0.25 tsp baking powder. I like to use a spoon to break up any flour clumps first – this ensures even texture throughout the cake. For the chocolate version, add the 0.25 cup unsweetened cocoa powder now and whisk everything together thoroughly.
If you’re making multiple cakes, sift the dry ingredients into a bowl first for even distribution. The key here is complete incorporation – you want no visible flour pockets that could make your cake dense. Give it a good stir with a fork until the mixture looks uniformly blended and no dry spots remain.
🍳 Step 2: Add Wet Ingredients and Whisk Until Smooth
Create a small well in the center of the dry ingredients and add the 0.25 cup vegetable oil and 1 whole large egg. Pour in the 0.5 tsp vanilla extract as well. Using a fork, gently whisk everything together until just combined – you shouldn’t see any dry flour remaining. The batter should have a thick, pudding-like consistency similar to pancake batter.
Here’s where it gets important: don’t overmix. You’re looking for a smooth batter with minimal lumps. Overmixing develops gluten which can make your cake slightly tough. If you notice the batter starting to look stringy or elastic, stop mixing immediately. The chocolate version will be slightly thicker due to the cocoa powder’s natural density.
⏰ Step 3: Microwave on High for Perfect Texture
Place the mug in the microwave and cook on high power for 90 seconds. I know it seems counterintuitive to cook something so briefly, but this is where the magic happens. The cake needs just enough time to set without drying out. After the initial 90 seconds, carefully open the microwave and check the cake – it should look mostly set but still slightly jiggly in the center.
Here’s the crucial part: if the center still looks completely raw or liquidy, microwave for an additional 15-30 seconds. If it appears overdone or dry, don’t worry – we’ll fix that next. The cake will continue cooking slightly from the residual heat. For the chocolate version, you might need an extra 10-15 seconds as cocoa powder can make the batter denser.
🍽️ Step 4: Finish and Serve Immediately
Let the cake cool for exactly 1 minute – this prevents it from sticking to your fork when you serve it. While it’s cooling, you can prepare your toppings. A simple drizzle of melted chocolate or a dollop of whipped cream works beautifully. For the chocolate version, I like to sprinkle powdered sugar on top right before serving to enhance the chocolate flavor.
Use a butter knife to loosen the edges if needed, then enjoy your warm mug cake straight from the mug. The texture should be soft and moist in the center with a slightly crisp exterior. If your cake came out too dry, try reducing the microwave time by 10 seconds next time. For extra richness, you can even add a spoonful of Nutella or peanut butter to the batter before microwaving!
Pro Tips For Making 4 Ingredient Mug Cake
- Measure Eggs Cold: Crack that egg straight from the fridge—no room-temperature nonsense. Cold eggs whip up fluffier in the microwave, and your cake will rise higher instead of sinking like a lead balloon.
- Sift Flour First: Skip the clumps by sifting the flour right into your mug before adding wet ingredients. I learned this the hard way—lumpy batter means a dense, brick-like cake, and nobody wants that.
- Oil the Mug Well: Don’t just drizzle—coat the inside of the mug with a thin layer of vegetable oil using a paper towel. This guarantees your cake won’t stick, even if you’re using a nonstick mug (and let’s be real, some aren’t).
- Microwave at 70% Power: Your microwave’s “high” setting is lying to you. Set it to 70% power for 60-90 seconds instead of blasting it full-throttle—this prevents a gummy center while keeping the edges from burning. (Yes, even if it feels slow.)
Health benefits of these flavors
Quick Energy Boost
This mug cake delivers a fast carbohydrate source perfect for an energy lift without the crash. The 0.25 cup granulated sugar provides immediate glucose for your brain and muscles, making it ideal for post-workout recovery or a mid-afternoon slump.
The 1 whole egg adds protein to balance the sugar, helping stabilize your blood sugar levels. 💪
Low-Calorie Indulgence
Compared to traditional baked cakes, this version is surprisingly light—just around 250 calories per serving. The 0.25 cup vegetable oil provides healthy fats, while the 0.5 cup all-purpose flour keeps it satisfying without excess calories.
It’s a guilt-free treat that still delivers rich, dessert-like flavor. Perfect for those watching their calorie intake but craving something sweet.
Gluten-Friendly Option
For a gluten-free version, simply swap the all-purpose flour for 0.5 cup gluten-free 1:1 baking flour (like Bob’s Red Mill). The texture remains tender, and you avoid gluten-related discomfort.
This makes it accessible for people with celiac disease or gluten sensitivity while keeping the same quick prep time. Always check your gluten-free flour brand for proper leavening properties.
Rich in Micronutrients
The egg in this recipe is a nutrient powerhouse, providing choline for brain health and vitamin B12 for energy metabolism. The flour contributes iron and magnesium, while the cocoa powder (if used) adds antioxidants like flavonoids.
It’s a simple dessert that sneaks in some surprising nutritional benefits without sacrificing taste.
Portion Control Perfection
Unlike traditional cakes that often lead to overeating, this mug cake is naturally portion-controlled—one serving per mug means no leftovers to tempt you. The single-serving size helps with mindful eating, making it easier to enjoy dessert without derailing your dietary goals.
Plus, the warm, comforting texture satisfies cravings more effectively than store-bought snacks.
Blood Sugar Balance
The combination of protein from the egg and fiber from the flour helps moderate blood sugar spikes. Unlike sugary pastries, this cake’s ingredients work together to create a more stable energy release.
For those managing diabetes or insulin sensitivity, this is a safer sweet option when enjoyed in moderation. Always pair it with a protein source (like Greek yogurt) to further slow sugar absorption.
Nutrition facts
Frequently asked questions
Can I make this mug cake without eggs?
Yes! Replace the 1 egg with 2 tablespoons of applesauce or 1 tablespoon of flaxseed meal mixed with 3 tablespoons of water. Let the flax mixture sit for 5 minutes to thicken before using. The texture will be slightly denser but still delicious. This works especially well for vegan versions or if you’re allergic to eggs.
Why did my mug cake come out dry or rubbery?
Overcooking is the most common cause. Start with 90 seconds and check immediately—it should be slightly jiggly in the center. If your microwave is high-powered, reduce time by 10-15 seconds. Also, ensure your mug isn’t too large (use a 12-ounce mug max) and don’t overmix the batter. For extra moisture, add 1 tablespoon of milk or yogurt to the batter before microwaving.
Can I use this recipe for a larger cake?
Not in a mug, but you can scale up for a 9-inch cake by doubling all ingredients and baking in a conventional oven at 350°F for 20-25 minutes. For a sheet cake, spread the batter on a lined pan and bake for 15-18 minutes. The texture will be slightly different (more cake-like than mug cake), but it works well for parties. The key is to reduce the baking powder to 1 teaspoon total for larger batches.
What’s the best mug for this recipe?
Use a microwave-safe ceramic or glass mug (at least 12 ounces)—never plastic. Dark-colored mugs can make the cake cook unevenly, so stick to light colors. If your mug is too small, the cake will overflow. For best results, use a mug that’s 3-4 inches wide at the top—this gives the cake room to rise properly. A coffee mug works perfectly!
How do I make this gluten-free or dairy-free?
For gluten-free, swap the all-purpose flour for 0.5 cup gluten-free 1:1 baking flour (like Bob’s Red Mill). For dairy-free, use coconut oil instead of vegetable oil (though it may need 5-10 extra seconds in the microwave). The egg can be replaced with 2 tablespoons of dairy-free yogurt if needed. Always check your substitutes for proper leavening—some gluten-free flours require extra baking powder.

- 12 Bean Chili Recipe: Hearty Slow-Cooked Depth With 12 Legumes - October 17, 2026
- 5 Seed Bread Recipe: Nutty Crunch and Artisan Flavor in One Loaf - October 17, 2026
- 1 Lb Macaroni Salad Recipe: Bold, Crunchy, and Crowd-Pleasing - October 17, 2026