
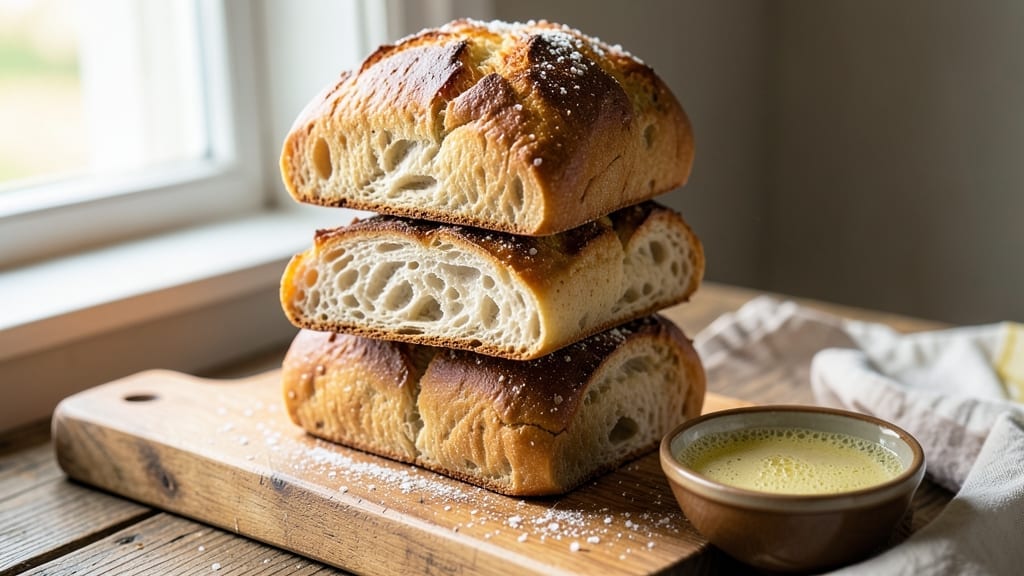
This 4-ingredient sandwich bread recipe delivers restaurant-quality loaves with just flour, yeast, salt, and water—no fancy mixers or complicated steps. The secret lies in proper kneading and rising times, which transform simple ingredients into bread with a crispy crust and soft, airy interior that holds sandwiches perfectly.
I’ve baked hundreds of loaves using this method, and it never fails to impress, even for beginners.
The beauty of this recipe is its simplicity: no butter, no sugar, no eggs—just the essentials. You’ll mix, knead, let it rise twice, and bake in 30 minutes (plus rising time), making it ideal for busy weeknights.
The dough develops naturally through fermentation, creating a flavor depth you’d expect from artisanal bread. No special equipment needed—just a bowl, your hands, and an oven.
What you’ll end up with is a loaf that’s crusty on the outside, pillowy inside, and perfect for grilled cheese, BLTs, or toast. The texture stays fresh for days, and you can even freeze slices for later.
This isn’t just bread—it’s a game-changer for anyone tired of store-bought loaves that crumble or go stale too quickly.
Ready to bake? Let’s break down the steps—from mixing to slicing—so you can enjoy warm, homemade sandwich bread in no time. The ingredients are basic, but the results are anything but ordinary.
Ingredients for 4 ingredient sandwich bread
Four simple ingredients transform into bread so good, you’ll forget it’s homemade.
| Ingredient | Amount | Notes |
|---|---|---|
| All-Purpose Flour 🌾 | 3 ½ cups | Unbleached preferred for better texture |
| Active Dry Yeast 🍞 | ¾ tsp | Ensure yeast is fresh and active |
| Kosher Salt 🧂 | 1 tsp | Diamond Crystal preferred for accuracy |
| Water 💧 | 1 ¼ cups | Room temperature for best activation |
The flour is the foundation here—King Arthur or Bob’s Red Mill are my go-tos for consistent results. Active dry yeast needs to be fresh (test it in warm water with a pinch of sugar—it should foam in 5-10 minutes). Store-bought yeast usually works fine, but if you’re baking often, grab a small jar from the bulk section. The salt matters too—Diamond Crystal measures differently than table salt, so stick to kosher if your recipe calls for it. Water temperature is key: too hot kills the yeast, too cold slows it down. Room temp (around 70°F) is perfect.
No yeast? Instant yeast works 1:1, but active dry needs to be dissolved in water first. Short on flour? Whole wheat or rye can replace up to 20%, but texture changes. The water can be sparkling (flat, not fizzy) if you’re out of plain. For extra flavor, add a 1 tsp of honey or sugar to the water—it helps activate the yeast faster. If your kitchen’s too cold, warm the water slightly (up to 110°F max) and let it cool before adding yeast.
This dough keeps for 24 hours in the fridge before shaping—perfect for overnight prep. Shape the loaf, let it rise, then bake as directed. The bread stays fresh for 3-4 days at room temp, wrapped in a towel. For longer storage, freeze the whole loaf (up to 3 months) or individual slices. To reheat, wrap in foil and warm in a 350°F oven for 5-10 minutes. No microwave—it makes bread gummy.
Why You’ll Love This Recipe
- Pantry-Proof Magic: I swear by this when my fridge is empty—just flour, yeast, salt, and water. No fancy ingredients, no last-minute grocery runs. The yeast does all the work while I sip my coffee.
- Crusty Yet Tender: That perfect balance? The outside gets a golden, crispy crust from the steam, while the inside stays soft and pillowy. Honestly, it’s the kind of bread that makes you pause mid-bite.
- Weeknight Wonder: I make a batch on Sunday, slice it, and freeze it—ready for toast, sandwiches, or garlic bread all week. No more sad, stale bread at the back of the drawer.
- Budget Bread: For under $2, I feed my family for days. The dough’s so forgiving that even if I mess up the first try, it still turns out usable. My wallet (and my taste buds) thank me.
Step-by-step instructions for 4-Ingredient sandwich bread
Here’s how to make perfect sandwich bread with just four simple ingredients.
Activate the Yeast with Warm Water
First, combine the 1.25 cups water with the 0.75 tsp active dry yeast in a small bowl. Let it sit for 5-10 minutes until it becomes frothy and bubbly. This tells you the yeast is alive and ready to work—if nothing happens after 10 minutes, your yeast might be old, and you’ll need to start over.
While waiting, measure out the 3.5 cups all-purpose flour and 1 tsp kosher salt in a large mixing bowl. I like to use a kitchen scale for accuracy, but measuring cups work fine. The flour should be sifted lightly to remove any lumps, which helps create a lighter bread texture.
Mix the Dough Until Just Combined
Pour the yeast mixture into the bowl with the flour and salt. Using a wooden spoon or your hands, stir until everything comes together into a shaggy dough. You’ll notice it’s sticky at first—that’s normal with this minimal-ingredient approach. The dough should pull away from the sides of the bowl but still feel tacky to the touch.
Once combined, turn the dough out onto a lightly floured surface and knead for 5-7 minutes. You’re not aiming for smooth perfection here—just enough to develop some gluten so the bread holds together. If the dough feels too sticky, wet your hands slightly to prevent sticking. The goal is a soft, slightly tacky dough that springs back slowly when poked.
Let the Dough Rise Until Doubled
Lightly grease a large bowl with a bit of oil or butter (if you have some on hand), then place the dough inside. Cover the bowl with a clean kitchen towel or plastic wrap and let it rise in a warm spot for 1-1.5 hours, or until it has visibly doubled in size. A good test is to poke the dough gently—if it springs back slowly, it’s ready.
I usually place the bowl near the oven with the light on (the light generates heat) or on top of the refrigerator for consistent warmth. Avoid placing it in a cold spot like a basement, as this slows down the rising process. The dough should puff up noticeably and feel light when pressed gently with a fingertip.
Shape and Bake for Crusty, Soft Bread
Preheat your oven to 375°F and place a baking sheet on the middle rack. Once the dough has risen, turn it out onto a lightly floured surface and gently shape it into a loaf. Don’t worry about perfect edges—this bread is forgiving. Place the shaped dough on the prepared baking sheet, seam-side up.
Bake for 25-30 minutes until the bread is golden brown on top and sounds hollow when tapped on the bottom. The internal temperature should reach 190-200°F when measured with an instant-read thermometer. If the top browns too quickly, tent the bread with aluminum foil to prevent over-browning while it continues to bake.
Cool and Slice for Perfect Sandwich Bread
Remove the bread from the oven and let it cool on a wire rack for at least 15 minutes before slicing. This resting time allows the steam inside to redistribute, resulting in a softer interior. If you can’t wait, slice carefully—hot bread is more likely to crumble.
Once cooled, slice the bread into ½-inch thick slices for perfect sandwiches. The crust should be lightly crisp, while the interior remains soft and pillowy. Store any leftovers in an airtight container or wrapped in plastic to maintain freshness for up to 3 days. For extra crispiness, you can lightly toast the slices before serving.
Pro Tips For Making 4 Ingredient Sandwich Bread
- Bloom the Yeast First: Skip mixing yeast into dry flour—it’s the fastest way to ruin your bread. Instead, dissolve it in warm (not hot) water with a pinch of sugar (or a splash of honey) and let it foam for 5–10 minutes. This guarantees your yeast is alive and ready to work, not just sitting there like a lazy roommate.
- Use Room-Temp Water: Cold water from the tap kills yeast faster than a New York winter. Let your water sit out for 10–15 minutes until it’s about 75°F—warm to the touch but not hot. Cold water makes your dough take forever to rise, and nobody has time for that.
- Knead Until Smooth: This isn’t a sprint—aim for 8–10 minutes of kneading by hand (or 5–6 minutes with a stand mixer). Stop when the dough springs back slowly when poked and looks silky, not sticky or crumbly. Over-kneading? You’ll get tough bread. Under-kneading? Flat, dense loaves. Find the sweet spot.
- Let It Rise Twice: One rise is for amateurs. After shaping, let your dough rise in a lightly oiled bowl until it’s almost doubled—about 1–1.5 hours. Then, punch it down, shape it again, and let it rise a second time for 30–45 minutes. This extra step makes the crumb lighter and the flavor deeper. Trust the process.
Essential equipment for perfect results
Basic Mixing Bowl
You don’t need anything fancy—a large mixing bowl (at least 4-quart capacity) is all you need to combine your ingredients. I prefer stainless steel or glass bowls because they’re easier to clean and maintain consistent temperatures during rising.
A non-stick bowl works too, but avoid plastic if you’re baking frequently—it can absorb odors over time. 🌾
Kitchen Scale
A digital kitchen scale (like the OXO Good Grips) makes measuring flour and water precise, which is especially helpful for beginners. While measuring cups work, scales eliminate guesswork and ensure consistent results every time.
If you’re on a budget, a basic analog scale (around $15) will do the job just as well.
Dough Scraper
A flexible dough scraper (I recommend the Nordic Ware) is a game-changer for handling sticky dough without tearing it. It helps transfer dough from the bowl to the counter and shapes the loaf neatly.
If you don’t have one, a spatula or butter knife works in a pinch—just be gentle to avoid deflating the dough.
Wire Rack
Let your bread cool on a wire cooling rack (like the OXO Good Grips) to prevent sogginess from steam. A rack also keeps the bottom crust crisp. If you’re short on space, a clean kitchen towel draped over a bowl works temporarily, but it won’t promote airflow as well.
Pro tip: Place the rack directly on the counter, not in the sink.
Instant-Read Thermometer
An instant-read thermometer (such as the Thermoworks ThermoPop) ensures your bread is baked to perfection—190-200°F internal temperature guarantees a soft interior and crisp crust.
Without one, you’ll have to rely on visual cues (golden brown, hollow sound when tapped), but a thermometer takes the guesswork out of baking. 🌡️
Nutrition facts
Frequently asked questions
Why does my dough feel too sticky?
This is completely normal with minimal-ingredient bread! The dough should be tacky but manageable. If it’s too sticky to handle, wet your hands slightly when kneading or use a dough scraper to shape it. The high water content creates a soft, moist crumb—this is actually what makes the bread so soft inside. Don’t add extra flour, or the texture will become dense.
Can I make this bread without a kitchen scale?
Use measuring cups for flour (spoon and level method) and a liquid measuring cup for water. For accuracy, lightly spoon flour into the cup and level it off. The recipe works perfectly with standard measuring tools—just don’t pack the flour down. If you’re new to baking, a scale helps with consistency, but it’s not required for this forgiving recipe.
What if my bread doesn’t rise?
Check three things first: yeast freshness (test in warm water with sugar), water temperature (should be room temp, not hot), and rising environment (warm spot like near the oven light). If the dough doesn’t double in 1.5 hours, it may be too cold. Try placing the bowl on top of your refrigerator or in a slightly warmer spot. If all else fails, your yeast might be inactive—start fresh with new yeast.
How do I get a crustier exterior?
For a crispier crust, bake at 400°F for the first 5 minutes before reducing to 375°F. You can also brush the risen dough with a little water or egg wash (if you have eggs) before baking. Another trick is to place a metal tray on the oven rack below the bread—this creates steam that helps develop the crust. Let the bread cool completely before slicing for maximum crispiness.
Can I add herbs or seeds to this recipe?
Yes! Add 1 tablespoon of seeds (sesame, poppy, or everything bagel) or 1 teaspoon of dried herbs (rosemary, garlic, or oregano) to the flour before mixing. For extra flavor, sprinkle them on top before baking. Just be aware that adding mix-ins may slightly alter the texture—start with small amounts if you’re unsure. The bread will still be soft inside with these additions.

- 12 Bean Chili Recipe: Hearty Slow-Cooked Depth With 12 Legumes - October 17, 2026
- 5 Seed Bread Recipe: Nutty Crunch and Artisan Flavor in One Loaf - October 17, 2026
- 1 Lb Macaroni Salad Recipe: Bold, Crunchy, and Crowd-Pleasing - October 17, 2026