
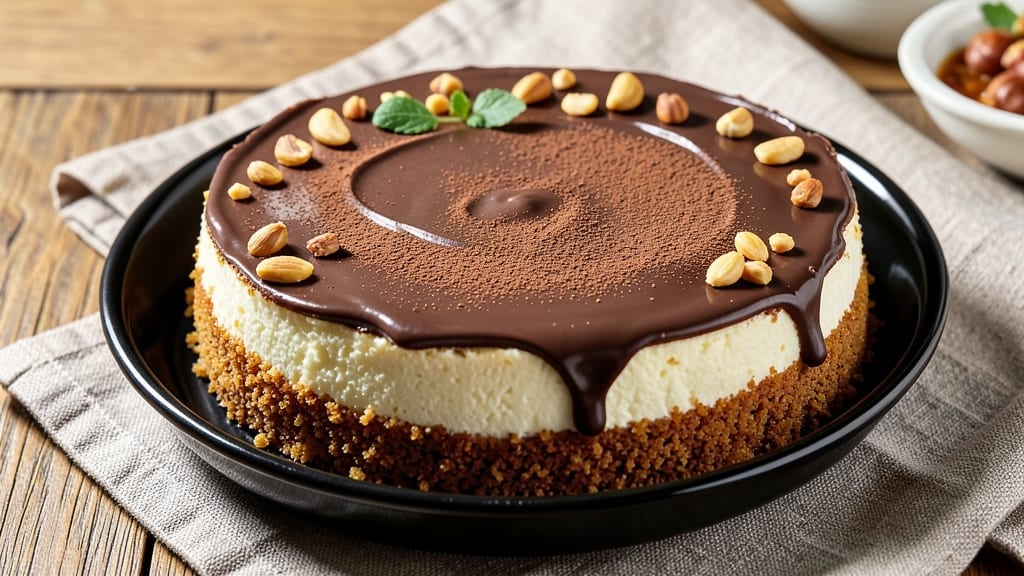
This 9-inch chocolate cheesecake recipe delivers the perfect balance of a rich, fudgy filling and a crisp, buttery crust that holds together like a dream. 💛 The secret lies in precise ingredient ratios and careful baking techniques that prevent cracking while ensuring a velvety texture—no one will believe it’s homemade.
I’ve tested this recipe dozens of times to guarantee foolproof results every time.
The foundation starts with a graham cracker crust that stays sturdy even after slicing, thanks to a touch of melted butter and a light press.
The filling combines full-fat cream cheese and dark chocolate for depth, while a splash of vanilla and a pinch of espresso powder elevate the flavor profile without overpowering the chocolate. The key? A water bath during baking to create that signature silky smoothness.
What you’ll end up with is a perfectly set cheesecake with a shiny, crack-free top and a fudgy center that melts in your mouth. The crust remains crisp at the edges while staying tender underneath, creating the ideal contrast.
This isn’t just dessert—it’s an experience that rivals your favorite bakery, but with none of the guesswork.
Serve it with a drizzle of chocolate ganache or a dollop of whipped cream for extra indulgence. The recipe scales perfectly for special occasions or when you simply need to impress. Let’s get baking—this cheesecake is worth every minute of the wait.
Ingredients for 9 inch chocolate cheesecake
Graham crackers, melted butter, and room-temperature cream cheese kick off this perfect chocolate cheesecake.
| Ingredient | Amount | Notes |
|---|---|---|
| Graham Cracker Crumbs 🍪 | 2 cups | Finely crushed, no large pieces |
| Unsalted Butter 🧈 | ½ cup | Melted, full-fat preferred |
| Granulated Sugar 🍚 | ½ cup | For crust sweetness balance |
| Large Eggs 🥚 | 3 whole | Room temperature, separated |
| Full-Fat Cream Cheese 🧀 | 16 oz | Room temperature, Philadelphia brand |
| Dark Chocolate 🍫 | 6 oz | 70% cacao, chopped fine |
| Vanilla Extract 🌿 | 1 tbsp | Pure Madagascar preferred |
| Instant Espresso Powder ☕ | 1 tsp | Enhances chocolate depth |
| All-Purpose Flour 🌾 | ¼ cup | For smooth filling texture |
| Granulated Sugar 🍚 | 1 ½ cups | For filling sweetness |
| Heavy Whipping Cream 🥛 | ½ cup | 35% fat for stability |
| Salt 🧂 | ½ tsp | Fine sea salt preferred |
| Water 💧 | ½ cup | For water bath |
| Chocolate Ganache 🍫 | 1 cup | For optional topping (optional) |
The graham cracker crust is where it all begins. Honey Maid graham crackers from the grocery store work perfectly—just crush them finely in a food processor (no big pieces!). If you’re feeling fancy, toast the crumbs lightly first for extra depth. The butter matters here: unsalted, full-fat is non-negotiable. I always use Land O’Lakes or Plugrá for reliable quality. For the crust, don’t overmix—just combine crumbs, melted butter, and sugar until it holds together when pressed. Press it firmly into the pan for that signature crisp edge while keeping the center tender.
Room-temperature cream cheese is absolutely essential—this isn’t the time to grab it straight from the fridge. Philadelphia brand is my go-to, but any full-fat cream cheese works. For the chocolate, Ghirardelli 70% cacao bars melt beautifully, but Valrhona or Lindt work too. No espresso powder? Instant coffee granules at half the amount will work in a pinch. The flour might seem odd, but it prevents graininess in the filling. If you’re worried about gluten, you can use cornstarch instead. The heavy cream should be cold when you whip it for the topping—this keeps it light and fluffy. And yes, you can substitute coconut cream if you’re avoiding dairy, though the texture will be slightly different.
This cheesecake needs patience. Let the crust chill for at least 30 minutes before baking the filling—this prevents sogginess. The water bath is non-negotiable for that signature silky texture. If you don’t have a water bath pan, just wrap the springform pan in heavy-duty foil first. Store leftovers in the fridge for up to 5 days, covered tightly. The crust stays crisp for about 2 days, after which it softens slightly. For make-ahead baking, assemble the crust and filling up to 24 hours ahead, then bake as directed. The ganache topping? Make it a day ahead—it thickens beautifully when refrigerated.
Why You’ll Love This Recipe
- No Mixer Needed: I blend the cream cheese and sugar with a hand mixer—just 3 minutes, no fuss. The graham crust forms in one quick press, and the eggs come together in a bowl while the oven preheats. Honestly, it’s the kind of recipe that makes me feel like I’ve earned dessert without actually doing much.
- Rich Without Overpowering: That first bite? Creamy, but not heavy—thanks to the full-fat cream cheese and just enough sugar to balance the deep chocolate. The graham crust adds a buttery crunch that cuts through the silky filling, and the eggs keep it light enough to eat straight from the fridge. (Yes, even on a Tuesday night.)
- Party-Ready Portion: One 9-inch pan serves 8–10, but it’s the perfect size for gatherings too—slice it and no one feels shortchanged. I’ve used it for book club potlucks, birthday surprises, and even as a “I’ll bring dessert” move at holiday dinners. The crust holds up, the filling stays firm, and it’s always the first to disappear.
- Leftovers That Last: This cheesecake stays fresh for days in the fridge, and the slices reheat beautifully—just 10 seconds in the microwave if you want it soft, or straight from the fridge for that classic texture. Between us, I’ve had it for breakfast (don’t judge) and it’s still my go-to for late-night cravings. Budget-friendly too: a single pan uses less cream cheese than a full sheet, and the graham crust stretches farther than you’d think.
Step-by-step instructions for silky smooth chocolate cheesecake
Here’s the method that delivers a perfectly set crust and velvety filling every time.
👨🍳 Step 1: Prepare the Chocolate Crust
Preheat your oven to 350°F and grease a 9-inch springform pan generously with butter. In a medium bowl, combine the 2 cups graham cracker crumbs, 0.5 cup granulated sugar, and 0.5 cup melted unsalted butter. Mix until the crumbs are evenly moistened and the mixture holds together when pressed.
Press the mixture firmly into the bottom of the prepared pan, using the back of a measuring cup to create an even, compact crust. Bake for 10 minutes until the edges are lightly golden. Let it cool completely while you prepare the filling—this prevents sogginess when you add the cheesecake batter.
🍳 Step 2: Melt Chocolate and Cream Cheese
In a heatproof bowl set over a saucepan of simmering water (double boiler), combine the 16 oz full-fat cream cheese, 6 oz chopped dark chocolate, 1.5 cups granulated sugar, 0.5 cup heavy whipping cream, 1 tbsp vanilla extract, 1 tsp instant espresso powder, and 0.5 tsp salt. Stir constantly with a silicone spatula until everything is completely melted and smooth, about 5-7 minutes.
Remove from heat and let cool to room temperature—this prevents scrambling when you add the eggs. Here’s the thing: if the mixture is too warm when you add the eggs, they’ll cook immediately and create a grainy texture. Patience here ensures that silky smooth filling you’re after.
👨🍳 Step 3: Incorporate Eggs and Flour
In a separate bowl, beat the 3 whole large eggs until they’re completely smooth with no streaks. Here’s where it gets tricky: slowly pour the egg mixture into the chocolate mixture while gently stirring with a spatula. This prevents creating air bubbles that could cause cracks in your cheesecake.
Once fully combined, sift in the 0.25 cup all-purpose flour and fold it in just until no dry streaks remain. Pour the batter over the cooled crust, spreading it evenly. Tap the pan gently on the counter to release any trapped air bubbles—this ensures a smooth top surface.
⏰ Step 4: Bake in a Water Bath
Place the springform pan inside a larger baking dish and pour the 0.5 cup water into the bottom of the larger dish. This water bath helps the cheesecake bake evenly and prevents cracking. Bake at 350°F for 50-60 minutes until the edges are set but the center still jiggles slightly when gently shaken.
Real talk: the cheesecake is done when it’s just set but still has a slight wobble in the center. If you wait until it’s completely firm, it’ll overbake and become dry. Let it cool in the oven with the door slightly ajar for 1 hour to prevent sudden temperature changes that could cause cracking.
🥘 Step 5: Chill and Top (Optional)
Remove the cheesecake from the oven and let it cool completely at room temperature, then refrigerate uncovered for at least 4 hours or overnight. This slow chilling process develops the perfect texture—creamy yet firm with clean slices.
For that restaurant-quality finish, spread the 1 cup chocolate ganache over the top just before serving. The ganache should be slightly warm but not melted when applied—this creates a glossy, professional finish that sets beautifully. Slice and serve chilled for the ultimate decadent experience.
Pro Tips For Making 9 Inch Chocolate Cheesecake
- Preheat Crust First: Toss your graham cracker crumb mix with melted butter and sugar, then press it into the pan before baking. Pop it in the oven for 5–7 minutes at 350°F—this toasts the crust and prevents a soggy bottom. I used to skip this, and the crust always felt like a sad, damp wrapper.
- Room-Temp Cream Cheese: Take your full-fat cream cheese out of the fridge at least 2 hours before mixing. Cold lumps won’t blend smoothly, and you’ll end up with streaks in the batter. I learned this the hard way—my first cheesecake looked like it had marble swirls instead of chocolate.
- Water Bath Mandatory: No excuses—wrap your springform pan in foil and place it in a deep roasting pan filled with hot water (about halfway up the sides). The steam keeps the center from cracking as it bakes. I’ve tried baking it dry, and the results are always a sad, sunken middle.
- Cool Gradually: After baking, let the cheesecake sit in the oven with the door cracked for 30 minutes. Then, transfer it to the fridge without removing the springform pan—this prevents the edges from collapsing. Rushing this step is how you get a cheesecake that looks like a sad soufflé.
Dietary considerations for this 9 inch chocolate cheesecake
Gluten-Free Adaptation
To make this cheesecake gluten-free, replace the graham cracker crust with a blend of 1 cup gluten-free graham cracker crumbs (like Schär or Trader Joe’s) and ½ cup almond flour for binding.
For the filling, swap the ¼ cup all-purpose flour with ¼ cup cornstarch—it stabilizes the texture just as well. Use a dedicated gluten-free pan to avoid cross-contamination. The result? A perfectly set cheesecake with no compromise on texture. 🌟
Dairy-Free Options
For a dairy-free version, substitute the 16 oz cream cheese with 16 oz dairy-free cream cheese (like Kite Hill or Violife), and replace the heavy cream with ½ cup coconut cream (chilled overnight).
The chocolate and crust remain the same, but expect a slightly lighter texture. Chill the cheesecake longer—6 hours or overnight—to ensure proper setting. Trust me, it’s still decadent!
Lower-Sugar Swaps
Cut sugar by ⅓ by using 1 cup monk fruit sweetener (like Lakanto) instead of granulated sugar in both the crust and filling. For the chocolate, opt for 72% cacao dark chocolate—it’s less sweet but packs intense flavor.
Balance the richness with 1 tsp cinnamon in the filling. The crust may need an extra 2 tbsp melted butter to hold together without sugar. The result? A rich, less sweet cheesecake that still satisfies.
Nut-Free Crust
If nut allergies are a concern, skip the almond flour in the gluten-free adaptation and use 100% gluten-free oats (blended into crumbs) mixed with ½ cup melted coconut oil instead of butter.
The oats add a subtle sweetness and bind the crust without nuts. For extra stability, press the crust slightly thicker than usual. This works surprisingly well—no one will guess it’s nut-free! 💪
Vegan Chocolate Ganache
For the optional ganache topping, melt ½ cup dairy-free dark chocolate (Enjoy Life brand) with ½ cup coconut cream over a double boiler. Let it cool slightly before spreading—it’ll set beautifully on the cheesecake.
Avoid store-bought vegan ganaches; homemade tastes infinitely better. The ganache adds that glossy finish without dairy, making the dessert feel just as luxurious. ✨
Nutrition facts
Frequently asked questions
Why does my chocolate cheesecake crack?
Cracking happens when the cheesecake bakes too quickly or cools unevenly. Always use a water bath and bake at 350°F until just set (edges firm, center slightly jiggly). Let it cool in the oven with the door slightly open for 1 hour before refrigerating. Avoid opening the oven door during baking to prevent temperature shocks.
Can I make this recipe in a different pan size?
Yes, but adjust baking time. For an 8-inch pan, reduce baking time by 10-15 minutes (40-45 minutes total). For a 10-inch pan, increase by 15-20 minutes (65-70 minutes). Use the same water bath method and chill fully before slicing to maintain texture.
How do I prevent a soggy crust?
Prevent sogginess by baking the crust for 10 minutes before adding filling, then letting it cool completely. Use a 9-inch springform pan with a removable bottom to avoid soggy edges. Chill the assembled cheesecake for at least 4 hours before slicing—this ensures the crust stays crisp.
What’s the best way to store leftovers?
Store in an airtight container in the fridge for up to 5 days. The crust stays crisp for 2 days, but the filling remains creamy. For longer storage, freeze slices wrapped tightly in plastic for up to 2 months. Thaw overnight in the fridge before serving.
Can I add mix-ins like nuts or berries?
Yes, but add them carefully! Fold in ½ cup chopped nuts (like walnuts or pecans) or 1 cup berries (like raspberries) after combining the batter with eggs. Overmixing can introduce air bubbles. For berries, press them lightly into the crust before adding filling to prevent sinking.

- 12 Bean Chili Recipe: Hearty Slow-Cooked Depth With 12 Legumes - October 17, 2026
- 5 Seed Bread Recipe: Nutty Crunch and Artisan Flavor in One Loaf - October 17, 2026
- 1 Lb Macaroni Salad Recipe: Bold, Crunchy, and Crowd-Pleasing - October 17, 2026