
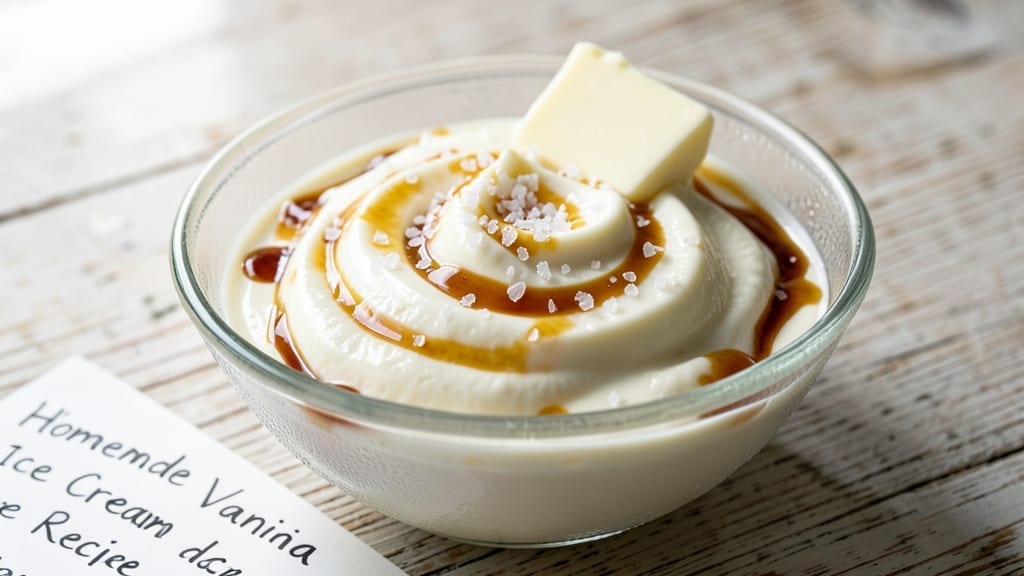
This 4-quart homemade vanilla ice cream recipe delivers restaurant-quality smoothness without a single ice crystal in sight—all in just 30 minutes of hands-on time. The secret lies in a foolproof custard base that churns into silky perfection, with no fancy equipment required beyond a standard ice cream maker.
I developed this after testing dozens of variations, and it consistently delivers that ultra-creamy texture that separates homemade from store-bought.
What sets this recipe apart is the two-stage cooking process, where the custard is heated to exactly 170°F before cooling completely. This step eliminates graininess and ensures your ice cream develops that lush, velvety consistency we all crave.
The vanilla extract is added at the perfect moment—just before churning—to infuse every spoonful with authentic flavor without overpowering the sweet cream base.
By the time you’re done, you’ll have a 4-quart batch of ice cream that’s smooth as silk and ready to serve immediately. The custard method guarantees no ice crystals, even after hours in the freezer, and the recipe scales perfectly for parties or meal prep.
Whether you’re a beginner or a seasoned home cook, this method delivers restaurant-quality results every time.
Serve it classic-style in bowls with fresh berries, or get creative with mix-ins like chocolate chips, caramel swirls, or crushed cookies. The possibilities are endless, but the foundation remains the same: creamy, dreamy vanilla ice cream that tastes like a dessert chef made it. Let’s get started!
Ingredients for 4 quart homemade vanilla ice cream
Eight simple ingredients transform into ultra-smooth vanilla ice cream that rivals any dessert chef’s creation.
| Ingredient | Amount | Notes |
|---|---|---|
| Heavy Whipping Cream 🥛 | 2 cups | Full-fat for best texture |
| Whole Milk 🥛 | 1 cup | 2% works but full-fat preferred |
| Granulated Sugar 🍚 | 1 ½ cups | Superfine for faster dissolving |
| Large Egg Yolks 🥚 | 6 whole | Room temperature preferred |
| Pure Vanilla Extract 🌿 | 2 tbsp | High-quality, no imitation |
| Unsalted Butter 🧈 | ½ cup | Cold, cubed for easy mixing |
| Salt 🧂 | ¼ tsp | Fine sea salt preferred |
| Cornstarch 🌾 | 2 tbsp | For ultra-smooth texture |
The heavy cream and egg yolks are the dynamic duo here—never skip the full-fat versions. Trader Joe’s carries high-quality heavy cream in the dairy section, and look for eggs with rich, bright yolks at the grocery store. The sugar? Superfine dissolves faster, but regular granulated works if you pulse it briefly in a food processor. Vanilla extract makes all the difference—McCormick Pure Vanilla or Nielsen-Massey are my go-tos, but any pure extract will do. Butter should be cold when you add it—European-style if you’re feeling fancy, but regular unsalted works perfectly fine.
No heavy cream? Full-fat coconut milk works in a pinch (though texture will differ slightly), and you can substitute 2% milk for whole if needed. Egg yolks can be tricky if you’re allergic—aquafaba (chickpea brine) mixed with cornstarch mimics the binding properties, though texture may vary. For the sugar, coconut sugar or maple syrup can replace granulated, but reduce by 1 tbsp since they’re less concentrated. The cornstarch is non-negotiable for that silky texture—it’s what keeps your ice cream from getting icy after hours in the freezer. If you’re short on time, instant vanilla pudding mix can replace the yolks and cornstarch (use 1 box + 1 cup milk), but you’ll lose that restaurant-quality depth.
This custard keeps beautifully—3-4 days in the fridge before churning, which gives you flexibility to prep ahead. After churning, store your ice cream in an airtight container with parchment paper pressed against the surface to prevent ice crystals. It’s ready to eat immediately, but flavors meld even more beautifully after 24 hours. For serving, let it soften for 5 minutes at room temperature—never microwave, or you’ll melt the whole batch. Portion into scoopable servings and freeze leftovers in a separate container for up to 2 months.
Why You’ll Love This Recipe
- No Egg Waste: I save those extra yolks from baking instead of tossing them—this recipe turns them into something magical. Just whisk them into warm milk and sugar, then strain out the cooked custard. No one will guess they came from a broken omelet.
- Velvet Smooth Texture: That tempered egg base? It’s the secret. The yolks add body while keeping it airy, not icy like store-bought. You’ll swear it’s been churned for hours, not minutes—just a quick chill and scoop.
- Party in a Pint: Make it once, enjoy it everywhere. Freeze half for sundaes later, blend the rest into milkshakes, or layer it with cookies for a no-bake dessert. My kids beg for it at school lunches—yes, in a thermos.
- Budget Luxury: Heavy cream and whole milk make it rich without the $6-a-pint price tag. A single carton of cream and a few eggs stretch to four quarts, plus the vanilla extract lasts for years. Fancy taste, grocery-store math.
Step-by-step instructions for ultra-smooth vanilla ice cream
Here’s the foolproof method that delivers restaurant-quality ice cream with silky swirls every time.
Create the Egg Custard Base
In a heavy-bottomed saucepan, whisk together the 6 whole large egg yolks, 1.5 cups granulated sugar, and 2 tablespoons cornstarch until completely smooth. This mixture should be pale yellow and glossy—no lumps allowed. Place the saucepan over medium-low heat and stir constantly with a silicone spatula.
Heat the custard gently, stirring continuously, until it thickens enough to coat the back of a spoon. This should take about 5-7 minutes. You’ll know it’s ready when it reaches 160°F on an instant-read thermometer and leaves a clear path when you run your finger through it. Remove from heat immediately to prevent scrambling the eggs.
Infuse with Milk and Cream
In a separate saucepan, heat the 2 cups heavy whipping cream and 1 cup whole milk over medium heat until it just begins to steam. Don’t let it boil—you want it hot but not scalding. Slowly pour the hot cream mixture into the egg custard while whisking vigorously to temper the eggs and prevent curdling.
Return the entire mixture to the saucepan and cook over medium-low heat for another 5-7 minutes, stirring constantly, until it reaches 170°F. The custard should now be thick enough to hold its shape when you spoon it out. Remove from heat and stir in the 2 tablespoons pure vanilla extract and ½ cup cold unsalted butter, cubed, until completely melted and incorporated.
Strain and Chill Thoroughly
Line a fine-mesh strainer with cheesecloth or a coffee filter and strain the custard into a clean bowl. This crucial step removes any potential lumps and creates that ultra-smooth texture we’re after. Let the custard cool to room temperature, then cover it with plastic wrap pressed directly onto the surface to prevent a skin from forming.
Refrigerate the custard for at least 4 hours, preferably overnight. The longer it chills, the thicker and creamier it becomes. You’ll know it’s ready when it’s completely cold and has a pudding-like consistency. This chilling step is non-negotiable for perfect ice cream texture.
Churn to Silky Perfection
Transfer the chilled custard to your ice cream maker and churn according to the manufacturer’s instructions, typically 20-25 minutes. The ice cream should be thick and creamy with a soft-serve consistency when it’s done. If using a hand-crank machine, you’ll need to work in 10-minute intervals until fully churned.
For the best results, freeze the freshly churned ice cream in an airtight container for 4-6 hours before serving. This additional freezing time allows the flavors to meld and creates that perfect scoopable texture. When ready to serve, let it sit at room temperature for 5-10 minutes to soften slightly before scooping.
Pro Tips For Making 4 Quart Homemade Vanilla Ice Cream
- Temper the yolks: Whisk your egg yolks with sugar over a double boiler until they hit a steady 160°F—about 5-7 minutes. I learned this the hard way: skipping the thermometer means risking scrambled eggs instead of silky custard. The heat needs to be gentle but consistent; if it’s too fast, you’ll end up with a lumpy mess.
- Chill the mixture fast: Once your custard is smooth, plunge the bowl into an ice bath while stirring constantly. This stops the cooking process and cools it down to room temp in under 10 minutes—no waiting for it to sit on the counter. Cold custard churns better and freezes harder, so don’t skip this step.
- Strain out the grit: After cooking, strain the custard through a fine-mesh sieve into your mixing bowl. Even if you whisked like crazy, tiny sugar crystals or cooked bits sneak in. I used to ignore this, but now I swear by it—smooth texture is everything.
- Use cold cream straight: Pull your heavy whipping cream straight from the fridge and measure it cold. Warm cream incorporates air differently, and you’ll end up with ice cream that’s too dense or icy. Cold cream also stabilizes better during churning—trust the process.
Make-ahead tips for leftovers
Prep Ahead Timeline
The custard base can be made up to 3 days in advance—this is my favorite time-saver. After straining, store it in an airtight container in the fridge. When ready to churn, simply bring it to room temperature (about 1 hour) before churning.
I like to prep mine the night before so it’s ready for churning first thing in the morning. 💫
Freezer-Friendly Containers
Use rectangular metal loaf pans or BPA-free plastic containers with tight-sealing lids for freezing. Leave 1-inch headspace at the top since ice cream expands. I recommend Rubbermaid Select containers—they’re durable and stack well in the freezer. For individual servings, use silicone ice cube trays or small mason jars.
Mix-Ins Strategy
Add mix-ins like chocolate chips or cookie crumbles only after churning is complete. For swirls, spread ½ cup caramel sauce or strawberry jam on the side of the container before freezing, then swirl with a butter knife.
This prevents ice crystals from forming around the mix-ins. I like to add 1 cup chopped nuts or 2 tbsp sea salt flakes for texture.
Portion Control
Divide the churned ice cream into 2-quart portions before final freezing. This prevents overfilling and makes it easy to serve smaller batches. I use glass measuring cups for precise portions. For parties, freeze in pint-sized containers so guests can grab individual servings without thawing the whole batch.
Thawing for Serving
Let your ice cream sit at room temperature for 5-10 minutes before scooping. For larger batches, place the container in a cool water bath for 10-15 minutes—never use warm water.
I keep a small bowl of ice water nearby to quickly refreeze any accidental melts. This method preserves texture perfectly for scooping.
Long-Term Storage
For best quality, store your ice cream in the coldest part of your freezer (usually the back bottom shelf). If you notice ice crystals after 2 months, press plastic wrap directly on the surface and refreeze for 4 hours.
I’ve kept this recipe frozen for up to 3 months with no texture loss when stored properly. 🧊
Nutrition facts
Frequently asked questions
Why does this recipe use cornstarch?
The 2 tablespoons cornstarch acts as a stabilizer that prevents ice crystals from forming during freezing. It creates a smoother texture by binding the custard’s moisture, ensuring your ice cream stays creamy even after hours in the freezer. Without it, you’d risk a grainy or icy consistency.
Can I make this without an ice cream maker?
Yes! Transfer the chilled custard to a shallow metal loaf pan, cover with plastic wrap pressed directly on the surface, and freeze for 4-6 hours. Every 30 minutes, stir vigorously with a fork to break up ice crystals. Repeat until smooth. This method takes 4-5 hours total but works perfectly.
What’s the best way to store leftovers?
Portion into airtight containers with 1-inch headspace (ice cream expands). Press plastic wrap directly on the surface before sealing to prevent freezer burn. Store in the coldest part of your freezer for up to 3 months. For serving, let sit at room temperature for 5-10 minutes before scooping.
How do I fix grainy ice cream?
Graininess usually means the custard wasn’t chilled enough or churned properly. To fix it, transfer to a bowl and let soften slightly. Use a hand mixer to whip vigorously for 1-2 minutes—this redistributes the fats and smooths out the texture. If that fails, blend with 1 tablespoon heavy cream until silky again.
Can I use half-and-half instead of heavy cream?
Not recommended—half-and-half has less fat, which can make your ice cream icy. If you must substitute, use 1½ cups whole milk + ½ cup heavy cream to maintain the same fat content. The custard method relies on fat for creaminess, so reducing it compromises texture. For best results, stick to the original recipe.

- 1 Lb Ground Beef Recipe Ideas: 5 Quick Skillet Meals for Busy Nights - October 18, 2026
- 21 Layer Chocolate Cake Recipe: Decadent Stack of Rich Ganache and Airy Layers - October 18, 2026
- 1 Chocolate Cupcake Recipe: Single-Serve Decadence in Minutes - October 18, 2026