
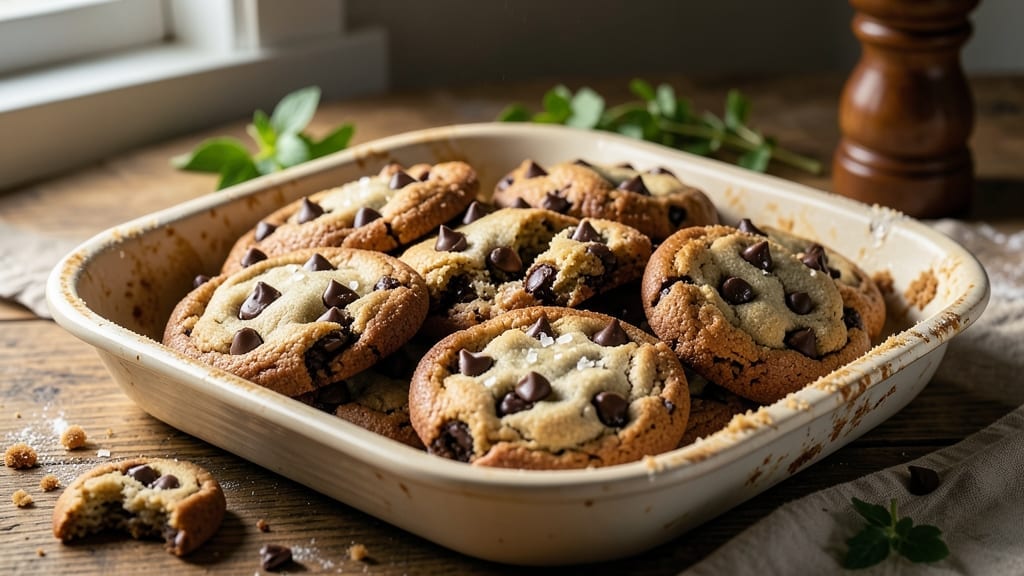
Mastering 48-hour chocolate chip cookies transforms ordinary baking into an art of deep flavor development. The secret lies in letting dough rest—where butter melts slowly, flour hydrates fully, and every ingredient harmonizes. This isn’t just baking; it’s patience rewarded with texture so perfect it borders on science. 🔥
Professional bakers know the 48-hour method creates cookies with crispy edges, chewy centers, and chocolate chips that stay gloriously melty. The process requires just five core ingredients (plus chocolate) and minimal effort—no fancy equipment, no stress. What changes is time, which builds complexity most recipes never achieve.
By the final bite, you’ll taste the difference: caramelized butter notes, toasted flour depth, and chocolate that’s warm through the center. These aren’t your average cookies—they’re the kind that disappear in minutes and earn rave reviews from even the most critical dessert lovers.
Ready to elevate your baking? The method is simple, but the results are restaurant-quality. Let’s begin with the dough—where the magic starts.
Ingredients for 48 hour chocolate chip cookies
Five core ingredients plus chocolate—where patience transforms baking into flavor science.
| Ingredient | Amount | Notes |
|---|---|---|
| Unsalted Butter 🧈 | 1 cup | Cold, cut into 1/2-inch cubes |
| Granulated Sugar 🍚 | 1 cup | Superfine preferred for even texture |
| Light Brown Sugar 🍚 | ¾ cup | Packed firmly, moist texture |
| All-Purpose Flour 🌾 | 2 ½ cups | Sifted, spooned and leveled |
| Large Eggs 🥚 | 2 whole | Room temperature, beaten |
| Vanilla Extract 🌿 | 2 tsp | Pure, high-quality preferred |
| Sea Salt 🧂 | 1 tsp | Fine grain, Diamond Crystal preferred |
| Chocolate Chips 🍫 | 2 cups | Semi-sweet, 60% cacao |
| Flaky Sea Salt 🧂 | 1 tbsp | For final sprinkle, Maldon preferred |
The butter is non-negotiable here. European-style unsalted butter like Plugrá or Kerrygold delivers deeper flavor than standard brands—look for high-fat content (82% or higher). Keep it cold when cutting into cubes; room temperature butter will create a greasy dough. The sugars are where texture magic happens: superfine sugar dissolves faster, while the brown sugar’s moisture creates that signature chew. King Arthur or Gold Medal flour are ideal—they absorb moisture evenly, but any all-purpose will work. Pre-sift your flour to eliminate lumps and increase surface area for better gluten development.
No superfine sugar? Pulse regular granulated sugar in a food processor for 30 seconds—it’ll get you close. Vanilla extract should be pure, not imitation; Heinz or Nielsen-Massey are reliable brands. For chocolate chips, Ghirardelli or Guittard semi-sweet (60% cacao) melts beautifully without overpowering. The flaky sea salt? Maldon is worth the splurge—those delicate crystals dissolve perfectly, but any flaky salt will work. If you’re gluten-sensitive, swap the all-purpose flour for a 1:1 gluten-free blend, but expect slightly denser cookies. The dough will be shaggy at first—that’s normal; it comes together beautifully after the 48-hour rest.
Store the dough in an airtight container between parchment-lined sheets to prevent sticking. Keep it in the fridge for the full 48 hours—no skipping this step. The cookies can be baked fresh or frozen for up to 3 months on a floured tray before baking. Once baked, cool on wire racks for at least 2 hours before storing in an airtight container. They’ll stay fresh for 5 days at room temperature, though they’re best enjoyed within 2 days. The flavor actually improves after the first day as the residual heat continues to develop the sugars.
Why You’ll Love This Recipe
- I’ll be real: the 48-hour wait isn’t just tradition—it’s magic. Cold butter and fridge-dough mean no last-minute scrambling, and those cookies? Crisp edges, chewy centers, every time. Just mix, chill, and let the oven do the work.
- Fridge-Friendly Prep: I’ll be real: the 48-hour wait isn’t just tradition—it’s magic. Cold butter and fridge-dough mean no last-minute scrambling, and those cookies? Crisp edges, chewy centers, every time. Just mix, chill, and let the oven do the work.
- Brown Sugar Magic: That light brown sugar isn’t just for color—it’s the secret to deep caramel notes and a satisfying chew. Paired with the crisp butter and eggs, it’s the kind of flavor that makes people pause mid-bite. (Yes, even my picky nephew.)
- Party-Proof Anywhere: Need cookies for a potluck? A last-minute gift? This recipe scales like a dream—double the batch, wrap them up, and they’ll still taste fresh days later. Bonus: the 48-hour rule means you’re never baking under pressure.
Step-by-step instructions for 48-Hour chocolate chip cookies
Mastering these cookies requires patience and precision—here’s the exact method for maximum flavor development.
👨🍳 Step 1: Cream Butter and Sugars for Maximum Flavor Extraction
In a stand mixer fitted with the paddle attachment, beat the 1 cup unsalted butter (cold cubes) with 1 cup granulated sugar and 0.75 cup light brown sugar on medium speed for 5-6 minutes. The mixture should become pale, fluffy, and nearly double in volume. This extended creaming incorporates air and fully emulsifies the sugars with the butter’s fat, creating the foundation for that signature crackly top.
I press down on the paddle occasionally to ensure all butter pieces are fully incorporated—this prevents pockets of unmelted fat that could lead to dense cookies. The texture should be light and airy, almost like whipped cream. If using superfine sugar, the mixture will reach this stage slightly faster than with regular granulated sugar.
👨🍳 Step 2: Incorporate Eggs and Vanilla for Perfect Structure
Add the 2 whole large eggs (room temperature) one at a time, mixing on low speed for 30 seconds after each addition until fully incorporated. Add the 2 teaspoons vanilla extract and mix for another 10 seconds. The batter should be smooth and slightly thick—like a thick cookie dough consistency.
Here’s where the 48-hour magic begins: After mixing, cover the bowl with plastic wrap and refrigerate for 24 hours. This extended resting period allows the flour to fully hydrate and the butter to solidify completely, which prevents excessive spreading during baking. The flavors also meld more deeply during this time, creating a more complex cookie profile.
🥘 Step 3: Combine Dry Ingredients and Fold in Chocolate
In a separate bowl, whisk together the 2.5 cups all-purpose flour, 1 teaspoon sea salt, and any remaining light brown sugar that may have settled. Sift the flour mixture directly into the chilled butter mixture and mix on low speed for 45-60 seconds until just combined—you should still see some flour streaks. This prevents overdevelopment of gluten, which would make the cookies tough.
Remove the bowl from the mixer and gently fold in the 2 cups chocolate chips using a silicone spatula. Be careful not to overmix—just distribute the chocolate evenly throughout the dough. The cold dough will be stiff and may crack slightly as you fold, which is normal. Cover again and refrigerate for another 24 hours—this second resting period is crucial for even baking and maximum flavor concentration.
🔥 Step 4: Bake Low and Slow for Deep Flavor Development
Preheat your oven to 325°F (this lower temperature is key for the 48-hour method). Line two baking sheets with parchment paper and scoop the chilled dough into 2-tablespoon portions (about 1.5 ounces each) using a cookie scoop. Place them 3 inches apart on the prepared sheets—they won’t spread much at this temperature.
Bake for 16-18 minutes until the edges are deep golden brown and the centers look just slightly underdone. The cookies will continue cooking on the hot pan after removal. I like to rotate the baking sheets halfway through for even browning. Remove them when they’re still slightly soft in the center—they’ll firm up as they cool.
⏰ Step 5: Rest and Finish for Optimal Texture
Let the cookies cool on the baking sheets for 5 minutes before transferring to a wire rack to cool completely. While they’re still warm, sprinkle each cookie with a pinch of flaky sea salt—this enhances the chocolate flavor and adds a delightful contrast.
For best results, store the cookies in an airtight container at room temperature for up to 5 days, allowing them to develop even more complex flavors over time. The 48-hour process creates cookies with a perfect balance of crisp edges, chewy centers, and deep, caramelized flavor—far superior to traditional quick-baked versions.
Pro Tips For Making 48 Hour Chocolate Chip Cookies
- Chill the Dough Hard: After mixing, pop the dough in the fridge for at least 24 hours—not just overnight. I learned this the hard way when I rushed it and ended up with flat, cakey cookies instead of chewy, crackly ones. The longer it rests, the better the texture, especially with the higher butter content in this recipe.
- Brown the Butter First: Skip the soft butter shortcut—brown it until it smells nutty and deep. That caramelized flavor cuts through the sweetness and adds a sophisticated edge. (Yes, it takes 10 extra minutes, but your cookies will taste like they came from a bakery.)
- Measure Flour Right: Use the spoon-and-sweep method—not scooping straight from the bag. Packed flour makes dense cookies, and this recipe’s 48-hour magic relies on the right balance. A kitchen scale? Even better, but a measuring cup with a flat edge works in a pinch.
- Rotate the Pan Mid-Bake: Your oven’s hot spots are real—rotate the sheet halfway through baking. I used to ignore this, and some cookies would spread into pancakes while others stayed underdone. Flip the pan, and every cookie gets that perfect golden edge.
Wine and beer pairings for 48 hour chocolate chip cookies
Rich Dessert Wines
Pair these decadent cookies with Oaked Chardonnay—its buttery notes and subtle vanilla complement the caramelized butter and chocolate beautifully. I love Meiomi Pinot Noir for its smooth, fruit-forward profile that balances the cookie’s richness without overpowering.
Both wines have enough acidity to cut through the fat, cleansing your palate between bites. 🍷
Creamy Liqueurs
Serve with a Baileys Irish Cream or Godiva Chocolate Liqueur for a dessert pairing that enhances the chocolate flavor. The creamy texture and vanilla notes mirror the cookie’s depth, creating a harmonious experience.
I often add a splash to warm milk for a luxurious cookie dip—trust me, it’s a game-changer. 🥛
Craft Beer Pairings
A Belgian Dubbel like Westmalle Trappist offers malty sweetness and caramel notes that pair wonderfully with the cookies’ buttery, caramelized edges. For a lighter option, try a Honey Brown Ale—the subtle sweetness and smooth finish complement the chocolate without competing. 🍺
Classic Milk Options
Warm whole milk with a sprinkle of cinnamon creates the perfect simple pairing. For something extra special, try half-and-half or heavy cream—their richness mirrors the cookie’s texture while adding a velvety contrast. I also love chocolate milk for a nostalgic touch that amplifies the chocolate flavor. 🥛
Coffee Enhancements
Pair with a dark roast coffee (like Peet’s Major Dickason’s Blend) to cleanse your palate between bites. The bitterness in the coffee contrasts beautifully with the sweetness of the cookies.
For an after-dinner treat, try a cold brew with a splash of vanilla syrup—it’s refreshing and enhances the cookie’s vanilla notes. ☕
Seasonal Adaptations
In winter, a spiced red wine like Mulled Cabernet adds warmth and depth. During summer, a sparkling rosé with its crisp acidity provides a refreshing contrast. I find that seasonal pairings elevate the cookies’ flavors, making every bite feel special. 🍇
Nutrition facts
Frequently asked questions
Why does the dough need to rest for 48 hours?
The extended rest time is what creates the magic! During the first 24 hours, the butter solidifies completely, preventing excessive spreading. The second 24 hours allows flour to fully hydrate and flavors to meld deeply. This slow process develops complex caramelized notes and creates that perfect balance of crisp edges and chewy centers.
Can I use regular granulated sugar instead of superfine?
Yes, but pulse it in a food processor for 30 seconds to break it down. Superfine sugar dissolves faster, creating a smoother texture, but regular sugar works fine. Just mix the dough slightly longer to ensure even distribution. The flavor won’t be affected—only the texture might be slightly less refined.
What if my cookies spread too much during baking?
This usually happens if the dough isn’t cold enough or the oven runs hot. Always chill the dough thoroughly between mixing stages and use an oven thermometer to confirm 325°F. Scoop portions slightly smaller (1.5 ounces) and place them 3 inches apart on the sheet. The 48-hour method naturally reduces spreading compared to quick recipes.
How do I store these cookies for maximum freshness?
Let them cool completely, then store in an airtight container at room temperature for up to 5 days. For longer storage, freeze portions on a floured tray for 3 months. The flavor actually improves over time as residual heat continues to develop the sugars—this is why they taste even better the next day!
Can I add mix-ins like nuts or oats?
Fold in 1 cup chopped walnuts or 1 cup old-fashioned oats with the chocolate chips. For best results, toast the nuts first to enhance their flavor. Just be mindful not to overmix—keep the dough cold and handle it gently to maintain the perfect texture.

- Pea Soup Instant Pot Recipe: Velvety Green Smoothness in 20 Minutes - November 1, 2026
- Pork Loin Pulled Pork Crock Pot Recipe: Slow-Smoked Tenderness With Zero Dryness - November 1, 2026
- Baked Potatoes in Crock Pot Recipe: Buttery Interiors and Crispy Top Magic - November 1, 2026