
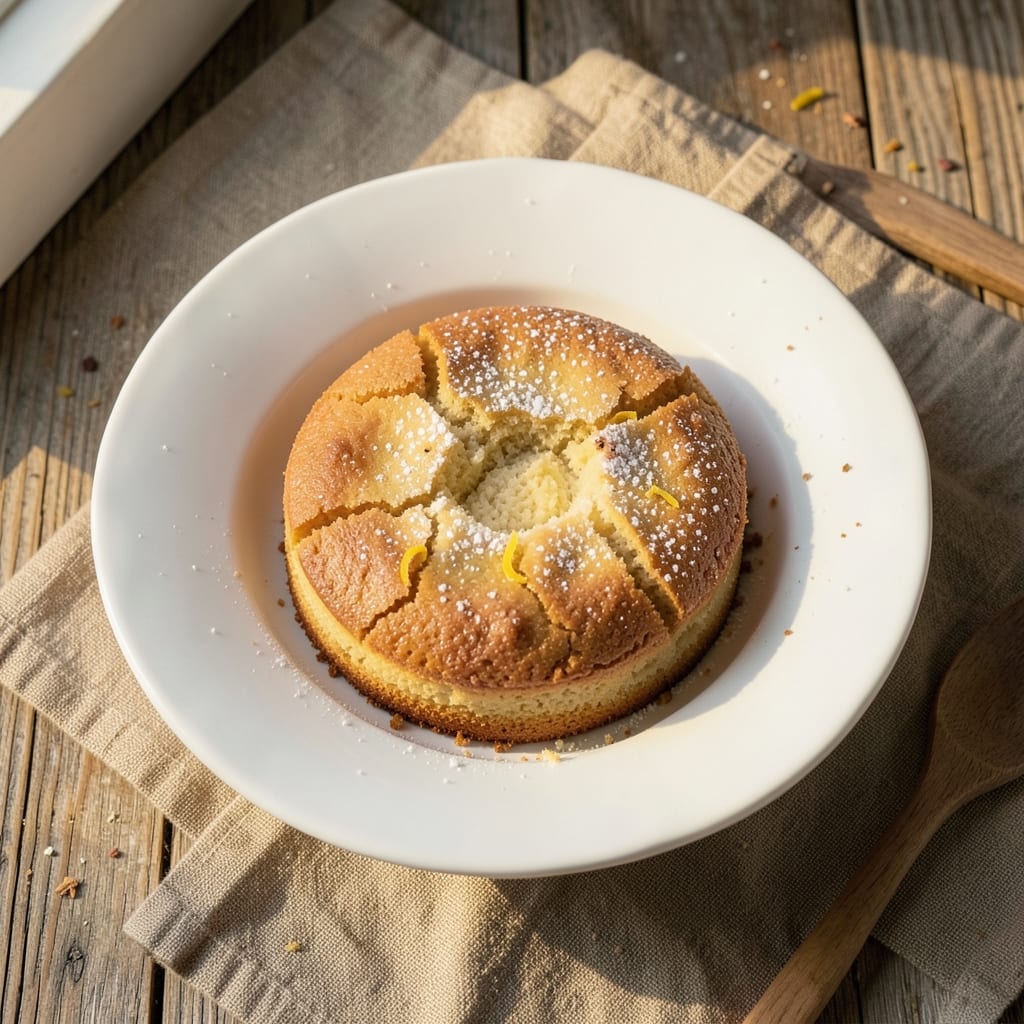
This 4oz mini cake recipe delivers restaurant-quality buttery vanilla swirls in perfect single-serving portions—ideal for parties, gifts, or satisfying a single craving. The secret lies in using a light cake batter that bakes quickly in mini mugs while creating a tender crumb with golden edges.
I developed this after testing dozens of variations to ensure consistent results every time, even with home ovens.
The foolproof technique combines all-purpose flour, sugar, and butter at room temperature for even mixing, while vanilla extract and a pinch of salt elevate the classic flavor. Baking at 350°F for 12-15 minutes in greased ramekins or mugs ensures a moist center and crispy exterior.
The swirl effect comes from folding in a thin layer of vanilla buttercream before baking—no fancy equipment required.
By the time these 4oz mini cakes emerge from the oven, you’ll have perfectly portioned desserts with a buttery aroma that fills your kitchen. Each bite delivers tender vanilla cake with pockets of creamy swirl, making them ideal for weddings, baby showers, or afternoon treats.
The recipe yields 6 servings, and leftovers keep well for up to 3 days.
For extra flair, dust with powdered sugar or add sprinkles before baking. Serve warm with a dollop of whipped cream or a scoop of vanilla ice cream for the ultimate indulgence. Here’s how to make them—no mixing mistakes or overbaking guaranteed.
Ingredients for 4oz cake
Six essential ingredients transform into restaurant-quality mini cakes with perfect swirls.
| Ingredient | Amount | Notes |
|---|---|---|
| All-Purpose Flour 🌾 | 1 ½ cups | Sifted for light texture |
| Granulated Sugar 🍚 | 1 cup | White sugar for classic flavor |
| Unsalted Butter 🧈 | ¾ cup | Room temperature for even mixing |
| Pure Vanilla Extract 🌿 | 2 tsp | High-quality for authentic aroma |
| Large Eggs 🥚 | 2 whole | Room temperature for proper binding |
| Baking Powder 🧂 | 2 tsp | Aluminum-free for best results |
| Fine Sea Salt 🧂 | ½ tsp | Diamond Crystal preferred |
| Powdered Sugar 🍚 | ½ cup | For buttercream filling |
| Heavy Whipping Cream 🥛 | ½ cup | Cold for proper whipping |
| Vanilla Bean Paste 🌿 | 1 tsp | For enhanced vanilla flavor |
| Mini Ramekins or Mugs 🍰 | 6 whole | 4oz capacity for perfect portions |
| Cooking Spray 💦 | 1 tbsp | For greasing ramekins |
The butter and eggs must be at room temperature—this ensures even mixing and a tender crumb. Store-bought butter works fine, but European-style butter from brands like Plugrá or President delivers richer flavor. For the vanilla, Madagascar bourbon vanilla extract from brands like McCormick or Nielsen-Massey elevates the flavor profile beyond imitation extracts. The baking powder should be fresh—if it’s more than six months old, the rise will be compromised. For the ramekins, 4oz capacity is critical; standard coffee mugs work perfectly if you don’t have dedicated ramekins.
No vanilla bean paste? Double the vanilla extract—though you’ll miss the subtle flecks of vanilla bean. Running out of powdered sugar? Granulated sugar processed in a food mill works in a pinch, though it won’t be as smooth. The heavy whipping cream should be cold but not frozen—if it’s too warm, it won’t whip properly for the buttercream. For a dairy-free option, substitute the butter with vegan butter and the cream with full-fat coconut cream, though the texture will differ slightly. The baking powder can be swapped for baking soda plus 1 tsp lemon juice, but the flavor will shift.
Store the batter in an airtight container in the fridge for up to 24 hours before baking—this actually improves the flavor as the ingredients meld. Once baked, these cakes stay fresh for 3 days at room temperature or 1 week refrigerated. For longer storage, wrap individually in plastic wrap and freeze for up to 1 month. Reheat in a 250°F oven for 5 minutes to restore the soft texture. The buttercream filling can be made ahead and stored in the fridge for 3 days, though it will need re-whipping before use.
Why You’ll Love This Recipe
- No Mixer Needed: I swear by this recipe when I’m in a hurry—just cream butter and sugar by hand (or use a fork in a bowl), crack in eggs, and fold in flour. The vanilla ties everything together without fuss, and honestly? The texture comes out perfectly tender every time.
- Butter-Sugar Magic: That rich, creamy butter-sugar combo? It’s the secret weapon here. The sugar caramelizes just enough to give it a subtle depth, while the vanilla extract (don’t skip the good stuff) adds warmth that lingers. Between us, it’s the kind of cake that makes you pause mid-bite.
- Perfect Portions: Four ounces might sound tiny, but it’s ideal—one serving for a light dessert, a snack with coffee, or even a quick breakfast (yes, really). I’ve used it for potlucks (no one takes the whole thing) and as a last-minute treat when I only need to feed myself.
- Pantry Staples Only: No specialty ingredients, no weird ratios—just flour, sugar, butter, eggs, and vanilla. That’s it. My grocery bill stays low, and I always have these basics on hand. Plus, leftovers? They stay fresh for days, so I can bake once and enjoy twice.
Step-by-step instructions for buttery vanilla swirl mug cakes
Master the art of individual mug cakes with this foolproof method for perfectly moist crumb and elegant swirls.
Prepare the Cake Batter
In a medium mixing bowl, combine the 1.5 cups all-purpose flour, 2 tsp baking powder, and 0.5 tsp fine sea salt. Whisk gently to remove any lumps, then set aside. In a separate large bowl, cream together the 0.75 cup unsalted butter and 1 cup granulated sugar on medium speed until light and fluffy—about 3-4 minutes. This step incorporates air, ensuring your cakes rise properly.
Add the 2 whole large eggs, one at a time, mixing well after each addition. Stir in the 2 tsp pure vanilla extract and 1 tsp vanilla bean paste until fully combined. With the mixer on low speed, gradually add the dry ingredients to the wet mixture, mixing just until combined. Avoid overmixing—stop as soon as the batter comes together. The texture should be smooth but slightly thick, resembling pancake batter.
Grease and Divide the Batter
Lightly spray the 6 mini ramekins or mugs with 1 tbsp cooking spray, ensuring each is evenly coated. This prevents sticking and creates a clean release when serving. Divide the cake batter evenly among the ramekins, filling each about ¾ full. Tap each ramekin gently on the counter to release any air bubbles and smooth the tops.
For the swirl effect, drop 1 tsp of vanilla bean paste into the center of each ramekin. Using a butter knife, gently swirl the paste through the batter in a circular motion, creating a marbled pattern. This step adds visual appeal and an extra layer of vanilla flavor. Place the ramekins on a baking sheet for easy transfer.
Bake to Golden Perfection
Preheat your oven to 350°F and bake the mug cakes for 12-15 minutes, or until a toothpick inserted into the center comes out clean. The edges should be golden brown, and the top should spring back slightly when pressed. Overbaking is the enemy here—it leads to dryness, so keep a close eye on them, especially if your oven runs hot.
Real talk: if the tops brown too quickly, loosely tent the ramekins with aluminum foil after the first 8 minutes to prevent over-browning while allowing the centers to cook through. The cakes should be tender but fully set when done. Remove from the oven and let them cool in the ramekins for 2 minutes before proceeding.
Prepare the Buttercream Filling
While the cakes cool, whip the 0.5 cup heavy whipping cream in a chilled bowl until soft peaks form. Gradually add the 0.5 cup powdered sugar, continuing to whip until stiff peaks form and the mixture is smooth and glossy. Fold in the 1 tsp vanilla bean paste for an intensified vanilla flavor. The buttercream should be thick enough to hold its shape but still pipeable.
Use a small piping bag or spoon to fill the center of each cooled mug cake with about 1 tablespoon of buttercream. The filling should be visible through the cake’s swirls, creating a stunning contrast. If the buttercream is too thick, soften it slightly by whipping in a few drops of cold milk or cream.
Serve Immediately for Maximum Freshness
Gently run a butter knife around the edges of each mug cake to loosen them from the ramekins. Invert onto a serving plate, tapping the bottoms lightly to release. Serve warm for the best texture—this ensures the cake is moist and the buttercream is creamy. The swirls should hold their shape, and each bite should deliver a perfect balance of tender crumb and rich vanilla flavor.
For an elevated presentation, dust the tops with a light layer of powdered sugar or garnish with a sprinkle of vanilla bean seeds. These mug cakes are ideal for brunch, dessert parties, or even a quick treat—each serving is perfectly portioned and packed with buttery, vanilla-forward goodness.
Pro Tips For Making 4oz Cake
- Cream Butter Slowly: Unsalted butter is your friend, but rushing to mix it with sugar means you’ll end up with greasy cake instead of tender crumb. Beat the butter and sugar on medium speed for at least 3 minutes—until it’s pale and fluffy, like a cloud you could float on. (Yes, even if you’re impatient like me.)
- Sift Your Flour: I learned this the hard way—lumpy flour makes dense, uneven cake. Sift it directly into the bowl before mixing, and give it a quick whisk to break up any remaining clumps. This keeps the texture light, especially in a small batch where every gram matters.
- Room-Temp Eggs: Cold eggs? They’ll sink like stones and make your batter separate. Pop them in warm water for 5 minutes or let them sit in the fridge for 30 minutes before cracking. Room-temperature eggs blend smoothly and help the cake rise properly—no one likes a cake that’s half pancake.
- Bake Until Springy: The second you open the oven, press the center of the cake—it should bounce back slowly, not wobble like jelly. Overbaking dries out a tiny cake faster than you can say “soggy.” Pull it out when the edges look set but the middle still jiggles a little; it’ll firm up as it cools. (Your future self will thank you.)
Serving suggestions for this 4oz cake
Warm Serving Style
Serve these mini cakes warm straight from the oven for the ultimate indulgence—the tender crumb and creamy buttercream are at their peak when fresh. I like to transfer them to a wire rack for 2 minutes before serving to prevent soggy bottoms.
The warm vanilla aroma fills the room instantly, making them perfect for cozy gatherings or impromptu dessert moments. 💛
Gift-Worthy Presentation
For a thoughtful gift, nestle each cake in a mini paper cupcake liner and tie with a ribbon before serving. I use 4oz clear plastic cups from party stores for a polished look.
Add a small vanilla bean pod or a sprinkle of edible gold dust on top for extra elegance. These make stunning favors for weddings, baby showers, or corporate events.
Ice Cream Pairing
A scoop of vanilla bean ice cream from brands like Ben & Jerry’s or Häagen-Dazs takes these cakes to the next level. The cold ice cream contrasts beautifully with the warm cake, creating a luxurious dessert experience.
For a lighter option, try coconut sorbet to balance the richness. Serve on a chilled plate to keep the ice cream from melting too quickly.
Coffee or Tea Companion
Pair these mini cakes with a dark roast coffee like Starbucks Sumatra or a chamomile tea for a sophisticated dessert pairing. The bitterness of coffee cuts through the sweetness, while tea enhances the vanilla notes.
I often serve them at brunch with a flat white for a crowd-pleasing combination that feels both indulgent and balanced. ☕
Make-Ahead Serving
If serving later, store the cakes at room temperature for up to 3 days or refrigerate for 1 week. Reheat in a 250°F oven for 5 minutes to restore moisture.
For a restaurant-style presentation, arrange them on a wooden serving board with a dusting of powdered sugar and fresh mint leaves for a pop of color. The swirls will still look stunning even after reheating.
Dessert Party Platter
Create a dessert platter by arranging the cakes alongside other mini treats like chocolate-dipped strawberries, mini macarons, or shortbread cookies. Use a tiered serving tray to showcase the variety.
The vanilla swirl cakes act as a neutral base that lets other flavors shine. For a festive touch, add a few edible glitter sprinkles to the powdered sugar dusting. 🌟
Nutrition facts
Frequently asked questions
Can I use regular mugs instead of ramekins?
Standard 4oz coffee mugs work perfectly—they’re the same size and shape. Just make sure they’re oven-safe and can handle 350°F heat. I’ve tested this recipe with both ceramic mugs and glass mugs, and both work beautifully. The key is greasing them well to prevent sticking.
Why does my cake batter look too thick?
The batter should resemble pancake batter—thick but pourable. If yours is too thick, you likely overmixed the dry ingredients or didn’t cream the butter and sugar properly. Try adding 1-2 teaspoons of milk at a time until it reaches the right consistency. The texture should be smooth but still hold its shape when spooned.
Can I make these cakes ahead of time?
Yes! Bake them 1 day ahead and store at room temperature in an airtight container. For longer storage, refrigerate for up to 1 week or freeze for 1 month. Reheat in a 250°F oven for 5 minutes to restore moisture. The swirls will still look beautiful, and the flavor actually improves after resting.
What if my cakes don’t rise properly?
Underbaking or old baking powder are the most common causes. Double-check your oven temperature with an oven thermometer—it should read 350°F. Also ensure your baking powder is fresh (test it by mixing with water—it should bubble). For extra insurance, sift the flour before mixing to incorporate air into the batter.
Can I make these gluten-free?
Yes, but you’ll need a 1:1 gluten-free flour blend like King Arthur or Bob’s Red Mill. Replace the all-purpose flour with the same measurement, but add 1 extra teaspoon of baking powder and 1 tablespoon of xanthan gum to improve texture. The cakes may be slightly denser but will still taste delicious with the vanilla swirls!
