
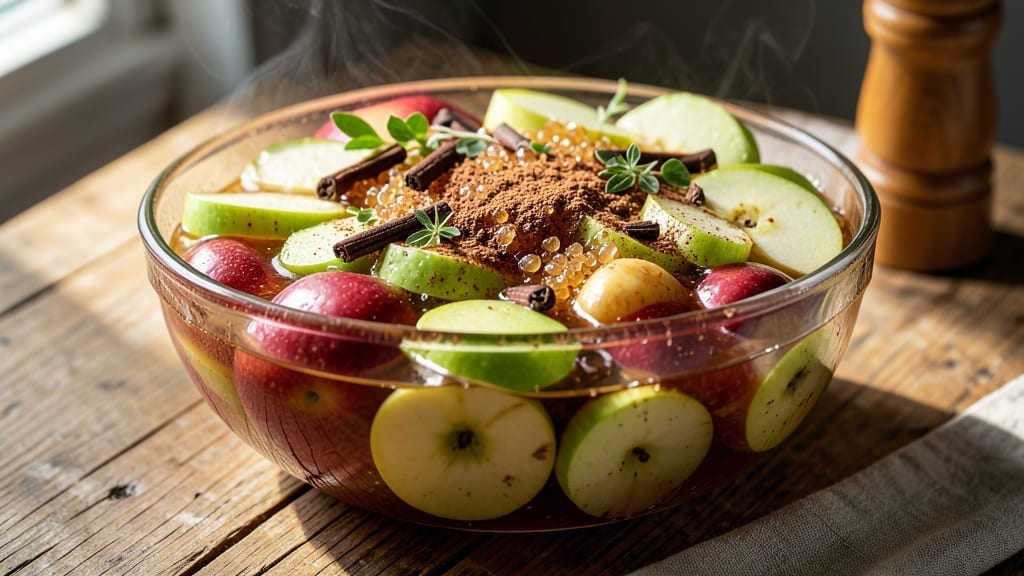
Transforming crisp autumn apples into a deep, spiced brandy mash unlocks flavors that bridge cider and boozy comfort—this 5-gallon recipe is where fermentation meets tradition. The process begins with sanitized equipment and a carefully balanced mix of fruit, spices, and yeast, ensuring every sip carries warmth and complexity.
What makes this different is the patience required: letting nature work its magic over days to develop rich, caramelized notes before distillation (if you choose to proceed).
This mash recipe serves as both a standalone spiced cider and the foundational step for homemade apple brandy, offering flexibility for beginners or experienced fermenters.
The key lies in proper fruit preparation—peeling, coring, and crushing apples to maximize surface area for yeast activity—while cinnamon, cloves, and orange peel infuse layers of aromatic depth. Safety is critical: sterilized containers and precise yeast activation prevent contamination, ensuring a smooth fermentation process.
By the time fermentation completes (typically 7–14 days), you’ll have a velvety, boozy mash with a golden hue and a scent that fills your home like a cozy autumn evening.
The result is a drinkable intermediate product—rich enough to enjoy now, but with the potential to become a refined brandy if distilled later. Whether you’re crafting for sipping or future distillation, this recipe delivers authentic, rewarding flavor with minimal fuss.
For those continuing to brandy, the mash stage is where magic happens—patience and precision now pay off later. Store the finished mash in a cool, dark place and monitor progress before distillation.
Every batch tells a story, and this one starts with the crisp crunch of apples and ends with a sip of liquid comfort.
Ingredients for 5 gallon apple brandy mash
Apples, spices, and yeast transform into rich, boozy comfort in this 5-gallon mash.
| Ingredient | Amount | Notes |
|---|---|---|
| Apples (Honeycrisp, Fuji, or Granny Smith) 🍎 | 10 lb | Peeled, cored, crushed (1-inch pieces) |
| Granulated White Sugar 🍚 | 3 cups | Non-iodized preferred |
| Distilled Water 💧 | 3 cups | For yeast activation |
| Active Dry Yeast 🍺 | ¼ oz | Lalvin EC-1118 or similar |
| Ground Cinnamon 🌿 | 1 tbsp | Freshly ground preferred |
| Whole Cloves 🍃 | 10 whole | Lightly crushed |
| Orange Peel 🍊 | 1 whole | Organic, unwashed, sliced thin |
| Campden Tablets (Potassium Metabisulfite) 🧪 | 1 whole | Sanitizes equipment |
| Non-Chlorinated Well Water or Spring Water 💧 | 2 cups | For final dilution |
| Food-Grade Plastic or Glass Fermentation Vessel 🥫 | 1 piece | 5-gallon capacity |
| Brewer's Yeast Nutrient 🍄 | 1 tbsp | For fermentation health |
| Lemon Juice 🍋 | 1 tbsp | Freshly squeezed |
| Sanitizing Solution (Star San or equivalent) 🧼 | ½ cup | For equipment sterilization |
The apples are everything—Honeycrisp or Fuji for sweetness, Granny Smith for tartness. Local orchards or grocery stores usually have them in season, but frozen works in a pinch (thaw first). Look for firm, unblemished fruit—bruises turn to mush during fermentation. The yeast? Lalvin EC-1118 is my go-to for apple mash, but any wine yeast will work. If you can’t find it, Champagne yeast is a solid backup. The spices? Penzeys Spices sells pre-ground cinnamon and whole cloves that stay potent longer than grocery store jars.
No Campden tablets? A pinch of potassium metabisulfite powder works too—just dissolve it in a little water first. Running short on yeast nutrient? Dried yeast nutrient from a homebrew shop or even a splash of apple juice can help. The orange peel adds brightness, but if you’re out, lemon peel works just as well. For the water, spring water or filtered tap water is best—chlorine kills yeast, so if you’re using tap, let it sit out overnight to off-gas. The fermentation vessel? Plastic food-grade buckets with gamma seals are my favorite—they’re easy to clean and keep oxygen out.
Sanitize everything before use—Star San or a 1:10 bleach-water solution works. The mash keeps 2-3 weeks in the fridge if you’re not distilling immediately, but it’s best enjoyed fresh. If you’re making brandy, ferment until it reaches 10-12% ABV (about 7-14 days). Store the finished mash in a cool, dark place—glass carboys are ideal for long-term storage. Every batch is different, so taste as you go and adjust sweetness or spice levels to your liking.
Why You’ll Love This Recipe
- Make it once, use it forever: serve it chilled for a holiday gathering, warm it up for a cozy night in, or even drizzle it over pancakes. My kids ask for it at birthday parties—yes, really.
- Five-Ingredient Magic: I swear by this recipe—just apples, sugar, water, yeast, and cinnamon. No fancy tools, no stress, and the yeast does all the heavy lifting while I sip my coffee.
- Spiced Perfection: That first sip? Sweet-tart apples caramelizing into a velvety mash with warm cinnamon—like autumn in a glass. Honestly, the yeast kick gives it this unexpected depth that makes it taste like a bakery’s secret.
- Party in a Pitcher: Make it once, use it forever: serve it chilled for a holiday gathering, warm it up for a cozy night in, or even drizzle it over pancakes. My kids ask for it at birthday parties—yes, really.
Step-by-step instructions for crafting apple brandy mash
Here’s how to transform fresh apples into a rich, spiced cider base ready for fermentation.
Prepare and Sanitize Your Equipment
First things first—sanitation is critical for fermentation success. Dissolve the 1 whole Campden Tablets (Potassium Metabisulfite) in 1 cup of the 2 cups Non-Chlorinated Well Water or Spring Water and use this solution to thoroughly rinse the 5-gallon Food-Grade Plastic or Glass Fermentation Vessel. Let it soak for 10 minutes while you prep the apples. Then, rinse with clean water and fill the vessel halfway with the remaining 1 cup Non-Chlorinated Well Water or Spring Water to keep everything sterile.
While the vessel sanitizes, peel, core, and crush the 10 lb Apples (Honeycrisp, Fuji, or Granny Smith) into 1-inch pieces. The larger the chunks, the more texture your mash will have—think rustic ciderhouse quality. I like to use a food processor for efficiency, but a sharp knife works too. Just be consistent with the size to ensure even fermentation.
Create the Spiced Cider Base
In a large stockpot, combine the crushed apples, 3 cups Granulated White Sugar, 1 tbsp Ground Cinnamon, 10 whole Whole Cloves, and the 1 whole Orange Peel. Add 3 cups Distilled Water and bring the mixture to a boil over medium-high heat. Once boiling, reduce the heat to medium-low and let it simmer uncovered for 45-60 minutes, stirring occasionally. You’re looking for a thick, syrupy consistency—almost like a concentrated cider reduction.
Here’s where the magic happens: the spices should infuse deeply, and the apples should break down into a rich purée. Taste it after 30 minutes—if it’s too tart, add a bit more sugar; if it’s too sweet, you can adjust later with lemon juice. The goal is balance: sweet, spiced, and complex. When the mixture reaches your desired consistency, remove it from heat and let it cool to room temperature—about 1 hour.
Activate and Add the Yeast
While the cider base cools, prepare the yeast. In a clean bowl, dissolve the 0.25 oz Active Dry Yeast in ½ cup of the 3 cups Distilled Water from the ingredients list. Add 1 tbsp Lemon Juice and 1 tbsp Brewer’s Yeast Nutrient to this mixture. Let it sit for 10-15 minutes until it becomes foamy—this confirms the yeast is active and ready to work.
Once your cider base has cooled to room temperature (around 75°F), pour it into the sanitized 5-gallon Fermentation Vessel. Stir in the yeast mixture thoroughly, ensuring it’s evenly distributed. The vessel should be about ¾ full—leave some room for fermentation activity. Cover the vessel loosely with a clean cloth or fermentation lid to allow airflow while keeping out contaminants.
Ferment and Age for Depth of Flavor
Place the vessel in a dark, 65-70°F space—like a closet or basement—and let it ferment for 5-7 days. You’ll know fermentation is active when you see bubbles forming and a frothy head on top. Stir the mash gently once a day to prevent a skin from forming and to ensure even fermentation.
After 5-7 days, taste the mash—it should be effervescent with a mild alcoholic tang. If it still tastes sweet, let it ferment another 2-3 days. Once it reaches your preferred flavor (I like a balance of sweetness and slight tartness), it’s ready for aging. Transfer the mash to a clean, sanitized vessel and store it in the refrigerator. Here, it will continue to develop complexity over 2-4 weeks, mellowing and deepening in flavor like a fine wine.
Pro Tips For Making 5 Gallon Apple Brandy Mash
- CHOP APPLES UNIFORMLY: Cut the apples into ½-inch chunks—no smaller, or they’ll turn to mush and clog your fermenter. I learned this the hard way after fishing out a sieve full of apple sludge mid-ferment.
- DISSOLVE SUGAR FIRST: Warm the distilled water to 85°F before adding sugar—it’ll dissolve faster and prevent clumps that yeast will ignore. Stir until it’s clear like syrup, or your mash will ferment unevenly.
- AVOID OVERSTIRRING YEAST: Sprinkle the yeast on top of the warm mash, then let it sit 10 minutes before stirring—this mimics a natural fermentation start. Overmixing now just creates bubbles and wastes energy.
- USE CINNAMON LATE: Add the cinnamon after the initial 24 hours, not at the start—its flavor gets muddy if it sits too long in the fermenting liquid. A pinch (½ teaspoon) is enough; more tastes like spice cabinet dust.
Dietary considerations for this 5 gallon apple brandy mash
Gluten-Free Adaptations
This apple brandy mash is naturally gluten-free since it relies on apples, spices, and yeast without grain additives. However, always check your yeast package—some commercial yeasts contain barley derivatives. For absolute certainty, use Lalvin EC-1118 or Champagne yeast, which are gluten-free certified.
The spices (cinnamon, cloves) and sugar are also safe, but verify brands like Penzeys for cross-contamination warnings.
Low-Sugar Options
If you’re watching sugar intake, reduce the 3 cups granulated sugar to 1.5 cups while increasing the apples to 12 lbs for balance. The extra fruit provides natural sweetness and acidity.
For a diabetic-friendly version, use erythritol or monk fruit sweetener (about 1 cup equivalent)—though fermentation may take slightly longer. Taste frequently to adjust sweetness, as fruit ripeness varies.
Alcohol-Free Cider
Skip the yeast entirely to create a non-alcoholic spiced cider—simmer the apples, sugar, and spices as directed, then strain and bottle. Add 1 tbsp lemon juice to preserve freshness. Store in the fridge for up to 1 week or freeze for longer shelf life.
This version keeps all the cozy flavors without fermentation, making it kid-friendly and versatile for cooking (think pies or sauces).
Vegan Considerations
This recipe is already vegan—no animal products are used in the mash or fermentation process. The yeast (Lalvin EC-1118) is plant-based, and all spices/sweeteners are derived from plants.
For extra assurance, confirm your brewer’s yeast nutrient is vegan (some contain animal-derived additives). The final mash is entirely plant-powered, perfect for vegan diets.
Histamine Sensitivity
Histamine-sensitive individuals should ferment this mash for no more than 5 days to minimize histamine buildup. Use wild yeast (like Lalvin EC-1118) instead of commercial strains, which can produce fewer biogenic amines.
Avoid long aging in the fridge—consume the mash fresh or distill it promptly if making brandy. Always monitor your tolerance, as histamine reactions vary.
Allergen-Friendly Swaps
For citrus allergies, omit the orange peel and substitute with lemon or lime zest (if tolerated). If cloves trigger reactions, replace them with nutmeg or allspice for warmth. For apple allergies, try pear or quince as alternatives—they ferment similarly.
Always test small batches first, as cross-reactivity can occur. The yeast and spices remain safe for most allergens, but fruit substitutions are key.
Nutrition facts
Frequently asked questions
Can I use frozen apples instead of fresh?
Yes, but thaw them completely first and drain excess liquid to avoid diluting your mash. Frozen apples work well for this recipe, though fresh apples yield slightly better texture and flavor. If using frozen, add 1 extra tablespoon of cinnamon to compensate for the milder taste.
How do I know when fermentation is complete?
Fermentation is done when bubbles slow dramatically and the mash tastes dry with no sweetness remaining (typically 7-14 days). Use a hydrometer to check alcohol content—aim for 10-12% ABV for brandy potential. If it’s still sweet after 2 weeks, add 1/4 oz more yeast and ferment another 3-5 days.
What if my mash smells like vinegar?
This indicates bacterial contamination (likely from poor sanitation). Discard the batch immediately—vinegar smell means the mash is unsafe to consume. Prevent this by sterilizing equipment with Campden tablets and using chlorine-free water. For future batches, work in a 65-70°F environment to encourage yeast over bacteria.
Can I make this recipe in a smaller container?
Scale down all ingredients proportionally—use a 1-gallon jar for a 1/5th-sized batch (2 lb apples, 3/5 cup sugar, etc.). The fermentation process works the same, but smaller batches ferment slightly faster. Ideal for testing flavor variations before committing to the full 5-gallon volume.
How long can I store the finished mash?
Unopened mash lasts 3-6 months in the fridge, while opened batches should be consumed within 1 month. For longer storage, freeze in airtight containers—thaw overnight in the fridge before use. The flavor mellows over time, developing deeper caramel notes. If making brandy, distill within 6 months for optimal results.

- 3 Lb Meatloaf Recipe with Bread Crumbs All: Glazed Crust and Juicy Heart - October 20, 2026
- 32 Ounce Cranberry Sauce Recipe: Homemade Holiday Glaze With No Pits - October 20, 2026
- 2lb Loaf Tin Bread Recipe: No-Knead Artisan Crust in 3 Hours - October 20, 2026