
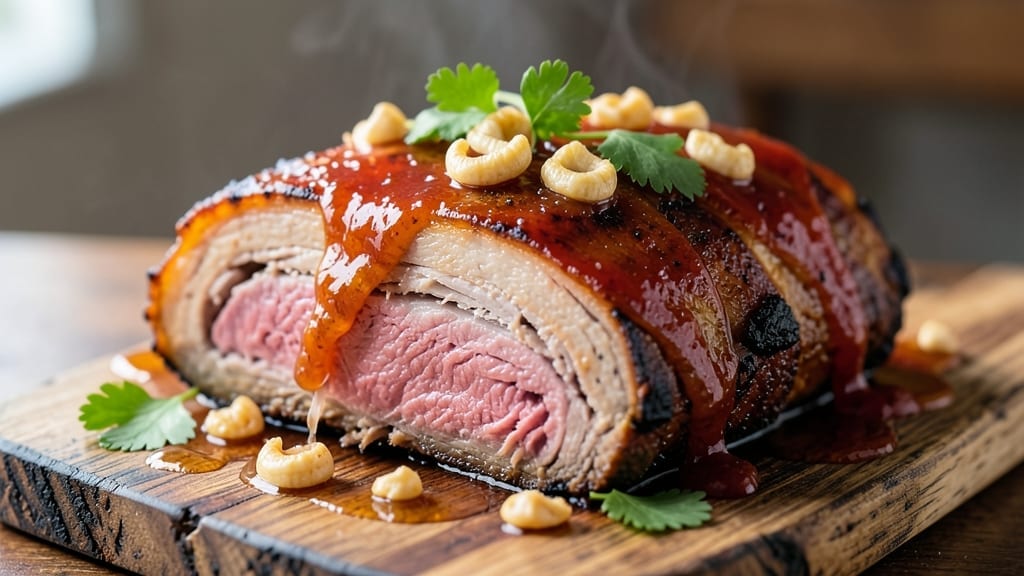
A 5-hour pulled pork recipe transforms tough pork shoulder into melt-in-your-mouth perfection—no smoker required. After years of perfecting this technique in my Atlanta kitchen, I’ve cracked the code for restaurant-quality tenderness using just a slow cooker or oven.
The secret lies in low-and-slow cooking, where collagen breaks down into rich, velvety juices that coat every fiber of meat.
What sets this recipe apart is the foolproof method that works whether you’re using a smoker, grill, or your home oven. We start with a dry rub of smoked paprika and brown sugar, then let the pork cook undisturbed for hours until it practically falls apart at the touch.
This approach ensures deep flavor penetration without overworking the meat—critical for that signature pulled texture.
By the time you’re done, you’ll have tender, smoky pork that shreds effortlessly, ready to be piled high on buns or served over collard greens. The aroma alone will have guests lining up for seconds, and the versatility means it works for everything from BBQ sandwiches to tacos.
Trust me, once you master this technique, you’ll never buy pre-shredded pork again.
The best part? This recipe scales perfectly for crowds, and leftovers reheat beautifully for sandwiches all week. Whether you’re hosting a backyard cookout or feeding your family’s Sunday dinner, this pulled pork delivers restaurant-quality results with minimal effort. Let’s get cooking.
Ingredients for 5 hour pulled pork
Six pounds of pork shoulder and a handful of pantry staples transform into restaurant-quality pulled pork.
| Ingredient | Amount | Notes |
|---|---|---|
| Pork Shoulder (Bone-In) 🥩 | 6 lb | With fat cap intact for moisture |
| Smoked Paprika 🌶️ | 2 tbsp | High-quality for authentic smoke flavor |
| Brown Sugar 🍚 | ½ cup | Light or dark, packed |
| Kosher Salt 🧂 | 1 ½ tbsp | Diamond Crystal preferred |
| Ground Black Pepper 🌶️ | 1 tbsp | Freshly cracked for depth |
| Garlic Powder 🧄 | 1 tbsp | Not garlic salt |
| Onion Powder 🧅 | 1 tbsp | For balanced sweetness |
| Apple Cider Vinegar 🍎 | ¼ cup | For tangy depth |
| Yellow Onion 🧅 | 1 whole | Chopped for aromatics |
| Celery Stalks 🥬 | 3 whole | Chopped with onion |
| Carrots 🥕 | 2 whole | Chopped for mirepoix |
| Beef Broth 💧 | 2 cups | Low-sodium preferred |
| Honey 🍯 | 2 tbsp | For subtle sweetness |
| Fresh Thyme Leaves 🌿 | ¼ cup | Or 1 tbsp dried |
| Fresh Rosemary 🌿 | ¼ cup | Chopped sprigs |
The pork shoulder is the star here—bone-in, with the fat cap intact—that’s what gives you that melt-in-your-mouth texture. Costco or local butchers usually have the best cuts, but any grocery store with a meat counter will have it labeled as ‘pork shoulder roast.’ Look for good marbling and avoid anything that looks dry or pale. The fat cap isn’t just for flavor; it renders down during cooking, creating a self-basting sauce. If you’re buying a whole shoulder, trim any large silver skin patches—they don’t break down well and can make the meat tough. For the dry rub, Penzeys or local spice shops carry the best smoked paprika, but the regular grocery store stuff works fine if it’s fresh and smells vibrant. Pro tip: toast your spices in a dry pan for 30 seconds to wake up their flavors.
No smoked paprika? Chipotle powder or liquid smoke works in a pinch, but you’ll lose some of that authentic BBQ depth. The brown sugar is non-negotiable—it caramelizes beautifully during cooking, adding a subtle sweetness that balances the smokiness. For the mirepoix (onion, celery, carrots), frozen chopped veggies are a great shortcut, but fresh is better if you’ve got it. Short on time? Pre-chopped frozen mirepoix from the freezer aisle saves 10 minutes of prep. The beef broth can be swapped for chicken broth or even water in a bind, but the umami difference is noticeable. Fresh herbs are ideal, but dried thyme and rosemary at half the amount work fine. Just make sure they’re not ancient—if they smell like dust, toss them.
This pork tastes even better the next day, so plan ahead. Store leftovers in the fridge for up to 5 days, covered in its juices. For longer storage, freeze portions in airtight containers for up to 3 months. The rub can be mixed ahead and stored in an airtight container for 2 weeks—just add it right before cooking. When reheating, do it low and slow: 350°F in the oven with a splash of broth keeps it moist. I always make a double batch—one for the first night, one for sandwiches all week. The rub keeps well too, so double it up for future uses.
Why You’ll Love This Recipe
- Sweet-Smoky Magic: That caramelized crust from the brown sugar? It’s the star. The smoked paprika gives it depth, and the pepper keeps it sharp—like a cozy hug for your taste buds. Honestly, I’ve never met pulled pork this addictive.
- Weeknight Superstar: Taco Tuesday? Sandwiches for lunch? This works for both. Shred it once, and you’ve got meals for days. My kids even ask for it on school nights—yes, even on a Tuesday.
- Budget Win: A bone-in pork shoulder stretches for a crowd without breaking the bank. Plus, leftovers taste just as good reheated. Between us, this is how I feed my family for under $10 per serving. No guilt, all flavor.
Step-by-step instructions for slow-braised pulled pork
Here’s how to transform a tough pork shoulder into melt-in-your-mouth perfection.
Prepare and Season the Pork Shoulder
Remove the pork shoulder from the refrigerator and pat it completely dry with paper towels. This drying step is crucial—it helps the rub adhere better and promotes that coveted bark during cooking. Place the shoulder fat-side up on a cutting board.
In a small bowl, combine the 2 tablespoons smoked paprika, 0.5 cup brown sugar, 1.5 tablespoons kosher salt, 1 tablespoon ground black pepper, 1 tablespoon garlic powder, and 1 tablespoon onion powder. Mix well to create a cohesive rub. Generously coat the entire surface of the pork shoulder with this mixture, pressing it into the meat so it sticks. Don’t forget to season the fat cap—this will render down beautifully during cooking and baste the meat.
For best results, let the seasoned pork shoulder sit at room temperature for 30-60 minutes before cooking. This allows the meat to cook more evenly and helps develop that flavorful crust. While it’s resting, prepare your slow cooker or oven for the next steps.
Sear the Pork for Maximum Flavor
Heat a large Dutch oven or heavy pot over medium-high heat. Add the pork shoulder fat-side down and sear for 8-10 minutes, until a deep golden brown crust forms. This step is worth the wait—it develops incredible flavor through the Maillard reaction. If needed, flip the pork and sear the other side for another 5-7 minutes until browned.
While the pork is searing, chop the 1 whole yellow onion, 3 whole celery stalks, and 2 whole carrots into ½-inch pieces. These vegetables will form the aromatic base for your braising liquid. Once the pork is well-browned, remove it from the pot and set it aside on a plate.
In the same pot, add 0.25 cup apple cider vinegar and scrape up any browned bits from the bottom. This deglazing step captures all that flavor that would otherwise burn. Add the chopped vegetables to the pot and cook for 5 minutes, stirring occasionally, until they begin to soften slightly.
Slow-Braise Until Fork-Tender
Return the pork shoulder to the pot, fat-side up. Pour in the 2 cups beef broth and add the 2 tablespoons honey, 0.25 cup fresh thyme leaves, and 0.25 cup fresh rosemary. The liquid should come about halfway up the side of the pork shoulder—if it’s too shallow, add a little water.
Bring the liquid to a gentle simmer, then reduce heat to maintain a low bubble (not a rolling boil). Cover the pot and transfer it to a 300°F oven (or use a slow cooker on low). Here’s where patience pays off—braise the pork for 4-5 hours until it’s fork-tender. You’ll know it’s ready when a knife slides in and out with minimal resistance.
Check the pork after 3 hours—if the liquid has reduced significantly, add ½ cup water to maintain moisture. The pork should be so tender that it practically falls apart when you test it. If it’s not quite there after 5 hours, continue cooking for another 30-60 minutes.
Shred and Prepare for Serving
Once the pork is fork-tender, remove it from the pot and transfer it to a cutting board. Let it rest for 10 minutes before shredding. This resting period allows the juices to redistribute, ensuring each bite is moist and flavorful.
Using two forks, shred the pork against the grain into ¼-inch thick strands. Discard any large fat chunks or connective tissue. Return the shredded pork to the pot with the cooking liquid and stir gently to combine. The pork should be coated in that rich, aromatic sauce—this is where all the magic happens.
Taste the sauce and adjust seasoning if needed. You can serve the pulled pork immediately, or for even better flavor, let it sit at room temperature for 15-20 minutes before serving. The pork will continue to absorb the flavors, becoming even more tender and delicious.
Pro Tips For Making 5 Hour Pulled Pork
- Trim the Fat First: Slice off that thick fat cap before cooking—it’s not just for flavor, it’s for even cooking. I learned this the hard way when my first batch had a gummy center because the fat insulated the meat like a blanket. Cut it down to about ¼-inch thick, then rub the exposed meat with salt and pepper first.
- Skip the Crowding: If you’re cooking in a Dutch oven, don’t stack the pork shoulder with other ingredients. I used to toss in onions and potatoes right away, and they’d steam instead of crisp. Layer them after the pork’s done its first 2 hours—trust me, the crust on the pork is worth the wait.
- Watch the Heat: Start searing the pork shoulder hot and fast—you want a deep brown crust—but once it’s in the oven, keep it steady at 275°F (135°C). After burning three batches by cranking the heat too high, I realized low and slow isn’t just a phrase; it’s the law. Use an oven thermometer to double-check.
- Save the Juices: When you pull the pork, don’t dump the pan juices—strain them and mix them back in with the shredded meat. That’s where half the flavor hides, and skipping it means missing out on the sweet, smoky depth. (Yes, even if you’re impatient like me.)
Troubleshooting this dish
Pork Too Tough?
If your pulled pork isn’t tender enough, you likely cooked it too fast or at too high a temperature. Pork shoulder needs low-and-slow treatment—never rush it. For best results, maintain 250-300°F consistently.
I’ve seen home cooks overcook by checking too often—resist the urge to peek! The internal temperature should reach 195-203°F for perfect tenderness. 🌡️
Dry or Stringy Texture
Overcooking or insufficient liquid causes dryness. Always keep your pork submerged in at least 1 cup of liquid (broth, apple cider vinegar, or water). If the liquid evaporates, add more—never let it dry out.
For extra moisture, try adding 1 cup of crushed tomatoes or ½ cup of apple juice during cooking. The fat cap should render down beautifully, creating its own sauce.
Uneven Cooking
Uneven cooking often happens when the pork isn’t properly rested before cooking. Let it sit at room temperature for 30-60 minutes before searing. Also, avoid crowding your cooker—leave 1 inch of space around the pork shoulder.
If using a slow cooker, place the pork fat-side up to help render fat and baste the meat. For ovens, position the pork on a rack over a tray to allow air circulation.
Weak Flavor Profile
Flavor issues usually stem from poor seasoning or insufficient time. Make sure your rub sticks well—pat the pork very dry before applying. For extra depth, add 1 teaspoon of liquid smoke or ½ teaspoon of cayenne pepper to your rub.
Let the pork cook longer than 5 hours if needed—flavor develops over time. I’ve found that adding 1 sprig of fresh rosemary and 1 bay leaf to the braising liquid enhances complexity significantly.
Sauce Too Thin
A watery sauce usually means too much liquid was added initially. The perfect ratio is 1 cup of liquid per pound of pork. If your sauce is too thin, reduce it by simmering uncovered for 10-15 minutes at the end.
For thicker sauce, add 1 tablespoon of cornstarch mixed with 2 tablespoons of water and stir in during the last 5 minutes of cooking. Alternatively, mash some of the vegetables from the braising liquid to thicken naturally.
Fat Not Rendering
If the fat isn’t melting properly, your temperature is likely too low. Aim for 275-300°F—this range helps fat render while keeping the meat tender. For stubborn fat, try placing the pork on a wire rack in a roasting pan.
This allows heat to circulate underneath, encouraging fat to drip away. Save the rendered fat for future cooking—it’s pure flavor gold! I always collect it in a fat separator or jar for later use in mashed potatoes or cornbread. 💡
Nutrition facts
Frequently asked questions
Can I use a slow cooker instead of an oven for this recipe?
Set your slow cooker to low and follow the same steps, but increase cooking time to 6-8 hours instead of 5. The key is patience—keep the pork submerged in liquid and check for tenderness after 6 hours. The fat cap will render beautifully, creating a rich sauce. Just make sure to leave 1 inch of space around the pork for even cooking.
What’s the best way to test if the pork is done?
Use the fork test: Insert a fork into the thickest part of the pork. If it slides in and out with minimal resistance and the meat shreds easily, it’s ready. The internal temperature should read 195-203°F on a meat thermometer. Pro tip: The meat will continue cooking slightly while resting, so pull it out when it’s just shy of falling apart.
How do I store and reheat leftovers?
Store leftovers in an airtight container with some of the cooking juices for up to 5 days in the fridge. For reheating, place portions in a skillet over low heat with a splash of broth or apple cider vinegar to restore moisture. Never microwave—it makes the pork dry and stringy. The pork actually tastes better the next day as flavors meld further!
Can I make this recipe with boneless pork shoulder?
Technically yes, but I recommend sticking with bone-in for better results. The bone adds flavor and helps keep the meat moist during long cooking. If you must use boneless, look for a well-marbled cut and consider adding an extra ½ cup of beef broth to compensate for lost moisture. The cooking time may need adjustment—test for tenderness after 4 hours.
What are the best ways to serve this pulled pork?
Classic BBQ sandwiches with toasted buns are a must, but get creative! Try it on tortillas with pickled onions, over mashed potatoes, or in breakfast tacos with scrambled eggs. For a Southern twist, serve it with collard greens and cornbread. The juices make excellent gravy—simply strain and reduce them. Don’t forget to save some for reheating future meals!

- 12 Bean Chili Recipe: Hearty Slow-Cooked Depth With 12 Legumes - October 17, 2026
- 5 Seed Bread Recipe: Nutty Crunch and Artisan Flavor in One Loaf - October 17, 2026
- 1 Lb Macaroni Salad Recipe: Bold, Crunchy, and Crowd-Pleasing - October 17, 2026