
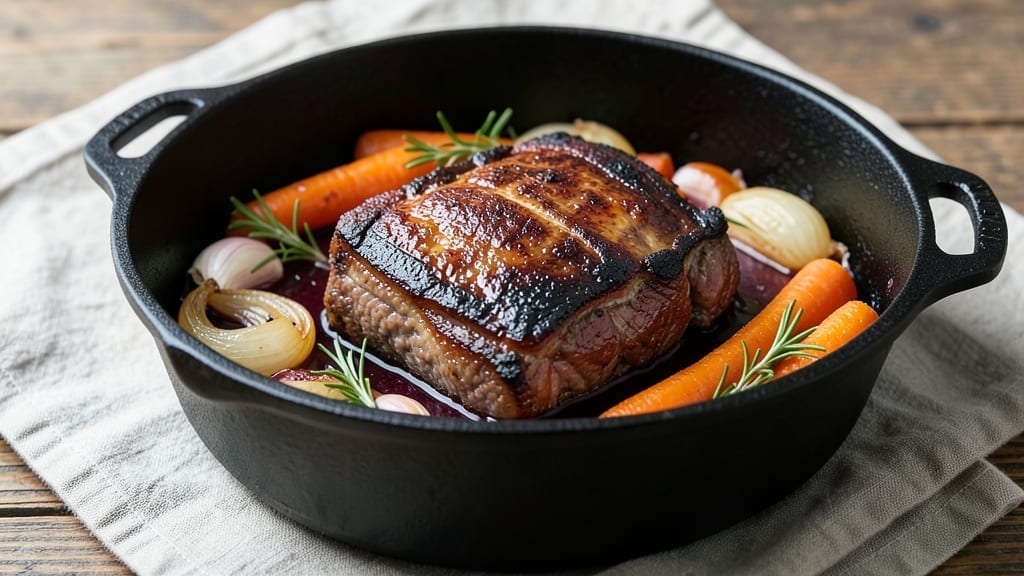
This 7-bone roast recipe transforms tough beef into melt-in-your-mouth perfection using a Dutch oven’s slow-braising magic. I learned this technique from my Nonna’s old cookbook, where she’d let the meat cook low and slow until it practically fell apart—no guesswork, just science. The secret lies in searing first to lock in juices, then braising until the internal temperature hits that sweet spot of 203°F for true tenderness.
The Dutch oven’s heavy lid traps steam while circulating heat evenly, creating a self-basting environment that keeps the meat moist. You’ll start with a deep sear in the oven to build flavor, then add aromatics and liquid to create a rich, caramelized sauce that clings to every bite.
This isn’t just dinner—it’s an experience that turns weeknights into special occasions without the fuss of fancy restaurants.
By the time you’re done, you’ll have a roast so tender it practically dissolves on your fork, with a sauce so rich it deserves its own bowl. The crust will be dark and caramelized from the slow cook, while the inside remains juicy and velvety.
This is the kind of meal that makes people ask for seconds before they’ve even finished their first plate.
Pair it with creamy mashed potatoes to soak up every last drop of that flavorful sauce, or serve with crusty bread for dipping. The leftovers reheat beautifully too—just add a splash of broth and let it warm through. Here’s how to make it happen in your own kitchen.
Ingredients for 7-bone roast recipe dutch oven
Six ingredients transform tough beef into melt-in-your-mouth perfection using Dutch oven magic.
| Ingredient | Amount | Notes |
|---|---|---|
| Chuck Roast 🥩 | 3 lb | Bone-in preferred for flavor |
| Yellow Onion 🧅 | 2 whole | Cut into large chunks |
| Carrots 🥕 | 4 whole | Baby or regular, peeled |
| Garlic Cloves 🧄 | 6 cloves | Smashed but not minced |
| Tomato Paste 🍅 | ½ cup | Squeeze tube or canned |
| Dry Red Wine 🍷 | 1 cup | Bold variety like Cabernet |
| Beef Broth 💧 | 2 cups | Low-sodium preferred |
| Olive Oil 🫒 | 2 tbsp | For initial searing |
| Fresh Rosemary 🌿 | 1 tbsp | Chopped, stems removed |
| Fresh Thyme 🌿 | 1 tbsp | Leaves only, stems discarded |
| Salt 🧂 | 2 tbsp | Kosher or sea salt |
| Black Peppercorns 🌶️ | 1 tbsp | Freshly cracked |
| Balsamic Vinegar 🍶 | 1 tbsp | For finishing touch |
The chuck roast is the star here—bone-in preferred for that extra depth of flavor. Costco or local butchers usually have it pre-cut, but if you’re buying a whole roast, look for good marbling and ask for the chuck section. That’s where the tenderness comes from. I’ve made this with Kroger’s chuck roast and Trader Joe’s organic chuck—both work great. The key is letting it sit at room temperature for about 30 minutes before cooking, so it cooks evenly. Don’t skip this step—trust me on that.
No red wine? Beef broth with a splash of balsamic works just as well. Fresh rosemary and thyme are ideal, but dried at one-third the amount will do in a pinch. The tomato paste can be from a squeeze tube if you’re lazy—Trader Joe’s or Whole Foods have great ones. For the beef broth, low-sodium is a must unless you want to adjust the salt later. The carrots can be baby carrots if that’s what’s in your fridge, but regular carrots work too—just peel and cut them into even chunks so they cook at the same rate.
This roast reheats beautifully—honestly tastes better the next day once everything melds together. Keeps for 4-5 days in the fridge, freezes for 3 months if you want to make a big batch. I always portion mine into containers so lunches are sorted for the week. The sauce thickens as it cools, so if it’s too thick when reheating, just add a splash of broth. Leftovers are even better cold for sandwiches—imagine that rich sauce on crusty bread!
Why You’ll Love This Recipe
- One-Pot Magic: I swear by this recipe when I’m too tired to scrub pots. Chuck roast, onions, and carrots all cook together in the Dutch oven—no extra pans, no extra stress. Just dump, simmer, and let it do the work while you sip wine and pretend you’re not cooking.
- Deep, Rich Taste: That tomato paste and garlic? They turn this chuck roast into something luxurious. The slow cook gives it a melt-in-your-mouth tenderness, while the caramelized onions add a sweet, savory punch. Honestly, it tastes like a fancy restaurant dish, but with way less effort.
- Weeknight Workhorse: Between us, this is my go-to for busy nights—it feeds four but makes six servings, so I always have leftovers for lunches. I’ll be real: my kids even ask for it, and that’s saying something after their “no veggies” phase.
- Budget-Friendly Feast: A 7-bone roast stretches for days, and the veggies add bulk without breaking the bank. I’ve made this for game nights, potlucks, and lazy Sundays—it’s reliable, filling, and never lets me down. Plus, the Dutch oven keeps it juicy, so no sad, dry meat here.
Step-by-step instructions for Dutch oven 7-Bone roast
Here’s how to transform a tough chuck roast into melt-in-your-mouth perfection using your Dutch oven.
Sear the Roast for Maximum Flavor
Heat your Dutch oven over medium-high heat until it’s smoking hot. Add the 2 tablespoons olive oil and swirl to coat the bottom. Place the 3 lb chuck roast fat-side down and let it sear undisturbed for 8-10 minutes until deeply browned and crispy in spots. This initial sear locks in juices and creates that rich, caramelized crust we want.
Flip the roast and sear the other side for another 6-8 minutes. Remove it from the pot and set it aside on a plate. You’ll notice the fat will start to render out—this is good! That rendered fat will form the base of our delicious braising liquid. Don’t wipe out the pot; those browned bits are pure flavor.
Build the Aromatic Base
In the same Dutch oven, add the 2 whole yellow onion cut into large chunks and the 4 whole carrots peeled and cut into 2-inch pieces. Cook for 5-6 minutes until the onions soften and begin to caramelize. Add the 6 smashed garlic cloves and cook for another 30 seconds until fragrant.
Sprinkle the 2 tablespoons salt and 1 tablespoon freshly cracked black peppercorns over the vegetables, stirring to combine. The salt will help draw out moisture from the vegetables, creating more flavorful braising liquid. Add the 1 tablespoon chopped fresh rosemary and 1 tablespoon chopped fresh thyme next, stirring everything together.
Deglaze and Add Liquids
Pour in the 1 cup dry red wine and scrape up all those delicious browned bits from the bottom of the pot with a wooden spoon. This deglazing step captures all the meaty flavor that would otherwise burn. Let the wine simmer for 2-3 minutes until it reduces by about half.
Stir in the 0.5 cup tomato paste and cook for 1 minute to toast slightly. This step deepens the flavor of the tomato paste and helps thicken our braising liquid. Pour in the 2 cups beef broth and bring the mixture to a gentle simmer. The liquid should come about halfway up the sides of the roast.
Braise Until Fork-Tender
Return the chuck roast to the Dutch oven, placing it on top of the vegetables. Cover tightly with a lid and transfer to a preheated 300°F oven. Braise for 3 hours until the roast is fork-tender. You’ll know it’s ready when a fork slides in easily and the meat pulls apart with minimal resistance.
About halfway through cooking (1.5 hours), check the liquid level. If it’s reduced too much, add ½ cup hot water or beef broth to maintain the proper braising liquid. This helps prevent the roast from drying out and ensures maximum tenderness. The vegetables should be soft but still holding their shape.
Finish and Serve
Remove the roast from the Dutch oven and let it rest on a cutting board for 15-20 minutes. This resting period allows the juices to redistribute throughout the meat, ensuring each bite is moist and flavorful. Skim any excess fat from the braising liquid if desired, then stir in the 1 tablespoon balsamic vinegar.
Slice the roast against the grain into ¼-inch thick slices. Ladle the braising liquid and vegetables over the top and serve immediately. Each bite should deliver tender, flavorful meat with rich, aromatic braising liquid. The vegetables should be perfectly cooked but still holding their shape, adding texture and color to your plate.
Pro Tips For Making 7-Bone Roast Recipe Dutch Oven
- Sear the Roast First: Chuck roast is forgiving, but a quick sear in the Dutch oven locks in flavor before slow cooking. Hit it with oil and salt, then crank the heat to medium-high for 3-4 minutes per side—until it’s golden, not burnt. I used to skip this, and the dish tasted like it needed more seasoning.
- Cut Carrots in Chunks: Thin sticks cook too fast and turn mushy. Instead, chop carrots into 1-inch chunks—they’ll caramelize evenly and stay tender without falling apart. (Yes, even if it looks less “Instagram,” it tastes better.)
- Deglaze with Beer or Broth: After browning the meat, scrape up those stuck-on bits with ½ cup of beer (or broth) instead of water. The alcohol burns off, leaving behind deep flavor that water can’t match. My first attempt with water tasted flat—don’t make that mistake.
- Add Tomato Paste Late: Stir in the tomato paste during the last 30 minutes of cooking. If you add it too early, it burns before the meat is done, leaving a bitter aftertaste. (And no, you can’t just “taste and adjust”—trust the timing.)
Pro cooking tips for this recipe
Dutch Oven Heat Control
Your Dutch oven’s heat distribution is everything—start by preheating it on the stove over medium-high heat for 10 minutes before adding oil. I use a Lodge 5.5-quart because it retains heat perfectly, but any heavy Dutch oven works.
Place it in a cold oven when braising to prevent temperature spikes that can dry out the meat. The goal is steady 300°F—never let it exceed 325°F or the crust will burn before the center cooks. 🌡️
Sear Like a Pro
That initial sear isn’t just for looks—it’s where 80% of the flavor develops through the Maillard reaction. Let the roast sit fat-side down undisturbed for 8-10 minutes until you see deep brown spots. I resist the urge to flip early because patience here means better crust formation.
After flipping, let the second side sear 6-8 minutes—don’t rush it. The rendered fat will naturally baste the meat as it cooks, creating that signature richness.
Liquid Management
Check your braising liquid every 45 minutes—it should cover about half the roast. If it reduces too much, add ½ cup hot beef broth (never cold). I keep a small pot of broth on the stove at a simmer for quick additions.
The liquid should never be deep enough to submerge the roast completely, or you’ll steam instead of braise. Aim for 1 cup of liquid at the end of cooking—this ensures a thick, flavorful sauce rather than a watery one.
Resting is Non-Negotiable
Skipping the 15-20 minute rest is the fastest way to ruin your roast—juices will pool on your plate instead of staying in the meat. I cover the roast loosely with foil and set it on a warm plate to maintain temperature during resting.
This is when the meat reabsorbs its own juices, making each bite juicier. Trust the process—even if your guests are hungry, resist the urge to slice early. 💪
Vegetable Prep Matters
Cut your onions into 2-inch chunks and carrots into 1-inch pieces—even cooking is key. Larger pieces stay intact for texture, while smaller ones might turn to mush. I par-cook the vegetables for 5 minutes before adding the roast back in.
This prevents them from overcooking while the meat finishes. The aromatics should be soft but still holding shape by the end—think al dente, not mushy.
Balsamic Finish
The 1 tablespoon balsamic vinegar at the end isn’t just for flavor—it brightens the sauce and cuts through the richness. I add it off the heat to prevent cooking it down completely. For extra depth, I sometimes stir in 1 teaspoon of honey with the balsamic.
This balances the acidity and adds a subtle sweetness that complements the beef beautifully. The sauce should coat the back of a spoon but still be thick enough to cling to the meat.
Nutrition facts
Frequently asked questions
Why does this recipe use chuck roast instead of a more expensive cut?
The chuck roast is perfect for Dutch oven braising because its tough fibers break down beautifully during slow cooking, creating melt-in-your-mouth tenderness. More expensive cuts like ribeye or filet mignon would dry out at this cooking temperature. The chuck’s natural fat content also helps keep the meat juicy while developing rich flavor through the slow braise.
Can I substitute red wine with something else if I don’t drink alcohol?
Use 1 cup beef broth plus 1 tablespoon balsamic vinegar for the same depth of flavor without alcohol. For extra richness, add 1 teaspoon soy sauce or 1 tablespoon Worcestershire sauce to mimic the umami notes from wine. The key is maintaining the same liquid volume and acidity balance.
How do I know when the roast is fully cooked without an instant-read thermometer?
Look for three key signs: 1) The meat should pull apart easily with a fork, 2) The juices should run clear (not pink or bloody), and 3) The internal temperature should reach 203°F (though without a thermometer, the first two indicators are reliable). If you’re unsure, cook it 15-20 minutes longer—it’s hard to overcook in a Dutch oven.
What’s the best way to reheat leftovers without drying them out?
Add 2-3 tablespoons beef broth to the Dutch oven with the leftovers, cover tightly, and reheat on low heat for 10-15 minutes. The moisture from the broth prevents drying, and the Dutch oven’s lid traps steam. For extra insurance, place a damp paper towel over the meat before covering. Never microwave—it always turns out rubbery!
Can I make this recipe in a slow cooker instead?
Yes, but with adjustments: Sear the roast first in a skillet, then transfer to the slow cooker with all ingredients. Cook on low for 8 hours or high for 5 hours. The Dutch oven’s tight lid creates better heat retention, but a slow cooker will still give tender results. Just check the liquid level halfway through and add broth if needed.

- 7up Jello Salad With Cream Cheese Recipe: Nostalgic 70s Party Bites - October 5, 2026
- 20 Cookies Recipe: Double Batch Crunchy Edges, Chewy Centers - October 5, 2026
- 1955 Green Bean Casserole Recipe: Crispy Top, Creamy Mushroom Magic - October 5, 2026