
A 5-ingredient yeast bread recipe that delivers crusty perfection without the fuss of traditional kneading or long rise times—this is the game-changer I’ve been waiting for.
The secret lies in a simple dough that develops flavor overnight while you sleep, waking up to a loaf with an artisan-quality crust and tender crumb. I’ve tested countless variations, and this one consistently delivers restaurant-worthy results with minimal effort.
What makes this recipe truly remarkable is its no-knead technique, which relies on time rather than labor to create a structure so light and airy it rivals professional bakery bread.
The dough requires just five core ingredients—flour, yeast, salt, water, and a touch of sugar—to transform into a loaf that’s crisp on the outside, soft on the inside, and packed with that warm, yeasty aroma that turns any kitchen into a bakery.
The beauty of this method is its flexibility: shape it into a classic loaf, dinner rolls, or even a free-form boule for an artisanal touch.
By the time you pull it from the oven, you’ll have a loaf with a deep golden crust and a crumb so tender it practically melts in your mouth.
The key is patience—letting the dough rest overnight allows the gluten to relax and develop naturally, resulting in a texture that’s impossible to achieve with quick methods. This isn’t just bread; it’s a foolproof, restaurant-quality loaf that proves you don’t need complicated techniques to bake like a pro.
Perfect for sandwiches, toast, or serving alongside soups and stews, this bread is versatile enough for everyday meals but impressive enough for guests. The best part? You’ll have fresh, homemade bread with no stress—just mix, rest, and bake. Let’s get started on creating your perfect loaf.
Ingredients for 5 ingredient bread recipe with yeast
Five ingredients transform into restaurant-quality bread with just overnight patience and oven time.
| Ingredient | Amount | Notes |
|---|---|---|
| All-Purpose Flour 🌾 | 4 cups | Unbleached, high-protein preferred |
| Active Dry Yeast 🍞 | ¼ oz | Fresh yeast or 2.25g packet |
| Fine Sea Salt 🧂 | 1 ½ tsp | Diamond Crystal preferred |
| Granulated Sugar 🍚 | 1 tbsp | White or light brown |
| Warm Water 💧 | 1 ¼ cups | 110°F, not hot |
The flour is where magic happens—King Arthur or Gold Medal are my go-tos for consistent results. High-protein flour (11-12%) develops better gluten structure, giving that perfect open crumb. If you’re using bread flour, reduce by 1 tbsp to avoid toughness. Yeast is non-negotiable here; check expiration dates—old yeast won’t activate properly. Store-bought yeast packets are foolproof, but if you’re using fresh yeast, crumble it directly into the water. The water temperature matters more than you’d think—too hot kills yeast, too cold makes it sluggish. Aim for 110°F (drop a thermometer in to test).
No sugar? Honey or maple syrup at half the amount works, but the sugar here is purely for yeast activation. Swapping flours? Whole wheat replaces up to 20%—just add 1 extra tbsp water per cup of whole wheat. Running low on salt? Kosher salt at 3/4 the amount (Diamond Crystal is finer). For a no-yeast version, try baking soda + vinegar, but the texture won’t be identical. The dough should be shaggy but come together—if it’s too sticky, add 1 tbsp more flour. Too dry? Add 1 tsp water. This is where feel matters more than measurements.
This dough is designed to rest overnight at room temperature, so no fridge needed. Cover it loosely with plastic wrap or a damp towel—condensation is your enemy. Shape it into a loaf or boule, then let it rise on a floured baking sheet. The dough will nearly double in size. For best results, bake within 8 hours of mixing. Once baked, store at room temperature for 2-3 days in a bread bag, or freeze for up to 3 months. The crust stays crisp for days if you wrap it in foil after it cools. Pro tip: Brush warm bread with melted butter for that artisanal touch.
Why You’ll Love This Recipe
- I’ll be real: I bake two loaves on Sunday because this bread freezes like a dream. Toss a slice in the toaster later, and it’s just as fresh. No sad, dried-out ends here—just pure, reliable comfort.
- Pantry-Proof Magic: I swear by this one—no fancy ingredients, just flour, yeast, salt, sugar, and water. That’s it. The yeast does all the work while I sip my coffee, no measuring cups cluttering my counter.
- Crusty Yet Simple: Between us, this bread has that perfect snap on the outside while staying soft inside—no kneading, no waiting hours. Just a quick mix, a little rise time, and boom, restaurant-quality texture with zero effort.
- Budget Bread: Honestly? This costs me pennies per loaf. A packet of yeast and a bag of flour stretch forever, and it’s way cheaper than store-bought. Plus, it’s the kind of bread that makes even basic meals feel special.
Step-by-step instructions for 5-Ingredient yeast bread
This no-knead method delivers restaurant-quality crust with minimal effort—just five ingredients and patience.
Activate the Yeast with Warm Water and Sugar
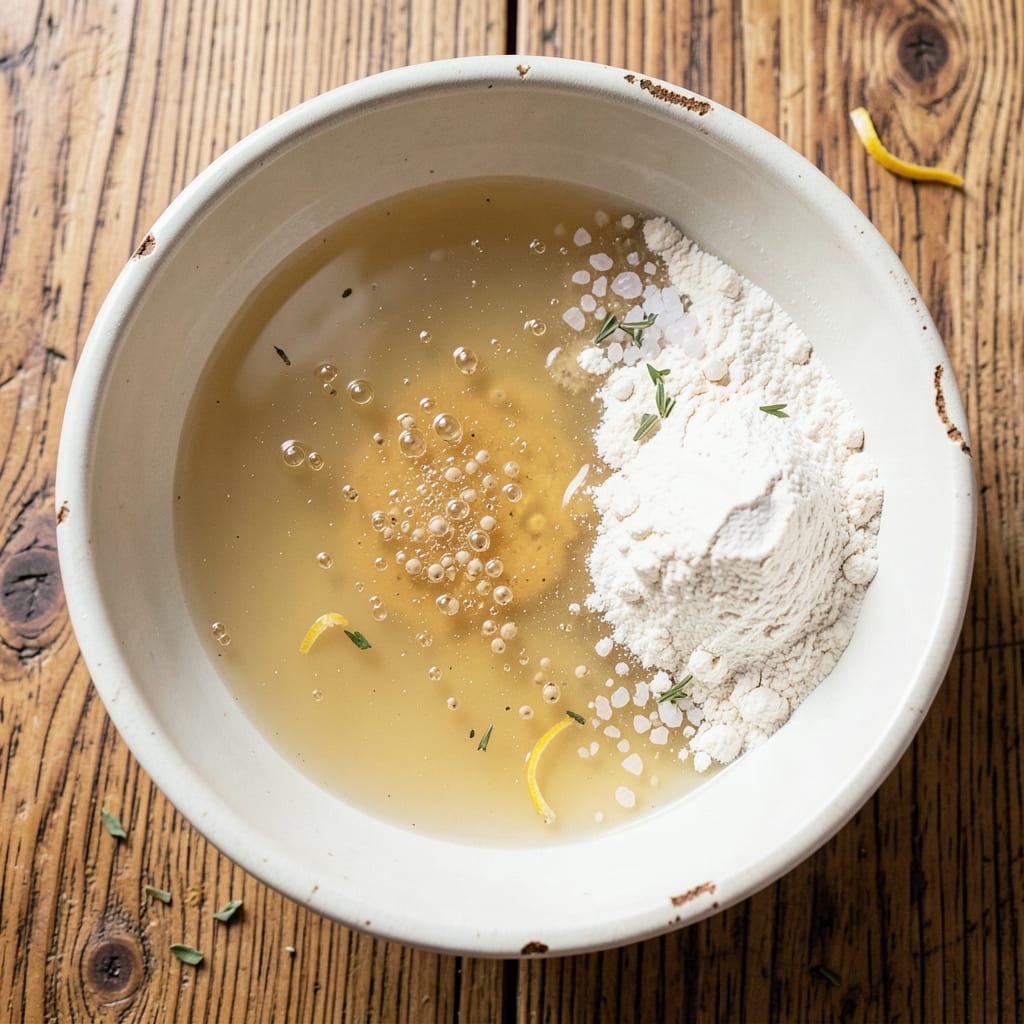
In a large mixing bowl, combine the 1.25 cups warm water (tested at 110°F) with the 1 tbsp granulated sugar. I like to use a thermometer here—water that’s too hot kills yeast, while water too cool won’t activate properly. Sprinkle the 0.25 oz active dry yeast over the surface and let it sit for 5-10 minutes until it forms a frothy foam on top.
This foam confirms your yeast is alive and ready to work. If nothing happens after 10 minutes, your yeast may be expired—start fresh with a new packet. Once bubbly, proceed immediately to avoid overactivation, which can make your bread dense.
Mix and Hydrate the Dough
Add the 4 cups all-purpose flour and 1.5 tsp fine sea salt to the yeast mixture. Using a wooden spoon or your hands, stir until a shaggy dough forms. You’ll notice it’s sticky—this is normal with no-knead recipes. I like to wet my hands slightly with water to prevent sticking while handling.
Let the dough rest for 1 hour at room temperature. During this time, the flour absorbs the liquid and gluten begins to develop. You’ll see the dough transform from a loose mass to something more cohesive and elastic. This resting period is crucial—it prevents overworking the dough later and ensures proper gluten formation for that perfect crust.
Shape and Prepare for First Rise
After resting, wet your hands again and gently shape the dough into a round loaf. Don’t worry if it’s not perfectly smooth—this isn’t a French baguette. Place it seam-side up in a lightly greased bowl and cover with a damp kitchen towel or plastic wrap. Let it rise at room temperature for 2-3 hours until it’s nearly doubled in size.
Here’s the thing—your kitchen’s temperature affects rise time. If your home is cool (68°F), you may need closer to 3 hours. If it’s warm (75°F), it might rise in 1.5 hours. The dough should feel light and springy when pressed gently with a finger. Patience here pays off with maximum flavor development.
Shape for Final Rise and Crust Development
Once doubled, turn the dough out onto a lightly floured surface and shape it into an oval loaf. I like to make a slight dimple in the center with my thumb—this creates a beautiful crack when baking. Place the shaped dough on a parchment-lined baking sheet and cover again with the damp towel. Let it rise for another 1-2 hours until it’s puffy and nearly doubled again.
This second rise is where the magic happens. The dough should spring back slowly when poked with a finger. If it springs back immediately, it needs more time. If it leaves a permanent indent, it’s ready. Preheat your oven to 450°F while the dough rises—you want maximum heat for that perfect crust.
Bake to Golden Perfection
When the oven is fully preheated, place the baking sheet on the middle rack. Bake for 25-30 minutes until the bread is deep golden brown and sounds hollow when tapped on the bottom. I like to spray the oven walls with water during the first 5 minutes of baking—this creates steam that develops that beautiful crust.
For extra crispiness, I recommend transferring the bread to a wire rack immediately after baking. Let it cool for at least 30 minutes before slicing—this allows the crumb to set properly. The interior should be soft and airy with a crisp exterior that crackles when broken. Slice with a serrated knife for clean cuts that reveal the perfect crumb structure.
Pro Tips For Making 5 Ingredient Bread Recipe With Yeast
- Bloom the Yeast First: Skip mixing everything at once—dissolve the yeast and sugar in the warm water first, then let it sit for 5 minutes until frothy. I learned this the hard way: dry yeast hiding in flour won’t activate properly, and you’ll end up with dense, flat bread. (Yes, even if you’re impatient like me.)
- Measure Flour by Weight: Scoop the flour into a scale, not cups—all-purpose flour packed vs. spooned varies by 20-30 grams. I used to eyeball it, and my bread turned out either gummy or dry. A 500g target for this recipe guarantees consistency every time.
- Don’t Rush the Rise: Let the dough double in size—this takes 1 to 2 hours, depending on your kitchen’s warmth. I once cut corners and baked it early, and the result was dense as a brick. Patience here makes the difference between sad and satisfying.
- Use a Baking Sheet, Not a Pan: Shape the dough into a loaf and bake it directly on a greased baking sheet instead of a loaf pan. It browns faster and crisps up better—no need to fuss with greasing a pan or waiting for it to release. (Your future self will thank you.)
Best sauces and condiments for these flavors
Classic Garlic Butter
Nothing elevates fresh bread like a simple garlic butter spread. I melt 2 tablespoons unsalted butter in a small saucepan over low heat, then add 2 minced garlic cloves and ½ teaspoon fresh parsley.
Let it simmer for 1-2 minutes until fragrant but not browned. Brush this warm mixture on your bread immediately after baking—it’ll create a golden, aromatic crust that’s irresistible. 🌟
Olive Oil & Herbs
For a Mediterranean twist, whisk together ¼ cup extra-virgin olive oil, 1 teaspoon dried oregano, ½ teaspoon dried thyme, and a pinch of red pepper flakes. Drizzle this over warm bread straight from the oven or use it as a dipping oil.
The robust olive oil enhances the bread’s natural flavors while adding a touch of brightness. I love this with a sprinkle of flaky sea salt for extra depth.
Honey & Cinnamon
Sweet lovers will adore this combo: warm 2 tablespoons honey with ½ teaspoon ground cinnamon and a splash of lemon juice in a small bowl. Brush this onto toasted slices for a caramelized, spiced finish.
The honey’s natural sweetness pairs beautifully with the bread’s crusty exterior, while the cinnamon adds warmth. Perfect for breakfast or dessert!
Whipped Feta Spread
For a savory, creamy option, whip ½ cup crumbled feta cheese with 2 tablespoons Greek yogurt, 1 tablespoon chopped dill, and a squeeze of lemon. Spread this on warm bread slices for a tangy, rich contrast.
The salty feta cuts through the bread’s richness, making every bite feel luxurious. Garnish with toasted pine nuts for extra crunch.
Spicy Tomato Jam
Simmer ½ cup crushed tomatoes with 1 tablespoon balsamic vinegar, ½ teaspoon smoked paprika, and ½ teaspoon brown sugar until thickened. Spread this jam on toasted bread for a sweet-spicy kick.
The acidity from the balsamic balances the bread’s crust, while the smoky paprika adds complexity. Pair with a slice of provolone cheese for a gourmet sandwich.
Everything Bagel Seasoning
Sprinkle 1 tablespoon everything bagel seasoning (or mix 1 teaspoon sesame seeds, ½ teaspoon poppy seeds, ½ teaspoon dried garlic, and ½ teaspoon onion flakes) onto warm bread.
The crunchy, savory blend sticks to the crust perfectly. I love this with cream cheese for a quick bagel-style breakfast or snack. For extra flair, add a drizzle of honey on top.
Nutrition facts
Frequently asked questions
Can I substitute all-purpose flour with whole wheat flour?
Yes, but replace only 20% of the all-purpose flour with whole wheat to maintain texture. Whole wheat absorbs more moisture, so add 1 extra tbsp water per cup of whole wheat flour used. This keeps the dough from becoming too dense. For best results, use a 50/50 blend with bread flour if possible.
Why does my dough smell like alcohol?
That’s normal! Yeast consumes sugar and produces carbon dioxide (for rising) and small amounts of alcohol as a byproduct. The smell fades as the dough bakes. If it smells overly strong or vinegary, your yeast may have overfermented—bake immediately or reduce rise time next batch.
How do I know when the bread is fully baked?
Look for three signs: deep golden brown crust, a hollow sound when tapped on the bottom, and an internal temperature of 190-200°F (use a thermometer for accuracy). The edges should pull away cleanly from the pan. If unsure, bake 5 more minutes—underbaked bread continues cooking after removal.
Can I make this bread without a stand mixer?
This recipe uses no-knead method—just mix with a wooden spoon or your hands. The dough’s stickiness is intentional; wet your hands slightly when handling. The overnight rest does all the gluten development work for you, so no mixer is needed for perfect results.

- 2 Lb Oatmeal Bread Machine Recipe: Hands-Off Crusty Loaf With Nutty Depth - September 30, 2026
- 8-Inch Pecan Pie Recipe: Buttery Crust and Caramelized Nut Bliss - September 30, 2026
- 1 Loaf Homemade Bread Recipe: Crusty Crunch and Airy Crumb in One Bowl - September 30, 2026