
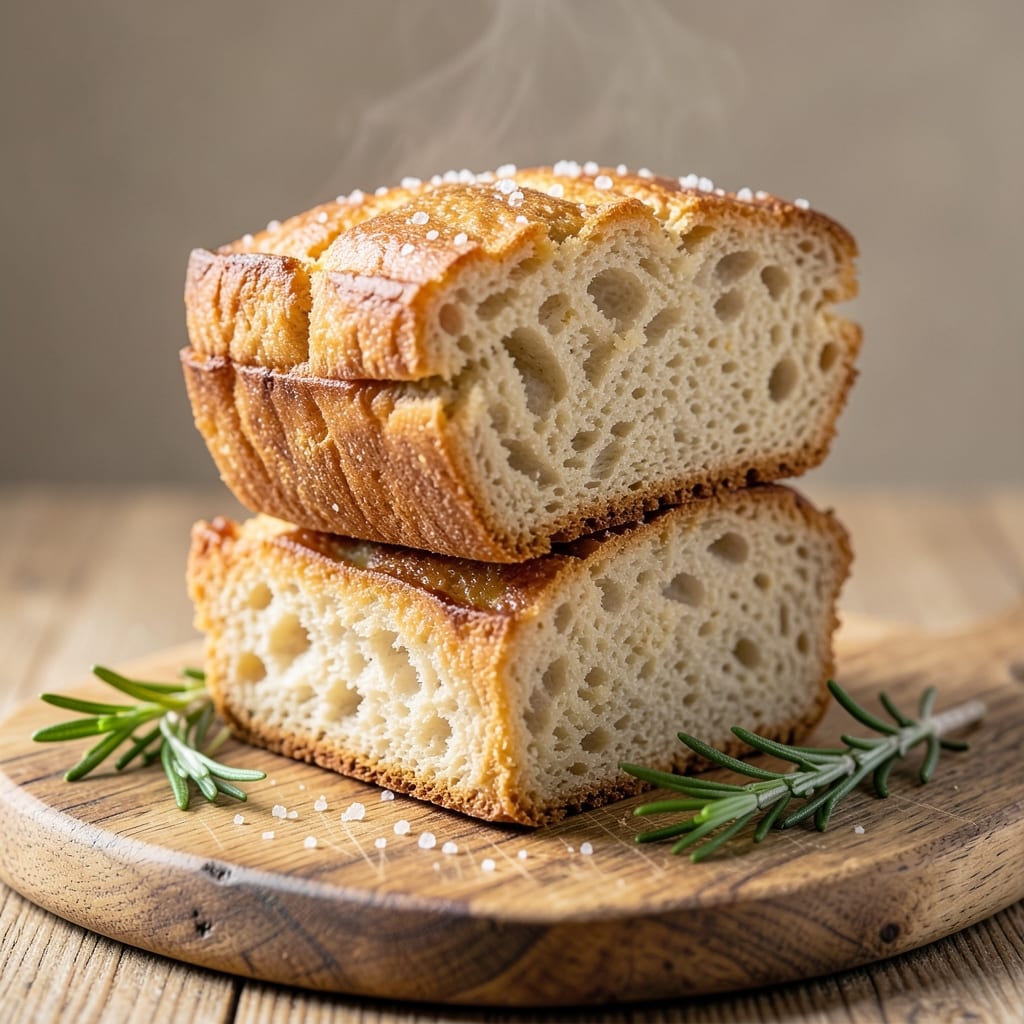
A 5-ingredient sandwich bread recipe that delivers fluffy, no-knead perfection in under an hour—this is the loaf that finally convinced me homemade bread was worth the effort.
The secret lies in a simple mix of flour, yeast, sugar, salt, and warm water, combined with a foolproof proofing technique that ensures airy, tender slices every time. No fancy equipment, no complicated steps, just reliable results that outshine store-bought in texture and flavor.
What makes this recipe truly special is its beginner-friendly approach—no kneading required, just a bowl, a spoon, and patience.
The dough rests twice (once in the bowl, once in the pan) to develop flavor and structure, while the high heat of the oven creates that perfect golden crust and soft interior. The result?
A loaf with a crisp exterior and a cloud-like crumb that’s ideal for sandwiches, toast, or French toast. Even if you’ve burned bread before, this method delivers consistent success.
By the time you pull this loaf from the oven, you’ll have a restaurant-quality sandwich bread with minimal effort. The aroma alone will have everyone asking for seconds, and the slices stay fresh for days—perfect for meal prep.
Whether you’re making grilled cheese, PB&J, or just buttered toast, this bread elevates every bite. Ready to bake? Let’s get started.
For extra flavor, try adding a pinch of garlic powder, dried herbs, or even a sprinkle of cheese to the dough before baking. The possibilities are endless, but the base recipe remains simple, reliable, and impossible to mess up. This is the kind of bread that makes homemade feel effortless.
Ingredients for 5 ingredient sandwich bread
Five simple ingredients transform into restaurant-quality sandwich bread with no kneading required.
| Ingredient | Amount | Notes |
|---|---|---|
| All-Purpose Flour 🌾 | 5 cups | Spooned and leveled for accuracy |
| Active Dry Yeast 🍞 | 2 ¼ tsp | One packet equals 2.25 tsp |
| Granulated Sugar 🍚 | 1 tbsp | White or brown sugar works |
| Salt 🧂 | 1 ½ tsp | Diamond Crystal preferred |
| Warm Water 💧 | 1 ½ cups | 110°F for ideal yeast activation |
The flour is everything here. King Arthur or Gold Medal brands yield the best texture, but any all-purpose will work. I keep a 5-pound bag on hand—it’s cheaper long-term and stays fresher. The yeast needs to be active dry, not instant, for this recipe. Check the expiration date: if it’s been sitting in your pantry for months, test it in warm water with sugar first. That little foam test tells you everything. The water temperature matters more than you’d think—too hot kills the yeast, too cold makes it sluggish. Aim for 110°F (like bathwater).
No yeast? Sourdough starter at 1/4 cup works in a pinch, but the rise will be slower. Brown sugar instead of white? No need to adjust—it adds subtle molasses notes. Short on flour? Whole wheat at 1 cup max keeps it manageable. The salt is non-negotiable though—it’s what gives store-bought bread its edge. Diamond Crystal dissolves faster than Morton’s, so if you’re in a hurry, grab that. For extra flavor, toss in 1 tsp garlic powder or dried herbs with the dough before baking—no one will know it’s not the original recipe.
Mix everything in a bowl, let it sit for 1 hour until bubbly, then shape and proof another 30 minutes before baking. The dough doubles in size both times—don’t rush it. Baked loaves keep 3-4 days at room temperature wrapped in a towel, or 1 week in the fridge. For longer storage, freeze slices wrapped in parchment. Toast straight from frozen for that perfect crunch. The first loaf is always the best—subsequent batches need a 10-minute extra proof since the yeast gets tired.
Why You’ll Love This Recipe
- Pantry Staples Only: I swear by this recipe because it uses things I always have. No specialty flours or obscure additives—just flour, yeast, sugar, salt, and water. That’s it. No last-minute grocery runs, no hunting for hard-to-find ingredients. It’s the kind of bread that proves you don’t need a fancy recipe to make something worth toasting.
- Golden Crust, Soft Core: The sugar in the dough gives it this perfect balance—crispy crust that shatters just enough, but a pillowy interior that’s still warm minutes after baking. It’s the kind of bread where the first bite makes me pause, like, “Wait, I made this?” No weird aftertaste, no dryness—just reliable, satisfying texture every single time.
- Weeknight & Meal Prep Hero: Between us, this is my go-to for quick lunches. I bake a batch on Sunday, and by Wednesday, I’m still pulling slices from the freezer for sandwiches or toast. The dough’s forgiving—even if I forget to let it rise overnight, a few extra hours on the counter still works. It’s the bread equivalent of a reliable friend who always shows up.
- Budget-Friendly Magic: A single batch costs me pennies—like, actual pennies—and stretches across breakfasts, sandwiches, and even croutons for salads. I’ll be real: I’ve made this for date nights, lazy Sundays, and even as a “fancy” side for guests. It’s the kind of recipe that makes me feel like I’m feeding people well, without breaking the bank.
Step-by-step instructions for no-knead sandwich bread
This method delivers soft, pillowy sandwich bread with minimal effort—no kneading required.
Activate the Yeast with Warm Water
In a large mixing bowl, combine the 1.5 cups warm water (about 110°F) with the 1 tbsp granulated sugar. Stir until the sugar dissolves completely. Sprinkle the 2.25 tsp active dry yeast over the water and let it sit for 5-10 minutes until it becomes frothy and bubbly.
This step ensures your yeast is alive and ready to work. If the mixture doesn’t bubble within 10 minutes, your yeast may be expired—start over with fresh yeast. The warm water activates the yeast, while the sugar provides food for fermentation, setting the foundation for fluffy bread.
Mix the Dough Until Just Combined
Add the 5 cups all-purpose flour and 1.5 tsp salt to the yeast mixture. Using a wooden spoon or dough whisk, stir vigorously for 2-3 minutes until a shaggy dough forms. The dough will be sticky but should come together when pressed.
Resist the urge to add extra flour—this dough needs moisture to develop properly. You’re aiming for a slightly sticky consistency that pulls away from the sides of the bowl when you lift the spoon. Over-mixing develops gluten too soon, which can make the bread dense. Once combined, let the dough rest for 10 minutes while you prepare your baking pan.
Shape and Proof the Dough
Lightly grease a 9×5-inch loaf pan with butter or oil. After the 10-minute rest, wet your hands to prevent sticking and gently shape the dough into a rectangle. Fold the sides toward the center, then roll it into a log shape. Place the dough seam-side down into the prepared pan and cover loosely with a clean kitchen towel.
Let the dough proof at room temperature for 45-60 minutes until it rises about 1 inch above the pan and looks puffy. The surface should be slightly domed, with no cracks forming. If your kitchen is cold, place the pan in a warm oven (70°F) with the light on to speed up proofing. Patience here is key—rushing leads to dense bread.
Bake Until Golden and Hollow-Sounding
Preheat your oven to 375°F. When the dough has proofed, bake uncovered for 30-35 minutes until the top is golden brown and the bread sounds hollow when tapped on the bottom. The internal temperature should reach 190-200°F.
For even browning, rotate the pan halfway through baking. The bread is done when it pulls away slightly from the sides of the pan and has a crisp crust. If the top browns too quickly, tent loosely with foil after 20 minutes. Let the bread cool in the pan for 10 minutes before removing to a wire rack to prevent collapsing.
Slice and Enjoy Freshly Baked Bread
Once cooled for 20-30 minutes, remove the bread from the pan and slice into ¼-inch thick pieces. The interior should be soft, evenly textured, and just slightly crumbly—ideal for sandwiches. Store any leftovers wrapped in a clean towel at room temperature for up to 3 days, or freeze for longer storage.
This bread shines when used for classic sandwiches, toast, or garlic bread. The no-knead method preserves the tender crumb while delivering that satisfying crust. The secret lies in proper proofing and baking—don’t skip these steps for best results.
Pro Tips For Making 5 Ingredient Sandwich Bread
- WEIGH YOUR FLOUR: I learned this the hard way—spooning flour into the bowl leads to inconsistent batches. Use a kitchen scale for the 500g (or 4 cups) and scoop it straight from the bag, then level it off. That extra 10-20g makes a difference in how your dough behaves, especially when shaping loaves.
- TEST YOUR YEAST FIRST: Skip the guesswork—proof your yeast in warm water with a pinch of sugar before mixing. If it bubbles within 5-10 minutes, you’re good to go. No bubbles? Toss that packet and open a new one. Dead yeast = flat, dense bread, and nobody wants that.
- KNEAD JUST ENOUGH: The dough should spring back slowly when poked, not bounce like a trampoline. Over-kneading develops gluten but can make your bread tough. Use a stand mixer with the dough hook for 5-6 minutes on medium—less time than you think, especially with all-purpose flour.
- LET IT RISE TWICE: First rise (1-2 hours) is obvious, but the second rise after shaping is where magic happens. Place shaped loaves in a greased bowl, cover with a damp towel, and let them rise until they’ve doubled in size—about 45-60 minutes. This ensures light, airy sandwich bread, not a brick. (Yes, even if you’re impatient like me.)
Serving suggestions for this 5 ingredient sandwich bread
Classic Sandwich Pairings
This bread is perfect for grilled cheese sandwiches—use sharp cheddar or Gruyère with a touch of Dijon mustard for extra flavor. For a PB&J, the soft texture holds peanut butter beautifully, and the crust adds satisfying crunch.
I love adding a sprinkle of flaky sea salt on top before serving for that gourmet touch. 🧀
For BLTs, toast the bread lightly and layer with crispy bacon, fresh lettuce, and ripe tomato slices. A drizzle of balsamic glaze elevates it to next-level restaurant quality. The bread’s neutral flavor lets the ingredients shine without overpowering. Keep it simple or go fancy—your call!
Breakfast Serving Ideas
Transform slices into French toast by dipping in an egg-cinnamon batter and pan-frying until golden. The bread’s soft interior soaks up the custard perfectly. For avocado toast, mash ripe avocado with a pinch of salt, lime juice, and red pepper flakes.
Top with a poached egg for a protein boost. 🍳
Make breakfast sandwiches with scrambled eggs, crispy sausage, and melted cheese. The bread’s sturdy structure holds everything together without falling apart. I often add a dash of hot sauce on the side for those who like a kick. These make great meal-prep breakfasts too!
Garnishes and Toppings
Add garlic butter by mixing softened butter with minced garlic and parsley, then brushing on warm bread. For herb bread, sprinkle dried rosemary or thyme on top before baking—it adds an aromatic touch. A light dusting of powdered sugar turns it into a sweet treat for dessert. 🌿
For savory twists, try a sprinkle of Parmesan cheese or everything bagel seasoning before baking. The bread’s mild flavor pairs well with bold toppings. Keep a small bowl of olive oil and flaky salt on hand for dipping—it’s a game-changer for toast lovers.
Meal Prep Strategies
Slice the cooled loaf and store in airtight containers with parchment paper between slices to prevent drying. It stays fresh for 4-5 days at room temperature.
For freezer storage, wrap individual slices in plastic wrap and freeze for up to 3 months. Toast straight from frozen for crispy results. ❄️
Pre-assemble sandwiches without the bread, then wrap everything (except the bread) in plastic wrap. Add the bread fresh when ready to eat—this keeps fillings crisp and prevents sogginess. I make a big batch of chicken salad or tuna salad on Sundays and pair it with this bread all week.
Nutrition facts
Frequently asked questions
Can I make this bread without a loaf pan?
Yes! For a free-form loaf, shape the dough into a round or oval and place it on a parchment-lined baking sheet. Let it rise until doubled, then bake at 375°F for 25-30 minutes until golden. The crust will be thicker, but the interior stays soft.
Why did my bread turn out dense?
Dense bread usually means the dough didn’t proof enough or was overmixed. Let the dough rise until it clearly doubles in size (about 1 inch above the pan) and avoid stirring after combining ingredients. Cold kitchens slow proofing—try placing the pan near a warm oven with the light on.
Can I add mix-ins like cheese or herbs?
Fold in ½ cup shredded cheese or 1 tbsp dried herbs with the flour. For cheese, use mild varieties like cheddar or mozzarella. Keep mix-ins to 10% of the flour to avoid density. Sprinkle extra toppings on top before baking for flavor bursts.
How do I store leftovers to keep them fresh?
Wrap the cooled loaf in a clean kitchen towel and store at room temperature for 3-4 days. For longer storage, slice and freeze wrapped in plastic for up to 3 months. Toast frozen slices directly for crispy results. The towel prevents drying better than plastic bags.
Is this bread gluten-free?
No, this recipe uses all-purpose flour which contains gluten. For a gluten-free version, substitute with a 1:1 gluten-free flour blend and add ½ tsp xanthan gum. Note that texture and rise time may differ slightly. Always check labels for certified gluten-free products.

- 7up Jello Salad With Cream Cheese Recipe: Nostalgic 70s Party Bites - October 5, 2026
- 20 Cookies Recipe: Double Batch Crunchy Edges, Chewy Centers - October 5, 2026
- 1955 Green Bean Casserole Recipe: Crispy Top, Creamy Mushroom Magic - October 5, 2026