
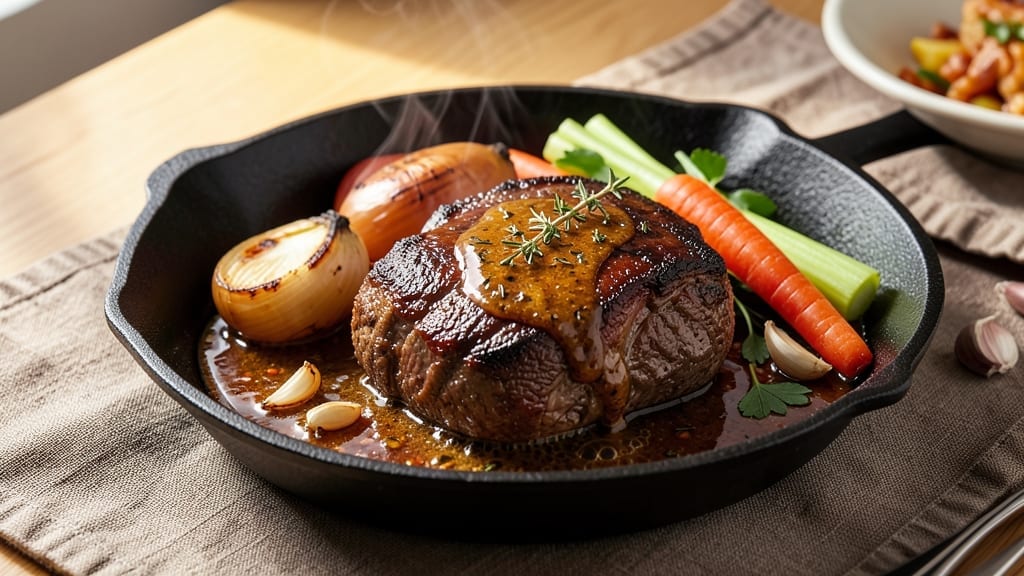
A 5 lb chuck roast transformed into melt-in-your-mouth perfection is the kind of meal that turns weeknights into celebrations. This slow-braised recipe delivers juicy, shred-worthy magic with minimal effort—just a few hours of hands-off cooking and a deep, rich flavor that lingers long after the last bite.
The secret lies in patience and simple seasoning, letting the meat tenderize until it practically falls apart at the touch of a fork.
What sets this recipe apart is the balance of technique and simplicity. You’ll start with a quick sear to build flavor, then slow-cook the roast until it reaches that ideal texture—tender enough to shred but still substantial enough to slice.
The result is a dish that’s hearty enough for a family dinner but impressive enough for guests, all while keeping prep straightforward. No fancy marinades or complicated steps, just a foolproof method that delivers restaurant-quality results at home.
By the time you’re ready to serve, you’ll have a roast so tender it practically shreds with a fork, bathed in its own rich, savory juices.
The aroma alone will have everyone gathering at the table, and the first bite will confirm why this recipe has become a staple in my kitchen. Serve it with classic sides like mashed potatoes, roasted vegetables, or a simple gravy to soak up every last drop of flavor.
This recipe isn’t just about the roast—it’s about the experience. The slow cooking process fills your home with an irresistible scent, and the final result is a centerpiece dish that feels special without requiring hours of effort.
Whether you’re feeding a crowd or treating yourself to a comforting meal, this 5 lb chuck roast delivers on every promise of juicy, satisfying perfection.
Ingredients for 5 lb chuck roast
A bold roast, aromatic herbs, and a slow cooker’s patience—this is all you need for melt-in-your-mouth perfection.
| Ingredient | Amount | Notes |
|---|---|---|
| Chuck Roast 🥩 | 5 lb | Well-marbled, bone-in preferred |
| Yellow Onion 🧅 | 2 whole | Chopped into 1-inch pieces |
| Carrots 🥕 | 4 whole | Cut into 2-inch chunks |
| Celery Stalks 🌿 | 4 whole | Cut into 2-inch pieces |
| Garlic Cloves 🧄 | 6 cloves | Smashed, not minced |
| Beef Broth 💧 | 4 cups | Low-sodium preferred |
| Red Wine 🍷 | 1 cup | Bold, dry variety |
| Tomato Paste 🍅 | 2 tbsp | Smooth, not chunky |
| Worcestershire Sauce 🥫 | 2 tbsp | Vegetarian if needed |
| Fresh Thyme 🌿 | 2 sprigs | Or 1 tsp dried |
| Fresh Rosemary 🌿 | 1 sprig | Woodsy flavor |
| Bay Leaves 🍃 | 2 whole | Removed before serving |
| Kosher Salt 🧂 | 2 tbsp | Diamond Crystal preferred |
| Freshly Ground Black Pepper 🌶️ | 1 tbsp | Coarse grind |
| Olive Oil 🫒 | 2 tbsp | For searing |
The chuck roast is your star—look for one with good marbling (that white fat streaked through the meat) at Costco or your local butcher shop. Bone-in adds flavor, but bone-out is fine if you prefer. Trader Joe’s often has great pre-cut chuck at a good price, but if you’re buying whole, ask for it cut into 1-inch chunks yourself. That extra effort makes the difference. The herbs? Fresh thyme and rosemary are worth hunting down at a specialty market if your grocery store’s selection looks sad—dried works in a pinch, but fresh has that bright, vibrant kick.
No red wine? Substitute extra beef broth with a splash of balsamic vinegar—it adds depth without the alcohol. Worcestershire sauce can be tricky if you’re avoiding anchovies, so check labels or use vegetarian Worcestershire. The tomato paste is non-negotiable for that rich, umami base, but if you’re using the squeeze tubes from Trader Joe’s, measure carefully—those are concentrated. For the aromatics, don’t skip the bay leaves; they infuse the broth with subtle earthiness. And if your carrots are small, use 6-8 baby carrots instead—they soften faster and add sweetness to the braise.
This roast tastes even better the next day, so make a double batch if you’re feeding a crowd. Store leftovers in the fridge for up to 5 days, or freeze portions for 3 months—just thaw overnight in the fridge. The slow-cooked juices thicken as they cool, so you can always add a splash of broth when reheating. For serving, I like to shred it right on the cutting board with two forks—no fancy tools needed. The leftovers? Toss them into tacos, sandwiches, or hash the next day—waste not, want not.
Why You’ll Love This Recipe
- One-Pot Magic: I swear by this—dump everything in a Dutch oven, add broth, and walk away. No chopping like a fine chef, no fancy techniques. Just slice the onion, celery, and carrots roughly (my kids call them “roast sticks”), toss in the garlic, and let the slow cooker or oven do the heavy lifting.
- Deep, Rich Payoff: That chuck roast? It practically melts in your mouth after hours of braising, while the onions and carrots caramelize right into the meat. Honestly, the first time I bit into it, I thought, “Why haven’t I been doing this all along?”—the garlic and herbs seep into every fiber, making it crave-worthy.
- Leftovers That Win: Between us, this recipe always makes more than we can eat in one sitting. The good kind of leftovers—better the next day because the flavors deepen. I freeze portions for lazy Mondays or toss cold slices into salads when I’m in a hurry. (Yes, even on a Tuesday night.)
- Budget Feast for Crowds: Five pounds of chuck roast feeds my family of five and leaves enough for guests—or for me to take to work. The veggies are cheap, the meat is hearty, and the end result? A meal that feels fancy without breaking the bank. My wallet and my taste buds thank me every time.
Step-by-step instructions for slow-braised chuck roast
Here’s the method that guarantees melt-in-your-mouth tenderness and rich, caramelized flavors.
Sear the Chuck Roast for Deep Flavor
Pat the 5 lb chuck roast dry with paper towels—this is crucial for that perfect crust. Heat a heavy Dutch oven over medium-high heat and add the 2 tbsp olive oil. Once shimmering, place the roast fat-side down and let it sear for 8-10 minutes, pressing down gently with a spatula to keep it flat. You’ll hear sizzling and see golden brown patches forming—that’s the Maillard reaction working its magic.
Flip the roast and sear the other side for another 8-10 minutes. Remove it from the pot and set it aside on a plate. You’re building layers of flavor right now, so don’t skip this step. The seared crust will lock in all those juices during the long braise.
Sauté the Vegetable Base
In the same Dutch oven, add the chopped 2 whole yellow onion, 4 whole carrots, and 4 whole celery stalks. Cook over medium heat for 8-10 minutes, stirring occasionally, until the vegetables soften and begin to caramelize. This step develops their natural sweetness and creates the foundation for your braising liquid.
Add the 6 cloves smashed garlic, 2 sprigs fresh thyme, 1 sprig fresh rosemary, and 2 whole bay leaves. Stir everything together for 1 minute until fragrant—you should smell that aromatic punch of herbs and garlic. This is where all the flavors meld together before the braising begins.
Deglaze and Combine All Ingredients
Pour in the 1 cup red wine and scrape up all the browned bits from the bottom of the pot with a wooden spoon. This deglazing captures all that meaty flavor that would otherwise be lost. Let it simmer for 3-4 minutes until the wine reduces by half and the alcohol burns off.
Stir in the 2 tbsp tomato paste, 2 tbsp Worcestershire sauce, 2 tbsp kosher salt, and 1 tbsp freshly ground black pepper. Add the seared chuck roast back to the pot, then pour in the 4 cups beef broth. The liquid should come about halfway up the sides of the roast—this ensures even cooking and maximum flavor penetration.
Braise Until Fork-Tender
Bring the liquid to a gentle simmer, then cover the pot and transfer it to a 325°F oven. Here’s where the magic happens—braise the chuck roast for 3-3½ hours until it’s fork-tender. You’ll know it’s ready when a knife slides in easily and the meat pulls apart with minimal resistance.
I like to check it at the 3-hour mark—if it’s not quite there, add ½ cup water to the pot and continue cooking. The goal is tender, juicy meat that practically falls apart at the touch. Don’t rush this step; patience is key to that perfect texture.
Rest and Shred for Serving
Remove the chuck roast from the pot and transfer it to a cutting board. Let it rest for 15-20 minutes before shredding. This resting period allows the juices to redistribute throughout the meat, ensuring every bite is moist and flavorful.
Discard the 2 whole bay leaves and any herb stems. Use two forks to shred the meat against the grain into ¼-inch thick strands. Taste the braising liquid and adjust seasoning if needed—you might want to add a splash more beef broth if it’s too thick. Spoon the liquid over the shredded meat and serve immediately with your favorite sides.
Pro Tips For Making 5 Lb Chuck Roast
- SEAR THE ROAST FIRST: Don’t skip the initial high-heat sear—this isn’t just for looks. After patting the chuck dry, hit it with oil and crank the heat to medium-high until deep brown crust forms. I learned this the hard way: skipping it means flavor stuck in the middle of the pan instead of on the meat.
- CHOP VEGETABLES UNIFORM: Carrots, celery, and onions should be cut to the same size—about ½-inch chunks. Uneven pieces mean some veggies turn to mush while others stay crunchy. Use a knife sharp enough to make clean cuts, or your hands will hate you.
- DON’T PEEK AT THE POT: Resist opening the lid during the first 2 hours of braising—steam escapes every time, and the roast loses moisture. If you’re nervous, use a meat thermometer instead. Trust me, the wait is worth the tender, juicy result.
- USE COLD WATER FOR SOAK: If your recipe calls for a quick soak of the roast before cooking, use cold water. Hot water cooks the outer layer too fast, leaving the center tough. Five minutes in cold water loosens surface fibers without overcooking—simple, but it makes a real difference.
Troubleshooting this recipe
Overcooked Meat Fix
If your chuck roast ends up tough instead of tender, it likely didn’t cook long enough at the right temperature. The fix? Return it to a 325°F oven for another 30-60 minutes with ½ cup extra broth to keep it moist.
The meat should yield to gentle pressure with a fork. Never rush the cooking time—this is where patience pays off. 💡
Dry or Stringy Texture
Dry meat usually means the roast lost too much moisture during cooking. To prevent this, always cover the pot tightly with a lid and maintain a gentle simmer, not a rolling boil.
If it’s already dry, try reheating it in a skillet with 2 tbsp beef broth over low heat for 5 minutes to restore moisture. The goal is juicy meat, so don’t skip the resting time before serving.
Uneven Cooking
Uneven cooking often happens when the roast isn’t fully submerged in liquid. Make sure the braising liquid covers at least half of the roast. If it’s not, add more beef broth or water to reach the proper level.
For extra insurance, flip the roast halfway through cooking to ensure even exposure to heat and liquid.
Weak or Bland Flavor
Bland flavor usually means the seasoning wasn’t strong enough or the herbs weren’t fresh. Boost the flavor by adding 1 tsp smoked paprika or ½ tsp onion powder to the braising liquid.
For a quick fix, deglaze the pot with ½ cup red wine or beef broth and simmer for 10 minutes to intensify the flavors. Fresh herbs make all the difference!
Liquid Too Thin
If your braising liquid is too thin, it likely evaporated during cooking. To thicken it, remove the roast and simmer the liquid uncovered for 5-10 minutes to reduce. For extra richness, stir in 1 tbsp cornstarch mixed with 2 tbsp cold water and simmer until thickened.
This will create a luscious sauce perfect for serving over the shredded meat.
Burnt or Stuck-On Bits
Burnt bits happen when the Dutch oven gets too hot. Always use medium heat when sautéing vegetables and avoid letting the liquid boil vigorously. If bits stick, deglaze with ½ cup red wine or beef broth to lift them off the bottom.
A well-seasoned Dutch oven helps too—I love my Lodge Pre-Seasoned Cast Iron for this recipe. 🔥
Nutrition facts
Frequently asked questions
Can I use a smaller or larger chuck roast?
This recipe works beautifully with 3-7 lb chuck roasts! For smaller cuts (3-4 lb), reduce cooking time by 30-45 minutes and adjust liquid to cover half the roast. For larger cuts (7+ lb), add 1 extra hour and increase broth by 1 cup. Always check doneness with a meat thermometer (203°F internal temp for perfect tenderness).
What’s the best way to store leftovers?
Store shredded chuck roast in an airtight container in the fridge for up to 5 days or freeze for 3 months. For reheating, warm in a skillet with 2 tbsp broth over low heat for 5 minutes or microwave for 1-2 minutes with a splash of liquid to prevent drying. Leftovers make amazing tacos, sandwiches, or hash!
Can I make this in a slow cooker?
Sear the roast first, then transfer it to your slow cooker with all ingredients. Cook on low for 8-9 hours or high for 5-6 hours. The liquid will be thinner, so reduce it on the stovetop after cooking. For best results, use a 6-quart slow cooker to ensure the roast is fully submerged in liquid.
Why does my chuck roast turn out tough?
Tough chuck usually means it wasn’t cooked long enough or at the right temperature. Always use 325°F and cook until it reaches 203°F internal temp. If it’s still tough, return it to the oven for 30-60 more minutes with ½ cup extra broth. Never rush the cooking time—this is where patience makes all the difference!
What are the best sides to serve with this?
Classic pairings include creamy mashed potatoes, buttery egg noodles, or roasted root vegetables. For extra flavor, serve with homemade gravy made from the braising liquid. Hearty bread like crusty sourdough or garlic bread also soaks up all the delicious juices perfectly!

- Pea Soup Instant Pot Recipe: Velvety Green Smoothness in 20 Minutes - November 1, 2026
- Pork Loin Pulled Pork Crock Pot Recipe: Slow-Smoked Tenderness With Zero Dryness - November 1, 2026
- Baked Potatoes in Crock Pot Recipe: Buttery Interiors and Crispy Top Magic - November 1, 2026