
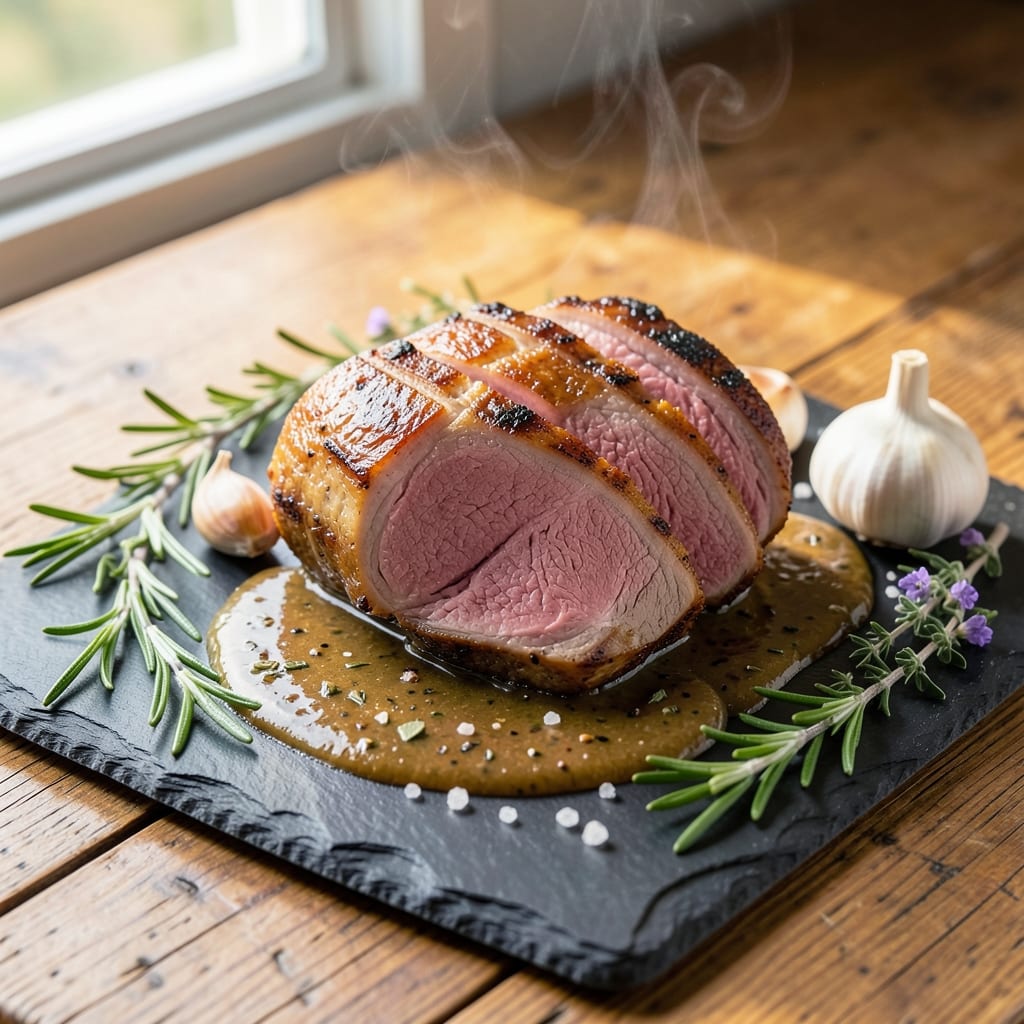
A 5 lb pork sirloin roast cooked to juicy perfection with a crispy herb crust is the centerpiece every holiday table deserves. The secret lies in precise seasoning and temperature control—something I perfected after years of cooking for crowds at The Smoky Pig.
This isn’t just another roast recipe; it’s a technique that transforms tough cuts into melt-in-your-mouth tenderness with a golden, flavorful crust.
The key to success begins with a dry brine—letting the pork sit overnight in a mix of salt, pepper, and fresh herbs. This step ensures moisture retention while building flavor deep within the meat.
Then, it’s all about the oven: a slow start at 325°F to develop even cooking, followed by a broil to achieve that coveted crispy exterior. My method guarantees a juicy pink center that’s never dry, even when sliced against the grain.
What you’ll end up with is a roast so flavorful and tender that guests will ask for seconds before the plate is empty. The herb crust adds aromatic depth, while the internal temperature stays perfectly at 145°F—safe, juicy, and restaurant-quality.
This is the kind of roast that elevates any meal from ordinary to extraordinary, with minimal effort once you master the technique.
Pair it with garlic mashed potatoes and roasted seasonal vegetables for a complete feast. The leftovers? Even better the next day, sliced thin for sandwiches or reheated for quick meals. Let’s get started on a roast that will become your new signature dish.
Ingredients for 5 lb pork sirloin roast
Pantry staples plus fresh herbs—everything you need for a showstopping holiday roast.
| Ingredient | Amount | Notes |
|---|---|---|
| Pork Sirloin Roast 🥩 | 5 lb | Bone-in for best flavor |
| Fresh Rosemary 🌿 | ¼ cup | Finely chopped, stems removed |
| Fresh Thyme 🌿 | ¼ cup | Leaves only, stems discarded |
| Garlic Cloves 🧄 | 8 cloves | Smashed, not minced |
| Kosher Salt 🧂 | 2 tbsp | Diamond Crystal preferred |
| Freshly Ground Black Pepper 🌶️ | 1 ½ tbsp | Coarse grind preferred |
| Olive Oil 🫒 | ¼ cup | Extra-virgin for crust |
| All-Purpose Flour 🌾 | ½ cup | For crust adherence |
| Unsalted Butter 🧈 | ½ cup | Cold, cubed for crust |
| Fresh Sage Leaves 🌿 | ¼ cup | Chopped, for extra aroma |
| Apple Cider Vinegar 🍎 | 1 tbsp | For brining balance |
| Brown Sugar 🍯 | 1 tbsp | Lightly packed |
The pork sirloin roast is the star here, and bone-in is non-negotiable—it adds flavor and keeps the meat juicy. Most butchers will trim it for you, but if you’re buying whole, ask for a 5 lb center-cut sirloin. I always grab mine from Whole Foods or my local butcher shop—they know exactly what I need. Look for good marbling and vibrant color; that’s your quality indicator. The herbs? Fresh is a must—dried just won’t give you that aromatic crust. If you’re short on time, Trader Joe’s sells pre-bundled herb mixes that work in a pinch.
No fresh rosemary? Substitute with 1 tbsp dried rosemary, but trust me on the fresh version—it’s worth the extra minute. Running out of thyme? Oregano at half the amount works, though it’ll change the flavor profile slightly. The apple cider vinegar might seem odd, but it helps tenderize the meat and balance the sweetness of the crust. For the crust itself, if you don’t have flour, crushed cornflakes add a nice crunch. And if you’re worried about the butter melting too soon, chill it for 30 minutes before mixing with other ingredients.
This roast tastes even better the next day, so double the recipe if you’re feeding a crowd. Store leftovers in the fridge for up to 5 days, tightly wrapped in foil. For longer storage, freeze portions for up to 3 months. I always slice it thin for sandwiches—add a smear of mustard and a sprinkle of those same herbs for a quick lunch. The crust keeps well too, so you can make it ahead and refrigerate until ready to use.
Why You’ll Love This Recipe
- No-Fuss Prep: I swear by this—just rub the roast with salt, crush garlic cloves right on top, and tuck in those rosemary and thyme sprigs. Five minutes max, and the hardest part is deciding whether to sear it first or skip straight to the oven.
- Herb-Crusted Magic: That rosemary-thyme crust? It’s not just garnish—it clings to the meat like a flavor hug. The garlic infuses deep, and the salt caramelizes into a crust so good, I’ve caught myself eating it straight off the cutting board.
- Leftovers That Shine: This roast practically begs to be repurposed. Slice it for sandwiches, dice it into stir-fries, or shred it for tacos—it stays juicy and packed with flavor. (Yes, even on day three.)
- Budget Crowd-Pleaser: Five pounds feeds a family dinner or a potluck with room to spare, and pork sirloin is cheaper than beef but just as satisfying. Honestly, it’s my go-to for gatherings where I don’t want to break the bank—or spend hours in the kitchen.
Step-by-step instructions for herb-crusted pork sirloin roast
Here’s how to create a perfectly juicy roast with a crispy herb crust—no guesswork involved.
Prepare the Herb Crust Mixture
In a food processor, combine the 0.25 cup fresh rosemary, 0.25 cup fresh thyme, 8 cloves smashed garlic, 0.25 cup olive oil, 0.5 cup all-purpose flour, 0.5 cup unsalted butter, 0.25 cup fresh sage leaves, 1 tablespoon apple cider vinegar, 1 tablespoon brown sugar, 2 tablespoons kosher salt, and 1.5 tablespoons freshly ground black pepper. Pulse until everything forms a coarse paste—you want visible herb flecks, not a smooth paste. This texture ensures flavor sticks to the roast while creating that coveted crust.
Taste the mixture and adjust seasoning if needed. The vinegar and brown sugar might make it taste slightly sweet and tangy at first, but trust me—this balance prevents the crust from becoming bitter during roasting. Transfer the mixture to a bowl and set aside while you prep the pork.
Season and Rest the Pork
Pat the 5 lb pork sirloin roast completely dry with paper towels—this is critical for achieving a crispy crust. Generously rub the herb mixture all over the roast, pressing it firmly into the meat so it adheres well. Place the roast on a rack set inside a rimmed baking sheet (the rack allows air circulation for even cooking). Cover loosely with plastic wrap and refrigerate for at least 4 hours or overnight. This resting period lets the flavors penetrate deeply and the meat cook more evenly.
Real talk: If you skip this step, you’ll end up with a roast that’s flavorful only on the outside. The cold resting period is what transforms good into exceptional. Take this time to prep your sides or set the oven—you’ll be ready to cook when the pork is.
Roast to Juicy Perfection
Preheat your oven to 325°F. Remove the roast from the refrigerator and let it sit at room temperature for 30 minutes before roasting—this ensures even cooking. Roast uncovered for 2 hours and 15 minutes, or until the internal temperature reaches 145°F when measured with a meat thermometer in the thickest part of the roast. The crust should be golden brown and crispy, while the center remains beautifully pink—this is the hallmark of a perfectly cooked pork sirloin.
Here’s the thing—pork sirloin can dry out if overcooked. The 145°F internal temperature guarantees juicy meat without compromising safety. If you’re unsure, err on the side of slightly underdone; the roast will continue cooking as it rests. Don’t open the oven during roasting—every time you peek, you lose heat and moisture.
Rest and Slice for Maximum Juiciness
Transfer the roast to a cutting board and tent loosely with aluminum foil. Let it rest for 20-30 minutes before slicing—this resting period allows the juices to redistribute throughout the meat. You’ll notice the temperature will rise another 5-10°F during this time, which is normal and actually improves tenderness. Use a sharp carving knife to slice the roast against the grain into ½-inch thick slices. Each slice should be moist, flavorful, and hold its shape.
If you’re serving this roast for a crowd, you can keep it warm in a 200°F oven while you finish other dishes. The herb crust will stay crispy, and the meat will maintain its juiciness. Serve with your favorite sides—roasted vegetables, mashed potatoes, or a fresh green salad to balance the richness.
Pro Tips For Making 5 Lb Pork Sirloin Roast
- SEAR FIRST, THEN SALT: Get that roast screaming hot in a dry skillet—no oil needed—before you even think about seasoning. The crust forms in minutes, and you’ll lock in flavor way better than if you salted first (yes, even if you’re impatient like me).
- CHOP HERBS COARSELY: Tiny herb bits burn fast. Roughly chop thyme sprigs and rosemary sprigs into ½-inch pieces so they infuse flavor without turning to ash. My grandmother swore by this, and she was right: big pieces stay aromatic longer.
- USE A MEAT THERMOMETER: Pork sirloin hits 145°F internally—don’t guess. I learned this the hard way after serving dry slices because I relied on time alone. A cheap probe ($10) guarantees juicy, safe results every time.
- SALT THE ROAST 24 HOURS EARLY: Generously coat the pork with kosher salt (about 1½ tsp for a 5-lb roast) and let it sit uncovered in the fridge. Sounds weird, but it works: the salt breaks down proteins, keeping the meat moist and the crust perfect. (Your future self will thank you.)
Dietary considerations for this recipe
Gluten-Free Adaptations
This recipe is naturally gluten-free, thanks to the herb crust’s flour-free design. Simply omit the 0.5 cup all-purpose flour and replace it with 0.5 cup crushed cornflakes or 0.5 cup almond flour for a nutty twist.
The cornflakes add a satisfying crunch while keeping the crust cohesive. For extra security, ensure all other ingredients—like broth or sides—are certified gluten-free. I always double-check labels on pre-made mixes, even if they seem safe. 🌾
Low-Carb Modifications
To make this a true low-carb powerhouse, skip the 1 tbsp brown sugar in the crust and use 1 tbsp erythritol or monk fruit sweetener instead. You can also reduce the flour to 0.25 cup or eliminate it entirely, relying solely on the butter and herbs for flavor.
The crust will still be flavorful and crispy—just less sweet. Pair with cauliflower mash or zucchini noodles for a fully low-carb feast. Trust me, the flavor won’t suffer!
Dairy-Free Options
For a dairy-free version, replace the 0.5 cup unsalted butter with 0.5 cup coconut oil (solid) or 0.5 cup vegan butter. The coconut oil adds a subtle tropical note that pairs surprisingly well with the herbs.
Just make sure to chill the mixture longer (up to 1 hour) since coconut oil melts faster. The crust will still crisp beautifully, and the meat stays just as juicy. 🥥
Allergen-Friendly Tips
If you’re accommodating nut allergies, avoid almond flour substitutions and stick with cornflakes or rice flour. For soy allergies, check your vinegar—some brands use soy-based processing aids. I always opt for apple cider vinegar from a trusted brand like Bragg to avoid cross-contamination risks.
When in doubt, use separate utensils and surfaces to prep the crust if allergens are a concern. Safety first!
Protein-Packed Boost
Want to add extra protein? Mix 1 cup cooked quinoa into the herb crust mixture for a heartier texture. The quinoa absorbs flavors beautifully and adds a satisfying bite. Alternatively, sprinkle 2 tbsp nutritional yeast on top before roasting for a cheesy, umami kick.
Both options keep the dish gluten-free while bumping up the protein content significantly. Perfect for meal prep!
Nutrition facts
Frequently asked questions
Why does the recipe call for a dry brine overnight?
The overnight dry brine transforms this roast from good to exceptional. The salt penetrates deep into the meat, breaking down proteins for tenderization while drawing out moisture that gets reabsorbed during cooking. This creates a juicier pink center that’s never dry. Plus, the herbs infuse flavor throughout—not just on the surface. Skipping this step risks flavorless outer layers and tougher meat. Think of it as the secret weapon behind restaurant-quality results at home.
Can I use a meat thermometer instead of guessing the cooking time?
Use a meat thermometer inserted into the thickest part of the roast—it should read 145°F for perfect doneness. The 2 hours and 15 minutes is an estimate, but every oven varies. Pork sirloin can dry out quickly, so pull it out when it hits 145°F—it’ll rise another 5°F while resting. Pro tip: Let the roast sit 10 minutes after removing from the oven before checking temp to avoid false readings from residual heat.
What if my roast comes out dry?
Dry pork usually means it was overcooked or didn’t rest properly. First, check your internal temp—145°F is perfect. If you missed the mark, try this fix: Slice thinly against the grain, then reheat in a skillet with 2 tbsp apple cider and 1 tbsp butter over low heat for 3-4 minutes per side. The liquid will rehydrate the slices beautifully. For future roasts, never skip the 30-minute room temp before cooking or the 20-30 minute rest after. Juices need time to redistribute!
How do I carve this roast properly for maximum tenderness?
Always slice against the grain—look for the direction of the muscle fibers and cut perpendicular to them. Use a sharp carving knife and make ½-inch thick slices for even cooking. For a crowd, slice into ½-inch medallions first, then separate each medallion into individual slices. This keeps the presentation neat while maximizing tenderness. A hot knife works wonders too—wipe it with a damp cloth before each cut to prevent sticking.
Can I make this roast in a slow cooker instead?
Not ideal for this recipe—the slow cooker won’t give you that crispy herb crust we’re after. However, you can adapt it by searing the roast first in a skillet, then transferring it to a slow cooker on low for 6-8 hours with ¼ cup broth for moisture. The texture will be more tender than crispy, but still delicious. For the best results, stick with the oven method for that perfect crust and juicy pink center.

- 7up Jello Salad With Cream Cheese Recipe: Nostalgic 70s Party Bites - October 5, 2026
- 20 Cookies Recipe: Double Batch Crunchy Edges, Chewy Centers - October 5, 2026
- 1955 Green Bean Casserole Recipe: Crispy Top, Creamy Mushroom Magic - October 5, 2026