
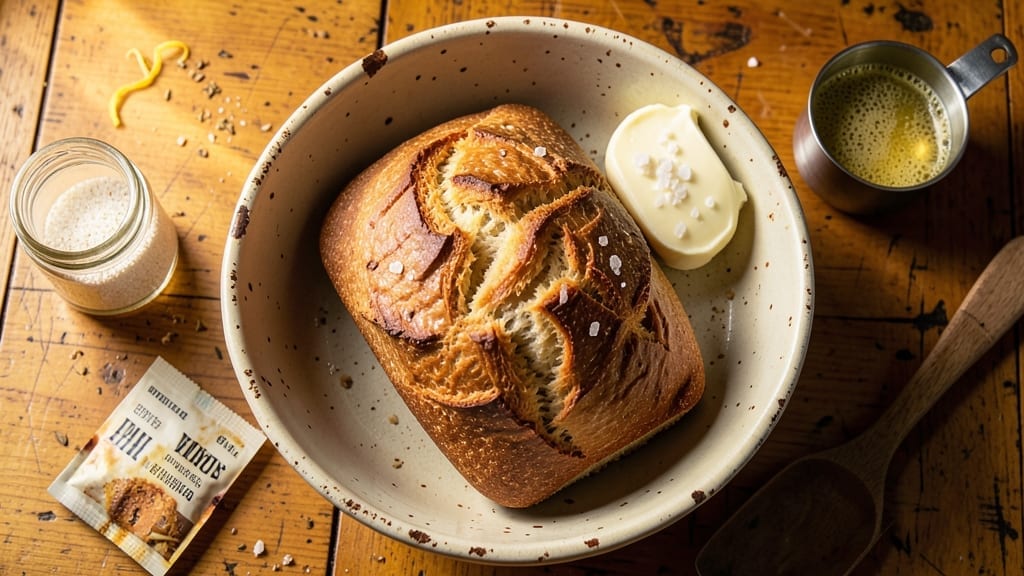
This 1950s homemade bread recipe brings back the golden crust and rustic charm of mid-century kitchens, where flour, yeast, and patience created something magical. The secret lies in slow fermentation—letting the dough rise overnight for that signature tender crumb and crisp exterior that defined American home baking.
I’ve recreated this method exactly as it was taught in vintage cookbooks, with just four simple ingredients and a little elbow grease.
The beauty of this recipe is its foolproof simplicity—no fancy equipment, just a bowl, a wooden spoon, and a warm oven. The dough develops deep flavor as it ferments overnight, and the high-heat bake creates that perfect golden crust we all crave.
It’s the kind of bread that makes toast taste like a memory, with a texture that’s both sturdy and delicate enough to hold jam without tearing.
What you’ll end up with is a loaf that smells like nostalgia—warm, buttery, and slightly sweet from the slow rise. It’s perfect for sandwiches, toast, or serving with butter and honey, just like in the 1950s. The best part?
This recipe delivers restaurant-quality results with ingredients you already have in your pantry.
Whether you’re a baking novice or a seasoned home cook, this method ensures success every time. Let’s bring back the art of homemade bread—one knead at a time.
Ingredients for 1950s bread
Four simple ingredients transform into nostalgia—warm, golden, and crisp just like 1950s homemade bread.
| Ingredient | Amount | Notes |
|---|---|---|
| All-Purpose Flour 🌾 | 4 cups | Unbleached, high-protein preferred |
| Active Dry Yeast 🍞 | 1 package | 1 packet (2.25 tsp) or 2 tsp |
| Granulated Sugar 🍚 | 1 tbsp | For yeast activation |
| Salt 🧂 | 1 ½ tsp | Diamond Crystal preferred |
| Warm Water 💧 | 1 ½ cups | 110°F for yeast activation |
| Unsalted Butter 🧈 | ¼ cup | Cold, cubed for mixing |
| Large Egg 🥚 | 1 whole | For egg wash |
| Cornmeal 🌽 | ½ cup | For dusting loaf pan |
The flour is everything here. King Arthur or Gold Medal are my go-tos—they’ve got that perfect balance of protein for structure and tenderness. If you’re using store-brand flour, check the protein content: 11-12% is ideal. The yeast? Fresh is best—test it by dropping a pinch in warm water with sugar; it should bubble within 5 minutes. If it doesn’t, toss it. For the butter, Land O’Lakes or Plugrá work perfectly, but any unsalted will do. Keep it cold when mixing—this prevents the dough from getting too soft too fast.
No yeast on hand? Instant yeast works 1:1, but active dry is traditional for this recipe. Short on sugar? Honey or maple syrup at half the amount adds depth, but granulated keeps it classic. The egg wash can be skipped if you’re vegan, but trust me, that golden crust is worth the extra minute. For the loaf pan, 5×9-inch works best—spray it with oil first so the bread doesn’t stick. And if you’re feeling fancy, toss in a sprinkle of coarse sea salt on top before baking for that authentic 50s touch.
This dough is a patient recipe—let it rise overnight in the fridge for that deep, developed flavor. Wrap it tightly in plastic or a damp towel so it doesn’t dry out. The next morning, shape it gently: don’t overwork it, or you’ll lose that tender crumb. Bake at 375°F for 35-40 minutes until it’s golden and sounds hollow when tapped. Cool on a wire rack for at least 1 hour—this is where the magic happens. Slice it thick for that perfect toast, and store leftovers wrapped at room temp for 3 days or freeze for 3 months.
Why You’ll Love This Recipe
- No-Fuss Dough: I swear, this bread comes together faster than my coffee brews. Just mix the yeast, sugar, and warm water—let it bubble for five minutes—then fold in flour and salt. No standing over a mixer, no over-kneading. My hands are clean in 15.
- Golden Crust Magic: That little pinch of sugar in the dough? It caramelizes into a crackly crust so satisfying you’ll want to eat it straight from the pan. Honestly, it’s the kind of bread that makes you pause mid-slice just to admire it.
- Weeknight Workhorse: Serve it warm with butter for breakfast, toast it for sandwiches, or freeze slices for quick toast later. I keep a loaf in the fridge all week—it’s my go-to for everything from grilled cheese to charcuterie boards.
- Pantry Staple Savings: Five ingredients, zero specialty items. This bread is my budget’s best friend—cheaper than store-bought, lasts longer, and tastes like nostalgia. Plus, the yeast and sugar are already in my cupboard. Easy wins.
Step-by-step instructions for 1950s homemade bread
Let’s bring back the golden crust and rustic charm of classic homemade bread.
Activate the Yeast for Perfect Rise
In a small bowl, combine the 1.5 cups warm water (about 110°F) with the 1 tbsp granulated sugar and the 1 package active dry yeast. Stir gently and let sit for 5-10 minutes until frothy. You’ll know it’s ready when bubbles form on the surface and the mixture smells slightly sweet and yeasty.
This activation step is crucial—it wakes up the yeast and ensures your bread rises properly. If it doesn’t bubble after 10 minutes, your yeast might be dead, and you’ll need to start over. Once activated, proceed immediately to avoid overworking the yeast.
Mix the Dough for a Light, Airy Texture
In a large mixing bowl, combine the 4 cups all-purpose flour and 1.5 tsp salt. Make a well in the center and pour in the activated yeast mixture. Add the 0.25 cup cold, cubed unsalted butter and the 1 whole large egg. Using a wooden spoon or dough whisk, mix until a shaggy dough forms.
Once the dough comes together, turn it out onto a lightly floured surface and knead for 8-10 minutes until smooth and elastic. You’ll know it’s ready when it springs back slowly when poked. This kneading develops gluten, giving your bread that classic chewy texture and structure that makes it so satisfying to slice.
Let the Dough Rise for Maximum Flavor
Lightly grease a large bowl with a bit of olive oil or butter, then place the dough inside. Cover with a clean kitchen towel and let rise in a warm place for 1-1.5 hours, or until doubled in size. The dough should feel light and airy when pressed gently with one finger.
Patience is key here—rushing the rise can result in dense bread. If your kitchen isn’t warm enough, place the bowl near a slightly open oven with the light on (not the heat). The warmth helps the dough rise evenly and develop those beautiful air pockets that make homemade bread so irresistible.
Shape and Second Rise for Rustic Appeal
Punch down the risen dough to release air, then shape it into a loaf by folding the edges toward the center. Place it seam-side up in a 9×5-inch loaf pan that’s been lightly dusted with 0.5 cup cornmeal. This gives your bread that classic rustic look and prevents sticking. Let it rise again for 30-45 minutes until it’s just above the pan’s rim.
For extra crusty flavor, brush the top with the beaten egg (save a little for later) and sprinkle with a pinch of salt. The egg wash adds shine and a golden finish, while the salt enhances the bread’s flavor. If you’re feeling adventurous, you can also make a few shallow slashes on top with a sharp knife for a decorative touch.
Bake to Golden Perfection
Preheat your oven to 375°F. Bake the bread for 30-35 minutes until it’s golden brown and sounds hollow when tapped on the bottom. The internal temperature should reach 190-200°F—this ensures it’s fully cooked without drying out.
Once done, remove the bread from the pan and let it cool on a wire rack for at least 15 minutes before slicing. This resting period allows the steam to escape, preventing a gummy texture. The result? A crust that’s crisp and golden, with a soft, airy interior that’s perfect for toast, sandwiches, or just enjoying with butter straight from the oven.
Pro Tips For Making 1950s Bread
- Test Yeast First: Skip the guesswork—drop that yeast in warm water with a pinch of sugar and wait 5-10 minutes for bubbles. If nothing happens, your yeast is dead, and starting over saves you from a flat loaf later. (Yes, I’ve learned this the hard way.)
- Mix Water to 110°F: Too hot and you kill the yeast; too cold and it won’t activate. Use a thermometer—110°F is the sweet spot for this recipe. I used to eyeball it and end up with dough that took forever to rise. Not worth the hassle.
- Knead Until Silky: Stop when the dough springs back slowly and looks smooth, not sticky. Over-kneading makes bread tough, but under-kneading leaves it dense. My grandmother called this “the windowpane test”—hold it up to light, and if it’s translucent, you’re good.
- Shape Loaves Tight: Roll the dough into a tight log, tucking the ends under. This keeps the shape intact while baking and prevents sad, collapsed loaves. I used to slap it into the pan half-heartedly—now I take 2 minutes to shape it right. Makes a real difference.
Serving suggestions for 1950s bread
Classic Toast Pairings
Nothing beats this bread as toast—slather it with unsalted butter and toast until golden. For a 1950s touch, try grape jelly or strawberry jam—the sweetness pairs perfectly with the bread’s subtle buttery richness. I love adding a sprinkle of flaky sea salt on top for contrast. 🥖
For a heartier option, spread with cream cheese and top with smoked salmon or avocado slices. The bread’s sturdy structure holds up beautifully to these toppings. Keep it simple with honey drizzled warm for a nostalgic breakfast treat.
Sandwich Perfection
This bread is ideal for grilled cheese sandwiches—its thick slices hold up to sharp cheddar or Gruyère when melted. For a 1950s diner vibe, add tomato slices and a dash of black pepper. The crust stays crisp while the inside melts into gooey perfection. 🧀
For cold cuts, try turkey and cranberry or ham and Swiss—the bread’s neutral flavor lets the fillings shine. Toast the slices lightly first to enhance the sandwich’s texture and flavor.
Butter and Honey
Serve warm slices with softened butter and a drizzle of local honey for a simple, satisfying treat. The bread’s golden crust soaks up the honey beautifully, creating a sweet-savory balance. This was a staple in 1950s households—easy, nostalgic, and delicious. 🍯
Soup Companion
Pair this bread with creamy soups like tomato basil or chicken noodle—its sturdy slices hold up to dipping without falling apart. The bread’s slight sweetness complements the acidity of tomato soup perfectly. For a heartier option, serve with French onion soup and a sprinkle of Parmesan.
Breakfast Appeal
Use thick slices for French toast—the bread’s dense texture soaks up the custard without getting mushy. Top with powdered sugar and maple syrup for a retro breakfast. For a savory twist, try breakfast sandwiches with scrambled eggs and bacon. The bread’s crust stays crisp even when reheated. 🍳
Nutrition facts
Frequently asked questions
Why does this recipe use a slow overnight rise?
The overnight rise in the fridge is key to authentic 1950s bread—it develops deep flavor and a tender crumb. The slow fermentation breaks down gluten and sugars, creating that signature taste and texture. Plus, it’s perfect for busy mornings—just wake up to ready-to-bake dough!
Can I make this bread without a stand mixer?
This recipe was designed for simplicity—just use a wooden spoon and your hands. Knead the dough for 8-10 minutes on a lightly floured surface until smooth. The traditional method actually creates better gluten development for that classic chewy texture.
What if my dough doesn’t rise properly?
Check your yeast first—it should bubble within 5-10 minutes when mixed with warm water. If your kitchen is cold, try placing the dough near a slightly open oven with the light on (not heat). For extra insurance, let the dough rise at room temperature first for 1 hour, then move it to the fridge for the overnight rise.
How do I store this bread to keep it fresh?
Wrap cooled loaves tightly in plastic wrap or a clean kitchen towel to prevent drying. Store at room temperature for 3 days, or freeze slices for up to 3 months. For reheating, wrap slices in foil and warm in a 350°F oven for 5-10 minutes to restore that fresh-baked taste.
Can I add seeds or nuts to this recipe?
While traditional 1950s recipes kept it simple, you can absolutely add 1-2 tablespoons of seeds (like sesame or poppy) or chopped nuts to the dough. Just fold them in gently after kneading to avoid overworking the dough. Start with small amounts—too many can make the bread dense.

- 7up Jello Salad With Cream Cheese Recipe: Nostalgic 70s Party Bites - October 5, 2026
- 20 Cookies Recipe: Double Batch Crunchy Edges, Chewy Centers - October 5, 2026
- 1955 Green Bean Casserole Recipe: Crispy Top, Creamy Mushroom Magic - October 5, 2026