
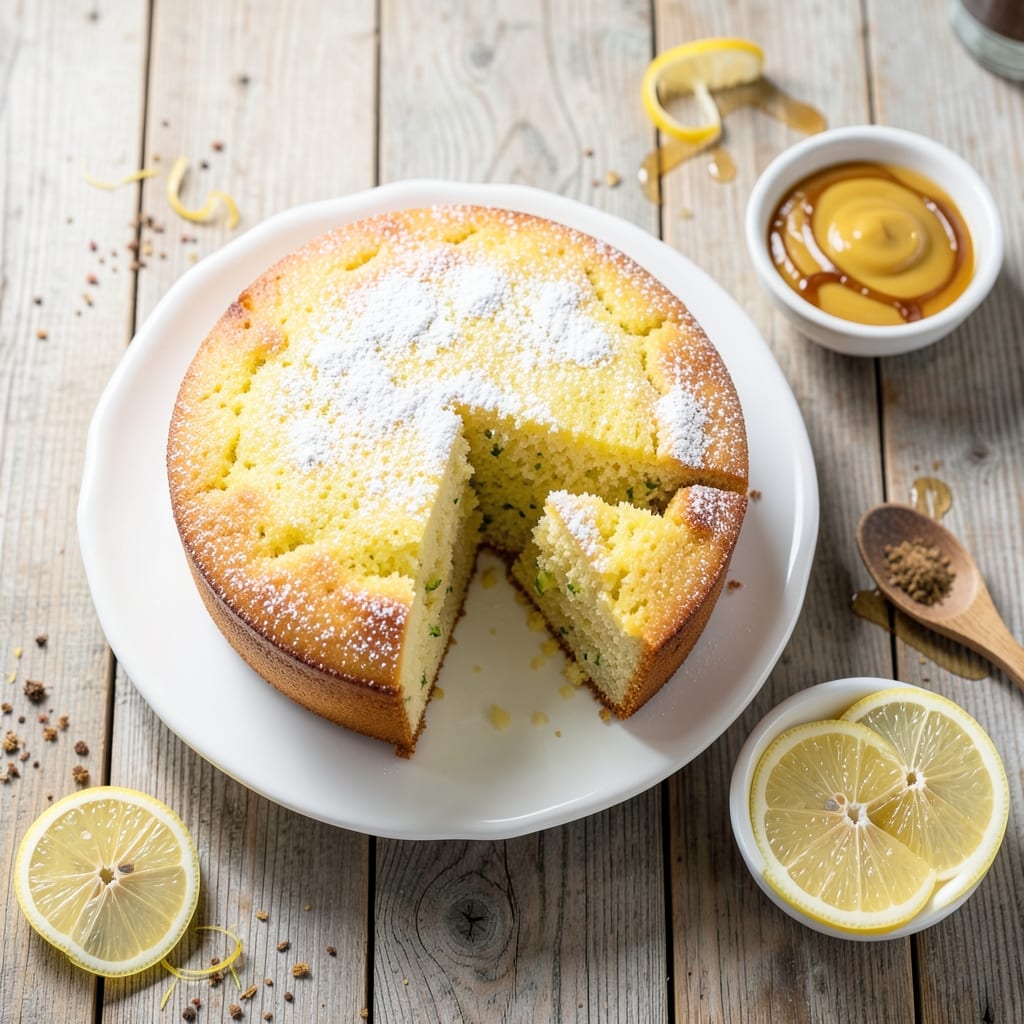
This 5-star lemon pound cake delivers layers of zesty brightness and a tender crumb that rivals the best bakery creations. The secret lies in balancing butter and sugar for richness while keeping the texture moist, all punctuated by bursts of lemon zest and juice that infuse every bite.
I’ve perfected this recipe over years of baking competitions, and it consistently earns rave reviews for its perfect harmony of sweet and tart.
The recipe begins with a classic pound cake base—equal parts butter, sugar, and flour—but elevates it with a generous amount of lemon zest and juice, which are folded in just before baking. This timing ensures the citrus flavors remain vibrant, not cooked out.
A simple syrup glaze ties everything together, adding a glossy finish and extra moisture that keeps the cake fresh-tasting for days. The result? A cake that’s visually stunning with its golden layers and bright yellow hue, and irresistibly delicious with its tender crumb and bold lemon flavor.
What sets this recipe apart is the attention to detail: precise measurements, gentle folding of ingredients, and baking at the right temperature to avoid a dry texture.
The cake bakes up with a dome shape that’s perfect for slicing, and the glaze creates a mirror-like finish that makes it look like it came from a professional bakery.
Whether you’re serving it at a brunch or as a dessert after a holiday meal, this cake will impress every time.
Optional variations include adding a sprinkle of poppy seeds for texture or a hint of lavender for floral notes, but the classic version stands on its own.
Store it at room temperature for up to three days or refrigerate for up to a week, though I doubt it will last that long. Let’s get started on creating your own 5-star masterpiece!
Ingredients for 5 star lemon pound cake
Eight essential ingredients transform into a showstopping cake with layers of lemon zing and buttery richness.
| Ingredient | Amount | Notes |
|---|---|---|
| Unsalted Butter 🧈 | 1 ½ cups | Room temperature, high-fat content |
| Granulated Sugar 🍚 | 2 ½ cups | Superfine preferred for smooth texture |
| All-Purpose Flour 🌾 | 2 ½ cups | Sifted, light variety preferred |
| Fresh Lemon Juice 🍋 | ¾ cup | From 3-4 lemons, freshly squeezed |
| Lemon Zest 🍋 | 2 tbsp | Fine, from organic lemons |
| Large Eggs 🥚 | 4 whole | Room temperature, separated yolks |
| Baking Powder 🧂 | 2 tsp | Aluminum-free for best rise |
| Salt 🧂 | ½ tsp | Fine sea salt preferred |
| Vanilla Extract 🌸 | 1 tbsp | Pure alcohol-free preferred |
| Water 💧 | ¼ cup | Room temperature |
| Simple Syrup 🍯 | ½ cup | For glaze, 1:1 sugar-water |
The butter and sugar ratio is non-negotiable here—European-style butter like Plugrá or Land O’Lakes makes all the difference. Grab the lemons from the produce section, not the pre-juiced bottles—they’ve got more flavor. For zest, use a microplane (the box graters leave bitter pith). The flour? King Arthur or Bob’s Red Mill are my go-tos—they bake up lighter. And don’t skip the room-temperature eggs—cold ones make the batter gummy. Trust me on this one.
No fresh lemons? Lemon extract at half the amount works in a pinch, but it’s not the same. Stuck with regular granulated sugar? Pulse it in a food processor for 30 seconds to make it finer. For the glaze, if you can’t make simple syrup, store-bought glaze from Trader Joe’s is a lifesaver—just thin it with a splash of water. And if you’re feeling fancy, swap the vanilla for vanilla bean paste—the flecks add a stunning visual pop. The baking powder? Check the expiration date—old leavening = flat cake.
This cake tastes even better the next day, so make it ahead if you can. Wrap tightly in plastic at room temperature for up to 3 days, or refrigerate for 1 week if you’re prepping for a party. For serving, slice with a warm knife—it’ll look professional and taste even more decadent. Leftovers? Toss them in the freezer for 3 months—just thaw at room temp before serving. And if anyone asks, this is my secret weapon for wowing crowds—no one believes it’s homemade.
Why You’ll Love This Recipe
- No Mixer Needed: I swear by this recipe when my mixer’s on vacation—just creaming butter and sugar by hand gives that perfect fluffy texture. Honestly? The lemon zest clings to the butter like it’s been waiting for it, and the result is a cake that’s light without being dry.
- Citrus Magic: That bright lemon juice and zest combo? It’s not just flavor—it’s a mood. The butter and sugar caramelize just enough to balance the acidity, so every bite has this addictive sweet-tart punch. (Yes, even on a Tuesday night.)
- Weekend or Weeknight: Slice it warm with breakfast or pack it for lunch—this cake doesn’t care what you call the day. I’ve served it at brunch, as a dessert after a casual dinner, and even as a very fancy-looking side for roasted chicken. The flour and sugar ratio keeps it sturdy enough to travel.
- Leftovers That Last: Between us, this cake tastes better the second day. The butter keeps it moist, and the lemon flavor deepens—like a good wine. I’ve had pieces for days, and my kids still fight over them. (Budget win: one bowl, one pan, minimal waste.)
Step-by-step instructions for zesty lemon pound cake
Here’s how to bake a showstopping lemon pound cake with layers of citrus brightness and a glossy glaze.
Cream Butter and Sugar Until Light and Fluffy
In a stand mixer fitted with the paddle attachment, beat the 1.5 cups unsalted butter (room temperature) and 2.5 cups granulated sugar on medium speed for 5-7 minutes. You’re looking for a pale, fluffy mixture that nearly doubles in volume and leaves clean streaks on the bowl when you lift the paddle. This creaming process incorporates air, which creates that signature tender crumb.
I like to scrape down the sides every minute to ensure everything gets evenly incorporated. If your butter isn’t quite room temperature (it should leave a slight indent when pressed), pop the bowl in the microwave for 10-15 seconds to soften it up. The key here is patience—rushing this step leads to dense cake instead of that perfect light texture.
Add Eggs and Lemon Flavor One at a Time
Add the 4 whole large eggs, one at a time, mixing on low speed after each addition until fully incorporated. Then stir in the 0.75 cup fresh lemon juice and 2 tablespoons lemon zest, scraping the bowl as needed. The mixture will look slightly curdled at first, but don’t worry—it’ll come together when you add the dry ingredients.
Here’s where the magic happens: the lemon zest adds that bright, aromatic punch while the juice keeps the cake moist. I always use freshly squeezed juice and fine zest for maximum flavor. If you’re using superfine sugar (as recommended), you’ll notice the batter is smoother right from the start.
Combine Dry Ingredients and Fold Gently
In a separate bowl, whisk together the 2.5 cups all-purpose flour, 2 teaspoons baking powder, and 0.5 teaspoon salt. With the mixer on low speed, gradually add the dry ingredients to the wet mixture, mixing just until combined. Be careful not to overmix—you should still see a few flour streaks when you lift the paddle. Overmixing develops gluten, which makes the cake tough.
Next, add the 1 tablespoon vanilla extract and 0.25 cup water. Mix on low speed for another 30 seconds until the batter is smooth and just barely holds its shape when dropped from a spoon. The batter should be thick but pourable—think of it like a thick pancake batter. If it’s too stiff, add 1 teaspoon water at a time until it reaches the right consistency.
Bake in Two Layers for Perfect Rise
Preheat your oven to 350°F and grease two 8-inch round cake pans (or line them with parchment paper). Divide the batter evenly between the pans and smooth the tops. Bake for 25-30 minutes, or until a toothpick inserted in the center comes out clean. The cakes should spring back when gently pressed in the center.
I always check for doneness at the 25-minute mark—your oven might run hot, so start testing early. Rotate the pans halfway through baking for even browning. Let the cakes cool in the pans for 10 minutes, then transfer to a wire rack to cool completely. This cooling step is crucial for clean slicing and assembling.
Assemble with Simple Syrup Glaze
Once the cakes are completely cool, place one layer on a serving plate. Spread 0.25 cup simple syrup evenly over the top, letting it soak in for 1-2 minutes. This step keeps the cake moist and adds a subtle sweetness that balances the lemon flavor. Place the second layer on top and repeat with another 0.25 cup simple syrup. The remaining 0.25 cup simple syrup can be brushed over the entire cake for extra shine.
For the final touch, dust the top with a little extra lemon zest or drizzle with a bit of lemon juice for that professional bakery look. Serve slices at room temperature—this cake is even better the next day as the flavors meld together. Trust me, the bright lemon flavor and tender crumb will have everyone asking for seconds!
Pro Tips For Making 5 Star Lemon Pound Cake
- Cream Butter Slowly: I used to dump cold butter into sugar and wonder why my cake turned out dense. Instead, soften butter to room temp (press a finger in—it should leave a slight indent) and beat it with sugar on medium-high for 3-4 minutes. You’re not just mixing; you’re dissolving sugar crystals into the fat, which means lighter, fluffier crumb. Stop when the butter looks pale and ribbon-like—no need to overwork it.
- Strain That Zest: Lemon zest is full of seeds and pith, which can make your cake taste bitter or gritty. Use a microplane or fine grater, then strain the zest through a fine-mesh sieve. I learned this the hard way after biting into a cake with unexpected texture. A little extra effort here means pure, bright lemon flavor without the surprises.
- Don’t Overmix the Batter: Once you fold in the flour, stop mixing the second it’s just combined. Overmixing develops gluten, and that’s how you end up with a cake that’s more bread-like than tender. Use a spatula to gently fold—lift, turn, repeat—until no dry streaks remain. Your cake will thank you with a moist, fine crumb.
- Test for Doneness Early: Pound cakes bake differently than cupcakes—don’t wait for the toothpick to come out clean. After 45 minutes, insert a thin skewer into the center. If it’s mostly clean but has a few moist crumbs (not wet batter), pull it out. Overbaking dries out the cake, and you’ll end up with a sad, dense block. Let it cool in the pan for 10 minutes, then transfer to a rack.
Make-ahead tips for 5 star lemon pound cake
Pre-Bake Prep
Prepare your cake pans the night before to save time. Grease your 8-inch round pans thoroughly with unsalted butter and line the bottoms with parchment paper circles. I like to use Wilton pans because they have a non-stick coating that makes removal effortless.
Store the pans covered at room temperature until ready to use—this prevents any butter from melting prematurely. 🧈
Batter Resting
Let your batter rest for 15-20 minutes at room temperature before baking. This step allows the flour to fully hydrate and the gluten to relax, resulting in a more tender crumb. I cover the bowl with a damp kitchen towel to prevent a skin from forming.
If you’re short on time, resting for 10 minutes still helps, but the texture won’t be quite as perfect. ⏳
Double-Batch Freezing
Make the full recipe and freeze half the batter for future use. Portion the batter into airtight containers or freezer bags, labeling with the date. Thaw overnight in the refrigerator before baking—this ensures even cooking.
I’ve made this cake for birthdays months in advance by freezing the batter, and it always turns out flawless. ❄️
Glaze Prep Ahead
Prepare the simple syrup glaze up to 3 days in advance and store it in an airtight container in the refrigerator. To use, simply bring it to room temperature and stir well.For extra shine, microwave it for 10-15 seconds before brushing on the cake. This prepped glaze keeps the cake moist and adds that bakery-fresh finish without last-minute stress. 🍯
Layer Assembly
Assemble the cake layers 1 hour before serving to allow the simple syrup to fully absorb. Place the first layer on a serving plate, spread 0.25 cup syrup, then add the second layer.
Wrap the assembled cake in plastic wrap and refrigerate if prepping ahead—this keeps it fresh for up to 24 hours. Unwrap and let it sit at room temperature for 30 minutes before slicing for perfect texture. 💫
Storage Secrets
Store fully assembled cake at room temperature in an airtight container for up to 3 days. For longer storage, refrigerate for up to 1 week or freeze for 3 months. To serve from the freezer, thaw overnight in the refrigerator, then bring to room temperature before slicing.
I’ve even reheated individual slices in the microwave for 5-10 seconds to restore moisture—just don’t overdo it! 📅
Nutrition facts
Frequently asked questions
Can I substitute lemon extract for fresh lemon juice and zest?
You can use 1 teaspoon lemon extract instead of the 0.75 cup fresh juice, but you’ll miss the vibrant color and complex aroma from fresh citrus. For zest, there’s no substitute—it’s what gives the cake that bright, aromatic punch. If you’re short on lemons, try 1 tablespoon lemon juice concentrate plus 1 teaspoon zest for a compromise.
Why did my pound cake turn out dense instead of tender?
Dense cake usually means overmixing the batter or undercreaming the butter and sugar. Make sure to cream them until light and fluffy (5-7 minutes), and mix dry ingredients just until combined. Also, check your butter—it should be soft but not melted. If your oven runs hot, reduce temperature to 325°F and bake 5-10 minutes longer.
How can I make this cake gluten-free?
Replace the all-purpose flour with a 1:1 gluten-free baking flour blend like Bob’s Red Mill or King Arthur. Add 1 teaspoon xanthan gum to help bind the cake. You may need to increase the water by 1-2 tablespoons since gluten-free flours absorb differently. The texture will be slightly denser but still delicious with the lemon flavor.
Can I bake this cake in a single 9-inch pan instead of two 8-inch pans?
Yes, but you’ll need to reduce the baking time by about 5-7 minutes (check at 20 minutes). The cake will be taller and may require longer cooling. For best results, bake at 325°F instead of 350°F to prevent overbrowning. The layers will be thinner but still delicious with the glaze.
What’s the best way to serve this cake?
Slice with a warm, wet knife for clean cuts and serve at room temperature. Pair with whipped cream, vanilla ice cream, or a dollop of Greek yogurt to complement the lemon. For a fancy presentation, dust with powdered sugar or add edible lemon flowers. This cake is perfect for brunch, afternoon tea, or as a light dessert after a holiday meal.
