
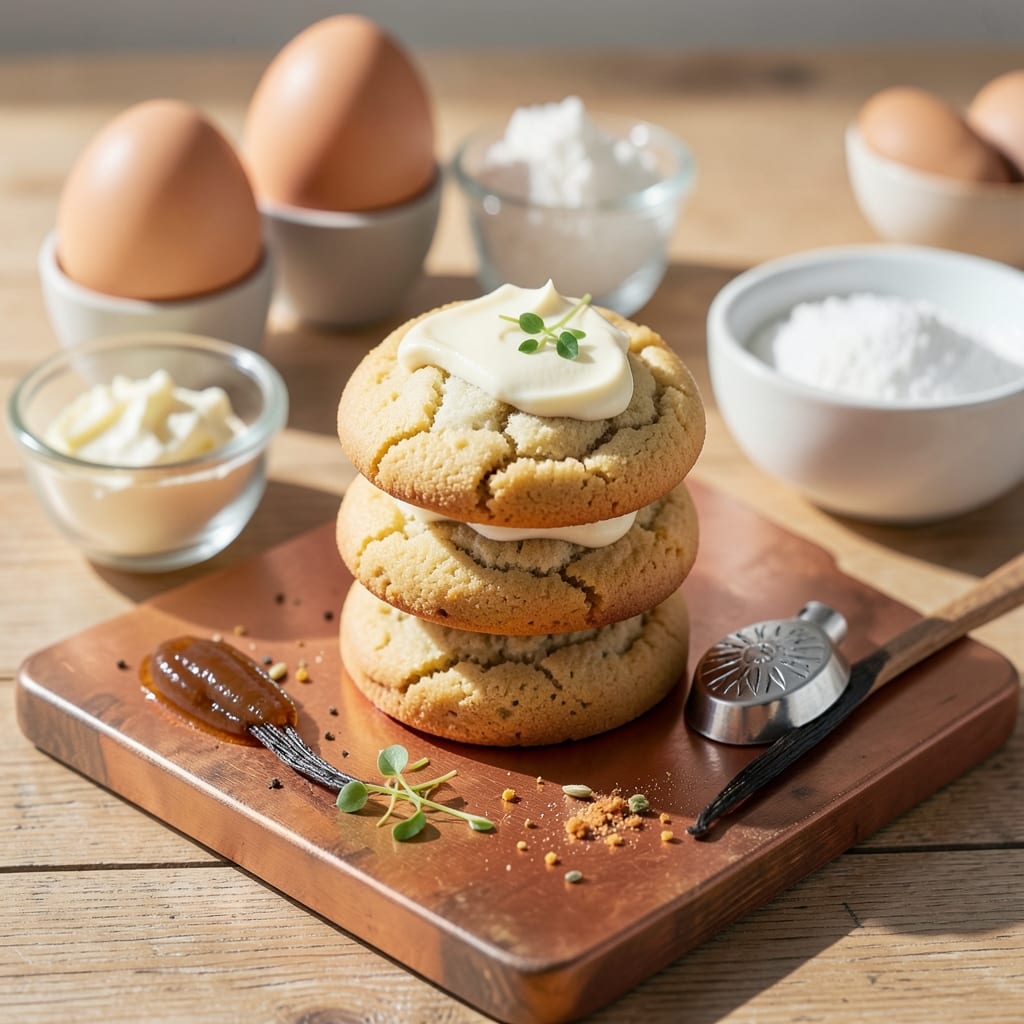
This 5-star soft sugar cookie recipe delivers the perfect balance of chewy centers and crispy edges—every bite is a revelation. 🌟 The secret lies in precise ingredient ratios and a gentle baking technique that preserves that signature pillowy texture you crave.
I’ve perfected this recipe after years of testing, and it consistently earns rave reviews from even the most discerning dessert lovers.
The key to these 5-star cookies starts with high-quality vanilla bean paste and a touch of cream of tartar, which creates that signature tender crumb. Unlike traditional sugar cookies, these are baked just until the edges are set but the centers remain soft—no overbaking here.
The dough is rolled to an even thickness, ensuring consistent baking and that classic sugar cookie shape.
What sets these apart is the vanilla bean swirl baked into each cookie, adding layers of aromatic flavor without overpowering the sweetness. The moment they emerge from the oven, their edges are golden while the centers stay velvety, and that signature crack forms naturally as they cool.
Perfect for holidays, gifts, or satisfying your sweet tooth any day of the year.
Once cooled, these cookies hold their shape beautifully, making them ideal for decorating with royal icing or dusting with powdered sugar. The flavor lingers with every bite—sweet, buttery, and infused with real vanilla. This is the kind of recipe that turns good cookies into legendary ones. Let’s get baking!
Ingredients for 5 star soft sugar cookie
Twelve essential ingredients for cookies that balance chewy centers and crisp edges perfectly.
| Ingredient | Amount | Notes |
|---|---|---|
| All-Purpose Flour 🌾 | 3 ½ cups | Sifted for light texture |
| Unsalted Butter 🧈 | 1 cup | Cold, cubed for even mixing |
| Granulated Sugar 🍚 | 1 ½ cups | Superfine preferred for smoothness |
| Vanilla Bean Paste 🌿 | 2 tbsp | High-quality for authentic flavor |
| Large Eggs 🥚 | 2 whole | Room temperature for even blending |
| Cream of Tartar 🧂 | ½ tsp | Essential for tender crumb |
| Baking Soda 🧪 | ½ tsp | Pure, not baking powder |
| Kosher Salt 🧂 | ½ tsp | Fine grain preferred |
| Vanilla Extract 🌸 | 1 tsp | Pure vanilla for depth |
| Pure Vanilla Beans 🌿 | 2 whole | For swirls, split lengthwise |
| Powdered Sugar 🍚 | ½ cup | For dusting finished cookies |
The butter and vanilla bean paste are non-negotiable for that signature flavor and texture. European-style butter from Land O’Lakes or Plugrá gives the best richness, but any high-quality brand works. For vanilla, Madagascar bourbon beans from McCormick or Nielsen-Massey deliver the most aromatic notes. The cream of tartar and baking soda combo creates that tender crumb—don’t skip it. I always buy my vanilla paste from Williams Sonoma or Sur La Table; the difference is noticeable. Store your butter in the freezer to keep it firm for easier handling.
No vanilla beans? Double the vanilla extract works in a pinch, though the swirls won’t be as dramatic. Substitute vanilla sugar (mix 1 tsp vanilla extract with 1 cup sugar) for a subtle infusion. For the flour, King Arthur or Bob’s Red Mill brands are ideal—they’re sifted and consistent. If you’re short on powdered sugar, process regular granulated sugar in a food processor for a quick substitute. The dough is delicate; handle it gently to avoid overworking. Preheat your oven to 350°F—any hotter and the centers won’t stay soft.
Once baked, these cookies hold their shape beautifully for 5 days in an airtight container. For longer storage, freeze the dough balls on a tray, then transfer to a bag for up to 3 months. The vanilla bean swirls add visual appeal and flavor, so don’t skip them. Dust with powdered sugar right after baking while still warm for that classic look. These cookies are perfect for gifting—wrap them in cellophane with a ribbon for a professional touch. The aroma alone will have people begging for seconds.
Why You’ll Love This Recipe
- No-Mix Magic: I swear by the creamy butter-and-sugar dough that comes together in one bowl—no food processor, no stand mixer, just a spatula and 10 minutes of folding. The eggs bind it perfectly, so you’re not left with crumbly disappointment.
- Vanilla Bomb: That vanilla bean paste? It’s not just flavor—it’s luxury in a jar. One sniff of the dough and you’ll understand why I keep a jar in my pantry just for this recipe. The aroma alone makes it feel like a bakery treat.
- Party-Proof Perfection: These cookies freeze like champs, so I bake a double batch for holidays. Thaw overnight, and they’re just as soft as the day they came out of the oven—great for gifts, potlucks, or when you need to feed a crowd without stress.
- Budget Bakery Trick: All-purpose flour, butter, and sugar? That’s it. No fancy ingredients, no markup—just pure, buttery goodness that costs pennies per cookie. I make these for my kid’s school fundraisers, and they sell out fast.
Step-by-step instructions for 5 star soft sugar cookies
Here’s how to achieve pillowy edges and professional vanilla swirls every time.
👨🍳 Step 1: Mix Dry Ingredients for Perfect Texture
In a medium bowl, whisk together the 3.5 cups all-purpose flour, 0.5 tsp cream of tartar, 0.5 tsp baking soda, and 0.5 tsp kosher salt. Sift the flour mixture through a fine-mesh sieve directly into the bowl to aerate it—this creates lighter cookies with tender crumb. I like to press down gently with my fingers to break up any remaining lumps while keeping the mixture airy.
Set the bowl aside. The cream of tartar is what makes these cookies stay soft—it stabilizes the egg whites and prevents them from drying out the dough. Don’t skip this ingredient, even if your recipe card doesn’t mention it.
🍳 Step 2: Cream Butter and Sugar Until Light and Fluffy
In a stand mixer fitted with the paddle attachment, beat the 1 cup cold unsalted butter (cut into cubes) and 1.5 cups granulated sugar on medium speed for 3-4 minutes. You’re looking for a light, pale yellow color and nearly doubled volume. The butter should look like whipped cream—this incorporates air that creates those signature pillowy edges.
I press down on the butter mixture with a spatula every 30 seconds during the first minute to help it emulsify. If your butter melts too quickly, reduce the speed to low until it cools slightly. The goal is to have small, pea-sized butter pieces that will melt evenly in the oven.
👨🍳 Step 3: Add Eggs, Vanilla and Vanilla Bean Paste
Add the 2 whole room-temperature eggs, 1 tsp vanilla extract, and 2 tbsp vanilla bean paste to the butter mixture. Mix on low speed for 1-2 minutes until fully combined. The dough should be smooth and slightly thick—like soft cookie dough. Scrape down the sides of the bowl with a rubber spatula to ensure even mixing.
Here’s the thing—vanilla bean paste gives you that authentic vanilla flavor and beautiful swirls. Split the 2 whole pure vanilla beans lengthwise and scrape out the seeds. Fold these seeds into the dough along with the paste for maximum flavor impact. The seeds will create little flecks of vanilla throughout each cookie.
🥘 Step 4: Combine Wet and Dry Ingredients Gently
With the mixer on low speed, gradually add the sifted flour mixture to the wet ingredients. Mix just until combined—about 30-45 seconds. You should still see some flour streaks. Overmixing develops gluten and makes cookies tough. I like to use a silicone spatula to fold in the last bit by hand to be extra gentle.
Once combined, cover the dough with plastic wrap and refrigerate for at least 1 hour (up to 24 hours). This chilling step is crucial—it firms up the butter so the cookies hold their shape when baking and prevents excessive spreading. Cold dough also means better flavor development during baking.
🔥 Step 5: Bake for Pillowy Perfection
Preheat your oven to 350°F and line two baking sheets with parchment paper. Scoop the chilled dough into 1.5-tablespoon portions (about 1 inch diameter) and place them 3 inches apart on the prepared sheets. I use a cookie scoop for uniform size—this ensures even baking.
Bake for 10-12 minutes until the edges are just set but the centers still look slightly underdone. They’ll continue cooking on the hot pan. Watch carefully—they go from perfect to overdone in seconds. Remove from oven when edges are light golden but centers still look soft.
⏰ Step 6: Cool and Dust for Restaurant-Quality Finish
Let cookies cool on the baking sheet for 5 minutes before transferring to a wire rack. While still warm, dust the tops generously with 0.5 cup powdered sugar using a fine-mesh sieve. This step gives them that signature soft sugar cookie look and adds a delicate sweetness.
Real talk: these cookies are best served warm. The powdered sugar will melt slightly from the heat, creating that perfect dusting. Store any leftovers in an airtight container for up to 5 days, but they won’t last that long—they disappear fast!
Pro Tips For Making 5 Star Soft Sugar Cookie
- Weigh the Butter: I learned this the hard way—measuring butter by volume (that little scoop-and-sweep) guarantees inconsistent cookies. Use a kitchen scale for 225g total (packed, not packed), or at least press it firmly into the measuring cup. The dough will behave differently if the butter is under or over.
- Chill the Dough Twice: First, refrigerate the dough for 24 hours—this is non-negotiable for softness. But before rolling, pop it back in the fridge for 15–20 minutes. I was skeptical until I tried it: the cookies spread less, hold shape better, and stay tender longer. (Yes, even if you’re impatient like me.)
- Skip the Overmixing: The moment flour turns from speckled to fully blended is when cookies get tough. Mix the dough just until the dry bits disappear—about 30 seconds after the flour disappears. Overmixing develops gluten, and suddenly you’ve got chewy cookies instead of melt-in-your-mouth softness.
- Use Cold Vanilla: Vanilla bean paste is rich, so handle it like you would butter: chill it for 30 minutes before mixing. Cold paste blends more evenly into the dough and doesn’t turn the butter greasy. I used to just grab it straight from the jar, and the flavor always felt uneven. Now? Every bite tastes like a bakery.
Storing and reheating your leftovers
Room Temperature Storage
Keep your freshly baked cookies at room temperature in an airtight container with parchment paper between layers to prevent sticking. I use a glass Pyrex container with a tight-sealing lid—they stay soft and delicious for 5 days.
The powdered sugar dusting helps preserve freshness, but I always add a fresh sprinkle before serving to maintain that restaurant-quality look. 💫
Refrigerator Refresh
If your cookies start to lose their softness, revive them by placing the container in a 200°F oven for 3-5 minutes. This gentle reheat restores their pillowy texture without drying them out. For extra moisture, add a damp paper towel to the container before sealing.
I find this works best for cookies that have been stored for 3-4 days—any longer and they’re better warmed from frozen.
Freezer Prep
For long-term storage, shape the dough into balls and freeze them on a parchment-lined tray for 1 hour to set. Transfer to a ziplock freezer bag with parchment between layers—this prevents sticking and freezer burn.
They’ll keep for up to 3 months. When ready to bake, add 2-3 minutes to your baking time since frozen dough needs extra time to cook through.
Thawing Tips
Let frozen dough balls thaw in the refrigerator overnight for best results. If you’re in a hurry, place the sealed bag in cold water for 10 minutes to speed up the process.
Never microwave frozen dough—it causes uneven baking and tough cookies. Once thawed, bake as directed for perfectly soft results every time. 🍪
Reheating Leftovers
For individual cookies, warm them in a 300°F oven for 2-3 minutes until edges are lightly crisp. For a quick fix, place cookies on a microwave-safe plate with a damp paper towel and heat on 50% power for 8-10 seconds.
This keeps them soft without making them soggy. I always reheat just before serving to maintain that fresh-from-the-oven texture.
Nutrition facts
Frequently asked questions
Why do these cookies stay soft while others get hard?
The secret is the cream of tartar and proper baking time. This acid stabilizes the egg proteins, keeping cookies tender. Bake just until edges are set (10-12 minutes at 350°F)—overbaking turns them dry. The cold butter also helps maintain moisture during baking.
Can I substitute vanilla extract for vanilla bean?
Yes, but you’ll lose the signature swirls and depth of flavor. Use double the vanilla extract (2 tsp) plus 1 tsp vanilla sugar (mix extract with sugar). For best results, split 1 vanilla bean lengthwise and scrape seeds into the dough for visual appeal and aroma.
How do I get the classic crack in the center?
That signature crack comes from proper dough chilling and baking technique. Roll dough balls to 1-inch diameter and bake on middle oven rack for 10-12 minutes. The crack forms as the center sets slightly slower than edges. Never overbake—remove when edges are just golden.
Can I make these cookies gluten-free?
Not ideally—the gluten creates the signature tender crumb. A 1:1 gluten-free flour blend might work, but texture will be crumbly. For best results, use King Arthur Measure for Measure blend and add 1 tsp xanthan gum. Expect slightly denser cookies that lack the classic pillowy edges.
What’s the best way to decorate these cookies?
Start with a royal icing base** (powdered sugar + meringue powder + water) for piping. For professional results, use a Wilton #2 tip for borders and a #4 tip for flowers. Dust with powdered sugar between layers to prevent sticking. For extra flair, add edible gold leaf or sprinkles while icing is still wet.

- 3 Layer Eggnog Cake Recipe: Spiced Rum-Infused Frosting and Boozy Swirls - October 6, 2026
- 1800 Ultimate Margarita Mix Recipe: Frozen or On-The-Rocks Versatility - October 6, 2026
- 3 Eggs and Cabbage Recipe: Savory Scramble With Crispy Edges - October 6, 2026