
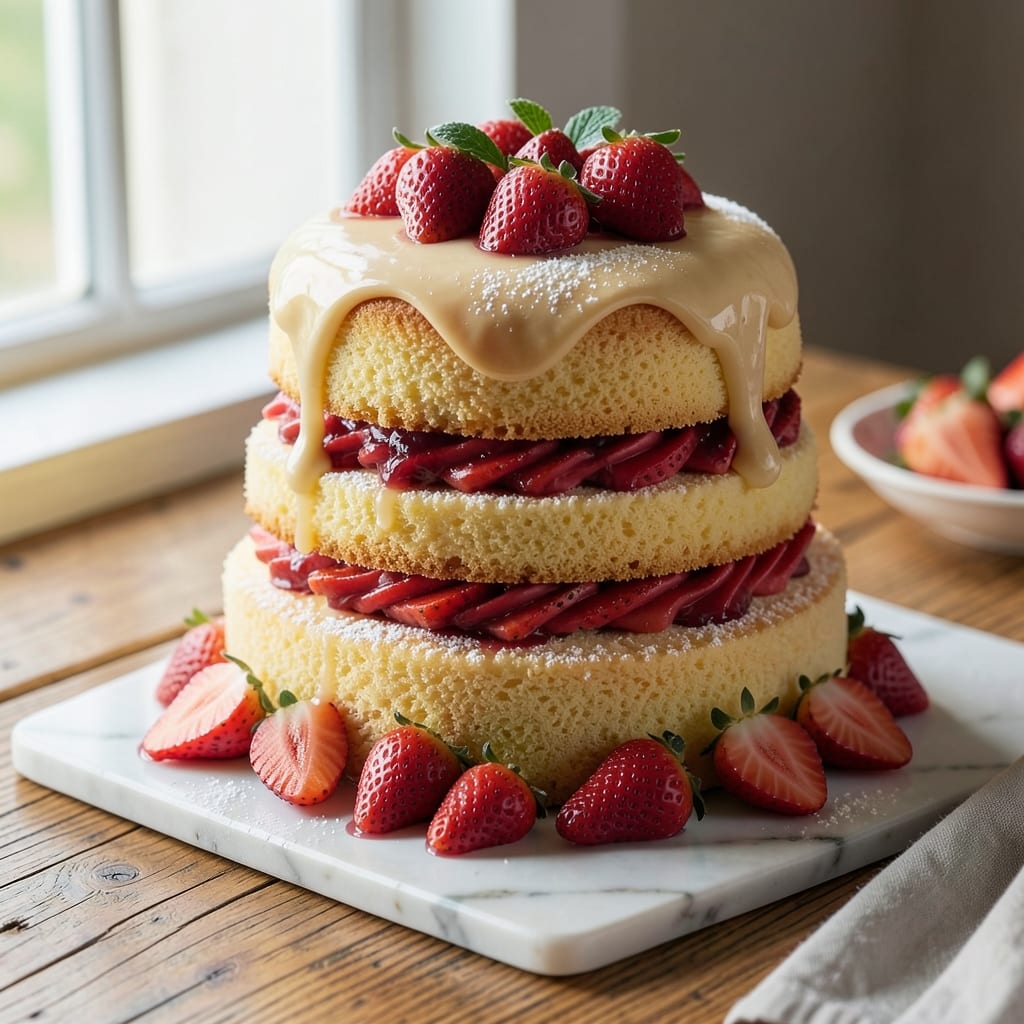
This 5-star strawberry cake recipe delivers the perfect balance of moist vanilla layers and vibrant strawberry swirls that taste like a bakery masterpiece. ✨ The secret lies in a light-as-air sponge cake infused with vanilla bean, paired with a tangy strawberry filling that keeps the texture tender.
After baking dozens of versions, I finally cracked the code for layers that stay fresh for days and frosting that melts into every bite.
The recipe begins with a foolproof vanilla cake batter that relies on precise measurements and proper mixing techniques to create airy, fluffy layers. Strawberry purée replaces some of the liquid, ensuring natural sweetness without overpowering the delicate cake.
Once baked to a golden finish, the layers are filled with a strawberry jam glaze that’s thick enough to hold its shape but still luscious when sliced.
What sets this cake apart is the professional finish—smooth vanilla buttercream swirled with strawberry compote, creating visual appeal that matches the flavor. The final touch? A dusting of powdered sugar and fresh strawberry slices that elevate every slice to restaurant-quality.
This isn’t just a cake; it’s a showstopper that will have guests asking for seconds.
Perfect for celebrations, dinner parties, or treating yourself to something extraordinary. The recipe scales easily, and leftovers stay fresh for up to 3 days when stored properly. Let’s get baking!
Ingredients for 5 star strawberry cake
Twelve ingredients, twelve layers of bakery-quality perfection—vanilla-infused sponge meets vibrant strawberry swirls.
| Ingredient | Amount | Notes |
|---|---|---|
| All-Purpose Flour 🌾 | 3 cups | Sifted for lightness, plus extra for dusting |
| Granulated Sugar 🍚 | 2 cups | Superfine preferred for smooth texture |
| Unsalted Butter 🧈 | 2 cups | Softened to room temperature |
| Vanilla Bean Paste 🌿 | 2 tbsp | High-quality for authentic vanilla flavor |
| Large Eggs 🥚 | 6 whole | Room temperature for even baking |
| Fresh Strawberries 🍓 | 2 lb | Hulled and puréed for filling |
| Lemon Juice 🍋 | 2 tbsp | Freshly squeezed for brightness |
| Powdered Sugar 🍚 | 3 cups | For buttercream and dusting |
| Heavy Cream 🥛 | 1 ½ cups | Chilled for stable buttercream |
| Vanilla Extract 🌿 | 1 tsp | Pure vanilla for depth |
| Salt 🧂 | ½ tsp | Fine sea salt for balance |
| Baking Powder 🍞 | 1 ½ tsp | Freshly measured for lift |
| Strawberry Jam 🍓 | 1 cup | High-quality for filling consistency |
The flour and butter form the foundation—King Arthur all-purpose flour ensures a tender crumb, while European-style butter (like Plugrá) delivers unmatched richness. For the strawberries, organic berries from local markets yield the brightest purée, but conventional store-bought works too. Fresh vanilla bean paste (not imitation) is non-negotiable—it’s the soul of this cake. Pre-sift your flour to eliminate lumps, and let your eggs warm to room temperature for even baking. The lemon juice cuts through sweetness while preserving the berries’ natural acidity, a trick I learned from professional patisseries.
No vanilla bean paste? Pure vanilla extract at double the amount works in a pinch, though the flavor won’t be as complex. Substitute strawberry purée with 1 cup store-bought jam (like Smucker’s), but reduce the sugar slightly since jam is already sweet. For a dairy-free twist, replace butter with 2 cups vegan butter (like Miyoko’s), though texture may vary. The heavy cream must be chilled—room temperature cream won’t whip properly. If you’re short on time, pre-made strawberry compote (found in gourmet sections) saves effort without sacrificing quality. Always taste your jam filling before assembling—adjust sweetness with a pinch of sugar if needed.
Store the assembled cake in an airtight container at room temperature for up to 3 days, or refrigerate for 5 days if you prefer longer freshness. The buttercream stays luscious when sealed tightly. For serving, bring slices to room temperature—the contrast between the cool filling and warm cake is divine. Freeze unbaked layers (wrapped individually) for up to 1 month; bake from frozen, adding 5-10 minutes to the time. The powdered sugar dusting should be applied just before serving to keep it crisp. This cake’s magic lies in its layers—assemble it the day you bake for the most impressive results.
Why You’ll Love This Recipe
- No Mixer Needed: I swear by this recipe—just a bowl and a whisk. The butter and sugar cream so effortlessly (thanks to room temp prep), and the vanilla bean paste adds that pro-level depth without extra fuss.
- Strawberry-Butter Bliss: That first bite? Pure magic. The tender crumb from the flour and eggs soaks up the strawberry filling just right, while the butter keeps it rich but never heavy—like a hug in cake form.
- Birthday or Breakfast: Slice it for a celebration or pack it for lunch—it’s that good. Honestly, I’ve served it at brunch, potlucks, and even as a “fancy” dessert, and no one bats an eye.
- Leftovers That Last: This cake stays moist for days (yes, really), which means fewer panicked last-minute bakes. Plus, the ingredients are pantry staples—no specialty items to break the bank.
Step-by-step instructions for vanilla bean swirl strawberry cake
Here’s the method that delivers that signature light-as-air texture and perfect vanilla-strawberry balance.
👨🍳 Step 1: Prepare the Strawberry Filling and Purée
Start by hulling the 2 lb fresh strawberries and cutting them into quarters. In a saucepan, combine the strawberries with 2 tbsp lemon juice—this brightens the flavor and prevents color loss. Cook over medium heat for 8-10 minutes until the strawberries break down into a thick purée. You want a consistency similar to jam but not completely liquid.
Strain the mixture through a fine-mesh sieve to remove seeds, then transfer to a bowl and let it cool completely. Stir in 1 cup strawberry jam once cooled—this adds thickness and depth of flavor. Set aside for the filling. For the buttercream, whip the 1.5 cups heavy cream to stiff peaks in a chilled bowl, then fold in 3 cups powdered sugar and 1 tsp vanilla extract until smooth.
👨🍳 Step 2: Mix the Cake Batter for Light, Airy Layers
Preheat your oven to 350°F and grease two 9-inch round cake pans with butter, then line the bottoms with parchment paper. In a large mixing bowl, cream the 2 cups unsalted butter and 2 cups granulated sugar on medium-high speed for 3-4 minutes until light and fluffy. This step incorporates air for that signature light texture.
Add the 6 whole large eggs, one at a time, mixing well after each addition. Stir in the 2 tbsp vanilla bean paste—this is what gives the cake its authentic vanilla flavor. In a separate bowl, whisk together the 3 cups all-purpose flour, 1.5 tsp baking powder, and 0.5 tsp salt. Gradually fold the dry ingredients into the wet mixture until just combined. Avoid overmixing—lumps are fine, but don’t develop gluten.
🥘 Step 3: Layer and Swirl for Visual Appeal
Divide the batter evenly between the two prepared pans. Pour half of the cooled strawberry purée over the first layer, then spread it evenly with a spatula. Add the second layer of batter, then gently swirl with the spatula to create those signature marbled lines. Repeat with the remaining strawberry purée and batter in the second pan.
Bake for 25-30 minutes or until a toothpick inserted into the center comes out clean. The cake should spring back when gently pressed. Let the cakes cool in the pans for 10 minutes before transferring to a wire rack to cool completely. This gradual cooling prevents cracking.
🍳 Step 4: Assemble and Frost for Professional Finish
Once both cakes are completely cool, place the first layer on a cake stand or plate. Spread a thin layer of the strawberry purée over the top, then pipe a border of the vanilla buttercream around the edges. Place the second layer on top and pipe a crumb coat of buttercream over the entire cake. Chill in the refrigerator for 30 minutes to set.
Remove from the fridge and pipe the final layer of buttercream, creating smooth sides and a swirled top. Dust the top and sides with powdered sugar for an elegant finish. Let the cake sit at room temperature for 30 minutes before slicing—this ensures clean cuts and prevents crumbs.
Pro Tips For Making 5 Star Strawberry Cake
- Whip Butter Cold: Take your unsalted butter straight from the fridge—no softening at room temp. I used to rush this, and the cake turned out dense. Cold butter creates flaky layers that hold up to strawberries’ moisture, while warm butter just melts into a sad, flat mess. (Yes, even if you’re impatient like me.)
- Sift That Flour: Sift the all-purpose flour twice—once before mixing, once after adding the dry ingredients. Strawberry cake relies on lightness, and unsifted flour packs down, making the texture heavy. Skip this, and you’ll end up with a cake that feels like it’s been compressed by a sad clown.
- Room Eggs First: Let your large eggs sit in warm water for 5 minutes before cracking them. Cold eggs can curdle when mixed with butter, and nothing ruins a strawberry cake faster than streaky, broken batter. Trust me, this tiny step keeps everything silky smooth.
- Bake Low and Slow: Preheat the oven to 325°F (not 350°F) and bake the cake until the center hits 205°F—just a few degrees shy of fully set. Strawberries release water, and high heat turns them into a soggy disaster. A slower bake keeps the crumb tender and the strawberries bright, not drowned.
Storing and reheating this 5 star strawberry cake
Room Temperature Storage
Store your 5-star strawberry cake in an airtight container at room temperature for up to 3 days. The buttercream stays luscious when sealed tightly, and the cake maintains its moist texture.
I always use Pyrex glass containers with snap-on lids—they keep the cake fresh longer than plastic. Place a piece of parchment paper between layers if stacking to prevent sticking. 🥧
Refrigerator Refresh
For longer storage, refrigerate the cake in an airtight container for up to 5 days. The cold temperature preserves the buttercream’s creaminess, though the cake may dry out slightly. Before serving, let slices sit at room temperature for 10-15 minutes—this restores the perfect balance of textures.
I often refrigerate the cake overnight and serve it chilled for dinner parties, especially in warm weather. 💫
Freezing Unbaked Layers
Freeze unbaked cake layers individually, wrapped tightly in plastic wrap and placed in quart-sized freezer bags. They’ll keep for up to 1 month without losing quality. When ready to bake, remove layers from the freezer and let them thaw in the fridge overnight.
Add 5-10 extra minutes to the baking time, and check for doneness with a toothpick. This method is perfect for prepping ahead for special occasions. ❄️
Reheating Slices
To revive slightly dried-out slices, warm them in the oven at 300°F for 3-5 minutes. This gently reheats the cake without melting the buttercream. For a quick fix, wrap a slice in a damp paper towel and microwave on low power for 10-15 seconds.
Always taste and adjust sweetness—sometimes the jam filling needs a pinch of sugar to brighten flavors after reheating. 🔥
Preserving Garnishes
Fresh strawberry slices and powdered sugar dusting should be added just before serving to keep them crisp. Store extra strawberries in a single-layer container in the fridge for up to 3 days, or freeze them for longer storage.
For powdered sugar, keep it in an airtight jar away from moisture to prevent clumping. A little goes a long way—use a fine-mesh sieve for an even, professional finish. ✨
Nutrition facts
Frequently asked questions
Can I substitute fresh strawberries with frozen ones?
Frozen strawberries work in a pinch, but they lack the vibrant flavor and texture of fresh. If using frozen, thaw them completely first, then drain excess liquid. For the purée, you may need to add 1 extra tablespoon of lemon juice to compensate for the lack of freshness. The cake will still taste delicious, but the filling won’t have that bright, summery quality.
Why did my cake sink in the middle?
This usually happens from overmixing the batter or opening the oven too soon. The secret is to mix just until combined—lumps are fine! Also, never open the oven door before 20 minutes of baking, even if the top looks done. If the cake sinks, try baking at 325°F next time for a slower rise. A toothpick test is key—it should come out clean but with a few moist crumbs.
How do I make this cake gluten-free?
Replace the all-purpose flour with a 1:1 gluten-free baking flour blend (like Bob’s Red Mill) and add 0.5 teaspoon xanthan gum to improve texture. For the strawberry filling, use a gluten-free jam. The cake will still be moist, but it may be slightly denser. Chill the assembled cake for 1 extra hour to prevent crumbling when slicing.
Can I make this cake in a single layer instead of two?
Use a 10-inch round pan and bake for 35-40 minutes at 350°F. Pour half the batter, then spread the strawberry purée evenly, and top with the remaining batter. Swirl gently before baking. The single-layer version is perfect for smaller gatherings or when you want a taller slice. Just adjust the frosting quantity to 2 cups buttercream instead.
What’s the best way to transport this cake?
For short trips (2 hours), keep the cake at room temperature in a sturdy box with a layer of parchment paper between the cake and lid. For longer trips, refrigerate the cake and transport it in a well-insulated cooler. Avoid temperature fluctuations—sudden heat or cold can cause the buttercream to melt or sweating. If transporting chilled, let it sit at room temperature for 20 minutes before serving.

- 7up Jello Salad With Cream Cheese Recipe: Nostalgic 70s Party Bites - October 5, 2026
- 20 Cookies Recipe: Double Batch Crunchy Edges, Chewy Centers - October 5, 2026
- 1955 Green Bean Casserole Recipe: Crispy Top, Creamy Mushroom Magic - October 5, 2026