
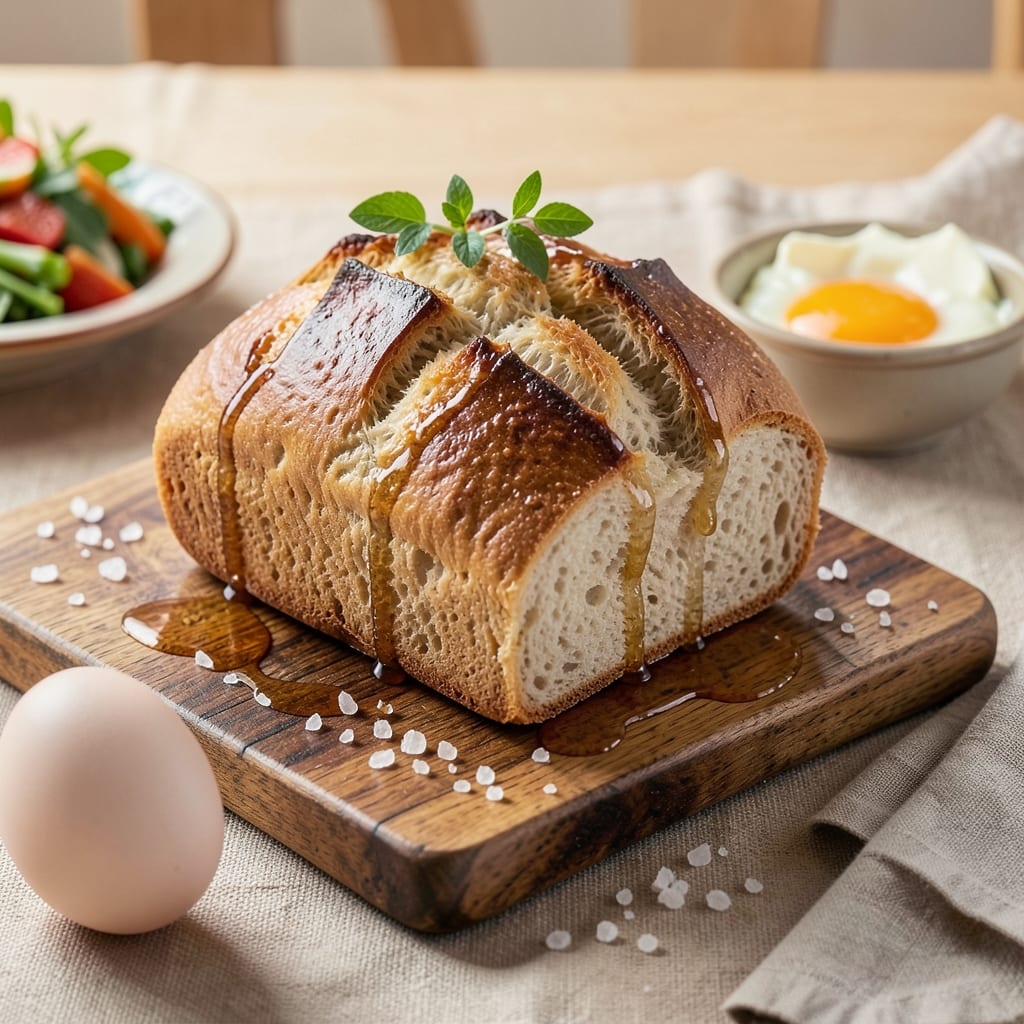
This 5-star white bread recipe delivers the perfect balance of a crisp, golden crust and an impossibly soft, pillowy interior—just like your favorite bakery loaf. 🌟 The secret lies in precise dough development, proper proofing, and baking at the right temperature to create that signature texture.
After years of testing and refining, this method consistently produces bread with an open crumb structure and rich, buttery aroma that makes every slice irresistible.
What sets this recipe apart is its foolproof technique that works whether you’re kneading by hand or using a bread machine. The dough is enriched just enough to create that tender crumb without sacrificing structure, and the steam generated during baking locks in moisture for days of freshness.
Even beginners can achieve professional results with clear, step-by-step instructions and troubleshooting tips for common issues like dense bread or underproofing.
By the time your loaf emerges from the oven, you’ll have a restaurant-quality white bread with a crackly crust that gives way to soft, fluffy layers inside. The aroma alone will have everyone asking for seconds, and the texture stays fresh for up to five days when stored properly.
This isn’t just bread—it’s a game-changer for sandwiches, toast, or simply enjoying with butter.
Whether you’re baking for a family gathering or treating yourself to homemade bread, this recipe scales beautifully and includes variations for enriched dough or no-knead methods. Let’s get started on creating your perfect loaf!
Ingredients for 5 star white bread
Nine simple ingredients transform into restaurant-quality white bread with a crisp crust and soft interior.
| Ingredient | Amount | Notes |
|---|---|---|
| All-Purpose Flour 🌾 | 5 cups | Sifted for even texture |
| Active Dry Yeast 🍞 | 2 ¼ tsp | One packet (2.25 tsp) |
| Granulated Sugar 🍚 | ¼ cup | For dough activation |
| Unsalted Butter 🧈 | ½ cup | Cold, cubed (room temp) |
| Large Eggs 🥚 | 1 whole | Room temperature |
| Warm Water 💧 | 1 ¼ cups | 110°F (43°C) ideal |
| Salt 🧂 | 1 ½ tsp | Kosher or sea salt |
| Milk 🥛 | ¼ cup | Warm, for enrichment |
| Instant Potato Flakes 🥔 | 1 tbsp | For extra tenderness |
| Cornmeal 🌽 | ¼ cup | For dusting bread pan |
| Ice Water ❄️ | ¼ cup | For final kneading |
| Egg Wash 🥚 | 1 whole | 1 egg + 1 tbsp water |
The flour is everything here—King Arthur or Gold Medal are my go-tos for that perfect crumb. Bulk bins at stores like Whole Foods or WinCo save money and keep flour fresher longer. If your flour smells musty, toss it—old flour makes dense bread. The yeast? Fresh is non-negotiable—check the date on the packet. Store it in the fridge to keep it potent for months. Butter should be cold when you mix it in—room temp works, but cold cubes create better pockets of fat for that tender crumb. Grab the European-style butter if you’re feeling fancy, but regular unsalted works perfectly fine too.
No instant potato flakes? Skip them or swap for 1 tbsp cornstarch—they’re just for that extra pillowy texture. Warm water is key: too hot kills yeast, too cold slows it down. 110°F is ideal, but if you don’t have a thermometer, let tap water sit for 10 minutes after boiling. Egg wash is simple but makes a huge difference—beat the egg with 1 tbsp water for a glossy finish. Short on time? Use milk + 1 tbsp vinegar as a quick substitute. The dough should be slightly sticky but not wet—if it’s too dry, add ice water 1 tbsp at a time. Too wet? Sprinkle more flour, but don’t overdo it or you’ll kill the rise.
Freshly baked bread stays good for 3-5 days at room temp, wrapped in a clean kitchen towel. For longer storage, freeze slices wrapped in parchment—toast straight from frozen for best results. The dough can proof overnight in the fridge if you’re doing a slow rise—just let it come to room temp before shaping. Double the recipe for holidays or big gatherings—this bread freezes beautifully too. And if your crust isn’t crispy enough? Broil for 1-2 minutes at the end for that bakery-style finish.
Why You’ll Love This Recipe
- No-Knead Magic: I swear by this—just mix, wait, and bake. The dough comes together in minutes, and the yeast does all the heavy lifting while you sip coffee or scroll through your phone. No stand mixer, no fuss, just that perfect pull-apart texture.
- Buttery Cloud Crust: That rich, caramelized crust? Pure gold. The butter and sugar work together to give it a sweet, golden finish that’s crisp on the outside and pillowy inside—like biting into a bakery loaf, but made with ingredients you already have.
- Breakfast to Picnic: Honestly, this bread is my go-to for everything. Toast it for breakfast, pack slices for sandwiches, or serve warm with jam at brunch. It’s the unsung hero of meal prep—freezes beautifully too, so you’re never stuck without fresh bread.
- Pantry-Friendly Staples: Between us, this recipe uses stuff you’re already buying: flour, butter, eggs. No weird substitutions or last-minute grocery runs. And since it makes two loaves, you’ll have leftovers for days—or freeze half for when laziness hits. Budget win.
Step-by-step instructions for artisan white bread
Here’s how to bake that perfect loaf with a crisp crust and airy interior.
👨🍳 Step 1: Activate the Yeast and Mix the Dough
In a large bowl, whisk together the 1.25 cups warm water (around 110°F), 0.25 cup granulated sugar, and 2.25 tsp active dry yeast. Let this sit for 5-10 minutes until it becomes frothy—you’ll see tiny bubbles forming on the surface. This tells you your yeast is alive and ready to work.
Next, add the 5 cups all-purpose flour and 1.5 tsp salt to the bowl. Using a wooden spoon or your hands, stir until a shaggy dough forms. Then cut in the 0.5 cup cold cubed butter with a fork or your fingers until it’s fully incorporated. The butter should be cold so it creates pockets of steam during baking, giving that signature tender crumb. Add the 1 tbsp instant potato flakes and 0.25 cup warm milk now—they’ll blend right in.
🍳 Step 2: Knead Until Silky Smooth
Turn the dough out onto a lightly floured surface and knead for 8-10 minutes until it’s smooth and elastic. I like to use my hands for this—press down, fold over, and rotate the dough while applying medium pressure. You’ll know it’s ready when it springs back slowly when poked and feels slightly tacky but not sticky.
Here’s the thing—if it feels too sticky, add 1 tablespoon of flour at a time until it comes together nicely. If it’s too dry, add 1 teaspoon of water. The goal is a dough that’s soft but not wet. Once it’s perfect, place it back in the bowl, cover with a damp towel, and let it rise in a warm spot for 1-1.5 hours or until it’s doubled in size. You’ll see it puff up and look light and airy.
🔥 Step 3: Shape and Proof the Dough
Punch down the risen dough to release air, then divide it into 4 equal pieces (about 8 ounces each). Roll each piece into a log shape and place them seam-side up in a 9×5-inch loaf pan that’s been lightly dusted with 0.25 cup cornmeal. This prevents sticking and gives that classic bread pan texture.
Cover the pan with a damp towel and let the dough rise again for 30-45 minutes until it’s puffy and just about reaches the top of the pan. Preheat your oven to 375°F while the dough proofs. This is where the magic happens—the bread will expand beautifully in the hot oven, giving you that perfect rise.
🔪 Step 4: Bake to Golden Perfection
Before baking, brush the tops of the loaves with the egg wash (1 whole egg beaten with 1 tablespoon water). This gives that gorgeous golden-brown crust we all love. Bake for 25-30 minutes until the bread is deep golden brown and sounds hollow when tapped on the bottom. If the tops brown too quickly, tent with foil to prevent over-browning.
Here’s a pro tip: I like to bake the bread on the middle rack for even heat distribution. The internal temperature should reach 190-200°F when done. Let the bread cool in the pan for 5 minutes, then transfer to a wire rack. This resting period keeps it from falling apart when you slice it.
⏰ Step 5: Rest and Slice for Maximum Freshness
Let the bread cool completely for at least 1 hour before slicing. This might be the hardest part, but trust me—it’s worth it. The bread will firm up and develop those beautiful layers. Once cooled, slice with a sharp serrated knife for clean cuts and serve warm with butter or your favorite jam.
You’ll know you’ve nailed it when each slice has that perfect crisp crust and soft, pillowy interior. The bread should be light, airy, and just slightly sweet—no dense, heavy texture here. Store leftovers wrapped in a bread bag at room temperature for up to 3 days, or freeze for longer storage.
Pro Tips For Making 5 Star White Bread
- Warm the Butter First: Cold butter in dough means tough, dense bread. Microwave your unsalted butter in 15-second bursts until just soft—not melted, just pliable—so it incorporates smoothly into the flour. I learned this the hard way after kneading a brick-like dough that refused to rise properly.
- Bloom the Yeast Right: Skip the warm water test—just mix yeast with sugar and a splash of warm milk (not boiling, not cold) for 5 minutes until foamy. If it’s sluggish, your kitchen’s too cold; pop the bowl near the oven with the light on for 10 minutes. Yeast that’s not active upfront will drag down your whole loaf.
- Don’t Over-Knead the Dough: Three minutes by hand, five by mixer—no more. Overworking the gluten makes bread chewy instead of tender. Press a finger into the dough: if it springs back slowly, you’re good. If it bounces like a trampoline, you’ve gone too far. I used to knead until my arms ached, only to end up with bread that tasted like a hockey puck.
- Egg Wash at 450°F: Brush the egg wash on after the oven hits 450°F, not before. The heat instantly sets the wash into a glossy crust instead of steaming away. Use one egg yolk + 1 tablespoon water for a softer crust, or whole eggs for a golden, crackly finish. I wasted eggs on soggy tops before I timed this right.
Common mistakes when making great 5 star white bread
Over-Kneading the Dough
I’ve seen so many beginners go overboard with kneading, thinking more time equals better bread. But after 8-10 minutes of hand-kneading (or 5-7 minutes in a stand mixer with a dough hook), your dough should be smooth and elastic—not tough or rubbery.
Over-kneading develops too much gluten, which creates a dense, chewy texture instead of that light, pillowy crumb we want. 💫
Skipping Proofing
Rushing the proofing stage is a surefire way to end up with dense bread. The dough needs time to ferment and develop flavor—1-1.5 hours for the initial rise and 30-45 minutes for the final proof in the pan.
If your kitchen is cold, place the dough near a warm spot (like the top of your fridge with a bowl of hot water underneath). Never skip this step, even if you’re in a hurry!
Using Old or Expired Yeast
This is a classic mistake that kills your bread before it even starts. Always check the expiration date on your yeast packet—it should be fresh and potent. If your yeast mixture doesn’t bubble within 5-10 minutes of activation, your yeast is dead.
Store your yeast in the fridge to extend its shelf life, and never use yeast that’s been sitting out for more than a few months. A little investment in fresh yeast makes all the difference!
Incorrect Dough Temperature
The dough should be warm but not hot to the touch—around 75-80°F. If your kitchen is cold, let the dough proof in a warm spot. Cold dough slows fermentation, while dough that’s too warm can overproof or develop off-flavors.
I like to place my dough bowl on top of my fridge with a towel draped over it for consistent warmth. A dough thermometer is a game-changer if you want precision!
Underproofing or Overproofing
Underproofed dough collapses in the oven, while overproofed dough loses structure and becomes gummy. The dough should double in size during the first rise and just about reach the top of the pan during the final proof.
Tap the dough gently—if it springs back slowly, it’s ready. If it springs back quickly, it needs more time. If it doesn’t spring back at all, it’s overproofed. 🌟
Ignoring the Egg Wash
Many home bakers skip the egg wash, but this simple step creates that beautiful golden-brown crust. The egg proteins brown in the oven, giving your bread that bakery-style shine and crispness. Don’t substitute with just oil or water—it won’t give the same effect.
For extra shine, brush on the egg wash right before baking and return the bread to the oven immediately. Pro tip: Use the leftover egg wash for other baked goods!
Nutrition facts
Frequently asked questions
Can I make this white bread without a bread pan?
Shape the dough into a free-form loaf or round boules instead. Place them on a baking sheet lined with parchment paper, brush with egg wash, and bake at 375°F for 25-30 minutes until golden. For a rustic look, score the top with a sharp knife before baking.
How do I store leftover white bread to keep it fresh?
Wrap cooled bread tightly in a clean kitchen towel or beeswax wrap, then store at room temperature for up to 5 days. For longer storage, slice and freeze between parchment paper—toast straight from frozen for best results. Never store in plastic bags, as they trap moisture and make bread stale faster.
Can I add herbs or garlic to this recipe?
Yes! For a savory twist, mix in 1 tablespoon dried herbs (like rosemary or thyme) or 2 cloves minced garlic with the flour. For extra flavor, brush the baked loaf with melted butter mixed with minced garlic or herbs. This works especially well for garlic bread or sandwiches.
Why did my bread turn out dense instead of light?
Dense bread usually means underproofed dough or over-kneading. Make sure your dough doubles in size during the first rise (1-1.5 hours) and springs back slowly when poked. Also, knead only until smooth (8-10 minutes by hand)—overworking develops too much gluten. Check your yeast freshness too!
Can I make this in a bread machine?
Yes! Use the “White Bread” setting with 5 cups flour, 1.25 cups water, 2.25 tsp yeast, 0.5 cup butter, 0.25 cup milk, 1.5 tsp salt, and 1 tbsp potato flakes. Add the egg wash manually before baking. Most machines handle this well, but monitor closely for the perfect rise.

- Baked Potatoes in Crock Pot Recipe: Buttery Interiors and Crispy Top Magic - November 1, 2026
- Braised Beef Short Ribs Recipe: Crock Pot Fall-Off-Bone Magic in 6 Hours - November 1, 2026
- Crock Pot Cocoa Recipe: Velvety Warmth With Hidden Spice Magic - November 1, 2026