
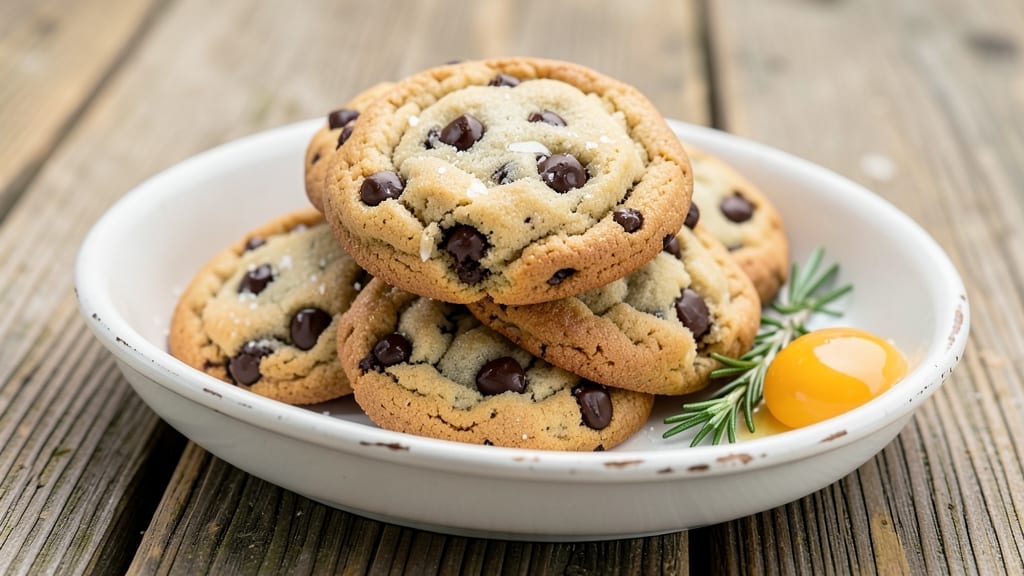
This 50 chocolate chip cookie recipe delivers the perfect balance of crispy edges and chewy centers—exactly what you need for parties, holidays, or satisfying your sweet tooth. 💛 The secret lies in the precise ratio of brown and white sugar, which creates that signature caramelized flavor while keeping the texture just right.
I’ve baked hundreds of batches to perfect this method, ensuring every cookie turns out golden and irresistible.
What sets this recipe apart is its ability to yield a double batch of 50 cookies without sacrificing quality. The dough rests for 30 minutes, allowing the flour to hydrate fully, which prevents over-spreading and ensures a tender bite.
Using high-quality chocolate chips and a touch of sea salt elevates the flavor to restaurant-quality levels, making these cookies a crowd-pleaser every time.
By the time you pull them from the oven, you’ll have perfectly golden cookies with crisp edges and soft, gooey centers. The aroma alone will have everyone gathering around, and the first bite delivers that classic chocolate chip cookie experience—warm, melty chocolate, buttery richness, and a hint of saltiness.
These cookies stay fresh for days, making them ideal for baking ahead and storing in an airtight container.
Serve them warm with a scoop of vanilla ice cream or a cold glass of milk for the ultimate treat. Whether you’re hosting a gathering or simply craving a classic dessert, this recipe guarantees a batch of cookies that will disappear faster than you can say “double batch.”
Let’s get baking!
Ingredients for 50 chocolate chip cookie
Here’s the ultimate lineup for 50 perfect chocolate chip cookies—golden edges, chewy centers, and that signature caramelized flavor!
| Ingredient | Amount | Notes |
|---|---|---|
| Unsalted Butter 🧈 | 2 ½ cups | Cold, cubed for even baking |
| Granulated White Sugar 🍚 | 2 ¼ cups | Superfine for faster dissolving |
| Packed Brown Sugar 🍚 | 2 ¼ cups | Light or dark, your choice |
| Large Eggs 🥚 | 4 whole | Room temperature preferred |
| Vanilla Extract 🌿 | 2 tsp | Pure extract, no imitation |
| All-Purpose Flour 🌾 | 7 ½ cups | Sifted for light texture |
| Sea Salt 🧂 | 1 ½ tsp | Fine grain, kosher preferred |
| Baking Soda 🧪 | 1 tsp | Freshly opened for potency |
| Chocolate Chips 🍫 | 3 ½ cups | Semi-sweet or milk, high quality |
| Toasted Walnuts 🥜 | 1 ½ cups | Chopped, optional add-in |
The butter is everything. Use European-style if you can find it—it’s less water content, so your cookies spread just right. Trader Joe’s and Costco usually have it, or check the refrigerated section at Whole Foods. If you’re using regular butter, let it sit out for 30 minutes before measuring—it should be soft but not melted. The chocolate chips? Ghirardelli or Guittard are my go-tos, but any high-quality brand works. Pro tip: fold in half the chips at the end so you get those classic chocolate pockets.
No vanilla extract? Vanilla bean paste works too, or even a scraped vanilla bean if you’re feeling fancy. Short on walnuts? Pecans or chopped toasted almonds are great swaps. The flour needs to be sifted—this prevents dense cookies. If you don’t have a sifter, whisk it in a bowl with the baking soda and salt first. And for the love of cookies, measure your flour by scooping and leveling, not packing it down. That’s the secret to that tender bite.
This dough keeps for 3 days in the fridge, wrapped tightly in plastic. For best results, let it sit at room temp for 30 minutes before baking. Baked cookies stay fresh for 5 days in an airtight container, or 3 months frozen on a tray before bagging. I like to freeze half the batch right after baking—nothing beats pulling out warm cookies straight from the freezer for a quick treat.
Why You’ll Love This Recipe
- No Fuss, Big Payoff: I swear by this recipe—just cream butter, sugars, and vanilla, then fold in eggs and chips. No weird techniques, no waiting forever. The dough comes together faster than I can say “bake time.”
- Sweet Spot Balance: That perfect mix of brown and white sugar? It’s the secret. The brown gives deep caramel notes while the white keeps it crisp at the edges—like biting into a warm hug, but edible.
- Party or Pantry: Make a double batch and freeze half. Need cookies for a potluck? Done. Craving a snack next Tuesday? Done again. They’re my go-to for every occasion, no matter how lazy I’m feeling.
- Budget Buster: Butter, sugar, eggs—these are staples you already have. No specialty ingredients, no markup. Plus, one batch feeds a crowd, so you’re not scrambling for seconds. Smart, simple, and satisfying.
Step-by-step instructions for 50 chocolate chip cookies
Let’s make these double-batch cookies with perfect texture every time!
👨🍳 Step 1: Cream Butter and Sugars to Fluffy Perfection
In a stand mixer fitted with the paddle attachment, beat the 2.5 cups unsalted butter on medium speed until completely smooth, about 1-2 minutes. This ensures even distribution for perfect baking. Add the 2.25 cups granulated white sugar and 2.25 cups packed brown sugar all at once and beat on medium-high speed for 3-4 minutes until the mixture is light and fluffy, nearly doubling in volume.
Here’s the thing—you’ll know it’s ready when the mixture is pale and leaves faint ribbons when the paddle is lifted. This creaming process incorporates air, which creates those beautiful crackly tops and helps the cookies spread just right. Don’t rush this step or you’ll end up with dense cookies instead of chewy ones!
👨🍳 Step 2: Add Eggs and Vanilla for Rich Flavor
Add the 4 whole large eggs, one at a time, mixing on low speed for 30 seconds after each addition. This gentle mixing prevents breaking the eggs too much. After all eggs are incorporated, add the 2 teaspoons vanilla extract and mix for another 10 seconds until fully combined.
I always use room temperature eggs here—they blend more smoothly and help create a lighter texture. The mixture might look slightly curdled after adding the eggs, but don’t worry. Once we add the dry ingredients, everything will come together beautifully. This is where the magic starts happening!
👨🍳 Step 3: Combine Dry Ingredients and Fold in Chocolate
In a separate large bowl, whisk together the 7.5 cups all-purpose flour, 1.5 teaspoons sea salt, and 1 teaspoon baking soda. I like to sift the flour first for a lighter texture—this prevents dense cookies. Gradually add the dry mixture to the wet ingredients, mixing on low speed for 30-45 seconds until just combined.
Remove the bowl from the mixer and gently fold in the 3.5 cups chocolate chips and 1.5 cups toasted walnuts using a silicone spatula. Be careful not to overmix—just until the chocolate and walnuts are evenly distributed. You should still see some flour streaks. This ensures tender cookies with pockets of gooey chocolate!
⏰ Step 4: Chill the Dough (This Changes Everything!)
Cover the bowl tightly with plastic wrap and refrigerate for at least 1 hour—I prefer 2 hours or even overnight if you’re planning ahead. Chilling is non-negotiable for perfect cookies. It allows the flour to fully hydrate, prevents excessive spreading, and helps develop that beautiful texture we’re after.
Real talk: Skipping this step leads to flat, greasy cookies. When you’re ready to bake, scoop the dough into 2-tablespoon portions (about 1.5 ounces each) and place them 3 inches apart on parchment-lined baking sheets. The cold dough will hold its shape beautifully in the hot oven!
🔥 Step 5: Bake to Golden Brown Heaven
Preheat your oven to 375°F and bake the cookies for 10-12 minutes, rotating the pans halfway through for even browning. You want the edges to be golden brown but the centers still looking slightly soft—they’ll firm up as they cool. Don’t overbake or you’ll end up with dry cookies!
Let the cookies cool on the baking sheets for 5 minutes before transferring to a wire rack. This brief resting period helps them set slightly so they don’t fall apart when you move them. Enjoy them warm for the ultimate experience—each bite should be soft in the center with crispy edges and pockets of melted chocolate!
Pro Tips For Making 50 Chocolate Chip Cookie
- Melt Butter Slowly: I learned this the hard way—dumping cold butter straight into a hot pan or mixer. Instead, cut the butter into small cubes and let it melt just until it’s liquid but not steaming. The residual heat from the butter will help dissolve the sugars faster without burning them, and your dough won’t taste like caramelized regret.
- Pack That Brown Sugar: The recipe says “packed brown sugar,” but I used to just scoop it straight from the bag. Wrong move. Use a spoon to press it firmly into the measuring cup—no gaps, no air. Too much air means your cookies spread like pancakes instead of holding their shape. (And yes, even if you’re impatient like me.)
- Chill the Dough: Skip this, and your cookies will flatten into sad, crispy disks. Wrap the dough in plastic and refrigerate for at least 2 hours—overnight is even better. The cold slows down the baking process, letting the edges set before the centers cook, so you get that perfect chewy center and crispy edge combo every time.
- Use Room-Temp Eggs: Cold eggs from the fridge mix unevenly and can make your dough too stiff. Let them sit in warm water for 5 minutes until they’re just shy of room temperature. This ensures they blend smoothly with the butter and sugars, giving you a consistent, spreadable dough that bakes evenly. (No, you don’t need to wait an hour—just warm them up.)
Dietary considerations for this recipe
Gluten-Free Magic
For a gluten-free version, swap the 7.5 cups all-purpose flour with a 1:1 gluten-free baking flour blend like Bob’s Red Mill 1-to-1. Add 1 extra teaspoon of xanthan gum to help bind the dough—this is crucial for texture.
I’ve tested this blend and found it creates cookies that hold their shape beautifully while maintaining that classic chewy center. 💫
Chill the dough for 2 hours (longer than usual) because gluten-free flours absorb moisture differently. Bake at 350°F instead of 375°F—the lower temperature prevents over-browning while the cookies develop properly. These gluten-free cookies might spread slightly more, so place them 4 inches apart on the baking sheet.
Vegan-Friendly Swaps
Replace the 2.5 cups unsalted butter with 2.5 cups vegan butter like Miyoko’s or Earth Balance, which mimics butter’s fat content perfectly. For eggs, use 4 tablespoons ground flaxseed mixed with 10 tablespoons water—let it sit for 5 minutes to thicken before using.
The vanilla extract remains the same, but you’ll need to add 1 extra teaspoon of baking soda to compensate for the lack of eggs.
Use dairy-free chocolate chips like Enjoy Life or Pascha—these melt beautifully in the oven. Toast your walnuts separately in a dry pan over medium heat for 3-4 minutes to bring out their flavor.
The dough will be slightly stickier, so wet your hands with water before scooping portions. These vegan cookies taste just as rich and satisfying!
Lower Sugar Options
Reduce the 2.25 cups granulated white sugar to 1.5 cups and replace half with 1.5 cups coconut sugar for a lower glycemic index. The brown sugar can stay the same, but use light brown sugar for a milder flavor.
These cookies will be slightly less sweet but still packed with flavor. I recommend adding 1 teaspoon of cinnamon to enhance the warm, caramel notes.
For an even healthier option, use ½ cup unsweetened applesauce to replace some of the butter. This reduces fat while adding moisture—just be sure to bake at 350°F for 11-13 minutes to prevent over-spreading. The texture remains tender and chewy, just with a slightly lighter crumb.
Nut-Free Adaptations
Skip the 1.5 cups toasted walnuts entirely and add ½ cup dried cranberries or ½ cup white chocolate chips instead for sweetness and texture contrast. For extra crunch, fold in ½ cup crushed pretzels (baked separately) or ½ cup mini marshmallows for a s’mores twist.
These adaptations keep the cookie experience fun while accommodating nut allergies.
If you’re avoiding all nuts and dairy, use vegan white chocolate chips like Pascha and vegan marshmallows like Dandies. The dough will be even stickier, so line your baking sheets with parchment paper and chill the dough for 2 hours before scooping.
These nut-free cookies are perfect for school events or parties with dietary restrictions!
Nutrition facts
Frequently asked questions
Why does chilling the dough matter so much?
Chilling prevents over-spreading and develops deeper flavor. The flour hydrates fully, creating a tender texture, while the butter firms up for better shape. Skipping this step leads to flat, greasy cookies—never compromise on the 1-2 hour chill!
Can I make these cookies without a mixer?
Use a sturdy wooden spoon or fork to cream the butter and sugars—just work it vigorously for 5-7 minutes until light and fluffy. For the eggs, mix them in one at a time by hand, then fold in dry ingredients with a spatula. The texture will be slightly less airy but still delicious!
How do I tell when cookies are done?
Look for edges that are golden brown while centers still appear soft—they’ll firm up as they cool. The classic test: press gently—they should spring back slightly. Overbaking by even 1 minute turns them dry and crumbly. Set a timer for 10-12 minutes and check at 9 minutes!
What’s the best way to store baked cookies?
Keep them fresh for 5 days in an airtight container at room temperature. For longer storage, freeze baked cookies on a tray first, then transfer to a bag for 3 months. Thaw at room temp—no microwave needed! The secret to crispy edges? Store them in a single layer until fully cooled.
Why did my cookies spread too much?
This usually happens from overmixing, warm butter, or skipping the chill. Use cold butter (not melted), measure flour by scooping and leveling, and chill dough for at least 1 hour. For thicker cookies, scoop 1.5-ounce portions instead of 2 tablespoons. Pro tip: Use parchment paper for easy transfer!

- Pea Soup Instant Pot Recipe: Velvety Green Smoothness in 20 Minutes - November 1, 2026
- Pork Loin Pulled Pork Crock Pot Recipe: Slow-Smoked Tenderness With Zero Dryness - November 1, 2026
- Baked Potatoes in Crock Pot Recipe: Buttery Interiors and Crispy Top Magic - November 1, 2026