
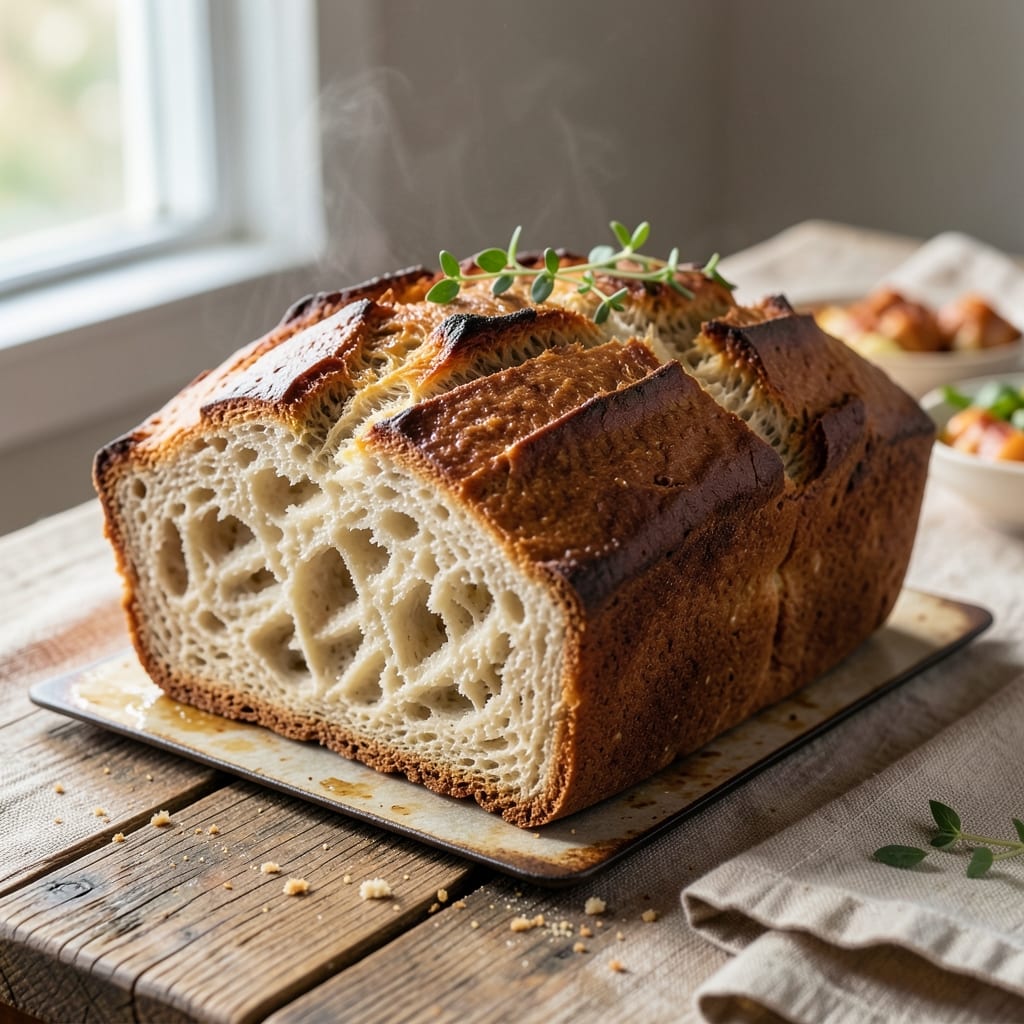
A 6-cup flour bread recipe that delivers artisanal crust without the fuss transforms your kitchen into a bakery. This hands-off method uses a foolproof approach to create a loaf with crisp golden edges and a tender crumb—no professional skills required.
The secret lies in precise hydration and a slow rise that develops flavor naturally, even for beginners.
What sets this recipe apart is its adaptability: whether you’re baking a classic sandwich loaf or experimenting with whole wheat, the same principles apply. With just 6 cups of flour, you’ll achieve a professional-quality crust that’s crisp enough to hold butter without crumbling.
The dough’s gentle fermentation overnight ensures maximum flavor development, so you can wake up to the aroma of freshly baked bread.
By the time you pull this loaf from the oven, you’ll have a crusty exterior with a satisfying snap and a soft, airy interior that’s perfect for toast or sandwiches. The hands-off rise means less monitoring and more time enjoying the process. This recipe builds confidence—one loaf at a time.
Perfect for daily meals or special occasions, this bread adapts to your schedule. Use it for breakfast toast, dinner rolls, or even garlic bread. The simple technique ensures consistent results every time, making it a staple for home bakers.
Ingredients for 6 cup flour bread
Six cups flour, two days patience—crusty perfection awaits your oven.
| Ingredient | Amount | Notes |
|---|---|---|
| Bread Flour 🌾 | 6 cups | High-protein for better structure |
| Instant Yeast 🍞 | ¼ tsp | Active dry works too |
| Granulated Sugar 🍚 | ¼ tsp | Feeds yeast activation |
| Salt 🧂 | 1 ½ tsp | Diamond Crystal preferred |
| Unsalted Butter 🧈 | ¼ cup | Cold, cubed for flavor |
| Warm Water 💧 | 2 ¾ cups | 110°F for ideal yeast |
| Extra-Virgin Olive Oil 🫒 | ¼ cup | For dough elasticity |
| Honey 🍯 | 1 tbsp | Enhances crust browning |
| Cornmeal 🌽 | ¼ cup | Prevents sticking |
| Coarse Sea Salt 🧂 | 1 tsp | For final crust |
| Ice Water ❄️ | ¼ cup | For shaping dough |
The flour is everything here. King Arthur or Caputo bread flour gives that perfect chew, but all-purpose in a pinch still delivers. Instant yeast cuts rise time, but active dry works fine—just dissolve it in warm water first. For the butter, European-style brands like Plugrá have more flavor, but any good unsalted butter will do. The water temperature matters: too hot kills yeast, too cold slows it. 110°F is ideal—think warm bath water. I always double-check with my thermometer, especially in winter when tap water runs cold.
No bread flour? All-purpose plus 1 tbsp vital wheat gluten mimics the protein structure. Short on honey? Maple syrup works beautifully—just reduce to 1 tbsp. Olive oil substitute? Melted coconut oil keeps the dough tender. The cornmeal is non-negotiable for dusting—it prevents sticking better than flour. For shaping, wet your hands to prevent tearing. And if your kitchen’s humid? Chill the dough 10 minutes before shaping to handle better. The ice water at the end? That’s the secret to a tight crumb structure—don’t skip it.
This dough keeps 24 hours in the fridge, so make it the night before. For longer storage, freeze shaped loaves wrapped in plastic—bake straight from frozen, adding 10 minutes. The crust stays crisp for 3 days at room temperature, but slice and toast for best texture. I always bake two loaves—one for breakfast, one to freeze. And if you’re experimenting with whole wheat? Replace 2 cups all-purpose with whole wheat flour, but add 1 tbsp vital wheat gluten to maintain structure.
Why You’ll Love This Recipe
- No-Knead Nightmare Solved: Mix it, wait, bake—no fancy skills needed. The instant yeast does all the heavy lifting while you sip your coffee, and that butter? It melts into pure golden richness without a single lump.
- Butter-Soft Crust Magic: That little sugar pinch isn’t just for show—it feeds the yeast and caramelizes just enough to give you a crust with actual character. Not dry, not gummy, but that perfect balance where every bite feels like a hug.
- Leftovers That Last: Seriously, this bread stays fresh for days if you store it right (wrapped in a towel in a bag, trust me). Toast it cold for croutons, freeze slices for quick toast—it’s my go-to for lazy mornings and last-minute guests.
- Budget Baking Wins: Six cups of flour? That’s half a bag for two loaves. The butter’s the only splurge, but it stretches further than you’d think, and the yeast? A tiny packet goes a long way. Frugal but feels fancy.
Step-by-step instructions for artisan-style bread with hands-off rise
This method delivers professional-quality bread with minimal effort—perfect crust and airy crumb guaranteed.
Mix Dough for Optimal Gluten Development
In a large stand mixer fitted with the dough hook attachment, combine the 6 cups bread flour, 1.5 tsp salt, and 0.25 tsp instant yeast. Mix on low speed for 1 minute to distribute the ingredients evenly. This ensures the yeast and salt are fully incorporated before hydration.
In a separate bowl, whisk together the 2.75 cups warm water (about 110°F) and 0.25 tsp granulated sugar until the sugar dissolves completely. The sugar helps activate the yeast immediately. With the mixer running on low, slowly pour in the water mixture while scraping down the sides of the bowl as needed. This gradual addition prevents a sticky mess and allows the flour to absorb liquid evenly.
Once combined, increase the mixer speed to medium and knead for 5-7 minutes until the dough forms a smooth, elastic ball that pulls away from the sides of the bowl. You’ll know it’s ready when the dough springs back slowly when poked with a finger—this indicates proper gluten development. The dough should feel slightly tacky but not sticky to the touch.
Incorporate Fat and Oil for Rich Texture
Add the 0.25 cup cold, cubed unsalted butter and 0.25 cup extra-virgin olive oil to the dough while the mixer is running on low speed. The cold butter will create pockets of flavor and tenderness, while the olive oil adds elasticity. Mix for an additional 2-3 minutes until the butter is fully incorporated and the dough becomes slightly softer.
Here’s the thing—don’t rush this step. The butter needs time to melt and distribute evenly without overheating the dough. If the dough feels too warm to the touch, let it rest for 5 minutes before proceeding. This prevents the yeast from activating too quickly, which can lead to a dense loaf.
Bulk Ferment with Controlled Rise
Transfer the dough to a lightly oiled bowl, cover it with a damp kitchen towel, and let it rise at room temperature (70-75°F) for 1-2 hours. The dough should nearly double in size and develop small bubbles on the surface. This bulk fermentation allows the gluten to relax and the yeast to ferment the sugars, creating flavor and structure.
I know it seems counterintuitive, but resist the urge to punch down the dough during this stage. The slow, natural rise builds better flavor and texture than aggressive kneading. If your kitchen is cooler than 70°F, extend the rise time to 2.5 hours—the dough will still develop properly, just more slowly.
Shape and Final Proof for Crispy Crust
Turn the risen dough onto a lightly floured surface and gently shape it into a 12-inch round loaf (or your preferred shape). To prevent sticking, dust your work surface with 0.25 cup cornmeal—it adds texture and prevents the dough from tearing. Press the dough into a smooth, even shape, then place it seam-side up in a parchment-lined baking dish.
Cover the dough again and let it proof for 30-45 minutes until it has risen about 50% and feels slightly springy to the touch. This final proof is crucial for that artisanal-style crust. For extra crispiness, brush the top with 1 tbsp honey and sprinkle with 1 tsp coarse sea salt just before baking.
Bake for Perfect Crust and Crumb
Preheat your oven to 425°F with a baking stone or inverted baking sheet on the middle rack. This creates steam for a crispy crust. Once preheated, bake the bread for 25-30 minutes until the crust is deep golden brown and the internal temperature reaches 190-200°F when measured with an instant-read thermometer.
For that coveted oven spring, I recommend baking the bread directly on the stone or sheet—no need to transfer. The steam from the stone helps create a crackly crust while keeping the crumb tender. If the top browns too quickly, tent the bread loosely with foil after 15 minutes to prevent over-browning.
Let the bread cool on a wire rack for at least 30 minutes before slicing. This resting period allows the gluten to relax and the crumb to set properly. Slice into thick pieces to enjoy that perfect balance of crispy crust and airy interior.
Pro Tips For Making 6 Cup Flour Bread
- Weigh Your Butter: That ½ cup butter measure? It’s not accurate. Use a kitchen scale for 113g—bread flour is heavy, and butter’s volume varies wildly when packed vs. scooped. I learned this the hard way when my loaves turned greasy or dense.
- Skip the Over-Kneading: Bread flour loves hydration, but too much handling develops gluten faster than the yeast can handle. Aim for 5–7 minutes by hand or 3–4 minutes in a mixer—just until the dough pulls away cleanly from the bowl. Overwork it, and you’ll end up with a chewy brick instead of a light loaf.
- Proof in Warmth: Your kitchen’s 70°F might feel warm to you, but yeast thrives at 78–80°F. Place the dough in a lightly oiled bowl, cover it with a damp towel, and set it near the oven (with the light on or a proofing box if you have one). Cold spots slow fermentation—no one wants a dough that takes hours to rise.
- Steam the First 10 Minutes: Yes, even with bread flour’s high protein, your crust will fight you. Boil a kettle, pour ½ cup hot water into a tray on the oven rack, then bake. That burst of steam guarantees a crispy, golden crust instead of a sad, pale top. (Your future self will thank you.)
Regional styles of this dish
Italian Ciabatta Style
Transform this recipe into a rustic ciabatta by shaping the dough into a long, oval loaf with dimpled sides. Use a sharp knife or bench scraper to create deep indentations—this creates those signature air pockets.
Brush the dough generously with extra-virgin olive oil before baking, then sprinkle with flaky sea salt for that classic Italian touch. Bake at 400°F for 20-25 minutes until the crust is deep golden and crisp. The result?
A light, airy interior with a crackly crust perfect for dipping in olive oil or serving with soups. 🥖
French Baguette Adaptation
For a baguette-style loaf, divide the dough into three equal portions and shape each into a 12-inch oval with tapered ends. Place them on a baking sheet lined with parchment, then score the tops with a razor blade in a diagonal crisscross pattern.
Brush with melted butter and bake at 425°F for 18-22 minutes. The high heat creates that iconic crusty exterior while keeping the crumb tender. Serve warm with herb butter or garlic confit for an authentic French experience. 🥖
German Pretzel Twist
Give your bread a pretzel-inspired flavor by adding 1 tbsp malt syrup or caramelized onion powder to the dough. Shape the loaf into a round boule, then boil it in water with 2 tbsp baking soda for 30 seconds before baking.
This creates the signature glossy, dark crust. Sprinkle with coarse sea salt and bake at 425°F for 25 minutes. The soda bath gives it that classic pretzel tang while keeping the inside soft and pillowy. 🥨
Southern Cornbread Hybrid
For a Southern-inspired twist, replace 1 cup of bread flour with cornmeal and add 1 cup of buttermilk to the dough. Shape into a round loaf and bake in a cast-iron skillet at 375°F for 30-35 minutes.
Brush the top with melted butter during the last 5 minutes of baking. The result is a crispy crust with a moist, slightly sweet crumb—perfect for serving with chili or fried chicken. 🍯
Mediterranean Focaccia
Turn this into a focaccia-style flatbread by shaping the dough into a rectangular pan (about 9×13 inches). Dimple the top with your fingers, then drizzle with olive oil and sprinkle with rosemary, garlic cloves, and flaky salt.
Bake at 375°F for 25-30 minutes until the edges are golden. Top with cherry tomatoes, olives, or feta cheese after baking for a Mediterranean-inspired loaf. Serve warm with balsamic glaze for dipping. 🌿
Savory Dinner Rolls
For soft, pillowy dinner rolls, divide the dough into 12 equal pieces and shape into round balls. Place them in a greased 9×13-inch pan, cover, and let rise for 1 hour. Brush with melted butter and bake at 375°F for 15-20 minutes until golden.
The slow rise keeps them tender and fluffy—perfect for serving with roast beef, gravy, or butter. Add a pinch of garlic powder or dried herbs for extra flavor. 🍽️
Nutrition facts
Frequently asked questions
Can I substitute all-purpose flour for bread flour in this recipe?
The recipe works with all-purpose flour, but you’ll need to add 1 tablespoon vital wheat gluten per 6 cups flour to mimic bread flour’s protein structure. This prevents a dense crumb. For best results, use King Arthur or Caputo bread flour—they deliver that signature chew and rise. If you’re short on time, all-purpose plus gluten is a great backup!
Why does my dough feel too sticky after mixing?
Sticky dough usually means either too much liquid or insufficient kneading. If your kitchen is humid, reduce water by 1-2 tablespoons or chill the dough for 10 minutes before shaping. For kneading, aim for 5-7 minutes in a stand mixer—this develops gluten and absorbs excess moisture. A slightly tacky dough is normal, but it should pull away cleanly from the bowl.
Can I make this bread without a stand mixer?
Mix the dough by hand in a large bowl, then knead for 10-12 minutes on a floured surface until smooth and elastic. Press the dough down and fold it over itself repeatedly—this builds gluten just like a mixer. For shaping, wet your hands to prevent sticking. The hands-off rise method works the same way, so no special equipment is needed!
How do I fix a dough that didn’t rise properly?
If your dough is flat after the first rise, check these fixes: 1) Yeast may be dead—test with warm water and sugar (should foam in 5 minutes). 2) Water too hot/cold—use 110°F water. 3) Cold kitchen—extend rise time to 2.5 hours. For a second chance, punch down the dough, cover, and let it rise again. If all else fails, shape and bake immediately for a denser loaf.
Can I bake this bread in a glass loaf pan?
Yes, but expect a softer crust since glass conducts heat differently. Grease the pan well and bake at 400°F instead of 425°F to prevent over-browning. For extra crispiness, place the pan on a baking sheet and add 1 cup boiling water to the oven when you put the bread in—this creates steam. Let the bread cool in the pan for 10 minutes before removing.

- 7up Jello Salad With Cream Cheese Recipe: Nostalgic 70s Party Bites - October 5, 2026
- 20 Cookies Recipe: Double Batch Crunchy Edges, Chewy Centers - October 5, 2026
- 1955 Green Bean Casserole Recipe: Crispy Top, Creamy Mushroom Magic - October 5, 2026