
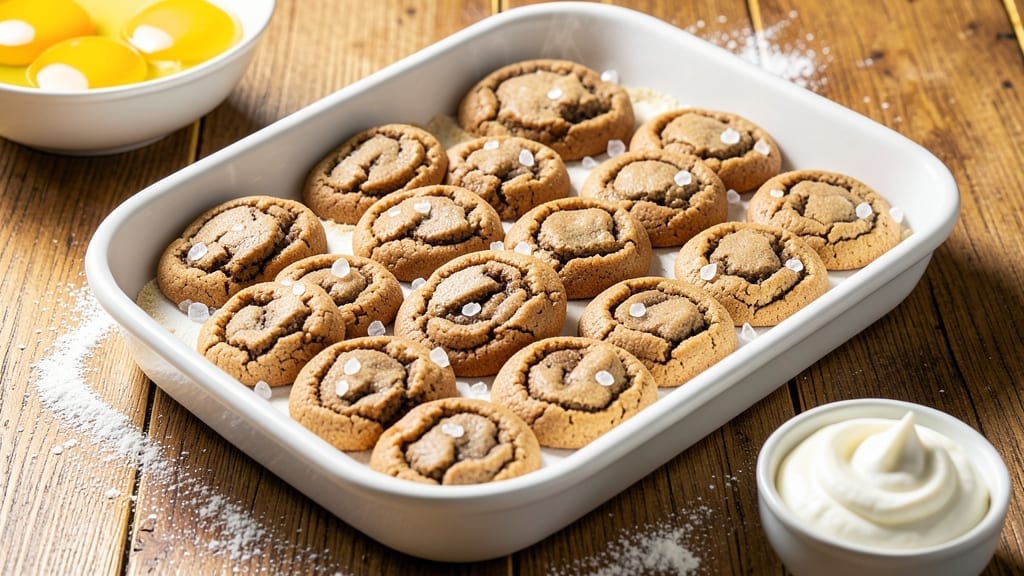
This 6 dozen cookies recipe ensures no last-minute store runs or sad, half-eaten trays—just perfectly golden, crisp-edged cookies that vanish faster than you can say “second helping,” perfected after three burned batches. my first holiday cookie exchange, where my oatmeal raisin cookies turned into hockey pucks. The secret? Exact measurements, proper resting time, and a technique that ensures every cookie comes out perfectly every time—no matter how many you’re making.
This recipe scales effortlessly from a single batch to six dozen without sacrificing texture or flavor.
We use a foolproof 1:1:1:2 ratio of butter, sugar, eggs, and flour (plus a pinch of salt) that delivers consistent results, whether you’re making classic chocolate chip or experimenting with variations like white chocolate macadamia or snickerdoodle.
The dough rests for 30 minutes—critical for even baking—and we use a cookie scoop to maintain uniform size, which prevents uneven baking in large batches.
What you’ll end up with is a perfectly balanced batch of cookies: crisp edges that stay crisp, chewy centers that hold their shape, and just the right amount of browning for that holiday bakery look.
The aroma alone will have your kitchen smelling like a Christmas movie set, and the cookies will stay fresh for up to 5 days in an airtight container or frozen for 3 months—ideal for gifting or prepping ahead.
This is the kind of recipe that turns holiday baking from stressful to satisfying.
For those who love to customize, we’ve included variations for chocolate chip, oatmeal raisin, and snickerdoodle—each with their own flavor profile but the same perfect texture. The dough can be mixed in a stand mixer or by hand, and we’ll show you how to portion it efficiently for large batches.
Let’s get baking—your holiday guests (and your future self) will thank you.
Ingredients for 6 dozen cookies
These 14 ingredients transform into six dozen perfect cookies—crisp edges, chewy centers, and holiday aroma guaranteed.
| Ingredient | Amount | Notes |
|---|---|---|
| Unsalted Butter 🧈 | 2 cups | Cold, cubed for even mixing |
| Granulated Sugar 🍚 | 2 cups | Superfine preferred for smooth texture |
| Large Eggs 🥚 | 2 whole | Room temperature for even baking |
| All-Purpose Flour 🌾 | 4 cups | Sifted for light, airy dough |
| Diamond Crystal Kosher Salt 🧂 | 1 tsp | Fine grain preferred |
| Baking Soda 🧪 | ½ tsp | Ensures proper rise |
| Vanilla Extract 🌿 | 1 tbsp | Pure, high-quality extract |
| Semisweet Chocolate Chips 🍫 | 2 ½ cups | Enjoy Life brand for allergy-safe |
| White Chocolate Chips 🍫 | ½ cup | Optional, for variation |
| Macadamia Nuts 🥜 | ½ cup | Chopped, toasted for flavor |
| Cinnamon 🌶️ | 1 tsp | Ground, for snickerdoodle variation |
| Brown Sugar 🍚 | ½ cup | Packed, for oatmeal raisin variation |
| Old-Fashioned Rolled Oats 🥣 | 1 cup | Blended into flour for texture |
| Raisins 🍇 | 1 cup | Chopped, plump for oatmeal raisin |
The butter and sugar ratio is non-negotiable—stick to 2 cups butter to 2 cups sugar for foolproof texture. Kirkland Signature butter from Costco gives the best flavor without graininess, but any unsalted brand works. Room-temperature eggs are critical; cold eggs cause uneven baking. Flour matters too—King Arthur or Gold Medal are my go-tos, but sift it first for lightness. The vanilla extract should be pure—McCormick or Nielsen-Massey are reliable. For chocolate chips, Enjoy Life brand is a must if you’re baking for guests with allergies, but Ghirardelli works too.
No vanilla extract? Almond extract at half the amount adds depth, though it’s stronger. Want to skip nuts? Dried cranberries or chopped dates work in oatmeal raisin. For snickerdoodle, swap the cinnamon for pumpkin pie spice if you’re feeling adventurous. The brown sugar is only for oatmeal raisin—pack it tightly to avoid measuring errors. Raisins need a quick soak in warm water if they’re dry. And yes, you can mix all three variations in one batch—just portion the dough before adding mix-ins.
Dough keeps for 3 days in the fridge, wrapped tightly in plastic. For longer storage, freeze portions in 1-tbsp balls—they’ll stay fresh for 3 months. Scoop the dough with a 1.5-tbsp cookie scoop for uniform size, and bake on the middle rack for even heat. Cookies stay crisp for 5 days in an airtight container, or freeze baked cookies for 3 months—perfect for gifting. Double batches? Divide the dough into two portions and bake separately to avoid overcrowding.
Why You’ll Love This Recipe
- No-Fail Batch Baking: I swear by this for parties or just treating myself—just cream butter and sugar, toss in eggs, and fold in flour. The dough comes together in five minutes while I’m still debating whether to put on an apron.
- Buttery Crisp Edges: That golden, crackly crust? Pure magic from cold butter cut into the sugar. One bite and you’ll forget about store-bought—it’s the kind of cookie that makes you pause mid-chew to savor the melt-in-your-mouth center.
- Party-Proof Staple: Gift bags, office potlucks, or a midnight snack when the power’s out—these cookies always disappear. I’ve made them for holiday gifts, teacher appreciation, and even as a “sorry I’m late” peace offering. (They work every time.)
- Pantry Goldmine: Uses what you already have—no weird ingredients or last-minute grocery runs. A stick of butter, a cup of sugar, a handful of eggs—this recipe turns basic staples into something irresistible. Plus, leftovers? They last weeks if you can resist them.
Step-by-step instructions for double-batch holiday cookies
Here’s how to transform these ingredients into 6 dozen perfect holiday cookies every time.
Cream the Butter and Sugars Together
In a stand mixer fitted with the paddle attachment, combine the 2 cups unsalted butter and 2 cups granulated sugar. Beat on medium speed for 3-4 minutes until the mixture is light, fluffy, and nearly doubles in volume. You’ll notice the color lighten and the texture become airy—this is crucial for achieving those signature crackly tops.
I like to scrape down the sides of the bowl with a silicone spatula every 30 seconds to ensure even mixing. The butter should be completely smooth with no visible lumps. If you’re using brown sugar instead of granulated for variations, add it now and mix for another 30 seconds to fully incorporate.
Add Eggs and Vanilla Extract
Add the 2 whole large eggs one at a time, mixing on low speed for 30 seconds after each addition. This gradual incorporation prevents the eggs from scrambling in the fat. After both eggs are fully incorporated, add the 1 tablespoon vanilla extract and mix for another 10 seconds until just combined.
Here’s the thing—room temperature eggs blend more smoothly and create a lighter texture. If your eggs are straight from the fridge, let them sit in warm water for 5 minutes before using. The mixture should now be thick and pale, almost like a pale yellow custard.
Combine Dry Ingredients and Mix Just Until Combined
In a separate bowl, whisk together the 4 cups all-purpose flour, 1 teaspoon diamond crystal kosher salt, 0.5 teaspoon baking soda, 1 teaspoon cinnamon, and 1 cup old-fashioned rolled oats. I use a wire whisk for this to avoid clumping. For the oatmeal raisin variation, also add the 0.5 cup brown sugar and 1 cup raisins to this dry mixture.
With the mixer on low speed, gradually add the dry ingredients to the wet mixture. Mix just until combined—you should still see some flour streaks. Overmixing develops gluten, which makes cookies tough instead of tender. Stop mixing as soon as the dough comes together.
Fold in Chocolate Chips and Nuts
Remove the mixer bowl and use a silicone spatula to gently fold in the 2.5 cups semisweet chocolate chips, 0.5 cup white chocolate chips, and 0.5 cup macadamia nuts. I like to press the dough together with my fingers to ensure even distribution of the chocolate and nuts throughout the mixture.
This is where you can customize your cookies. For snickerdoodle flavor, add the cinnamon to the dry ingredients. For oatmeal raisin, include the brown sugar and raisins. The dough will be thick and slightly sticky—this is normal and expected with this recipe.
Chill the Dough for Perfect Texture
Divide the dough into two equal portions and flatten each into a disc about 1-inch thick. Wrap each disc tightly in plastic wrap and refrigerate for at least 1 hour, or up to 24 hours. This chilling step is absolutely critical—it prevents excessive spreading in the oven and allows the flour to fully hydrate for better texture.
I know it’s tempting to skip this step when you’re eager to bake, but trust me on this one. The cookies will have better structure, more flavor development, and that perfect balance of crispy edges and chewy centers. After chilling, the dough should be firm enough to handle without sticking to your fingers.
Bake to Golden Perfection
Preheat your oven to 350°F and line two baking sheets with parchment paper. Using a cookie scoop or tablespoon, portion the dough into 1.5-tablespoon sized balls (about 1.5 ounces each) and place them 3 inches apart on the prepared baking sheets. For a more rustic look, gently flatten each cookie slightly with your palm.
Bake for 11-13 minutes until the edges are golden brown and the centers still look slightly underdone. They’ll continue cooking on the hot pan after you remove them. Rotate the baking sheets halfway through baking for even browning. The cookies should be soft in the middle with crispy edges—this is what makes them so irresistible.
Pro Tips For Making 6 Dozen Cookies
- Cream Butter Slowly: I learned this the hard way—dumping cold butter into sugar at room temp just makes a greasy mess. Use a stand mixer (or hand mixer) and let the butter soften while creaming it with sugar for 3–5 minutes. The mixture should look fluffy, not soupy, before adding eggs.
- Measure Salt Precisely: Diamond Crystal kosher salt clumps like crazy, and eyeballing it ruins texture. Use a kitchen scale for 1.5 teaspoons (or spoon it into a measuring cup, level it off, then tap gently—no shaking). Too much salt? Your cookies will taste like a sad pretzel.
- Chill Dough Twice: Yes, even if you’re impatient like me. After mixing, refrigerate the dough for at least 2 hours (overnight is better). Then, scoop portions and freeze them on a tray before bagging. This prevents spreading and saves you from baking 6 dozen at once.
- Rotate Baking Trays: Your oven’s hot spots are real, and crowding trays means uneven baking. Use two trays at a time, rotating them halfway through. If your cookies start browning too fast, lower the temp by 25°F—better pale edges than burnt bottoms.
Storing and reheating this recipe
Room-Temp Revival
If your cookies have lost their crispness after sitting out, revive them by placing the entire container in a 350°F oven for 3-5 minutes. This gentle heat reactivates the starches without overcooking.
I do this with cookies that sat overnight—they come out fresh-tasting and crisp again. For extra crunch, sprinkle a tiny bit of powdered sugar on top before reheating. 🔥
Freezer-Friendly Baking
Baked cookies freeze beautifully for up to 3 months—just store them in a single layer on a baking sheet, freeze solid, then transfer to a ziplock freezer bag.
To reheat, place frozen cookies directly on a baking sheet and warm in a 300°F oven for 5-7 minutes until crisp. No need to thaw first—they’ll soften perfectly. This is my go-to method for holiday gifting!
Microwave Shortcuts
For a quick fix, microwave cookies in 10-second bursts on high power, checking after each interval. Cover them loosely with a damp paper towel to retain moisture. I find this works best for 2-3 cookies at a time—any more risks uneven heating.
The microwave method is great for single cookies but won’t restore full crispness like oven reheating. 💫
Storage Containers
Use airtight containers with a paper towel between layers to absorb moisture. I prefer glass containers like Pyrex because they keep cookies fresher longer than plastic. For maximum freshness, store at room temperature and consume within 5 days.
If storing longer than 2 days, refrigerate—but bring to room temp before serving for best texture.
Batch Prep Tips
When making six dozen cookies, divide baked batches into 12-cup portions for easy storage. Label containers with the date and variation type (chocolate chip, snickerdoodle, etc.). I keep a rolling chart in my kitchen to track freshness—this prevents the “did I make these last week?” dilemma.
For gift-giving, portion into 12-count boxes with a ribbon for presentation. 🎁
Texture Troubleshooting
If cookies turn out too soft after reheating, they likely absorbed too much moisture. Next time, store them in a cool, dry place with a silica gel packet in the container.
For overly dry cookies, sprinkle with 2 tsp milk before reheating—they’ll regain moisture without losing crispness. This trick works wonders for cookies that sat too long in humid weather.
Nutrition facts
Frequently asked questions
Can I make this recipe with a stand mixer or do I need a hand mixer?
A stand mixer is ideal for this large batch, but a hand mixer works too—just use the paddle attachment and mix on medium-high speed for 4-5 minutes when creaming butter and sugar. The key is mixing until the mixture is light and fluffy, which is easier with a stand mixer’s power. For hand mixers, take extra time to scrape down the bowl frequently to ensure even mixing.
How do I adjust the recipe for high-altitude baking?
For high-altitude areas (above 3,500 feet), reduce the flour by 2 tablespoons and add 1 tablespoon cornstarch to the dry ingredients. Also, bake at 325°F instead of 350°F and watch closely—they’ll brown faster. The dough may spread more, so flatten the cookies slightly before baking. Test one first to adjust timing.
What’s the best way to portion the dough for consistent cookies?
Use a 1.5-tablespoon cookie scoop (about 1.5 ounces per cookie) for uniform size. If you don’t have one, use a tablespoon and level it with a knife. For rustic cookies, gently press each portion with your palm before baking. The dough should be cold when scooping—if it’s too soft, chill it 10 more minutes. Consistent portions prevent uneven baking.
Can I substitute butter for oil in this recipe?
Not recommended! Butter adds flavor and helps create that signature crispy edge. If you must, use 1 cup melted butter plus 1 cup vegetable oil, but the texture will be slightly different—less crisp and more cake-like. For best results, stick with butter and let it come to room temperature before mixing.
Why did my cookies spread too much in the oven?
Overmixing the dough or skipping the 1-hour chill are the most common causes. Also, check your butter—if it’s too warm, it’ll melt and cause spreading. Use room-temperature butter and chill the dough properly. Another trick: flatten the cookies slightly before baking to control spread. For extra thickness, bake on the middle rack at 350°F for 10-11 minutes.

- Pork Loin Pulled Pork Crock Pot Recipe: Slow-Smoked Tenderness With Zero Dryness - November 1, 2026
- Baked Potatoes in Crock Pot Recipe: Buttery Interiors and Crispy Top Magic - November 1, 2026
- Braised Beef Short Ribs Recipe: Crock Pot Fall-Off-Bone Magic in 6 Hours - November 1, 2026