
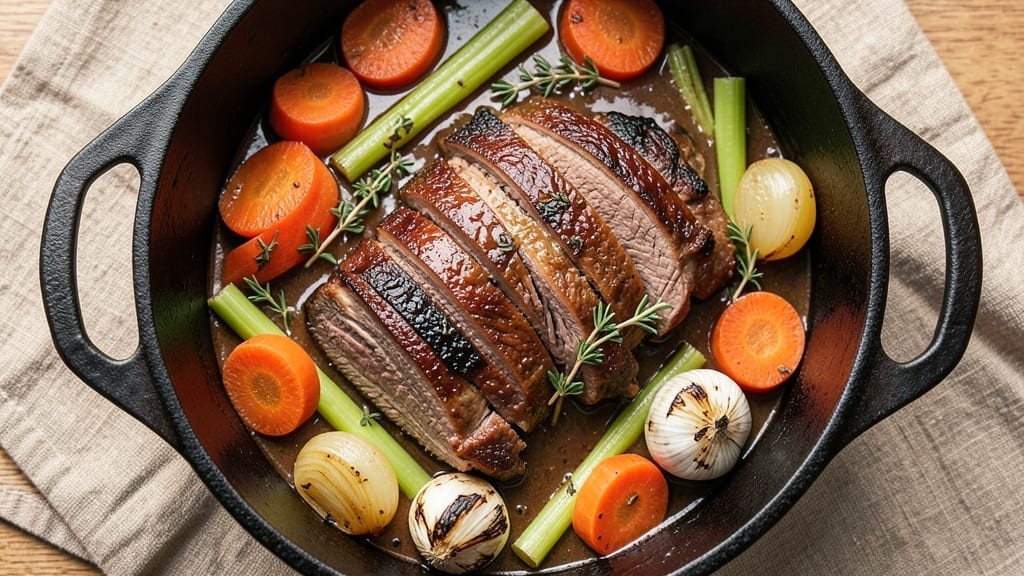
A 6-hour beef stew transforms tough cuts into melt-in-your-mouth perfection through slow, deliberate cooking—where flavors deepen with every passing hour. This isn’t just a meal; it’s a foolproof method for restaurant-quality results at home, where caramelized edges and tender beef create a dish that tastes even better the next day.
The secret lies in patience: browning the meat thoroughly and letting it simmer low and slow, allowing collagen to break down into rich, velvety broth.
What sets this recipe apart is the balance of technique and simplicity. You’ll start with a simple ingredient list—chuck roast, root vegetables, and aromatic herbs—but the magic happens in the 6-hour simmer.
The beef becomes fork-tender while absorbing the flavors of garlic, thyme, and bay leaves, creating a dish that’s hearty enough for a cold evening yet elegant enough for company. No fancy equipment is needed, just time and attention to detail.
By the final hour, your kitchen will smell like a homey, comforting embrace, and every spoonful will deliver layers of deep, savory richness. The broth reduces to a perfect consistency, coating every bite in a luxurious, umami-packed sauce.
This is the kind of stew that disappears quickly—so plan to make extra. The leftovers, if there are any, will be even better the next day, as the flavors continue to meld.
Serve it with crusty bread to soak up every last drop or alongside roasted potatoes for a complete meal. The beauty of this recipe is its versatility—it’s perfect for a weeknight dinner or a special occasion. Let’s get started on creating a stew that’s worth the wait.
Ingredients for 6 hour beef stew
Six core ingredients transform tough beef into luxurious, melt-in-your-mouth perfection through slow simmering.
| Ingredient | Amount | Notes |
|---|---|---|
| Chuck Roast 🥩 | 3 lb | Well-marbled for tenderness |
| Yellow Onions 🧅 | 2 whole | Chopped into 1-inch pieces |
| Carrots 🥕 | 4 medium | Peeled and cut into 1-inch chunks |
| Celery Stalks 🧄 | 4 whole | Diced into 1/2-inch pieces |
| Garlic Cloves 🧄 | 6 cloves | Minced for aromatic depth |
| Fresh Thyme 🌿 | 2 tbsp | Leaves only, stems removed |
| Bay Leaves 🌿 | 2 whole | For subtle herbal complexity |
| Tomato Paste 🍅 | ½ cup | For rich umami foundation |
| Beef Broth 💧 | 6 cups | Homemade or high-quality store-bought |
| Red Wine 🍷 | 1 cup | Bold dry variety recommended |
| Olive Oil 🫒 | 2 tbsp | Extra-virgin for searing |
| Salt 🧂 | 1 ½ tsp | Diamond Crystal preferred |
| Ground Black Pepper 🌶️ | 1 tsp | Freshly cracked for intensity |
| All-Purpose Flour 🌾 | 2 tbsp | For thickening broth |
The chuck roast is non-negotiable—its marbling ensures tender results. Costco’s pre-cut chuck roast saves time, but a whole roast from Whole Foods gives you better control over size. Look for pieces with visible fat marbling; this fat renders during cooking, creating a velvety sauce. The vegetables—carrots, celery, and onions—should be fresh but don’t need perfection; imperfect shapes work fine as long as they’re crisp. For the thyme, fresh bundles from the grocery store’s produce section last longer than dried, and the flavor is more vibrant. Bay leaves add subtle complexity, so use only the highest quality—dried leaves from Penzeys are ideal.
No red wine? Substitute with additional beef broth and a splash of balsamic vinegar—it mimics the acidity and depth. Fresh thyme unavailable? Dried thyme at one-third the amount works, but toast it first in a dry pan for 30 seconds to intensify flavor. The tomato paste can be swapped for crushed San Marzano tomatoes if you prefer a chunkier texture. For the flour, King Arthur all-purpose creates a smooth thickening, but any high-quality flour will suffice. If you’re watching carbs, reduce the flour to 1 tablespoon and stir more frequently during the final thickening stage.
This stew tastes even better the next day as flavors meld further. Store in an airtight container in the fridge for up to 5 days—the sauce will thicken beautifully. For longer storage, freeze portions for up to 3 months. When reheating, add a splash of water or broth to prevent drying. The leftovers reheat perfectly—simmer gently on the stove or microwave in 30-second bursts, stirring between each, until heated through. The crusty bread you’ll serve alongside? Store it in a paper bag at room temperature for up to 3 days.
Why You’ll Love This Recipe
- Foolproof Prep: I swear by this method—just sear the chuck roast in one pot, toss in the onions, carrots, and celery (no fancy dicing needed), then let the slow cooker do the work. The garlic cloves get buried in the meat, so every bite is packed with that deep, savory punch without any extra effort.
- Deep, Rich Flavor: That six-hour simmer transforms tough chuck roast into melt-in-your-mouth perfection. The onions caramelize just enough to sweeten the broth, while the garlic cloves infuse the whole pot with a warmth that lingers. Honestly, it’s the kind of taste that makes you slow down and savor every spoonful.
- Weeknight Workhorse: Between us, this is my go-to for busy nights—dump everything in the crockpot in the morning, and by dinner, it’s ready. It’s hearty enough for a family dinner but simple enough to reheat for lunches all week. (Yes, even on a Tuesday night when you’re exhausted.)
- Budget Magic: A single chuck roast stretches to feed four or five, and the veggies—onions, carrots, celery—are cheap staples that bulk it up. I’ve made this for under $10 per serving, and it always feels like a restaurant-quality meal. That’s the kind of practical win I love.
Step-by-step instructions for 6-Hour beef stew
This method builds rich, layered flavor through slow cooking and proper technique.
Sear the Chuck Roast for Maximum Flavor
Pat the 3 lb chuck roast dry with paper towels—this ensures a proper sear. Heat the 2 tablespoons olive oil in a heavy Dutch oven over medium-high heat until shimmering. Place the roast in the pot and sear on all sides for 5-6 minutes total, until deeply browned in spots. The goal is to develop a rich crust that will carry through the long cooking process.
Remove the roast and set it aside. Don’t wipe out the Dutch oven—those browned bits are pure flavor waiting to dissolve into the stew. This initial searing creates the foundation for the stew’s deep, caramelized taste that develops over hours of cooking.
Build the Aromatic Base
In the same Dutch oven, add the 2 whole yellow onions, 4 medium carrots, and 4 whole celery stalks. Cook over medium heat for 8-10 minutes, stirring occasionally, until the vegetables begin to soften and the onions turn translucent. This process releases their natural sugars and sweetness into the pot.
Add the 6 cloves minced garlic and cook for another 30 seconds until fragrant. Stir in the 2 tablespoons fresh thyme leaves and 2 whole bay leaves. Pour in the 1 cup red wine and scrape up all the browned bits from the bottom of the pot. Let the wine simmer for 3-4 minutes until reduced by half. This step develops the stew’s complex flavor profile through the Maillard reaction and wine reduction.
Create the Rich Umami Foundation
Add the 0.5 cup tomato paste and stir to combine. Cook for 2 minutes until it darkens slightly and loses its raw taste. Sprinkle the 2 tablespoons all-purpose flour over the vegetables and stir vigorously for 1-2 minutes. This creates a roux that will help thicken the stew and bind all the flavors together.
Pour in the 6 cups beef broth and add the 1.5 teaspoons salt and 1 teaspoon ground black pepper. Return the seared chuck roast to the pot, along with any accumulated juices. Bring the mixture to a gentle simmer, then reduce heat to maintain a bare bubble at the surface. This low-and-slow approach prevents the stew from boiling vigorously, which can make the meat tough.
Slow Cook to Perfection
Cover the Dutch oven and transfer it to a preheated 300°F oven. Cook for 5-6 hours, maintaining the gentle simmer. The stew will develop a rich, velvety texture and deep color as the meat breaks down and the flavors meld. Check occasionally and add hot water if needed to maintain the liquid level—you want it to remain just below the surface of the meat.
About 1 hour before the stew is done, skim off any excess fat that rises to the surface. This helps create a cleaner, more elegant presentation. The stew is finished when the chuck roast is fork-tender and pulls apart easily. The vegetables should be completely tender but still hold their shape.
Finish and Serve
Remove the stew from the oven and let it rest for 15 minutes. This resting period allows the flavors to fully develop and the juices to redistribute throughout the meat. Discard the bay leaves and adjust seasoning if needed—this is when you can truly taste the final result.
Ladle the stew into warmed bowls, ensuring each serving contains both meat and vegetables. The stew should be rich, velvety, and deeply flavorful, with each bite delivering layers of caramelized beef, aromatic vegetables, and complex wine and herb notes. Serve with crusty bread to soak up every last drop of this comforting, restaurant-quality dish.
Pro Tips For Making 6 Hour Beef Stew
- Sear the Chuck Hard: That crust isn’t just for looks—it’s what keeps the meat tender and rich during six hours of simmering. Use a heavy pot, medium-high heat, and let it sit undisturbed for 3-4 minutes per side until deep brown. I learned this the hard way when I rushed it and ended up with gray, mushy beef.
- Cut Celery in Half Lengthwise: Whole celery stalks take forever to soften and leave you with chewy bits. Slice them lengthwise into quarters first—this speeds up cooking and gives you that classic stew texture without the guesswork. (Yes, even if you’re impatient like me.)
- Deglaze with Red Wine First: Skip the water and start with ½ cup of red wine (or broth) right after searing. The alcohol burns off quickly, adding depth that water can’t match. My grandmother swore by this, and she was right: the flavor difference is noticeable.
- Add Carrots Last: Toss them in during the final 30 minutes so they stay crisp-tender, not mushy. If you’re worried about timing, just peel and cut them earlier but hold off on adding them until the end—your future self will thank you.
Dietary considerations for this dish
Gluten-Free Adaptations
This stew is naturally gluten-free, but the flour used for thickening requires attention. Replace the 2 tbsp all-purpose flour with 2 tbsp cornstarch or 2 tbsp gluten-free flour blend like Bob’s Red Mill 1:1.
Stir the cornstarch into a little cold water first to prevent clumping, then whisk into the simmering stew during the final 10 minutes of cooking. The texture will be just as rich and velvety. 💫
Low-Carb Modifications
For a lower-carb version, reduce the carrots to 2 medium and omit the tomato paste. Instead, add ½ cup crushed tomatoes (no sugar added) for acidity.
The flour can be cut to 1 tbsp gluten-free flour blend—just stir more frequently during the last 15 minutes to achieve the desired thickness. The beef and broth will still provide hearty satisfaction without the extra carbs.
Dairy-Free Considerations
This recipe is already dairy-free, but if you’re using a specific dairy-free broth, check the label for hidden additives. The King Arthur all-purpose flour is naturally dairy-free, and the olive oil provides all the fat needed.
For extra richness, stir in 1 tbsp nutritional yeast during the final 5 minutes of cooking—it adds a cheesy, umami depth without dairy. 🌱
Allergen-Friendly Swaps
For nut allergies, ensure your beef broth is nut-free (some brands use nut-based thickeners). If you’re avoiding wine, substitute with 1 cup additional beef broth plus 1 tbsp balsamic vinegar to maintain acidity.
For soy allergies, check your tomato paste—some brands contain soy lecithin. Always verify labels on store-bought ingredients to keep this stew safe for all dietary needs.
Protein Variations
Want to make this stew vegetarian? Swap the beef for 3 lbs extra-firm tofu (pressed and cubed) or 3 lbs mushrooms (cremini or portobello). Sear the tofu or mushrooms first for depth, then proceed with the same method.
For a seafood twist, use 3 lbs firm white fish (like cod) and reduce cooking time to 30 minutes—add the fish during the last 10 minutes to prevent overcooking. 🍽️
Nutrition facts
Frequently asked questions
Can I use a slow cooker instead of the oven for this 6-hour beef stew?
Transfer the stew to a slow cooker after Step 3 and cook on low for 8 hours or high for 5-6 hours. The key is maintaining a gentle simmer—if the liquid reduces too much, add a splash of broth or water. The slow cooker method is perfect for hands-off cooking while you’re busy during the day.
Why does the recipe call for such a long cooking time?
The 6-hour simmer is essential for transforming tough chuck roast into tender, melt-in-your-mouth beef. This slow cooking time allows collagen in the meat to break down into rich, velvety gelatin that thickens the broth. The flavors also deepen as the aromatics and wine meld together over time, creating a complex, restaurant-quality dish. Patience is the secret to the perfect texture and taste!
What if my stew ends up too thick or too thin?
If too thick, stir in ½ cup hot broth or water to loosen. If too thin, mix 1 tbsp cornstarch with 2 tbsp cold water, stir into the stew, and simmer for 5 minutes until thickened. For a smoother finish, strain the stew through a fine-mesh sieve before serving—just be sure to return the meat and vegetables to the pot first.
Can I make this stew in a smaller pot or Dutch oven?
Yes, but reduce the recipe by half to maintain proper proportions. A 3-quart Dutch oven works well for 1.5 lbs of beef and 3 cups of broth. The key is keeping the liquid level just below the meat surface—this ensures even cooking and prevents boiling, which can make the meat tough. Smaller batches often yield even more concentrated flavor!
How do I know when the beef is fully tender?
The beef is done when it easily pulls apart with a fork and the meat fibers separate cleanly. For extra assurance, cut into a small piece—if it’s fork-tender and juicy (not dry), it’s ready. The vegetables should also be completely tender but not mushy. If in doubt, let it cook 15-30 minutes longer—the stew will only get better!

- 6 Oz Chocolate Chip Cookie Recipe: Perfectly Balanced Crispy Edges and Chewy Hearts - September 25, 2026
- 6-Inch Coffee Cake Recipe: Vanilla Bean Swirls and Buttery Streusel Topping - September 25, 2026
- 1 Hour Soup Recipe: Velvety Richness Without the Wait - September 25, 2026