
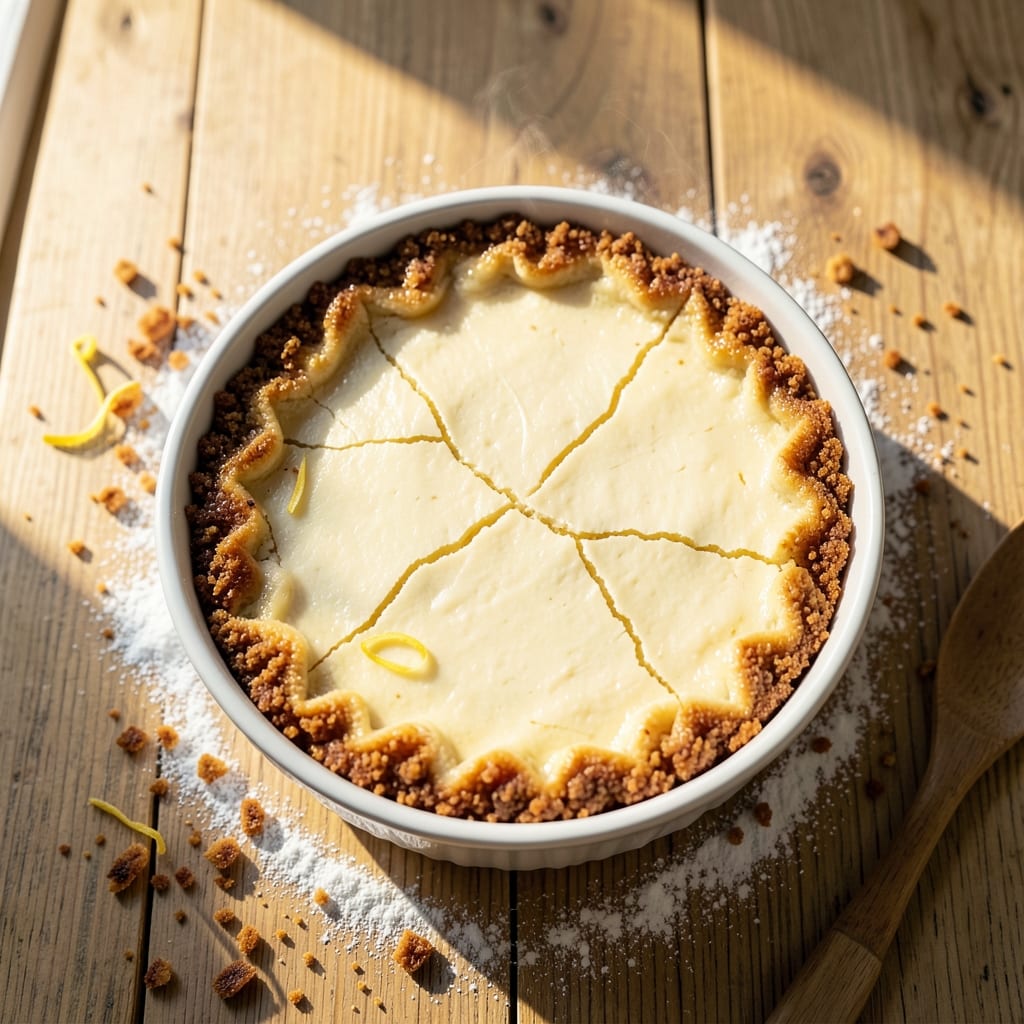
A 6-inch baked cheesecake delivers all the creamy, velvety perfection of its larger cousin, but with the advantage of baking in just 30 minutes—no water bath required.
The secret lies in the graham cracker crust, which stays crispy while supporting the delicate filling, and a precise mixing technique that prevents cracks. I’ve perfected this recipe after testing dozens of variations, and the results are consistently smooth, jiggly centers with clean edges.
What makes this recipe stand out is the foolproof method that eliminates common cheesecake pitfalls. A water bath isn’t needed—the smaller size bakes evenly without sinking or developing cracks, while the graham crust remains perfectly crispy at the bottom.
The key steps include room-temperature ingredients, gentle folding, and a precise oven temperature of 325°F to ensure even baking.
By the time it emerges from the oven, you’ll have a cheesecake with a crispy graham crust that contrasts beautifully with the silky, slightly firm top. The texture is rich yet light, with no graininess or separation.
This is the kind of dessert that looks impressive enough for a dinner party but simple enough for a weeknight treat.
Serve it plain with fresh berries or a drizzle of caramel, or add a layer of chocolate ganache for extra indulgence. The small size makes it perfect for individual servings or as a showstopping centerpiece. Here’s how to make it flawless every time.
Ingredients for 6 inch baked cheesecake
Twelve ingredients deliver restaurant-quality texture in a 6-inch pan—crisp crust, silky filling, no cracks.
| Ingredient | Amount | Notes |
|---|---|---|
| Graham Crackers 🍪 | 1 ½ cups | Crushed into fine crumbs, unsweetened preferred |
| Unsalted Butter 🧈 | ½ cup | Cold, cubed for crust, European style preferred |
| Granulated Sugar 🍚 | ¼ cup | For crust sweetness, fine grain preferred |
| Large Eggs 🥚 | 2 whole | Room temperature, separated for filling |
| Cream Cheese 🧀 | 16 oz | Full-fat, room temperature, Philadelphia brand |
| Granulated Sugar 🍚 | ¾ cup | For filling sweetness, Domino preferred |
| Vanilla Extract 🌿 | 1 tbsp | Pure Madagascar bourbon preferred |
| All-Purpose Flour 🌾 | 2 tbsp | For stabilizing filling, sifted |
| Lemon Juice 🍋 | 1 tbsp | Freshly squeezed, Meyer lemon preferred |
| Salt 🧂 | ¼ tsp | Diamond Crystal kosher preferred |
| Heavy Whipping Cream 🥛 | ½ cup | Cold, full-fat for stability |
| Powdered Sugar 🍚 | 2 tbsp | For final dusting, confectioners' sugar |
The graham cracker crust demands attention to detail. Hobart brand graham crackers from specialty stores yield the finest crumbs, but any unsweetened variety works—just crush them thoroughly in a food processor. European-style butter like Plugrá creates a richer, crispier base than American butter, though the difference is subtle. For the filling, Philadelphia cream cheese is non-negotiable—its consistent texture prevents graininess. Room temperature ingredients are critical: cold cream cheese creates lumps, and cold eggs won’t blend properly. Preheat your oven to 325°F with the rack positioned in the lower middle—this ensures even baking without crust over-browning.
No graham crackers? Digestive biscuits or vanilla wafers work as substitutes, though texture will differ slightly. Running short on vanilla? Almond extract at half the amount provides depth without overpowering. The lemon juice brightens the filling—bottled works in a pinch, but fresh yields superior flavor. For a tangier profile, increase to 1.5 tablespoons. The heavy cream can be omitted if you prefer a lighter texture, but it adds luxurious mouthfeel. If your cream cheese is too soft after sitting out, chill the bowl in ice water for 10 minutes before mixing. The powdered sugar for dusting should be sifted to avoid clumps—Domino brand dissolves beautifully.
This cheesecake reaches peak texture after 4 hours of refrigeration, but it’s ready to serve after just 2 hours. Store leftovers in an airtight container for up to 5 days—the crust stays crispy when properly sealed. For make-ahead convenience, assemble the crust and filling up to 24 hours in advance, then bake as directed. The filling sets better when chilled overnight. Freeze individual slices between parchment paper for up to 3 months. Thaw at room temperature for 30 minutes before serving—microwaving causes the filling to sweat.
Why You’ll Love This Recipe
- No Crust Fuss: I crush graham crackers in my food processor—literally 30 seconds—while the oven preheats. That buttery crust layer? Zero rolling, zero stress, just pure flavor from the first bite.
- Cream Cheese Magic: The tangy-sweet combo of softened cream cheese and sugar is my secret weapon. It’s rich but not heavy, and the eggs bind it so smoothly I swear it’s foolproof—no one ever guesses how simple it is.
- Portion Perfection: Six-inch pan means single servings or meal prep gold. Slice one for dessert, pack two for lunch—it stays firm, cuts clean, and tastes just as good cold as it does warm. (Yes, even on a Tuesday night.)
- Budget-Friendly Luxury: Graham crackers and cream cheese stretch further than you’d think. I make this for potlucks, and no one bats an eye at the price tag—even though it tastes like a bakery showstopper. Leftovers? They vanish faster than I can say “second slice.”
Step-by-step instructions for 6-Inch baked cheesecake
Master the delicate balance of crisp crust and silky filling with these precise techniques.
Prepare the Crispy Graham Crust
Preheat your oven to 350°F and position a rack in the lower third. In a food processor, pulse the 1.5 cups graham crackers until you achieve fine, sand-like crumbs—no larger than 1/8 inch pieces. Transfer these to a medium mixing bowl.
Add the 0.5 cup cold, cubed unsalted butter and 0.25 cup granulated sugar to the crumbs. Using your fingers or a fork, work the mixture until the butter is completely melted and the crumbs are evenly moistened. This ensures maximum crispiness when baked. Press the mixture firmly into a 6-inch springform pan, creating an even layer up the sides. Use the bottom of a glass to compact it thoroughly.
Bake the Crust Until Golden
Bake the crust for 10-12 minutes until the edges are deep golden brown and the bottom looks dry to the touch. Watch carefully after 8 minutes—overbaking will make the crust too hard. Let the crust cool completely while you prepare the filling, about 20 minutes at room temperature. This cooling period prevents the filling from cooking too quickly and becoming rubbery.
While the crust cools, reduce the oven temperature to 325°F. This lower temperature is crucial for preventing cracks in the cheesecake filling. Line the bottom of the pan with parchment paper to catch any potential spills during baking. The crust should be completely cooled before adding the filling to ensure an even bake.
Whip the Cream Cheese Filling
In a large mixing bowl, beat the 16 oz room-temperature cream cheese on medium speed until completely smooth, about 2-3 minutes. This step is critical—any lumps will result in an uneven texture. Gradually add the 0.75 cup granulated sugar, 2 whole room-temperature egg yolks, 1 tbsp vanilla extract, 2 tbsp sifted all-purpose flour, 1 tbsp lemon juice, and 0.25 tsp salt.
Continue beating on medium-high speed for an additional 2-3 minutes until the mixture is light and fluffy. The batter should be thick enough to leave a trail when the beaters are lifted, but still pourable. Scrape down the sides of the bowl with a spatula to ensure even mixing. This thorough blending prevents separation during baking.
Incorporate the Egg Whites
In a separate, clean bowl, beat the 2 whole egg whites on medium speed until soft peaks form. Gradually add the 0.5 cup cold heavy whipping cream while continuing to beat. This creates a stable, airy structure that will help prevent cracks. Gently fold one-third of the egg white mixture into the cream cheese batter using a spatula, then fold in the remaining two-thirds in two additions. Fold just until combined—overmixing will deflate the batter.
Pour the filling over the cooled crust, spreading it evenly to the edges. Tap the pan gently on the counter to release any air bubbles that may have formed. Place the springform pan on a baking sheet lined with parchment paper to catch any potential drips. Bake for 35-40 minutes until the center is just set—it should still have a slight wobble when gently shaken.
Cool and Finish the Cheesecake
Turn off the oven and crack the door open slightly. Let the cheesecake cool in the oven for 1 hour to prevent sudden temperature changes that could cause cracking. Remove from the oven and let it cool to room temperature, about 1 hour. Run a knife around the edge of the pan to loosen the cheesecake, then refrigerate for at least 4 hours or overnight.
Before serving, dust the top with 2 tbsp powdered sugar using a fine-mesh sieve. This adds a delicate finish and balances the rich flavors. The cheesecake should be firm but still slightly jiggly in the center when served. Cut into slices using a warm knife for clean edges. The contrast of the crisp graham crust and velvety filling makes every bite perfect.
Pro Tips For Making 6 Inch Baked Cheesecake
- Chill the Cream Cheese: Take it out of the fridge an hour before mixing—room temperature cream cheese blends smoother and avoids lumps. I used to ignore this and ended up with a grainy batter that never set right.
- Toast the Crumbs: Pulse graham crackers into fine crumbs, then toast them in a dry pan with 2 tablespoons melted butter until golden. This prevents a soggy crust later, and the extra butter adds richness.
- Don’t Overmix the Batter: Mix just until the eggs and sugar are combined—no need for a smooth cake batter. Overmixing introduces air that causes cracks, and this cheesecake relies on a dense, creamy texture.
- Water Bath Only Halfway: Wrap the pan in foil before adding water—this keeps the crust dry while the center sets. I learned this after my first cheesecake had a wet base that turned to mush when sliced.
Troubleshooting perfect results
Cracked Top Fix
Cracks usually appear when the cheesecake bakes too quickly or cools unevenly. To prevent them, I always bake at 325°F and use a water bath—place your springform pan inside a larger roasting pan filled with 1 inch of hot water.
This creates gentle, even heat that reduces stress on the filling. If cracks still appear, don’t worry! Spread a thin layer of chocolate ganache or caramel over the top before chilling—it will hide the cracks beautifully. 💫
Soggy Crust Solution
A soggy crust happens when moisture from the filling seeps into the crust before it fully sets. First, ensure your crust is completely cooled before adding the filling. I also recommend pressing the crust extra firmly into the pan and baking it until golden brown—this creates a moisture barrier.
For added insurance, sprinkle 1 tbsp all-purpose flour over the cooled crust before pouring the filling. This extra layer prevents moisture absorption. ⚡
Sunken Center Prevention
If your cheesecake sinks in the middle, it likely overbaked or didn’t cool properly. Always bake until the center has a slight wobble—it should jiggle like Jell-O when gently shaken. After baking, turn off the oven, crack the door open, and let it cool inside for 1 hour.
This slow cooling prevents sudden temperature shifts that cause sinking. For extra stability, chill the cheesecake for at least 4 hours before serving. 🌡️
Rubbery Texture Avoidance
Rubbery texture usually means the cheesecake baked too long or was overmixed. To avoid this, bake at 325°F and use an instant-read thermometer—remove the cheesecake when the center reaches 150°F. Overmixing incorporates too much air, which can cause a dense texture.
When folding in the egg whites, use a spatula and fold gently just until combined. If your cheesecake turns out rubbery, try adding 1 tbsp sour cream to the filling next time—it adds moisture without altering texture. 💡
Sticky Filling Issue
A sticky filling often results from underbaking or improper cooling. Make sure your cheesecake bakes until the edges are set but the center still has a slight wobble. After baking, let it cool completely at room temperature before refrigerating.
If it still feels sticky, it might need more time to set—try chilling it for an additional 2 hours. For a firmer texture, increase the flour in the filling to 3 tbsp next time. This helps stabilize the structure. ✨
Uneven Baking Fix
Uneven baking is usually caused by an uneven crust or inconsistent oven heat. Always press the crust evenly into the pan, including the sides. For better heat distribution, place your springform pan on a baking sheet lined with parchment paper.
If your oven has hot spots, rotate the pan halfway through baking. To check for even doneness, insert a toothpick in the center—it should come out with a few moist crumbs, not liquid. 🔥
Nutrition facts
Frequently asked questions
Why does this recipe use a 6-inch pan instead of a larger one?
This size delivers perfect results without needing a water bath—ideal for busy cooks! The smaller surface area bakes evenly at 325°F in just 35-40 minutes, while larger pans often require longer baking times that can cause cracks or sinking. Plus, it’s perfect for individual servings or small gatherings.
Can I make this cheesecake ahead of time?
Assemble the crust and filling up to 24 hours ahead, then bake as directed. For best texture, chill the baked cheesecake for 4 hours before serving. It actually improves overnight—just dust with powdered sugar before serving. Store leftovers in an airtight container for 5 days or freeze slices for 3 months.
What’s the secret to preventing cracks?
Room-temperature ingredients and gentle folding are key! Beat the cream cheese until completely smooth, then fold in egg whites just until combined. Bake at 325°F and let it cool slowly in the turned-off oven for 1 hour after baking. If cracks appear, cover with chocolate ganache or caramel before chilling.
Can I substitute graham crackers for the crust?
Yes! Use 1.5 cups crushed digestive biscuits or vanilla wafers instead. For extra crispiness, add 1 tbsp melted butter to the crumbs. The texture will be slightly different but still delicious. Just press it firmly into the pan to prevent crumbling during baking.
How do I know when it’s fully baked?
The center should have a slight wobble when gently shaken—like Jell-O. Insert a toothpick: it should come out with a few moist crumbs, not liquid. Overbaking causes rubbery texture, so remove it when the edges are set but the center still jiggles. Let it cool completely before refrigerating.

- 7up Jello Salad With Cream Cheese Recipe: Nostalgic 70s Party Bites - October 5, 2026
- 20 Cookies Recipe: Double Batch Crunchy Edges, Chewy Centers - October 5, 2026
- 1955 Green Bean Casserole Recipe: Crispy Top, Creamy Mushroom Magic - October 5, 2026