
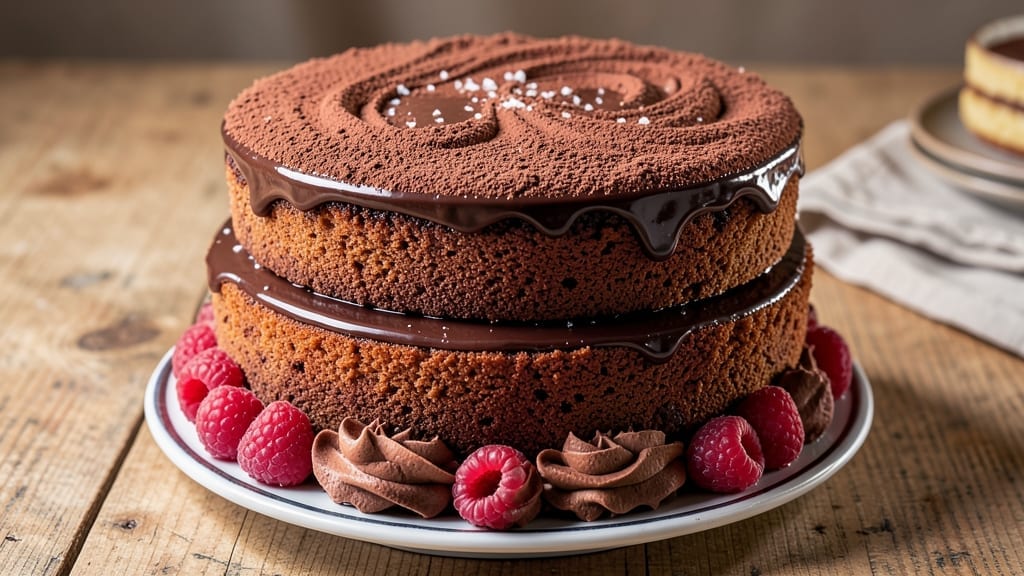
This 6-inch chocolate layer cake recipe delivers decadent, velvety layers soaked in rich ganache—a showstopper for birthdays or special occasions. The secret lies in precise baking techniques that prevent cracking while creating a moist crumb and glossy finish.
I’ve perfected this recipe after years of testing, ensuring every slice is perfectly balanced between dense chocolate flavor and tender texture.
What sets this cake apart is the ganache soak, which transforms dry layers into luscious, moist bites without sogginess. The recipe uses a simple yet foolproof method for even layers, with clear instructions for baking at 350°F for 25-30 minutes per layer.
No special equipment is needed—just patience and attention to detail for a restaurant-quality result at home.
By the time you’re done, you’ll have a 6-inch masterpiece with smooth frosting, clean layers, and a flavor so rich it’ll impress even the most discerning dessert lovers.
The ganache soak ensures every forkful is moist and indulgent, while the velvety crumb guarantees a texture that’s neither too dense nor too light.
Perfect for celebrations or spontaneous cravings, this cake scales effortlessly to other sizes while maintaining its signature depth of flavor. Ready to bake? Let’s get started with the foolproof steps that make this recipe a guaranteed success.
Ingredients for 6 inch chocolate layer cake
Six ingredients transform into velvety layers—ganache soak ensures every bite stays moist.
| Ingredient | Amount | Notes |
|---|---|---|
| Unsalted Butter 🧈 | 1 ½ cups | Cold, cubed for even baking |
| Granulated Sugar 🍚 | 2 ½ cups | Superfine preferred for smoothness |
| Unsweetened Cocoa Powder 🍫 | ¾ cup | Natural or Dutch-processed |
| All-Purpose Flour 🌾 | 2 cups | Sifted for light texture |
| Large Eggs 🥚 | 4 whole | Room temperature for even mixing |
| Baking Powder 🧂 | 1 tsp | Aluminum-free preferred |
| Salt 🧂 | ½ tsp | Fine sea salt preferred |
| Vanilla Extract 🌿 | 2 tsp | Pure Madagascar preferred |
| Whole Milk 🥛 | 1 cup | Room temperature for smooth batter |
| Dark Chocolate Chips 🍫 | 1 ½ cups | 70% cocoa or higher |
| Heavy Whipping Cream 🥛 | 1 ½ cups | Full-fat for stable ganache |
| Semisweet Chocolate Chips 🍫 | 1 cup | For ganache texture |
The cocoa powder and chocolate chips determine depth of flavor—Valrhona or Guittard brands deliver consistent quality. For the ganache, Ghirardelli chips melt smoothly without graininess. Butter should be European-style if possible, with higher fat content for richer layers. The milk and cream? Store-brand works fine—just ensure they’re full-fat. Vanilla extract is non-negotiable here; imitation won’t cut it for this recipe’s sophistication.
No cocoa powder? Melted dark chocolate plus extra sugar substitutes at 3:1 ratio. Eggs too expensive? Flax eggs (1 tbsp ground flax + 3 tbsp water per egg) work but may alter texture slightly. The chocolate chips can be chopped bars if needed—just ensure they’re 70% cocoa or higher for proper ganache. For a lighter cake, replace 1/4 cup flour with cake flour. The baking powder must be fresh—test by mixing with water; it should bubble immediately.
Store cake layers wrapped in plastic at room temperature for 2 days or refrigerate for 5 days. Ganache keeps 1 week refrigerated or 3 months frozen. Assemble cake the day you bake—layers dry out if stored separately. For make-ahead convenience, bake layers, cool completely, then freeze wrapped in plastic for up to 2 months. Thaw overnight at room temperature before assembling.
Why You’ll Love This Recipe
- No Mixer Needed: I’ve made this cake with just a whisk and a fork—no stand mixer required. The butter and sugar cream out smoothly when chilled, and the eggs blend right in without overworking the batter. Honestly, it’s the kind of recipe that makes me question why I ever bought a mixer for cake.
- Rich Without Overpowering: That unsweetened cocoa powder? It’s the star here. It delivers deep chocolate flavor without tasting bitter, thanks to the balanced sugar and eggs. The layers stay moist but never cloying—just the right amount of indulgence for a treat that doesn’t leave you regretting it.
- Portion Control Perfection: Six-inch layers are just right for one serving or a small crowd. Need a single slice? Done. Planning for four? Stack them with whipped cream or ice cream. Between us, this size is my go-to for date nights or when I’m craving cake but don’t want to bake a whole sheet pan.
- Budget-Friendly Luxury: Butter, sugar, and eggs are pantry staples, and a little cocoa powder goes a long way. This recipe costs me about half what a store-bought cake does, but tastes like something from a bakery. Plus, leftovers? They keep well for days—perfect for when I’m too lazy to bake again.
Step-by-step instructions for 6 inch chocolate layer cake
Master this technique for perfectly moist layers and silky ganache that soaks through beautifully.
Prepare the Cake Batter for Perfect Texture
Preheat your oven to 350°F and grease three 6-inch round cake pans with butter, then line the bottoms with parchment paper. In a stand mixer fitted with the paddle attachment, beat the 1.5 cups unsalted butter and 2.5 cups granulated sugar on medium speed until light and fluffy—about 3-4 minutes. This creaming process incorporates air, which creates the signature tender crumb.
Add the 4 whole large eggs one at a time, mixing well after each addition. Scrape down the sides of the bowl as needed. Then whisk together the 2 cups all-purpose flour, 0.75 cup unsweetened cocoa powder, 1 teaspoon baking powder, and 0.5 teaspoon salt in a separate bowl. With the mixer on low speed, gradually add the dry ingredients to the wet mixture, alternating with the 1 cup whole milk beginning and ending with the flour. Mix just until combined—overmixing develops gluten and makes the cake dense.
Fold in the 1.5 cups dark chocolate chips by hand using a spatula. Divide the batter evenly among the prepared pans, smoothing the tops. Bake for 25-30 minutes or until a toothpick inserted into the center comes out clean. Let the cakes cool in the pans for 10 minutes before transferring to a wire rack to cool completely.
Create the Signature Ganache Soak
While the cakes cool, prepare the ganache by combining the 1.5 cups heavy whipping cream and 1 cup semisweet chocolate chips in a heatproof bowl set over a pot of simmering water. Stir gently until the chocolate melts and the mixture becomes smooth and glossy. Remove from heat and let it cool slightly—it should thicken enough to coat the back of a spoon but still be pourable.
This ganache is the secret to that professional restaurant-style moisture. If it thickens too much before using, gently reheat it over low heat and stir until smooth again. The ganache should be at room temperature when you use it to soak the layers—too hot will melt the cake, too cold won’t penetrate properly.
Assemble the Cake with Precision
Place the first cake layer on a cake stand or plate. Using a serrated knife, level the top if needed. Spread an even layer of the ganache over the top, leaving about ½ inch border uncovered. This ensures the ganache soaks in rather than pooling on the outside. Repeat with the second layer, then place the third layer on top.
For a flawless finish, brush any excess ganache from the sides with a pastry brush. The cake should have a clean, professional look with no visible ganache on the exterior. Chill the assembled cake in the refrigerator for at least 4 hours or overnight. This resting period allows the ganache to fully absorb into the layers, creating that signature moist texture.
Final Touches for Presentation
Once chilled, remove the cake from the refrigerator and let it sit at room temperature for 15-20 minutes before serving. This brief warm-up makes the texture even more velvety. For decoration, dust the top and sides with a light layer of powdered sugar or add chocolate shavings for an elegant finish. Each slice should reveal a rich, moist crumb with visible chocolate flecks throughout, and that signature ganache soak that keeps it perfectly moist.
Pro Tips For Making 6 Inch Chocolate Layer Cake
- Sift the Cocoa: DESCRIPTION: I learned this the hard way—just dumping cocoa powder into the dry ingredients leaves lumps that ruin the texture. Sift it with the flour first, then whisk everything together. The difference in crumb smoothness is night and day.
- Cream Butter Cold: DESCRIPTION: Take the butter straight from the fridge and beat it with the sugar until it’s pale and fluffy—this takes longer than you’d think, but don’t rush. Warm butter cuts the fat and makes the cake dense. (Yes, even if you’re impatient like me.)
- Don’t Overmix Eggs: DESCRIPTION: Once the eggs are fully incorporated, stop mixing. I used to beat them until the batter looked like glue, but that adds air you don’t want in a dense cake. Just fold gently until no streaks remain—overmixing makes the layers tough.
- Grease with Butter, Dust with Flour: DESCRIPTION: Skip the nonstick spray—it leaves a film that makes the cake stick. Use a pastry brush to coat the pan with melted butter, then dust with flour, tapping out excess. This guarantees clean layers every time. (Your future self will thank you.)
Best sauces and condiments for this recipe
Classic Ganache Soak
The signature ganache soak in this recipe transforms dry layers into velvety bites by combining 1.5 cups heavy whipping cream with 1 cup semisweet chocolate chips over simmering water.
Let it cool slightly before spreading—it should coat the back of a spoon but remain pourable. This method ensures even saturation without sogginess. 🍫
Salted Caramel Drizzle
For a sophisticated twist, drizzle ½ cup salted caramel sauce (store-bought or homemade) over the ganache-soaked layers. I recommend Trader Joe’s Salted Caramel Sauce for its perfect balance of sweetness and salt.
Warm the caramel slightly to make it easier to spread, then let it set at room temperature before slicing.
Chocolate Glaze Finish
Elevate your cake with a dark chocolate glaze made by melting ½ cup dark chocolate with ¼ cup heavy cream over low heat. Strain for a silky finish, then drizzle over the chilled cake.
Use a paintbrush to create elegant swirls or a clean, glossy coat. This adds a professional restaurant touch while keeping the ganache soak intact.
Coffee Syrup Enhancement
Add depth by brushing 2 tablespoons coffee syrup (equal parts brewed coffee and sugar, simmered until thick) between layers. This pairs beautifully with the chocolate and enhances the ganache soak’s richness. For an extra boost, sprinkle espresso powder over the glaze before it sets.
Cream Cheese Frosting
For a lighter alternative to ganache, spread ½ cup cream cheese frosting (mix 4 oz cream cheese, 2 tbsp butter, and 1 cup powdered sugar) between layers.
Pipe extra frosting on top for decoration. This adds a tangy contrast to the sweet ganache soak while keeping the cake moist.
Fruit Compote Topping
Balance the richness with a raspberry or blackberry compote (simmer 1 cup fruit with 2 tbsp sugar and 1 tsp lemon juice for 10 minutes).
Spread a thin layer between cake layers or drizzle over the top. The acidity cuts through the chocolate, making every bite more vibrant and refreshing.
Nutrition facts
Frequently asked questions
Can I use this recipe for a 6-inch cake with fewer layers?
This batter works perfectly for a single 6-inch layer if you prefer a simpler cake. Just bake one pan at 350°F for 25-30 minutes, then top with ganache or frosting. The same ganache soak technique will keep it moist—just adjust the chilling time to 2-3 hours if serving immediately.
Why does my chocolate cake crack on top?
Cracking usually happens from sudden temperature changes or overbaking. To prevent this: 1) Bake at 350°F until a toothpick comes out clean but not dry, and 2) Let cakes cool in pans for 10 minutes before removing. If cracks appear, cover them with ganache or frosting—they won’t affect flavor!
How do I make this cake gluten-free?
Replace the 2 cups all-purpose flour with a 1:1 gluten-free baking flour blend (like Bob’s Red Mill) plus ½ teaspoon xanthan gum. For best results, also use a gluten-free cocoa powder and ensure your baking powder is GF-certified. The texture will be slightly denser but still delicious!
Can I use this recipe for a 9-inch cake?
Yes, but you’ll need to adjust baking time and layer count. For a 9-inch triple layer, bake each layer 30-35 minutes at 350°F. The batter quantity makes 3 layers for 6-inch pans—either bake longer for 9-inch or halve the recipe for 2 layers. The ganache soak ratio stays the same per layer.
What’s the secret to perfectly even layers?
Weigh your batter for precision (each 6-inch layer should be ~12 oz) and use a kitchen scale. Level each layer with a serrated knife before adding ganache. For extra insurance, chill pans 15 minutes before baking to prevent doming. The key is patience—don’t rush the cooling process!

- Pea Soup Instant Pot Recipe: Velvety Green Smoothness in 20 Minutes - November 1, 2026
- Pork Loin Pulled Pork Crock Pot Recipe: Slow-Smoked Tenderness With Zero Dryness - November 1, 2026
- Baked Potatoes in Crock Pot Recipe: Buttery Interiors and Crispy Top Magic - November 1, 2026