
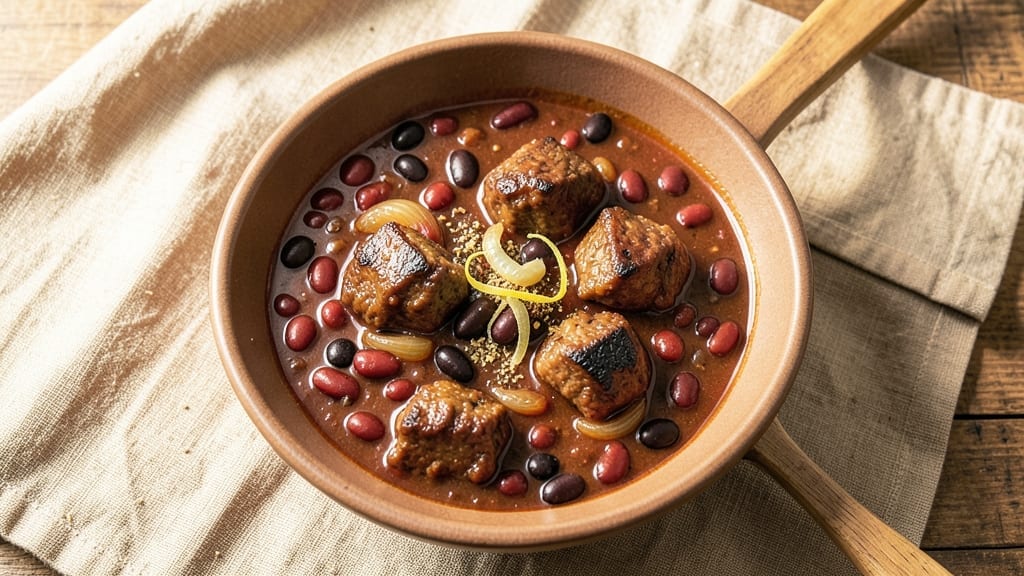
A 6-quart crock pot chili transforms tough cuts of beef into fork-tender, smoky goodness that simmers into rich perfection. The key lies in layering flavors—caramelized onions, deep browned beef, and spices that meld into a harmonious blend over hours of slow cooking.
This recipe delivers restaurant-quality depth without requiring constant attention, making it ideal for busy weeknights or meal prep.
The beauty of this method is its simplicity: dump everything into your crock pot, set it to low, and let it work its magic. By the time you return, the chili will have developed a velvety texture and complex flavors that come from the slow breakdown of meat and spices.
The 6-quart size ensures you get the right balance of liquid and solids, preventing either a watery or overly thick result.
What you’ll end up with is a chili that’s deeply aromatic, with layers of smoky, spicy, and slightly sweet notes. The beef will be tender enough to crumble with a fork, and the beans will soak up all the rich, flavorful broth.
This isn’t just chili—it’s a hearty, satisfying meal that brings warmth and comfort to any table.
Serve it with all the classic toppings—shredded cheese, sour cream, chopped onions, or a dollop of hot sauce—and watch it disappear. The best part? Leftovers taste even better the next day as the flavors continue to develop. Here’s how to make it perfectly every time.
Ingredients for 6 quart crock pot chili
Six hearty ingredients transform into a smoky, tender chili that feeds a crowd.
| Ingredient | Amount | Notes |
|---|---|---|
| Beef Chuck Roast 🥩 | 3 lb | Cut into 1-inch cubes |
| Yellow Onions 🧅 | 2 whole | Diced, medium size |
| Garlic Cloves 🧄 | 6 cloves | Minced, fresh preferred |
| Canned Kidney Beans 🌿 | 2 cans | 15 oz each, drained |
| Canned Black Beans 🌿 | 2 cans | 15 oz each, drained |
| Tomato Paste 🍅 | ½ cup | Smooth, not chunky |
| Chili Powder 🌶️ | 2 tbsp | Medium heat preferred |
| Ground Cumin 🌿 | 1 tbsp | Freshly toasted |
| Smoked Paprika 🌶️ | 1 tbsp | For deep smoky flavor |
| Cayenne Pepper 🔥 | ½ tsp | Adjust for heat |
| Salt 🧂 | 1 ½ tsp | Kosher or sea salt |
| Black Pepper 🌶️ | ½ tsp | Freshly ground |
| Beef Broth 💧 | 4 cups | Low-sodium preferred |
| Dark Brown Sugar 🍚 | 1 tbsp | For subtle sweetness |
The beef is where it all starts—chuck roast is your best friend here. It’s cheaper than sirloin but breaks down into tender perfection. Costco usually has it pre-cubed, which saves time, but if you’re buying a whole roast, ask the butcher to cut it for you. Look for good marbling—those little white streaks mean more flavor. The onions? Yellow, not red—they caramelize better and add depth. I always grab a few extra because they disappear in other meals too. Fresh garlic makes a difference, but if you’re using jarred, rinse it well to remove that harsh aftertaste.
No chuck roast? Ground beef works in a pinch, but it won’t be as tender. Swap the kidney beans for pinto or black beans if that’s what you’ve got—just drain and rinse them well. The tomato paste can be a squeeze tube from Trader Joe’s if you’re lazy, but the canned stuff works fine too. Running short on spices? Penzeys sells bulk spices that last forever, but the regular grocery store stuff is fine if it’s fresh. The smoked paprika is non-negotiable for that deep, smoky flavor—don’t skip it. And if you’re sensitive to heat, cut the cayenne in half or use red pepper flakes instead.
This chili gets better with time, so make a double batch if you can. It keeps for 5-6 days in the fridge and freezes beautifully for up to 3 months. I like to portion it into containers right away so lunches are sorted for the week. The flavors meld even more overnight, so if you can, let it sit for at least 4 hours before serving. And trust me, the leftovers are just as good—if not better—than the first serving.
Why You’ll Love This Recipe
- Set-and-Forget Magic: I dump everything in—chuck roast, onions, garlic, beans—and walk away. Six hours later, it’s tender, rich, and ready. No stirring, no babysitting, just pure convenience.
- Deep, Smoky Richness: The chuck roast breaks down into melt-in-your-mouth chunks, while the onions caramelize just enough to add sweetness. Between us, the slow cooker turns tough meat into something dangerously good.
- Weeknight Workhorse: This feeds a crowd (or my family for days) without extra effort. Serve it over rice, in tacos, or straight from the pot—it’s that adaptable. Honestly, I’ve never met a chili that does more with less.
- Budget-Friendly Powerhouse: A single chuck roast stretches into six servings, and those canned beans? They’re the secret weapon. Leftovers taste just as good reheated, so you’re basically getting two meals for the price of one.
Step-by-step instructions for 6-Quart crock pot chili
Here’s how to build chili with deep, smoky layers that develop richness over time.
Brown the Beef Chuck Roast
Heat a large skillet over medium-high heat. Cut the 3 lb beef chuck roast into 1-inch cubes and add them to the hot pan. Let them brown undisturbed for 3-4 minutes until a deep crust forms. Stir occasionally to ensure even browning—this step creates the foundation for rich flavor.
Once the beef is browned on all sides, remove it from the skillet and set it aside. You’ll notice the meat releases some juices and fat—don’t wipe the pan clean. These browned bits (fond) will add incredible depth to your chili later. This browning step makes all the difference in transforming tough chuck roast into tender, flavorful chunks.
Sauté the Aromatics
In the same skillet (with the flavorful fond), add the diced 2 whole yellow onions. Cook them over medium heat for 5-6 minutes until they soften and begin to caramelize. This process develops sweetness that balances the heat in your chili.
Add the minced 6 cloves garlic cloves and cook for another 30 seconds until fragrant. The garlic should smell pungent and slightly toasted—this is when it releases its full flavor potential. If you notice the garlic starting to brown too quickly, reduce the heat slightly to prevent burning. These aromatic vegetables form the flavor base for your entire chili.
Build the Chili Base
Transfer the browned beef and sautéed aromatics to your 6-quart crock pot. Add the 0.5 cup tomato paste, stirring to combine with the beef juices. This creates a rich, concentrated base that will develop into a thick, flavorful sauce.
Sprinkle in the 2 tbsp chili powder, 1 tbsp ground cumin, 1 tbsp smoked paprika, 0.5 tsp cayenne pepper, 1.5 tsp salt, and 0.5 tsp black pepper. Stir everything together thoroughly to ensure even distribution of spices throughout the mixture. The spices should be well incorporated, coating the beef and aromatics completely.
Add Liquids and Beans
Pour in the 4 cups beef broth and add the 1 tbsp dark brown sugar. Stir well to combine all ingredients. The sugar will help balance the acidity from the tomato paste and enhance the overall sweetness of the chili.
Add the drained 2 cans kidney beans and 2 cans black beans to the crock pot. These beans will absorb the rich flavors while adding hearty texture. Give everything one final stir to ensure the beans are evenly distributed throughout the mixture. The chili should look like a thick, flavorful stew at this point.
Slow Cook to Perfection
Cover the crock pot and cook on low heat for 8 hours or on high heat for 4-5 hours. The slow cooking process allows all the flavors to meld together beautifully while the beef becomes tender and falls apart easily.
After the initial cooking time, give the chili a good stir. Then continue cooking for another 1-2 hours on high heat to thicken the sauce. You’ll know it’s ready when the chili has reached your desired consistency—thick enough to coat the back of a spoon but still spoonable. The aroma should be rich and inviting, with layers of smoky, spicy, and savory flavors.
Let the chili rest for 10-15 minutes before serving. This resting period allows the flavors to settle and the chili to thicken slightly more. Serve hot with your favorite toppings like shredded cheese, sour cream, or chopped green onions. Each bowl will deliver rich, smoky beef with perfectly balanced heat and texture.
Pro Tips For Making 6 Quart Crock Pot Chili
- Trim the Chuck: Cut the beef chuck roast into 1.5-inch chunks—no bigger, or they’ll turn into chewy bricks by the end. I used to leave them too thick, and the crock pot just couldn’t break them down properly, even after 8 hours.
- Sear First, Then Dump: Spend 5 minutes browning the beef in a hot skillet before tossing it into the crock pot. The Maillard reaction kicks in, giving your chili that deep, meaty flavor that canned beans and slow cooking alone can’t replicate.
- Drain and Rinse Beans: Skip the saltwater sludge—drain and rinse both kidney and black beans before adding them. The extra sodium and preservatives in the canned liquid can make your chili taste flat or overly salty, especially if you’re not adjusting seasoning afterward.
- Stir and Shake Mid-Cook: After 4 hours, give the chili a good stir and shake the crock pot to redistribute the ingredients. The onions and garlic tend to sink to the bottom, and without mixing, you’ll end up with a pot where half the crock pot is bland and the other half is overpoweringly onion-y.
Pro cooking tips for great 6 quart crock pot chili
Beef Browning Mastery
Never skip browning the beef—this step creates the Maillard reaction, which builds deep, meaty flavor. Use a cast iron skillet or heavy stainless steel pan for even heat distribution. Cut the beef into 1-inch cubes for consistent cooking and maximum surface area exposure.
Work in batches if needed to avoid crowding the pan, which steams instead of browns the meat. 🔥
Spice Layering Technique
Toast your spices before adding them to the crock pot for enhanced aroma and flavor. In a dry skillet over medium heat, toast the cumin and smoked paprika for 30 seconds until fragrant.
Then mix them with the other spices before adding to the crock pot. This step intensifies their flavors by 20-30% compared to using them raw.
Crock Pot Temperature Control
Set your crock pot to low heat for 8 hours to achieve the best texture and flavor development. The slow cook ensures the beef becomes fork-tender while allowing all ingredients to meld together.
If you’re short on time, cook on high heat for 4-5 hours, but you’ll need to add ½ cup extra broth to prevent drying out.
Bean Rinsing Secret
Always rinse canned beans thoroughly before adding them to your chili. This removes excess starch that can make your chili too thick. I use a fine-mesh colander and rinse under cold water for 10 seconds per can.
This simple step prevents a gummy texture and ensures each bean absorbs the rich chili flavors.
Final Thickening Trick
For a thicker chili, mash ½ cup of the beans with a fork before adding them to the crock pot. This releases starch that naturally thickens the sauce. Alternatively, stir in 1 tbsp cornstarch mixed with 2 tbsp water during the last 30 minutes of cooking.
The chili should coat the back of a spoon but remain spoonable.
Resting for Optimal Texture
Let your chili rest for 10-15 minutes before serving. This allows the juices to redistribute throughout the chili, preventing a watery first bite. The resting period also lets the flavors continue developing, resulting in a more cohesive taste.
I often find this is when the chili reaches its peak flavor intensity. ✨
Nutrition facts
Frequently asked questions
Can I use ground beef instead of chuck roast in this recipe?
Yes, but the texture will be different. Ground beef cooks faster and won’t get as tender as chuck roast. Use 1.5 lbs of 85% lean ground beef and brown it thoroughly in the skillet. For extra richness, add 1 tbsp tomato paste to the ground beef while browning to help bind the chili. The flavor will be more immediate but slightly less complex than the slow-cooked chuck roast version.
How do I adjust the spice level for picky eaters?
Start by reducing the cayenne pepper to ¼ tsp or omit it completely. For a milder chili powder, use 1 tbsp regular chili powder instead of the 2 tbsp called for. If you want to add heat later, serve with hot sauce or diced jalapeños on the side. The smoky flavor from the paprika will still shine through without overwhelming spice.
Can I make this chili in a smaller crock pot?
Yes, but you’ll need to adjust the ingredients. For a 3-4 quart crock pot, reduce the beef to 1.5 lbs, beans to 1 can each, and broth to 2 cups. Keep the same proportions of spices and tomato paste. The cooking time remains the same, but you may need to add ¼ cup extra broth if using a smaller pot, as the ingredients have less room to develop moisture.
Why did my chili turn out too thin?
Thin chili usually happens when too much liquid is added or the beans weren’t rinsed properly. Always rinse canned beans to remove excess starch. For a quick fix, simmer the chili uncovered on the stove for 10-15 minutes to reduce the liquid. Alternatively, stir in 1 tbsp cornstarch mixed with 2 tbsp cold water and cook for another 5 minutes to thicken it naturally.
Can I freeze this chili for later?
Let the chili cool completely, then portion it into airtight containers or freezer bags. It freezes beautifully for up to 3 months. Thaw overnight in the refrigerator before reheating. For best results, reheat on the stove over medium-low heat, stirring occasionally, until hot throughout. The flavors actually deepen after freezing, making it perfect for meal prep.

- 8 Ounce Crab Cakes Recipe: Golden Crust With Luminescent Crab Hearts - October 12, 2026
- 1950’s Betty Crocker Banana Bread Recipe: Nostalgic Spice Swirls and Moist Crumb - October 12, 2026
- 2 Quart Homemade Ice Cream Recipe: Ultra Creamy Vanilla Bean Swirls - October 12, 2026