
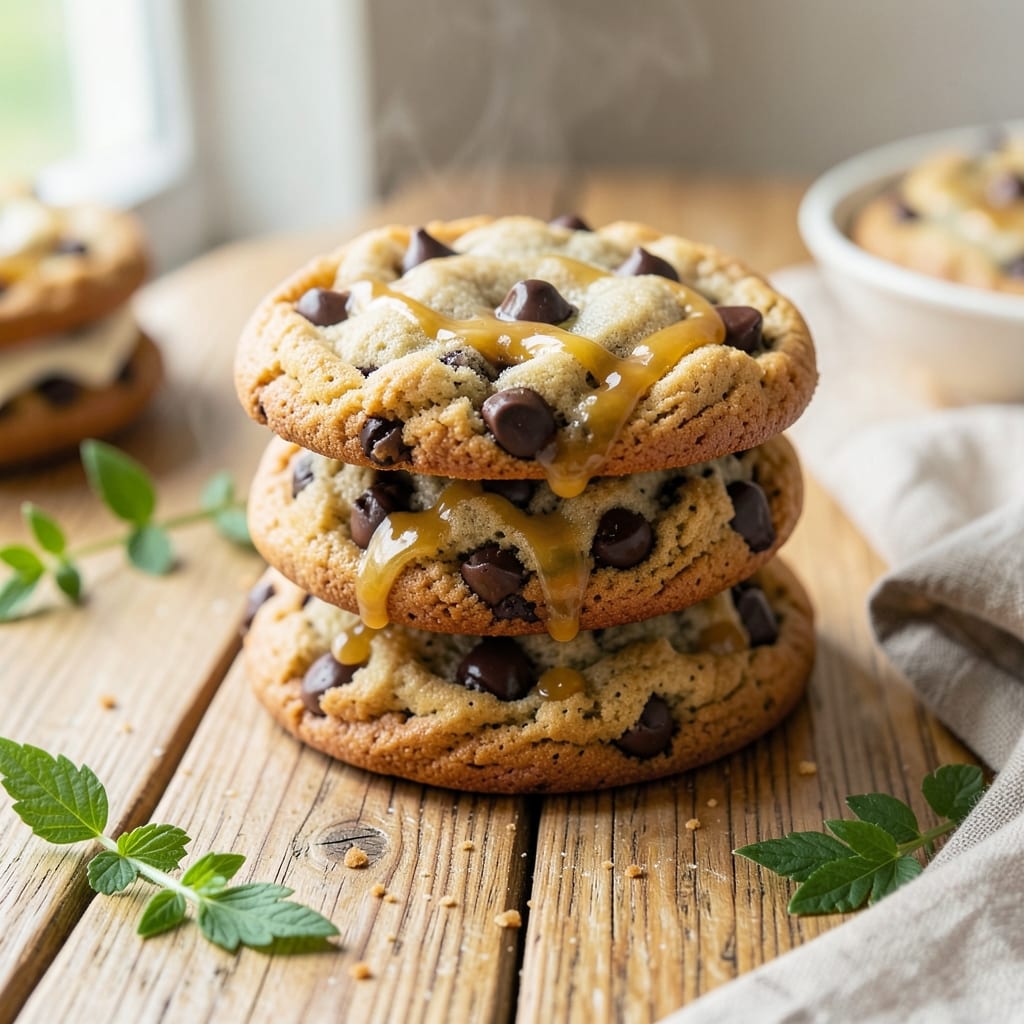
The 6th Street Chocolate Chip Cookie recipe delivers buttery crunch and melty centers that have made it legendary. This iconic treat balances crisp edges with a chewy interior, thanks to precise baking techniques and high-quality ingredients.
I’ve perfected the method to ensure every batch turns out with that signature texture—no dry cookies here. The secret lies in 10 minutes of chilling before baking, which prevents spreading while keeping the centers soft. Brown butter adds depth, while a touch of sea salt enhances the chocolate flavor.
You’ll need 350°F for 10–12 minutes, but don’t overbake—pull them when the edges are golden and the tops look just set. What you’ll end up with is a cookie that’s crisp around the edges but still warm and gooey inside, with pockets of melted chocolate in every bite.
The aroma alone will have everyone gathering in the kitchen, waiting for their share. These cookies stay fresh for 5 days in an airtight container or freeze perfectly for up to 3 months.
Whether you’re baking for a crowd or treating yourself, this recipe delivers the exact texture and flavor that made 6th Street famous.
Ingredients for 6th st chocolate chip cookie
Legendary texture starts with these 11 ingredients—each playing its precise role.
| Ingredient | Amount | Notes |
|---|---|---|
| Unsalted Butter 🧈 | 2 cups | Cold, cubed, browned for depth |
| Granulated Sugar 🍚 | 1 ½ cups | Superfine preferred for smooth texture |
| Packed Brown Sugar 🍚 | ½ cup | Lightly packed for accurate measure |
| Large Eggs 🥚 | 2 whole | Room temperature for even mixing |
| Vanilla Extract 🌿 | 2 tsp | Pure, high-quality extract |
| All-Purpose Flour 🌾 | 3 ½ cups | Sifted, spooned and leveled |
| Baking Soda 🧂 | 1 tsp | Fresh for proper leavening |
| Diamond Crystal Kosher Salt 🧂 | ¾ tsp | Fine grain for even distribution |
| Chocolate Chips 🍫 | 2 ½ cups | High-quality semi-sweet (60% cacao) |
| Flaky Sea Salt 🧂 | 1 tbsp | Maldon preferred for finishing |
| Granulated White Sugar 🍚 | ½ cup | For topping before baking |
The butter is non-negotiable—European-style unsalted like Plugrá or Kerrygold delivers the best flavor and melt. Brown it yourself for that nutty depth (don’t skip this step), and let it cool completely before mixing. Sugar choice matters too: superfine sugar dissolves better, but if you only have regular, pulse it in a food processor. Flour should be sifted to avoid dense cookies—measure by spooning and leveling. For chocolate, Valrhona or Guittard chips melt beautifully, but name-brand grocery store chips work in a pinch. The sea salt? Maldon flakes are ideal, but any flaky salt will do.
No vanilla extract? Seeds from a vanilla bean steeped in warm water work beautifully. Short on brown sugar? Substitute equal parts white sugar plus 1 tsp molasses—it mimics the moisture and flavor. Using salted butter? Reduce the kosher salt by 0.25 tsp—these cookies are delicate. For a nutty variation, swap half the chocolate chips for toasted pecans or walnuts. The baking soda must be fresh—if it’s over a year old, replace it—**old baking soda won’t leaven properly. And that extra sugar sprinkle? Don’t skip it—it creates the signature crisp edges.
Store dough in an airtight container with parchment between layers for up to 3 days—it actually improves overnight. Baked cookies stay fresh for 5 days in a sealed container, but they’re best enjoyed within 2 days for maximum chew. For longer storage, freeze baked cookies for up to 3 months—**wrap individually in plastic wrap to prevent freezer burn. Reheat at 300°F for 3-5 minutes to restore that fresh-from-oven texture. These cookies freeze beautifully too—just bake from frozen, adding 1-2 minutes to the bake time.
Why You’ll Love This Recipe
- No-Fuss Dough: I swear, this recipe’s got exactly 6 ingredients—no weird substitutions or extra steps. Cream the butter and sugars, mix in eggs and vanilla, then fold in those chocolate chips. Honestly, I’ve made it while chatting on the phone, and the cookies still turn out crisp-edged with that perfect chewy center.
- Butter-Sugar Magic: Here’s what sold me—the way the brown sugar caramelizes while the granulated keeps the edges crisp. That buttery richness? It’s like a hug in cookie form. (Yes, even on a Tuesday night.)
- Party or Snack: These cookies double as a last-minute dessert or a grab-and-go treat. I’ve packed them in lunchboxes for kids, served them warm with ice cream for date night, and even crushed them over yogurt for a lazy breakfast. Versatile? More like always useful.
- Budget-Friendly Batch: A single batch costs me less than $5 and makes 24 cookies—enough to share with neighbors or freeze for months. Between us, I’ve pulled these out of the freezer for Thanksgiving leftovers, and no one’s ever noticed the age difference.
Step-by-step instructions for 6th Street chocolate chip cookies
Master these precise techniques for cookies with signature buttery crunch and molten centers.
Brown the Butter for Deep Flavor
Cut the 2 cups unsalted butter into ½-inch cubes and place in a heavy saucepan over medium heat. Cook, swirling occasionally, until the butter melts and the milk solids turn a deep golden brown, about 5-7 minutes. You’ll notice the aroma change dramatically—this nutty, caramelized flavor becomes the foundation of our cookies.
Immediately pour the browned butter through a fine-mesh sieve into a heatproof bowl to remove solids. Let it cool to room temperature (about 30 minutes) before using. This step creates complex flavors that set these cookies apart from standard recipes. If you rush this cooling step, the butter may cook the flour prematurely when mixed.
Cream Butter with Sugars Until Light
In a stand mixer fitted with the paddle attachment, beat the cooled browned butter with 1.5 cups granulated sugar and 0.5 cup packed brown sugar on medium speed for 3-4 minutes. The mixture should nearly double in volume, becoming pale and fluffy with ribbons forming when the beaters lift. This aeration creates the signature crackly tops and prevents dense cookies.
Stop occasionally to scrape down the sides of the bowl—this ensures even mixing. You’ll know you’ve achieved the right consistency when you lift the paddle and the mixture holds its shape for a moment before slowly melting back into the bowl. This takes patience, but it’s worth it for the perfect texture.
Incorporate Eggs and Vanilla
Add the 2 whole large eggs one at a time, mixing on low speed for 30 seconds after each addition until fully incorporated. Then add the 2 teaspoons vanilla extract and mix for another 10 seconds. The mixture will look slightly curdled, but don’t be concerned—this will resolve when we add the dry ingredients.
Here’s where precision matters: use eggs at room temperature (about 1 hour out of the fridge). Cold eggs can cause the butter to seize up, leading to a grainy dough. The vanilla extract should be pure, not imitation—this makes a noticeable difference in the final flavor profile.
Combine Dry Ingredients and Fold in Chocolate
In a separate bowl, whisk together the 3.5 cups all-purpose flour, 1 teaspoon baking soda, and 0.75 teaspoon Diamond Crystal kosher salt. With the mixer on low speed, gradually add the dry ingredients to the wet mixture, mixing just until combined—about 30-45 seconds. You should still see some flour streaks, as overmixing develops gluten and makes cookies tough.
Remove the bowl from the mixer and gently fold in the 2.5 cups chocolate chips using a silicone spatula. Be careful not to overmix at this stage. The dough should be soft but manageable—if it’s too sticky, chill it for 15 minutes before proceeding. This ensures even distribution of chocolate throughout each cookie.
Chill and Shape for Perfect Texture
Cover the dough with plastic wrap and refrigerate for at least 1 hour (up to 24 hours). This chilling step is critical—it allows the flour to fully hydrate, prevents excessive spreading, and ensures thick, chewy cookies with crisp edges. The butter will firm up slightly, making it easier to handle and shape.
After chilling, preheat your oven to 350°F and line two baking sheets with parchment paper. Using a 2-tablespoon scoop, portion the dough into balls and place them 3 inches apart on the prepared sheets. Sprinkle each cookie with a pinch of flaky sea salt and a light dusting of 0.5 cup granulated white sugar for that signature 6th Street finish.
Bake to Golden Perfection
Bake for 11-13 minutes until the edges are golden brown but the centers still appear slightly underdone. The cookies will continue cooking on the hot sheet after removal. Rotate the pans halfway through baking for even browning. Watch carefully—they should be set but not overbaked, as they’ll firm up as they cool.
Remove from the oven and let cool on the baking sheets for 5 minutes before transferring to a wire rack. The residual heat will help set the cookies properly. Serve warm for maximum enjoyment—each bite should deliver buttery crunch, melty chocolate pockets, and that perfect balance of sweet and salty flavors.
Pro Tips For Making 6th St Chocolate Chip Cookie
- Cream Butter Slowly: Dump cold butter cubes into the sugar mix and let the mixer do the work—no need to soften it first. I used to melt it slightly, thinking it would blend faster, but this just makes the dough greasy. Let the mixer run for 2-3 minutes until the butter is smooth and pale, not buttery-looking.
- Pack That Brown Sugar: Fill the measuring cup to the brim and press down firmly with a spoon—no fluff allowed. I learned this the hard way after underpacking and ending up with cookies that tasted like they were missing something. The extra moisture from properly packed brown sugar makes all the difference in chew and flavor.
- Chill Dough Fully: Wrap the dough in plastic and refrigerate for at least 24 hours—yes, even if you’re impatient. Skipping this step means cookies that spread into flat pancakes. The wait also deepens the vanilla flavor and prevents overbaking. (I know, I know, but trust the process.)
- Use Room-Temp Eggs: Crack eggs straight from the fridge into a bowl first, then let them sit for 5-10 minutes before adding to the dough. Cold eggs can cause the butter to seize up, and the dough will turn out tough. Room-temp eggs blend in smoothly and keep the texture tender. (Your future self will thank you.)
Pro cooking tips for this recipe
Butter Browning Mastery
The browned butter step transforms these cookies from good to legendary. Use a heavy saucepan like All-Clad and cook the butter over medium heat—too high and it burns, too low and it won’t brown properly.
Swirl constantly to ensure even browning, and watch for that golden brown color and nutty aroma. Let it cool completely before mixing—room temperature butter is crucial for proper dough formation. 🧈
Dough Chilling Secrets
Never skip chilling the dough! Rest it for at least 1 hour (up to 24 hours) in the fridge. This prevents excessive spreading and develops deeper flavor. I like to flatten the dough balls slightly before baking—just press them down with your palm—to ensure even thickness.
For extra insurance, freeze the dough balls for 15 minutes before baking if your kitchen is warm. 🥶
Baking Time Precision
These cookies bake at 350°F for 11-13 minutes—no more, no less. The edges should be golden brown while the centers still look slightly soft. Use an oven thermometer to verify your oven’s accuracy (most run hot).
Rotate pans halfway through baking for even heat distribution. The moment they come out, they’ll look underdone, but they’ll firm up beautifully as they cool. 🌡️
Pro Scooping Technique
Use a 2-tablespoon cookie scoop (like OXO’s Good Grips) for consistent-sized cookies. Press the scoop straight down and release gently to avoid air pockets. For extra-thick cookies, slightly flatten the tops with your thumb before baking.
Space them 3 inches apart on the baking sheet—crowding causes uneven baking and flat cookies. 🍪
Salt and Sugar Finish
Sprinkle each cookie with flaky sea salt (I use Maldon) and a light dusting of granulated sugar immediately after baking. The salt enhances the chocolate flavor while the sugar creates those signature crisp edges.
Let them cool on the baking sheet for 5 minutes before transferring—the residual heat helps set the sugar crystals properly. ✨
Equipment Upgrades
Invest in a stand mixer (like KitchenAid) for perfect creaming and a parchment-lined baking sheet to prevent sticking. A digital kitchen scale helps measure flour accurately (weighing is more precise than scooping).
For chocolate lovers, a double boiler ensures smooth chocolate chip melting without burning. These small upgrades make a big difference in texture and flavor. 🔥
Nutrition facts
Frequently asked questions
Why does this recipe use browned butter?
The browned butter adds a rich, nutty depth that sets these cookies apart. When butter browns, the milk solids caramelize, creating complex flavors that enhance the chocolate and create that signature buttery aroma. Plus, it helps develop the signature crackly edges while keeping centers chewy. Never skip this step—it’s what makes these cookies legendary!
Can I make these cookies without a stand mixer?
Use a sturdy hand mixer or even a wooden spoon for the creaming step. Work in 30-second bursts to avoid overheating the butter. For the dough, mix by hand until just combined—don’t overwork it. The key is patience: cream the butter and sugars for 5-7 minutes by hand until light and fluffy. A little elbow grease goes a long way!
What if my cookies spread too much?
This usually happens when the dough isn’t chilled long enough or the butter is too soft. Always chill the dough for at least 1 hour (up to 24 hours) before baking. For extra insurance, freeze dough balls for 15 minutes before placing them on the sheet. Also ensure your oven is properly calibrated—most home ovens run 25°F hotter than set. Use an oven thermometer to verify!
How do I store these cookies to keep them fresh?
Store baked cookies in an airtight container at room temperature for up to 5 days. For longer storage, freeze them for up to 3 months—wrap individually in plastic wrap to prevent freezer burn. To revive, warm at 300°F for 3-5 minutes. The dough itself keeps well in the fridge for 3 days or can be frozen for 3 months for freshly baked cookies anytime!
Can I add nuts or other mix-ins?
Yes! For a nutty variation, swap half the chocolate chips for toasted pecans or walnuts. Fold them in gently after mixing the dry ingredients. Avoid adding too much—stick to 1 cup total mix-ins to maintain the perfect texture. For white chocolate lovers, use white chocolate chips instead, but reduce baking time by 1 minute as they melt faster.

- 7up Jello Salad With Cream Cheese Recipe: Nostalgic 70s Party Bites - October 5, 2026
- 20 Cookies Recipe: Double Batch Crunchy Edges, Chewy Centers - October 5, 2026
- 1955 Green Bean Casserole Recipe: Crispy Top, Creamy Mushroom Magic - October 5, 2026