
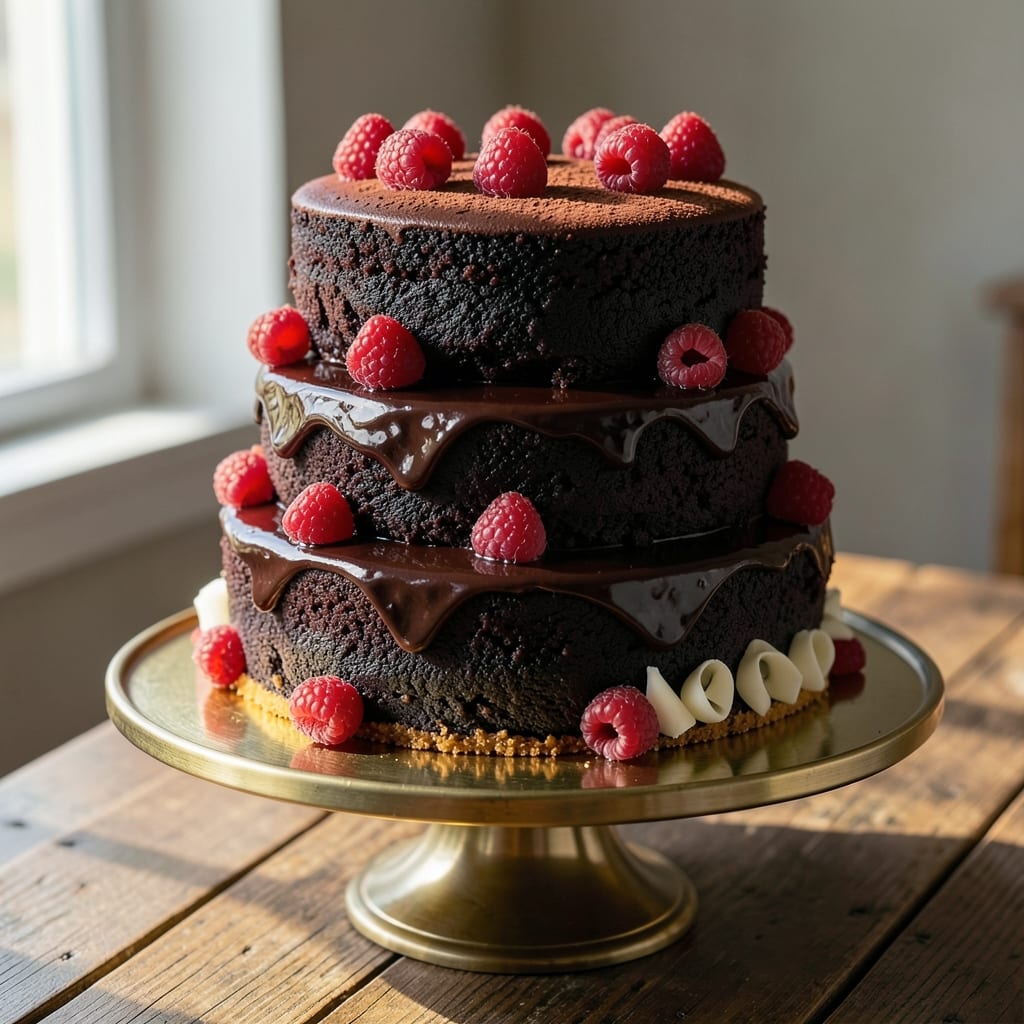
A 2-kilogram chocolate cake that delivers moist layers and a rich ganache drizzle is the showstopper dessert for any celebration. This recipe scales perfectly for large gatherings while maintaining professional-level texture and flavor. The secret lies in precise measurements and slow cooling—no dry crumbs or cracked tops here.
What sets this recipe apart is the foolproof method for even baking, even in home ovens. We use a two-stage cooling process to prevent sinking, and the ganache drizzle adds a luxurious finish that makes it feel like a bakery creation.
Every slice comes out tender, fudgy, and perfectly balanced between dense cake and velvety chocolate.
The cake itself is built on a simple but effective formula: high-quality cocoa powder, buttermilk for moisture, and a touch of espresso powder to deepen the chocolate flavor. The ganache, made with dark chocolate and heavy cream, adds a glossy, semi-solid topping that melts into each bite.
Perfect for birthdays, holidays, or when you simply need to impress, this recipe scales easily for even larger batches. Let’s get started—your guests won’t believe it’s homemade.
Ingredients for 2 kg chocolate cake
Precision ingredients for a 2-kilogram showstopper cake with velvety layers and professional ganache finish.
| Ingredient | Amount | Notes |
|---|---|---|
| All-Purpose Flour 🌾 | 6 ½ cups | Sifted for even texture |
| Unsalted Butter 🧈 | 22 oz | Room temperature, European preferred |
| Granulated Sugar 🍚 | 3 ½ cups | Superfine preferred for smooth batter |
| Dark Brown Sugar 🍚 | 1 ½ cups | Packed firmly for accuracy |
| Large Eggs 🥚 | 8 whole | Room temperature, separated for stability |
| Buttermilk 🥛 | 2 cups | Fresh, not powdered |
| Unsweetened Cocoa Powder 🍫 | 1 cup | Dutch-processed for smoothness |
| Instant Espresso Powder ☕ | 1 tbsp | Enhances chocolate depth |
| Baking Powder 🧂 | 1 tbsp | Aluminum-free for best rise |
| Salt 🧂 | ½ tsp | Fine sea salt preferred |
| Vanilla Extract 🌿 | 2 tsp | Pure Madagascar bourbon |
| Dark Chocolate Bars 🍫 | 24 oz | 70% cocoa, chopped finely |
| Heavy Whipping Cream 🥛 | 3 cups | Full-fat, cold for ganache |
The cocoa powder and butter are non-negotiable for that rich, fudgy texture. Valrhona or Callebaut cocoa powder delivers the deepest chocolate flavor—don’t skimp here. For butter, Plugrá or European-style brands melt more smoothly, preventing graininess in the batter. The buttermilk adds moisture without overpowering the chocolate, but if you’re short on time, substitute with 2 cups milk plus 2 tbsp vinegar. Room temperature eggs are critical—they incorporate better for a light crumb. If your kitchen isn’t warm, separate the yolks and whites and warm them gently in separate bowls before mixing.
No buttermilk? Substitute with 2 cups milk plus 2 tbsp lemon juice or vinegar, let sit 5 minutes. For the espresso powder, instant is best—it dissolves completely without graininess. The dark chocolate bars should be at least 70% cocoa for that professional bitterness level. If you can’t find 70%, use 60% but increase to 28 oz total. The heavy cream must be cold and full-fat for the ganache to set properly—don’t use anything below 36% fat. For the vanilla, Madagascar bourbon has the most complex flavor, but pure vanilla extract works in a pinch. If you’re concerned about the cake being too dense, reduce the sugar slightly to 3.25 cups total.
Store the cake layers wrapped tightly in plastic wrap at room temperature for up to 3 days before assembling. The ganache keeps for 1 week refrigerated in an airtight container, but reheat gently before drizzling. For long-term storage, freeze the cake layers (without ganache) for up to 3 months
Why You’ll Love This Recipe
- No Mixer Needed: I swear by this recipe because it’s all about the creaming method—just butter, sugars, and eggs beaten by hand (or with a spoon if you’re lazy). No electric mixer, no fuss, and the result? A cake so tender it practically melts in your mouth.
- Rich Without Bitterness: That combo of granulated and dark brown sugar? Pure magic. It balances the chocolate’s depth while keeping it from tasting like a sad, one-note dessert. Honestly, I’ve tried fancier recipes, but this one delivers that just-right sweetness every time.
- Party-Proof Portion: Two kilograms isn’t just a cake—it’s a statement. Feed a crowd, slice for office birthdays, or freeze half for when your kid’s soccer team demands cake after practice. (Yes, I’ve done all three.)
- Budget-Friendly Luxury: Unsalted butter and basic flour might sound boring, but here’s the secret: high-quality chocolate (or even good cocoa powder) turns this into a showstopper without breaking the bank. Leftovers? Even better—they’re my go-to for “I don’t feel like baking” days.
Step-by-step instructions for 2-Kilogram chocolate cake
Precision matters in this recipe—every ingredient plays a role in achieving that signature moist texture and deep chocolate flavor.
Prepare the Cake Batter
Preheat your oven to 350°F and grease three 9-inch round cake pans with butter, then line the bottoms with parchment paper. In a stand mixer fitted with the paddle attachment, cream together the 22 oz unsalted butter, 3.5 cups granulated sugar, and 1.5 cups dark brown sugar on medium speed for 5-7 minutes until light and fluffy. You’ll see the mixture nearly double in volume and turn pale—this incorporates air that creates the cake’s signature tenderness.
Add the 8 whole large eggs, one at a time, mixing well after each addition. Scrape down the sides of the bowl to ensure even incorporation. Then whisk together the 6.5 cups all-purpose flour, 1 cup unsweetened cocoa powder, 1 tbsp baking powder, 0.5 tsp salt, and 1 tbsp instant espresso powder in a separate bowl. With the mixer on low speed, gradually add the dry ingredients to the wet mixture, alternating with the 2 cups buttermilk, beginning and ending with the flour mixture. Mix just until combined—overmixing develops gluten and can make the cake dense.
Divide the batter evenly among the prepared cake pans. Smooth the tops with a spatula and bake for 30-35 minutes, or until a toothpick inserted into the center comes out clean. The cakes should spring back gently when pressed in the center. Real talk: don’t open the oven door during baking—this causes the cakes to sink.
Cool and Prepare the Chocolate Ganache
Remove the cakes from the oven and let them cool in the pans for 10 minutes before transferring to a wire rack to cool completely. While the cakes cool, prepare the ganache by finely chopping the 24 oz dark chocolate bars. Place the chopped chocolate in a heatproof bowl set over a saucepan of simmering water (ensure the bottom of the bowl doesn’t touch the water). Add the 3 cups cold heavy whipping cream and let the mixture sit for 5 minutes, stirring occasionally until the chocolate melts completely and the ganache is smooth and glossy.
Remove the ganache from the heat and let it cool to room temperature, stirring occasionally. The ganache should thicken slightly as it cools—this is crucial for proper layering. If it thickens too much, gently warm it for 10-15 seconds in the microwave to restore a pourable consistency. This step ensures the ganache doesn’t run off the cake when drizzled.
Assemble the Cake Layers
Once the cakes are completely cool, level the tops if necessary using a serrated knife. Place the first cake layer on a serving plate and spread a thin, even layer of the cooled ganache over the top. Here’s the thing—don’t rush this step. Use a spatula to create a smooth, even base for the next layer. Place the second cake layer on top and repeat the process, spreading ganache over the second layer. Finally, top with the third cake layer.
Spread the remaining ganache evenly over the top and sides of the cake, using a spatula to create a smooth, professional finish. Chill the cake in the refrigerator for at least 2 hours before serving. This resting period allows the ganache to set properly and the layers to meld together, ensuring clean slices and maximum moisture.
Final Touches and Serving
Before serving, let the cake sit at room temperature for 15-20 minutes to soften slightly. This makes slicing easier and enhances the texture contrast between the moist cake and rich ganache. Use a long serrated knife to cut through the cake, wiping the blade with a damp cloth between slices to ensure clean cuts. The cake should hold its shape well, with a tender crumb and a glossy, chocolatey ganache that drizzles beautifully.
Serve immediately for the most decadent experience. The cake’s moisture comes from the precise balance of butter, sugar, and buttermilk, while the ganache adds a luxurious finish. For best results, store any leftovers in an airtight container in the refrigerator for up to 3 days, bringing to room temperature before serving again.
Pro Tips For Making 2 Kg Chocolate Cake
- Cream Butter Properly: I learned this the hard way—whipping butter and sugars at room temperature for a solid 3-4 minutes until it’s pale and fluffy, not just combined. For a 2 kg cake, split the butter into two batches if your mixer struggles; this keeps the dough from overheating and ensures that rich, airy texture. (Yes, even if you’re impatient like me.)
- Sift the Flour Twice: Skip this, and you’ll end up with dense layers or weird pockets of dryness. After mixing the wet ingredients, sift the flour directly into the bowl (not pre-sifting into a separate container) to avoid compacting it. Then sift it again halfway through adding it—this guarantees even distribution and prevents a brick-like cake. My grandmother swore by this, and she was right.
- Don’t Overmix the Eggs: After adding the eggs, mix just until they’re fully incorporated—no need to overbeat. Overmixing incorporates too much air, which can cause the cake to collapse or develop tunnels. Stop when the batter looks smooth but still has a few streaks of flour; the final mixing happens when you fold in the dry ingredients.
- Use a Toothpick Test: This isn’t the prettiest method, but it’s the tastiest. For a 2 kg cake, check doneness at 50 minutes (assuming 350°F/175°C). Insert a toothpick into the center—it should come out with moist crumbs, not wet batter or dry flour. If it’s sticky, bake another 5-10 minutes. Underbaking is worse than overbaking here; you want a fudgy core.
Wine and beer pairings for this dish
Rich Chocolate Wines
For a decadent pairing, reach for bold reds with chocolate undertones. A Cabernet Sauvignon from Napa Valley, like Caymus Vineyards, complements the deep cocoa flavors beautifully. The tannins in Cabernet cut through the richness of the cake, while its dark fruit notes enhance the chocolate’s complexity.
I always keep a bottle of 750ml chilled for 30 minutes before serving—this softens the edges without muting the wine’s character. 🍷
Port for Decadence
Ruby Tawny Port is my go-to for chocolate desserts—its caramel and nutty notes mirror the cake’s ganache while adding a luxurious finish. Look for a 10-year Tawny Port like Graham’s or Dow’s for a balanced sweetness that won’t overpower the cake.
Serve it slightly chilled (55-60°F) in small 3-ounce portions to let guests savor its depth alongside each slice.
Creamy Dessert Whites
If you prefer white wine, a Viognier with its floral and stone fruit notes creates an unexpected but delightful contrast. I recommend Rochester Hills Viognier from California—its honeyed sweetness and subtle spice balance the chocolate’s bitterness.
For a sweeter option, try a Moscato d’Asti with its effervescence and light fruitiness, perfect for cutting through the cake’s density.
Dark Beer Pairings
Stout lovers, rejoice! A dry Irish stout like Guinness or Murphy’s pairs surprisingly well with chocolate cake. The roasted malt flavors and slight bitterness echo the cake’s cocoa depth while the creamy head provides a refreshing contrast.
For a sweeter option, try a Belgian Dubbel like Westmalle Trappist, which offers caramel and spice notes that harmonize beautifully with the ganache.
Coffee Liqueur Twist
For a non-alcoholic twist, serve the cake with a side of Kahlúa or Tia Maria coffee liqueur. The espresso powder in the cake already hints at coffee notes, so adding a shot of liqueur enhances this connection.
I drizzle ½ oz over each slice and let it sit for 30 seconds before serving—this creates a warm, aromatic experience that feels like a dessert within a dessert. ☕
Chilled Chocolate Milk
For a nostalgic touch, pair the cake with chilled chocolate milk made with whole milk and 1 tbsp Dutch-process cocoa powder per 8 oz serving. The cool temperature contrasts with the warm cake, while the milk’s sweetness balances the ganache’s richness.
I like to serve it in mason jars with a chocolate straw for an extra-special presentation.
Nutrition facts
Frequently asked questions
Can I bake this cake in a single 10-inch pan instead of three 9-inch pans?
Not recommended for this recipe. A single 10-inch pan would require adjusting baking time and temperature, risking uneven cooking or a dense center. The three 9-inch pans ensure even heat distribution and proper layer separation. If you must use one pan, reduce the batter by 25% and bake at 325°F for 50-60 minutes, but expect a denser texture.
How do I prevent my cake layers from cracking?
Cracking happens when layers cool too quickly or aren’t properly leveled. After baking, let cakes cool in pans for 10 minutes before transferring to racks. Level tops with a serrated knife while warm, and avoid opening oven doors during baking. For extra insurance, brush layers with simple syrup (½ cup sugar + ½ cup water) before assembling.
What’s the best way to store leftovers?
Store assembled cake in an airtight container at room temperature for up to 3 days. For longer storage, freeze layers (without ganache) for 3 months10-second microwave bursts, stirring between each, to restore smoothness. Never store the cake with ganache in the fridge—it’ll absorb moisture and become soggy.
Can I substitute cocoa powder with melted chocolate?
Not directly—melted chocolate changes the cake’s structure. For a 1:1 substitution, use 2 oz melted chocolate per 1 oz cocoa powder, but reduce buttermilk by 2 tbsp to compensate for extra liquid. The texture will be slightly denser. For best results, stick to the recipe’s cocoa powder—it’s essential for that signature fudgy texture.
Why did my ganache turn grainy?
Grainy ganache usually means the chocolate wasn’t melted completely or the cream was too hot. Always use cold heavy cream and ensure chocolate is fully dissolved over double boiler heat (never microwave). If it happens, whisk in 1 tsp coconut oil or 1 tbsp warm cream to smooth it out. Straining through a fine-mesh sieve also helps remove any remaining particles.

- 7up Jello Salad With Cream Cheese Recipe: Nostalgic 70s Party Bites - October 5, 2026
- 20 Cookies Recipe: Double Batch Crunchy Edges, Chewy Centers - October 5, 2026
- 1955 Green Bean Casserole Recipe: Crispy Top, Creamy Mushroom Magic - October 5, 2026