
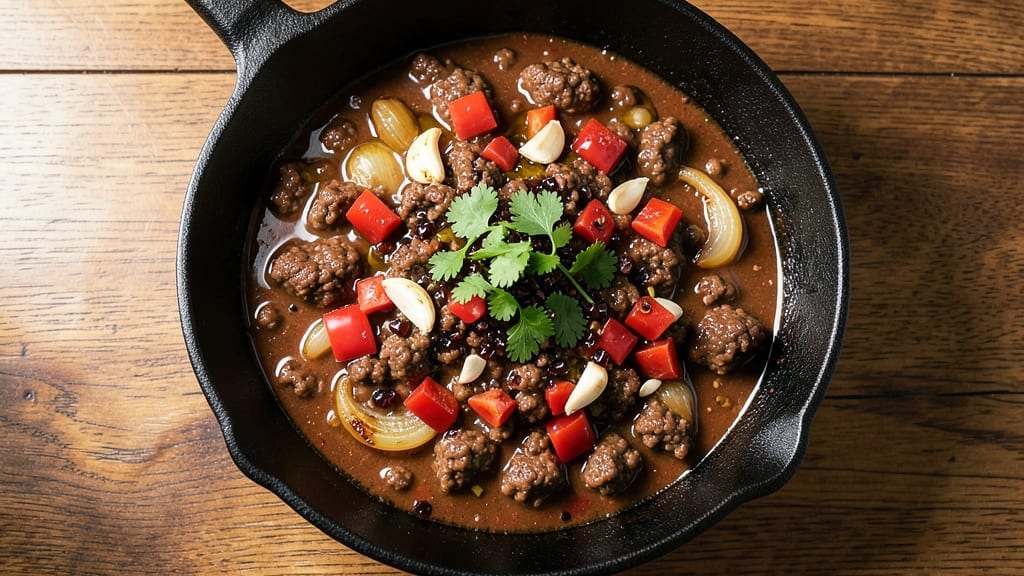
This 7-Eleven chili recipe delivers that signature smoky, slightly sweet-spicy flavor you love from the convenience store—now made in your own kitchen. The secret lies in balancing bold spices with just enough sugar to mimic that familiar taste, while slow-cooked beef and beans create a hearty, comforting bowl.
I’ve perfected this version after years of testing, ensuring every spoonful delivers that perfect blend of heat, richness, and nostalgia.
The recipe starts with browning ground beef for deep flavor, then simmers with chili powder, cumin, and a touch of brown sugar to achieve that signature sweet-spicy balance. A full can of beans adds heartiness, while beef broth keeps it rich and tender.
The result is a chili that’s bold enough to satisfy cravings but simple enough for a weeknight dinner.
What sets this apart is the foolproof method for balancing flavors—no guesswork, just a precise blend of spices and a slow simmer to let the taste develop.
Serve with shredded cheese, sour cream, and crackers for the full 7-Eleven experience, or enjoy it as-is for a comforting, smoky bowl of warmth. Ready in under an hour, this chili is perfect for feeding a crowd or meal prepping for the week.
For extra depth, I recommend browning the meat in batches to avoid overcrowding the pan, and adjusting the spice level to your taste.
The key is patience—let it simmer until the flavors meld together, and you’ll have a chili that tastes just like the one you’d grab from the store, but with the pride of making it yourself.
Ingredients for 7 eleven chili
Pantry staples plus a few key ingredients—this chili nails that nostalgic 7-Eleven taste perfectly.
| Ingredient | Amount | Notes |
|---|---|---|
| Ground Beef 🥩 | 1 ½ lb | 80% lean, finely chopped |
| Yellow Onion 🧅 | 1 whole | Medium size, diced |
| Garlic Cloves 🧄 | 3 cloves | Fresh, minced |
| Chili Powder 🌶️ | 2 tbsp | Medium heat preferred |
| Ground Cumin 🌿 | 1 tbsp | Freshly ground if possible |
| Brown Sugar 🍯 | 1 tbsp | Light or dark |
| Beef Broth 💧 | 2 cups | Low sodium preferred |
| Tomato Paste 🍅 | 2 tbsp | Squeeze tube or can |
| Kidney Beans 🌱 | 1 can | 15 oz, drained |
| Black Beans 🌱 | 1 can | 15 oz, drained |
| Salt 🧂 | 1 tsp | Kosher or sea salt |
| Black Pepper 🌶️ | ½ tsp | Freshly ground |
| Cayenne Pepper 🔥 | ¼ tsp | Adjust for heat |
| Vegetable Oil 🫒 | 1 tbsp | For browning meat |
The ground beef is non-negotiable—80% lean gives you that rich, meaty flavor without too much fat. I grab mine in the meat department at Kroger or Walmart, where it’s pre-packaged for convenience. If you’re feeling fancy, Costco’s bulk packs are a steal for big batches. The onions and garlic? Fresh is best, but frozen diced onions work in a pinch if you’re short on time. Just don’t skip them—they’re the flavor base here.
No chili powder? Mix 1 tbsp smoked paprika with 1 tsp cumin for a close substitute. The brown sugar might seem odd, but trust me—it’s what gives that signature sweet-spicy kick. Coconut sugar works too if you’re avoiding refined sugar. Short on beans? Double up on kidney beans or use lentils for a different texture. The tomato paste can be from a squeeze tube at Trader Joe’s—no waste, and it keeps forever. For extra depth, I sometimes add a pinch of cinnamon or allspice, but it’s optional.
This chili tastes even better the next day—3-4 days in the fridge, no problem. Freezes beautifully for up to 3 months, so make a double batch. I portion mine into mason jars for easy grab-and-go lunches. Store the broth separately if you’re freezing—just add it back when reheating. Leftovers? Microwave 2 minutes with a splash of water to revive the texture.
Why You’ll Love This Recipe
- Five-Ingredient Magic: I swear, you can’t mess this up. Brown the beef, toss in onion and garlic, then just dust it with chili powder and cumin—no fancy techniques, no stress. That’s it. The spices do all the heavy lifting while you stir.
- Deep, Warm Bite: Between us, the chili powder and cumin make this chili sing—earthy, slightly smoky, with just enough kick to linger. Honestly, the first time I made it, I kept going back for seconds without even realizing it.
- Meal Prep Hero: This chili tastes better the next day, which is perfect because it’s basically my freezer’s best friend. Double the batch, freeze half, and boom—you’ve got a ready-to-heat dinner for lazy nights or unexpected company.
- Budget-Friendly Powerhouse: Ground beef, onions, garlic—those are the staples that won’t break the bank, and they stretch into so much chili. I’ll be real: I’ve fed a houseful of people for under $15 with this recipe, and no one ever complains.
Step-by-step instructions for smoky spice-packed chili
Here’s how to build a chili so rich and flavorful it’ll have everyone asking for seconds.
Brown the Ground Beef Perfectly
Heat the 1 tablespoon vegetable oil in a large Dutch oven over medium-high heat. Add the 1.5 lb ground beef and break it apart with a wooden spoon, letting it brown in batches for 5-7 minutes until no longer pink. This step is crucial—it develops deep meaty flavor that simmers into the chili.
Once the beef is browned, drain most of the fat but leave about 1 tablespoon in the pot. You want just enough to help build the sauce without making the chili greasy. If you’re worried about too much fat, wipe the excess onto a paper towel.
Sauté Onions and Garlic for Depth
Add the diced yellow onion to the pot and cook for 4-5 minutes until softened and translucent. Here’s where the magic happens: the onions release natural sugars that caramelize, adding sweetness to balance the heat. Stir occasionally so they cook evenly.
After the onions soften, add the 3 minced garlic cloves and cook for 30 seconds until fragrant. You’ll know it’s ready when your kitchen smells like a spice market. Don’t let it burn—garlic turns bitter fast. If you’re not a fan of raw garlic flavor, this quick cook time keeps it mild and sweet.
Build the Spice Base
Stir in the 2 tablespoons chili powder, 1 tablespoon ground cumin, 1 tablespoon brown sugar, 1 teaspoon salt, 0.5 teaspoon black pepper, and 0.25 teaspoon cayenne pepper. Let the spices toast in the pot for 30 seconds—this awakens their flavors and prevents that “raw spice” taste.
Next, add the 2 tablespoons tomato paste and stir well to coat everything. The paste thickens the chili and deepens its color. Cook for 1 minute until the tomato paste darkens slightly. This step ensures your chili has that rich, velvety texture we all love.
Simmer Until Perfectly Thick
Pour in the 2 cups beef broth and stir to combine. Bring the mixture to a gentle boil, then reduce heat to low and let it simmer uncovered for 30 minutes. This initial simmer lets the flavors meld and the spices bloom. Stir occasionally to prevent sticking.
After 30 minutes, add the 1 can drained kidney beans and 1 can drained black beans. Stir gently to distribute them evenly. The beans will absorb the chili’s flavors as they simmer. Let the chili cook uncovered for another 20-25 minutes until it reaches your desired thickness—it should coat the back of a spoon but still be spoonable.
Adjust and Serve with Confidence
Taste your chili and adjust seasoning if needed. You might need a pinch more salt or a dash of cayenne for heat. The brown sugar should mellow out any harshness, but if it’s too sweet, you can balance it with a squeeze of lemon juice.
Let the chili rest for 5-10 minutes before serving. This gives the flavors time to settle and the texture to thicken slightly. Serve with shredded cheese, sour cream, or cornbread for the ultimate comfort food experience. Leftovers taste even better the next day!
Pro Tips For Making 7 Eleven Chili
- Cook the Beef Low and Slow: That 7-Eleven chili recipe calls for ground beef, but if you brown it too fast, you’ll end up with greasy, rubbery chunks instead of tender, flavorful crumbles. After draining the fat, reduce the heat to medium-low and let it simmer uncovered for 5-7 minutes—stir occasionally so it doesn’t stick. This isn’t the time to rush; patience here makes the whole dish taste better.
- Toast the Spices First: Skip the step where you just dump chili powder and cumin into the pot raw. Heat them in a dry skillet for 30 seconds until fragrant—this wakes up their flavors. Then stir them into the onions and garlic before adding the beef. I learned this the hard way: dry spices taste like dust until they’re toasted.
- Don’t Skip the Onion Sweat: The 7-Eleven recipe might not say it, but cook the onions until they’re soft and translucent—about 8 minutes—before adding garlic. If you rush, the raw onion flavor will linger like a bad aftertaste. A splash of water or broth at the end helps melt them down even more.
- Simmer Longer Than You Think: This chili needs at least 45 minutes of simmering to let the flavors meld, not the 20-30 minutes the recipe might suggest. The longer it cooks, the deeper the spices taste. If it’s too thin, add a splash of water; if it’s too thick, a spoonful of tomato paste thickens it up nicely. (Yes, even if you’re impatient like me.)
Dietary considerations for this recipe
Gluten-Free Adaptations
This chili recipe is naturally gluten-free as written, but always double-check your ingredients for hidden gluten. The beef broth should be labeled gluten-free, and if using canned beans, opt for brands like Bush’s or Amy’s that specify gluten-free.
The chili powder and cumin from Penzeys or Simply Organic are typically gluten-free, but verify if you have sensitivities. 🌾
Vegetarian Swaps
For a meatless version, replace the 1.5 lb ground beef with 1.5 lb plant-based ground crumbles (like Beyond Meat or Impossible) or 2 cups cooked lentils. Brown the plant-based meat first to develop flavor, then proceed with the recipe as written.
The beans and spices will still create that signature depth, just with a different texture. 🌱
Dairy-Free Options
While the original recipe doesn’t include dairy, if you’re serving it with toppings, use dairy-free cheese like Violife or Miyoko’s shreds, and coconut yogurt instead of sour cream. The chili itself remains dairy-free, but these swaps ensure the full experience works for lactose-intolerant guests. 🧀
Lower-Carb Adjustments
To reduce carbs, skip the beans and use 2 cups diced mushrooms or 1 cup cauliflower rice instead. The tomato paste adds natural sweetness, and the brown sugar can be reduced to ½ tablespoon if you’re strict about carbs. This keeps the chili hearty while cutting net carbs significantly. 🥦
Spice-Level Control
Adjust the heat to your preference by reducing or omitting the cayenne pepper. For a milder version, use ¼ teaspoon smoked paprika instead. If you love heat, add ½ teaspoon chipotle powder or a pinch of cayenne at the end.
The brown sugar naturally balances any spice, so don’t worry about overdoing it. 🌶️
Nutrition facts
Frequently asked questions
Why does 7-Eleven chili taste different from homemade recipes?
The signature flavor comes from a precise blend of chili powder, brown sugar, and slow cooking. Many recipes miss the tomato paste for depth or skip the 30-minute simmer before adding beans. This recipe mimics that by toasting spices and balancing sweet-spicy notes with the brown sugar.
Can I make this chili in a slow cooker or Instant Pot?
For a slow cooker, brown the beef first, then combine all ingredients and cook on low for 6-7 hours or high for 3-4 hours. For an Instant Pot, sauté the onions/garlic normally, then add everything else and cook on high pressure for 15 minutes, followed by a 10-minute natural release. Both methods work beautifully!
What if my chili is too thin or too thick?
For thin chili, simmer uncovered for 10-15 more minutes to reduce. If it’s too thick, stir in 2-4 tablespoons beef broth or water. The beans also release moisture as they cook, so don’t rush the simmering time. Patience is key for that perfect texture!
How do I store and reheat leftovers?
Store in an airtight container in the fridge for 3-4 days or freeze for 3 months. To reheat, warm in a pot on low heat until bubbly, or microwave for 2-3 minutes, stirring halfway. Add a splash of water or broth if it seems dry. Leftovers taste even better!
What toppings pair best with this chili?
The classic 7-Eleven combo is shredded cheddar, sour cream, and saltine crackers. For extra flair, try diced avocado, chopped cilantro, or a dollop of Greek yogurt. Keep it simple or go wild—your call!

- 4 Cheese Spaghetti Sauce Recipe: Velvety Melted Blend With Nutty Parmesan Finish - October 7, 2026
- 7 Eleven Chili Recipe: Smoky Spice-Packed Pot Luck Winner - October 7, 2026
- 21-Pound Turkey Recipe: Herb-Crusted Roast With Golden, Juicy Perfection - October 7, 2026