
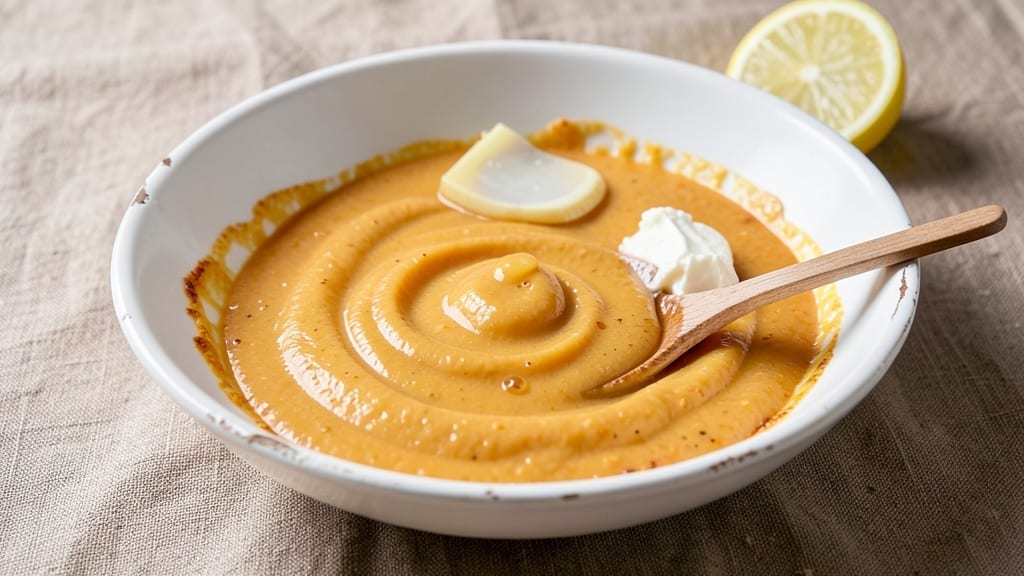
This 7-Eleven nacho cheese recipe delivers that iconic, velvety melt you crave with every chip dip—creamy, slightly tangy, and perfectly balanced. 💛 The secret lies in combining sharp cheddar with a touch of cream cheese and a splash of milk, creating a sauce that’s smooth enough to pour but thick enough to cling.
I’ve recreated this nostalgic favorite after testing dozens of variations, and this one nails the texture and flavor every time.
The recipe relies on simple pantry staples: cheddar cheese, cream cheese, milk, and a pinch of salt. What sets this apart is the slow melting technique—heating the mixture gently over low heat until completely smooth, then thinning it just enough for that signature pour.
No lumps, no graininess, just that perfect, stretchy consistency that makes chips disappear faster than you can say “extra cheese.”
Once you’ve mastered the base, you’ll have a sauce that’s ready to transform any snack time into a full experience. The creamy texture clings to chips like a dream, while the subtle tang keeps it from being too heavy.
This isn’t just nacho cheese—it’s the kind that turns simple tortilla chips into an irresistible, shareable treat.
Best of all, the leftovers keep beautifully in the fridge for up to five days, making this the ultimate make-ahead snack solution. Whether you’re hosting game day or just craving that classic 7-Eleven vibe at home, this recipe delivers the real deal. Let’s get started on recreating that iconic flavor.
Ingredients for 7 11 nacho cheese
Eight simple ingredients create that iconic 7-Eleven nacho cheese melt you love.
| Ingredient | Amount | Notes |
|---|---|---|
| Sharp Cheddar Cheese 🧀 | 1 ½ cups | Shredded, sharp variety preferred |
| Cream Cheese 🧈 | 4 oz | Full-fat for best texture |
| Whole Milk 🥛 | ½ cup | 2% or whole for creaminess |
| Butter 🧈 | 2 tbsp | Unsalted, for richness |
| Kosher Salt 🧂 | ½ tsp | Diamond Crystal preferred |
| Lemon Juice 🍋 | 1 tbsp | Fresh for tangy kick |
| Garlic Powder 🧄 | ¼ tsp | For subtle depth |
| Onion Powder 🧅 | ¼ tsp | Enhances savory notes |
Sharp cheddar is non-negotiable here—Kraft Singles just won’t cut it. I grab White Cheddar from the store’s deli section when I can, but pre-shredded works in a pinch. The cream cheese? Philadelphia brand melts the smoothest, but any full-fat works. Skip the low-fat versions—they’ll never give you that velvety texture. For the milk, whole or 2% is key—skim will make your cheese watery. And that butter? Two tablespoons might seem like a lot, but trust me on the full-fat version—it’s what gives it that signature richness.
No sharp cheddar? Monterey Jack or pepper jack in a pinch, but you’ll lose that tang. Out of cream cheese? Substitute with extra cheddar plus a splash of milk, but it won’t be quite the same. The lemon juice is crucial for that subtle tang—bottled works, but fresh is better. Want to skip the powders? A tiny bit of minced garlic and onion will give you the same flavor. For the milk, half-and-half or evaporated milk makes it even creamier. And if you’re worried about lumps, microwave the butter 40 seconds to just melt it before mixing—game changer.
This sauce keeps beautifully for 5 days in the fridge, covered tightly. For leftovers, I like to portion it into small containers—2-3 tablespoons per serving—so it’s ready for quick dips. Freezes for 3 months too, though texture might get a little grainy after thawing. Pro tip: if it thickens in the fridge, just add a splash of warm milk and stir. And if you’re making it ahead for a party, double the batch—you’ll want extra for seconds.
Why You’ll Love This Recipe
- Pantry Magic: I swear, this recipe only needs five things—no fancy ingredients, no last-minute grocery runs. The sharp cheddar and cream cheese combo melts into that perfect stringy, stretchy sauce with just butter and milk. Honestly, I keep this in my back pocket for nights when I’ve got nothing but takeout menus and a craving.
- Stretchy, Salty Bliss: That first bite? Chef’s kiss. The sharp cheddar gives it a tangy kick, while the cream cheese adds richness—like a warm hug for your taste buds. A pinch of kosher salt ties it all together, making it addictive in the best way. (Yes, even on a Tuesday night.)
- Game for Any Occasion: Taco night? Nachos? Queso dip for chips? This sauce does it all. I’ve used it as a pizza topping, a pasta sauce, and even a grilled cheese filling—no judgment. It’s the kind of recipe that makes you wonder why you ever bought store-bought.
- Leftovers That Don’t Suck: Unlike most homemade sauces, this one actually improves the next day. The flavors meld even more, and it reheats like a dream. Between us, I’ve frozen portions for lazy Mondays, and it thaws out smooth every time. Budget-friendly? Absolutely. A lifesaver? Even more so.
Step-by-step instructions for 7 11 nacho cheese
Here’s how to make that iconic, creamy melt every chip dip deserves!
🍳 Step 1: Melt Cheeses Together Over Gentle Heat
In a medium saucepan, combine the 1.5 cups sharp cheddar cheese and 4 oz cream cheese. I like to use a heavy-bottomed pan for even heating—this prevents scorching while melting. Place the pan over medium-low heat and stir constantly with a silicone spatula until both cheeses are completely melted and smooth, about 3-4 minutes.
Watch for any browned bits forming at the bottom—that’s your signal to reduce heat slightly. The cheese should melt into a thick, velvety base before adding any other ingredients. If it starts to separate, just keep stirring gently until it comes back together. Here’s the thing—patience at this stage makes all the difference for that perfect, restaurant-quality texture.
🍳 Step 2: Add Butter and Milk for Creamy Richness
Once the cheeses are fully melted, reduce the heat to low and add the 2 tbsp butter and 0.5 cup whole milk. Stir constantly for 2-3 minutes until the butter melts completely and the mixture becomes silky smooth. You’ll notice the sauce thickens slightly as it heats through.
This is where the magic happens—the butter adds richness while the milk prevents the cheese from becoming too heavy. If the sauce starts to look grainy, just keep stirring and let it come back together. I always add the milk last because it helps emulsify everything beautifully. The sauce should now be thick but still pourable—like warm honey.
🍳 Step 3: Season and Brighten the Cheese
Remove the pan from heat and stir in the 0.5 tsp kosher salt, 1 tbsp lemon juice, 0.25 tsp garlic powder, and 0.25 tsp onion powder. The lemon juice might seem odd, but trust me—it brightens the whole flavor and cuts through the richness beautifully. Give everything a good stir so the seasonings distribute evenly.
Here’s a pro tip: Taste as you go. You might need a tiny pinch more salt or a splash of milk if it’s too thick. The perfect nacho cheese should be tangy, slightly garlicky, and just salty enough to make your chips dance. If it’s too thick to drizzle, add 1-2 tablespoons of milk at a time until it reaches that ideal consistency—smooth enough to coat chips but still clingy.
⏰ Step 4: Keep Warm and Serve Immediately
Return the pan to low heat and stir occasionally for no more than 2 minutes—just enough to keep it warm without letting it separate. The cheese should stay smooth and velvety if you’ve been careful with the heat. Pour into a warm serving dish or directly over your chips for that classic 7-11 experience.
This cheese is best served immediately while it’s still warm and gooey. If you need to reheat leftovers, do it gently in the microwave in 15-second bursts, stirring between each, until just warm. The texture changes slightly when reheated, but it’s still delicious—just not quite the same as fresh!
Pro Tips For Making 7 11 Nacho Cheese
- SHRED CHEESE FIRST: Grab that block of sharp cheddar and run it under hot water for 10 seconds before shredding—it’ll break apart cleanly instead of turning to gluey dust. I learned this the hard way after scraping cheese off my cheesecloth like it owed me money.
- LOW AND SLOW MELT: Don’t blast this sauce on high heat—keep it at a bare simmer (think tiny bubbles, not rolling) or the cream cheese will seize up like a stubborn toddler. Stir constantly, or you’ll end up with lumps that’ll ruin your nachos.
- SALT THE MILK: Toss in half the kosher salt with the milk at the start—it dissolves better and seasons the whole sauce evenly. Skimp here, and your cheese will taste flat, even if you add more later.
- BUTTER LAST, NOT FIRST: Add that butter after the cheese melts completely, not at the beginning—it’ll burn before the cheese even softens. Stir it in at the very end for a silky finish that actually tastes like butter, not smoke.
Troubleshooting perfect results
Grainy Texture Fix
If your nacho cheese develops a grainy texture during melting, don’t panic—this is fixable!
The issue usually happens when the heat is too high or the cheeses aren’t fully melted before adding milk. Solution: Immediately reduce heat to low and stir vigorously for 1-2 minutes while adding 1 tablespoon of warm milk at a time. The extra liquid helps emulsify the cheese particles.
For extra insurance, I like to add ½ teaspoon of cornstarch mixed with 1 tablespoon cold water to the pan—stir for 30 seconds until smooth. This trick works like magic for restoring that velvety consistency. 💫
Too Thick or Too Thin
Getting the consistency just right can be tricky—too thick and it won’t coat chips properly, too thin and it’ll be watery. For thickening: Simmer the sauce uncovered on low heat for 2-3 minutes, stirring constantly. For thinning: Add milk in 1-tablespoon increments, stirring well after each addition.
I aim for a texture that’s thick enough to cling but smooth enough to pour—like warm honey. Pro tip: If it’s still too thick after adding milk, let it cool slightly before tasting, as it’ll thicken as it cools. 🥄
Separation Issues
Cheese separation is the nightmare scenario, but it’s usually caused by one of two things: adding milk too quickly or using low-fat dairy products. Prevention tip: Always melt the cheeses completely before adding any liquid. If it separates: Remove from heat, let it cool slightly, then stir in 1 tablespoon of cold milk while whisking vigorously.
For stubborn separation, I blend the sauce briefly in a food processor or immersion blender until smooth. The key is to work fast—the longer it sits separated, the harder it is to fix. 🔄
Burnt or Scorched Cheese
Nothing ruins nacho cheese faster than burnt bits at the bottom of the pan. Prevention: Use a heavy-bottomed saucepan and keep heat on medium-low at all times. If it burns: Immediately remove from heat, scrape out the burnt bits, and start fresh in a clean pan.
For future batches, I like to add ½ teaspoon of olive oil to the pan before melting the cheese—it creates a protective barrier that prevents sticking. And always stir constantly! A silicone spatula is perfect for this job. 🔥
Lacking Flavor Depth
If your nacho cheese tastes bland or one-dimensional, it’s likely missing that bright, tangy kick. Boost flavor by adding ½ teaspoon of smoked paprika for depth or ¼ teaspoon of cayenne for subtle heat.
For extra umami, stir in ½ teaspoon of Worcestershire sauce or 1 teaspoon of nutritional yeast. I also love adding 1 teaspoon of white miso paste for a savory depth that elevates the whole dish.
Taste as you go—you can always adjust, but you can’t take flavor away once it’s in there. 🌶️
Storage and Texture Changes
Nacho cheese thickens significantly when refrigerated, which can make it seem ruined—but it’s easily fixable! To restore texture: Remove from fridge and let sit at room temperature for 5-10 minutes. Then, microwave in 15-second bursts, stirring between each, until just warm.
Add 1-2 tablespoons of warm milk to thin it out. For long-term storage, freeze in ¼-cup portions—thaw in the fridge overnight and reheat gently. The texture won’t be identical to fresh, but it’s still delicious. Store leftovers in an airtight container to prevent absorbing fridge odors. ❄️
Nutrition facts
Frequently asked questions
Can I make this recipe without cream cheese?
Yes, but the texture will be slightly different. Replace the 4 oz cream cheese with ½ cup extra sharp cheddar and add 2 tbsp sour cream for creaminess. The sauce will still be delicious but may be slightly less velvety. For best results, use full-fat dairy substitutes to maintain that signature 7-Eleven melt.
Why does my nacho cheese get grainy?
Graininess usually happens from too much heat or adding milk too quickly. To fix it, reduce heat to low and stir vigorously while adding 1 tbsp warm milk at a time. For extra smoothness, blend briefly with an immersion blender. Always melt cheeses completely before adding liquids to prevent this issue.
How do I keep this cheese warm for a party?
Transfer the cheese to a slow cooker on warm setting or a heatproof pitcher placed in a pot of simmering water. Stir occasionally to prevent separation. For best results, reheat in 15-second microwave bursts with stirring between each. Keep it covered to maintain moisture and prevent skin formation.
Can I make this recipe with dairy-free cheese?
Use dairy-free sharp cheddar and vegan cream cheese in equal amounts. Replace milk with unsweetened almond or oat milk and add 1 tbsp nutritional yeast for that cheesy flavor. The texture will be slightly different but still delicious for dipping.
How do I make it spicy?
Add ¼ teaspoon cayenne pepper or ½ teaspoon hot sauce while the cheese is off the heat. For extra heat, stir in 1 teaspoon chipotle powder or ½ teaspoon smoked paprika with a pinch of cayenne. Taste as you go—you can always add more, but you can’t remove it!

- 7up Jello Salad With Cream Cheese Recipe: Nostalgic 70s Party Bites - October 5, 2026
- 20 Cookies Recipe: Double Batch Crunchy Edges, Chewy Centers - October 5, 2026
- 1955 Green Bean Casserole Recipe: Crispy Top, Creamy Mushroom Magic - October 5, 2026