
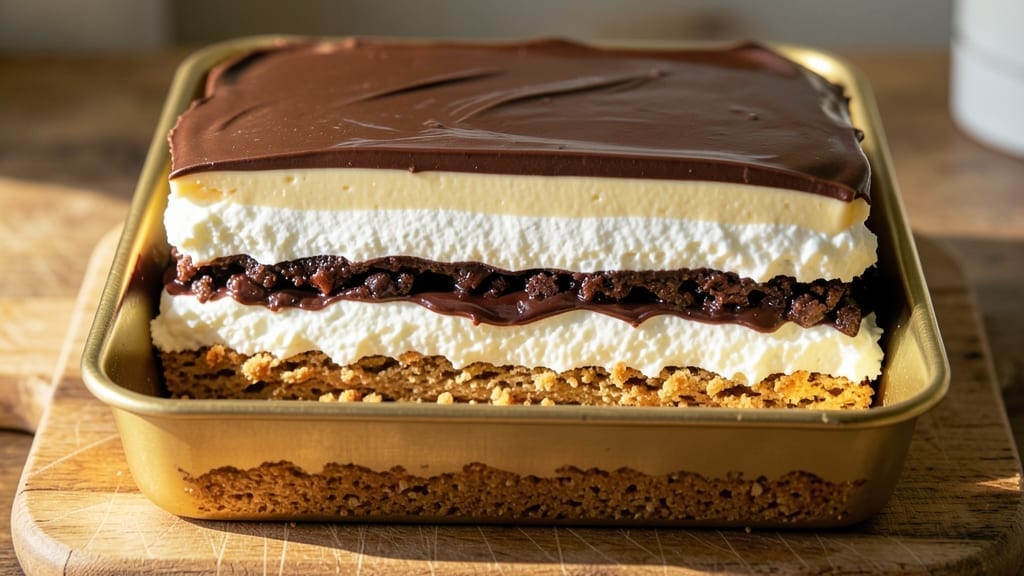
This 7-layer bars recipe without coconut delivers all the creamy, dreamy layers you love—without a single flake of coconut in sight. 💛 The secret lies in swapping traditional toppings for a rich vanilla bean pudding layer, velvety whipped cream, and a satisfying walnut crunch that ties everything together.
After years of perfecting the texture (and fixing my own messy first attempts), I’ve cracked the code for layers that stay distinct yet harmonious.
The foundation starts with a buttery graham cracker crust, baked to a perfect golden crisp, followed by layers of melted chocolate, creamy pudding, and fluffy whipped cream. Each layer gets chilled separately to prevent melting, and the walnuts add a satisfying crunch that cuts through the richness.
No coconut means no texture compromise—just pure, creamy indulgence in every bite.
What you’ll end up with is a dessert that looks impressive but requires no advanced skills—just patience for chilling and careful layering. The result? A bar so creamy it practically melts in your mouth, with each layer maintaining its own perfect texture.
This is the kind of dessert that disappears faster than you can say “second slice.”
Perfect for potlucks, holiday gatherings, or satisfying a sweet tooth, these bars keep their structure even in warm weather. Let’s get started on creating your own no-coconut masterpiece.
Ingredients for 7 layer bars recipe without coconut
Sixteen perfect squares of creamy, dreamy layers—no coconut needed for this masterpiece.
| Ingredient | Amount | Notes |
|---|---|---|
| Graham Crackers 🍪 | 2 cups | Crushed into fine crumbs |
| Unsalted Butter 🧈 | 1 cup | Melted, cooled slightly |
| Granulated Sugar 🍚 | 1 ½ cups | For chocolate layer |
| Semi-Sweet Chocolate Chips 🍫 | 1 ½ cups | High-quality chips |
| Heavy Whipping Cream 🥛 | 1 ½ cups | Whipped to stiff peaks |
| Vanilla Bean Pudding Mix 🌿 | 1 box | Small 3.4 oz box |
| Milk 🥛 | 1 cup | Whole milk preferred |
| Vanilla Extract 💧 | 1 tbsp | Pure vanilla extract |
| Walnuts 🌰 | 1 ½ cups | Chopped finely, toasted |
| Powdered Sugar 🍚 | ½ cup | For dusting layers |
| Salt 🧂 | ¼ tsp | Fine sea salt |
| White Chocolate Chips 🍫 | ½ cup | Optional for final layer |
The graham crackers and butter are your foundation—Honey Maid or Keebler work best for that buttery crunch. Toast the nuts yourself for maximum flavor—just 5 minutes in a dry pan until fragrant. Vanilla bean pudding mix is non-negotiable here; Jell-O brand is my go-to for that rich vanilla flavor. For the chocolate layer, Ghirardelli chips melt smoother than store brands. The heavy cream needs to be cold when whipping—pull it from the fridge right before you start.
No vanilla bean pudding mix? Instant vanilla pudding plus 1 tsp vanilla extract works in a pinch. Short on walnuts? Pecans or almonds toast just as beautifully. The powdered sugar layer is key—Confectioners’ sugar prevents clumping. For a deeper chocolate flavor, add 1 tsp espresso powder to the melted chocolate layer. Want extra richness? Swap half the milk for heavy cream in the pudding layer. The white chocolate chips are optional but add a stunning contrast—Ghirardelli baking bars melt perfectly.
Each layer needs at least 20 minutes in the fridge before adding the next—patience is everything. Store completed bars in an airtight container with parchment between layers for up to 5 days. For longer storage, freeze individual bars wrapped in plastic for up to 3 months. The walnut layer stays crunchy for days if toasted properly—no soggy textures here. Dust with extra powdered sugar right before serving for that bakery-fresh look.
Why You’ll Love This Recipe
- No-Fuss Assembly: I swear by this recipe because it’s literally just layering and pressing—no fancy techniques, no waiting for dough to rise. Crush the graham crackers, melt the butter and sugar together, then alternate with chocolate and whipped cream like building blocks. Honestly, even my toddler could help (and usually does).
- Crunch-Meets-Cream Magic: That first bite? Graham cracker crunch gives way to a buttery-sweet layer, then melty chocolate, then fluffy cream—it’s like a dessert hug. The heavy cream adds that perfect pillowy texture without tasting overly sweet, and the chocolate chips? They melt just enough to hold everything together.
- Party or Snack Attack: Between us, these bars are my secret weapon for potlucks, school bake sales, or when I just need a treat. They cut cleanly, travel well, and no one ever guesses how little effort went into them. (Yes, even on a Tuesday night.)
- Budget-Friendly Leftovers: A single pan makes enough to feed a crowd—or let me stretch it for days. The graham crackers and chocolate chips are cheap staples, and the butter/sugar combo stretches further than you’d think. Plus, they taste just as good reheated (or straight from the fridge) as they do fresh.
Step-by-step instructions for 7 layer bars without coconut
Layer by layer, we’ll build these dreamy bars with velvety swirls and nutty crunch.
👨🍳 Step 1: Prepare the Crust Foundation
Preheat your oven to 350°F and line a 9×13-inch baking pan with parchment paper, leaving an overhang on the sides for easy removal. In a food processor, pulse the 2 cups graham crackers until you have fine, sand-like crumbs—no floury dust yet. I like to work in batches if my processor is small.
Transfer the crumbs to a large bowl and stir in the ½ cup powdered sugar and ¼ teaspoon salt. Mix until evenly distributed—this sweetens the base and balances the richness of the layers to come. Real talk: don’t skip this step or your bars will taste too buttery.
🍳 Step 2: Build the Chocolate Layer
Melt the 1 cup unsalted butter in a microwave-safe bowl in 30-second intervals, stirring between each, until completely smooth but not bubbling. Stir in the 1.5 cups granulated sugar and 1.5 cups semi-sweet chocolate chips until fully combined. The mixture should look glossy and thick—like a rich chocolate ganache.
Spread this chocolate mixture evenly over the graham cracker crumbs in your prepared pan. Use a rubber spatula to press it down gently—this creates a solid base for your layers. Here’s the thing: tap the pan lightly on the counter a few times to help it settle evenly. Bake for 10-12 minutes until the edges start to set but the center still looks slightly soft.
🥘 Step 3: Assemble the Vanilla Bean Layers
While the chocolate layer bakes, prepare the vanilla pudding mixture. In a medium bowl, whisk together the 1 cup milk, 1 cup heavy whipping cream, 1 box vanilla bean pudding mix, and 1 tablespoon vanilla extract until completely smooth. Let it thicken slightly for 2-3 minutes while you work.
Whip the remaining ½ cup heavy whipping cream to stiff peaks using a hand mixer or stand mixer. Fold this whipped cream into the pudding mixture until fully combined—this creates those signature creamy swirls. Once your chocolate layer is out of the oven, spread the pudding mixture evenly over it, then swirl it gently with a butter knife for that classic marbled effect.
⏰ Step 4: Add the Walnut Crunch Layer
Toast the 1.5 cups walnuts in a dry skillet over medium heat for 5-6 minutes, stirring constantly, until fragrant and lightly golden. Let them cool completely, then roughly chop them—you want a mix of fine pieces and small chunks for texture.
Sprinkle the toasted walnuts evenly over the pudding layer, pressing down gently with the back of a spoon. This creates the perfect crunchy contrast to the creamy layers below. Here’s where it gets fun—press down firmly so they stay in place when you add the final chocolate layer. The walnuts should cover about 75% of the surface, leaving some pudding visible.
🔥 Step 5: Finish with White Chocolate and Chill
Melt the ½ cup white chocolate chips in the same microwave-safe bowl you used earlier, again in 30-second intervals, stirring between each. Once melted, spread this evenly over the walnut layer. For extra decadence, I like to sprinkle a few extra chocolate chips on top before they completely melt into the layer.
Let the bars cool at room temperature for 30 minutes, then refrigerate for at least 4 hours (overnight is best). This chilling time is CRITICAL—it lets all the layers set properly and prevents a messy dessert. When you’re ready to serve, lift the bars out using the parchment overhang and slice into 16 perfect squares.
Pro Tips For Making 7 Layer Bars Recipe Without Coconut
- Chill the Butter First: DESCRIPTION: Unsalted butter straight from the fridge is your friend here—let it sit out just until it’s soft enough to press into the graham cracker crust, but not melted. I learned this the hard way after my first batch turned into a greasy mess because I rushed it. That 10-minute wait makes all the difference in keeping the layers crisp.
- Toast the Graham Crumbs: DESCRIPTION: Don’t skip toasting the crushed graham crackers before mixing them with butter and sugar. Spread them on a baking sheet and toast at 325°F for 5–7 minutes until they’re just golden—this adds depth of flavor and prevents a bland base. (Yes, even if you’re impatient like me.)
- Press the Crust Firm: DESCRIPTION: The crust is the foundation, so pack it down tight in the pan using the bottom of a measuring cup or a flat-bottomed glass. Press until every corner is evenly compacted—no gaps, no loose crumbs. I used to skimp here, and the layers would slide or get soggy. It’s worth the extra 30 seconds.
- Melt Chocolate Slowly: DESCRIPTION: Heat the chocolate chips in a double boiler or microwave in 20-second bursts, stirring between each, until smooth but not hot. Overheating turns them grainy, and no one wants to eat sandpaper. If you’re in a rush, use a microwave-safe bowl and check every 10 seconds—better safe than sorry.
Common mistakes when making this recipe
Overmixing Layers
I’ve ruined more 7-layer bars than I’d like to admit by overmixing the pudding layer—especially when folding in whipped cream. The key is to gently fold just until combined, using a spatula to cut through the mixture and lift it from the bottom.
Overmixing incorporates too much air, which can cause the pudding to break down and turn grainy. Remember, you want that signature creamy swirl, not a lumpy mess. 💫
Skipping Chill Time
Patience is absolutely critical here. If you rush and don’t let each layer chill for at least 20 minutes before adding the next, your bars will end up with a sad, soggy middle.
I’ve learned the hard way—when I skipped this step, the chocolate layer melted into the pudding, and the walnuts lost their crunch. Trust me, the 4-hour fridge time is worth it for perfect texture.
Uneven Layer Distribution
An uneven spread is one of the most common mistakes, and it’s easy to fix. Use a rubber spatula to scrape every last bit of each mixture from the bowl onto the pan, then spread it evenly.
I like to tap the pan lightly on the counter after spreading to help the layer settle uniformly. Uneven layers mean some bites will be too heavy on one flavor, while others miss out entirely.
Using Warm Ingredients
Cold ingredients are non-negotiable for perfect 7-layer bars. If you use warm butter, milk, or whipped cream, the layers won’t set properly. Always chill your mixing bowls and utensils in the freezer for 10 minutes before starting, and keep your dairy products refrigerated until the last possible moment.
Warm ingredients = melted pudding = a disaster waiting to happen.
Not Pressing Layers Firmly
Many recipes skip this crucial step, but pressing each layer gently with a spoon or the back of a spatula ensures everything stays in place.
This is especially important for the walnut layer—if you don’t press it down, those nuts will float to the top when you add the final chocolate layer. A light but firm press keeps the structure intact and prevents a messy, uneven finish.
Underestimating Room for Expansion
Baking pans expand when heated, and layers can shift during chilling. That’s why I always use parchment paper with overhang—it gives me something to grip when lifting the bars out of the pan. Without this, your bars might crack or stick, ruining the presentation. Pro tip: Leave about ½ inch of overhang on all sides for easy removal after chilling.
Nutrition facts
Frequently asked questions
Can I substitute graham crackers in this recipe?
For a gluten-free option, use 1.5 cups gluten-free graham cracker crumbs or crushed gluten-free digestive biscuits. For extra crunch, try 1 cup crushed pretzels mixed with 1 cup crushed graham crackers. Just be mindful that different bases will change the flavor profile slightly—pretzels add a salty contrast while gluten-free options may need an extra ½ teaspoon salt to balance sweetness.
How do I make these bars without white chocolate?
Skip the final white chocolate layer entirely and use either ½ cup extra whipped cream or a thin layer of melted semi-sweet chocolate instead. For a different texture, try ½ cup caramel sauce (cooled slightly) or a sprinkle of crushed nuts as the topping. The walnut layer will still provide plenty of crunch without needing an additional chocolate layer.
Why did my layers get soggy?
Soggy layers almost always happen when you skip chilling time or use warm ingredients. Each layer needs at least 20 minutes in the fridge before adding the next—this prevents melting. Also, make sure your butter, milk, and whipped cream are completely cold when mixing. If you’re in a warm kitchen, chill your mixing bowls in the freezer for 10 minutes before starting.
Can I make these bars ahead of time?
Yes! These bars keep beautifully for up to 5 days in an airtight container with parchment paper between layers. For longer storage, wrap individual squares in plastic wrap and freeze for up to 3 months. Let them thaw at room temperature for 30 minutes before serving—they’ll taste just as good as fresh!
What’s the best way to slice perfect squares?
Use a sharp chef’s knife and score the bars by pressing down firmly along the grid lines. Dip the knife in hot water between cuts to keep it clean. For extra precision, freeze the bars for 15 minutes before slicing—they’ll hold their shape better. Pro tip: Use a ruler to mark 16 equal squares before cutting for perfect portions every time!

- 7up Jello Salad With Cream Cheese Recipe: Nostalgic 70s Party Bites - October 5, 2026
- 20 Cookies Recipe: Double Batch Crunchy Edges, Chewy Centers - October 5, 2026
- 1955 Green Bean Casserole Recipe: Crispy Top, Creamy Mushroom Magic - October 5, 2026