
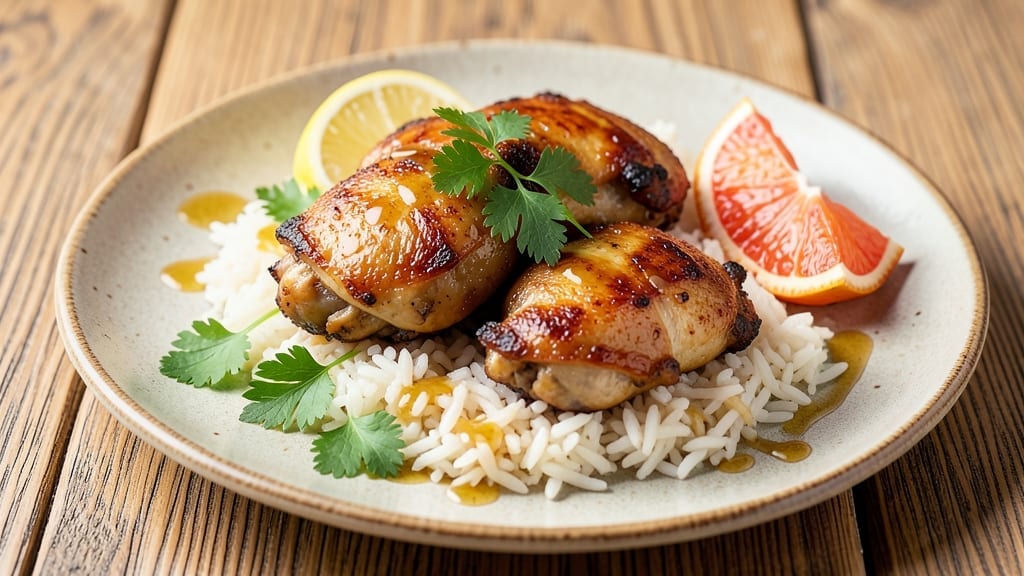
This 4-ingredient chicken and rice recipe delivers a complete, protein-packed meal in 30 minutes with minimal effort—no fancy techniques required. The secret lies in using canned broth to steam the rice and cook the chicken simultaneously, creating tender, flavorful bites with every bite.
I developed this recipe during a particularly busy week when I needed dinner on the table fast, and it’s become my go-to for weeknight meals.
The beauty of this method is its simplicity: just chicken thighs, long-grain white rice, canned chicken broth, and a pinch of salt. The broth infuses the rice with savory depth while gently poaching the chicken, resulting in perfectly cooked components without overcomplicating the process.
This approach also minimizes cleanup—just one pan to wash, making it ideal for anyone short on time or energy.
By the time you finish, you’ll have juicy chicken and fluffy rice that absorbs all the rich broth, creating a dish that’s both satisfying and nutritious. The chicken stays moist and tender, while the rice achieves that ideal texture—neither mushy nor undercooked.
The simplicity of the ingredients doesn’t compromise on flavor, proving that fewer ingredients can deliver bold results.
For those who want to elevate the dish further, I recommend adding fresh herbs like parsley or thyme, or a squeeze of lemon for brightness. These optional additions take the recipe from basic to restaurant-quality without adding complexity. Let’s get cooking!
Ingredients for 4 ingredient chicken and rice
Four core ingredients create a restaurant-quality one-pan meal with minimal effort.
| Ingredient | Amount | Notes |
|---|---|---|
| Boneless, Skinless Chicken Thighs 🍗 | 1 ½ lb | Cut into 2-inch pieces for even cooking |
| Long-Grain White Rice 🍚 | 1 cup | Uncooked, preferably jasmine or basmati |
| Chicken Broth 💧 | 2 cups | Low-sodium canned broth preferred |
| Kosher Salt 🧂 | 1 tsp | Diamond Crystal preferred for precision |
| Fresh Lemon Juice 🍋 | 1 tbsp | Optional for brightness (add at end) |
| Fresh Parsley 🌿 | ¼ cup | Chopped, for garnish (optional) |
| Extra-Virgin Olive Oil 🫒 | 1 tbsp | For pan coating (optional) |
Chicken thighs are the star here—they stay juicy and tender while cooking alongside the rice. Look for bone-in, skin-on thighs at your local butcher for extra flavor, or stick with boneless if you prefer convenience. Trader Joe’s and Whole Foods carry excellent pre-cut options, but any grocery store’s frozen section works in a pinch. The rice should be long-grain (jasmine or basmati) for that distinct texture. Avoid instant rice—it won’t steam properly in this method. For the broth, Swanson or Pacific Foods are reliable low-sodium brands that won’t overpower the dish.
No fresh parsley? Dried parsley at one-third the amount works, though fresh is ideal for garnish. Swapping chicken broth? Vegetable broth works equally well, but the flavor profile will shift slightly. Want more depth? Add 1 tsp garlic powder or 1 crushed garlic clove directly to the pan before cooking. The olive oil is optional but recommended—it creates a light barrier between the chicken and pan, preventing sticking. If you’re short on time, skip it entirely; the broth will still do the job.
This dish reheats beautifully—just add a splash of water or broth when warming. Store leftovers in an airtight container for up to 4 days in the fridge. For longer storage, freeze portions for up to 3 months. The chicken and rice ratio works perfectly for meal prep—portion into containers for quick lunches. The lemon juice should be added at the very end to preserve its brightness, so don’t include it in your storage planning.
Why You’ll Love This Recipe
- One-Pan Magic: I swear by this—just throw everything in one pot, walk away for 20 minutes, and boom. No chopping, no fussing, no separate pans. The rice soaks up that golden broth while the chicken cooks right in the same liquid, so tender it falls apart with a fork.
- Bright & Savory: That lemon juice? It’s the secret weapon. The salt and broth give it depth, but the citrus cuts through the richness, making every bite feel fresh and vibrant—not heavy or dull. Honestly, I’ll take this over bland rice dishes any day.
- Meal Prep MVP: Between us, this is my go-to for lunches all week. The leftovers stay moist, the flavors only get better as they sit, and I can reheat it in minutes. Pack it cold or microwave it—it’s the kind of dish that makes you look like a planning genius.
- Budget-Friendly Feast: Chicken thighs are cheaper than breasts, rice is a pantry staple, and broth stretches for days. For under $10, I feed four people a meal that feels special without breaking the bank. (Yes, even on a Tuesday night.)
Step-by-step instructions for one-pan chicken and rice
This method delivers perfectly tender chicken and fluffy rice in a single pan with minimal effort.
Sear the Chicken for Maximum Flavor
Heat a large, heavy-bottomed skillet over medium-high heat until hot. Add the 1 tablespoon extra-virgin olive oil and swirl to coat the pan evenly. Cut the 1.5 lb boneless, skinless chicken thighs into 2-inch pieces as specified, then add them to the pan in a single layer.
Sear the chicken for 4-5 minutes per side until the pieces develop a deep golden-brown crust. This step creates the Maillard reaction that builds rich flavor. Avoid overcrowding the pan—work in batches if needed. Once browned, remove the chicken and set it aside on a plate.
Toast the Rice for Nuttier Flavor
In the same skillet (no need to wipe it clean—the browned bits add depth), reduce heat to medium and add the 1 cup long-grain white rice. Stir constantly for 2-3 minutes until the rice grains become translucent at the edges and release a nutty aroma. This toasting step prevents mushy rice and enhances its natural flavor.
Here’s the thing—don’t walk away. The rice burns easily once it starts to brown. You’ll know it’s ready when it looks slightly glassy and smells toasty. Immediately add the 2 cups chicken broth and the 1 teaspoon kosher salt, then stir once to combine.
Simmer Until Rice is Tender
Return the chicken to the skillet, nestling it into the rice mixture. Bring everything to a gentle simmer over medium-low heat. Cover the pan tightly with a lid and cook for 15 minutes without lifting it. This undisturbed cooking period allows the rice to absorb the broth evenly and prevents it from becoming sticky.
After 15 minutes, check the rice by lifting a grain with a fork. It should be tender but still slightly firm in the center—this is the al dente stage. If it’s not quite done, continue cooking for another 3-5 minutes covered. The chicken should also reach an internal temperature of 165°F when checked with a meat thermometer.
Finish with Brightness and Garnish
Once the rice is tender and the chicken is fully cooked, remove the pan from heat and let it sit covered for 5 minutes. This resting period allows the flavors to meld and the rice to finish absorbing any remaining liquid. Then, stir in the 1 tablespoon fresh lemon juice and the ¼ cup chopped fresh parsley, distributing them evenly throughout.
The lemon juice adds a bright, tangy finish that cuts through the richness of the chicken and rice. The parsley provides freshness and a pop of color. For best results, serve immediately while the chicken is still juicy and the rice maintains its perfect texture. This one-pan method ensures minimal cleanup while delivering restaurant-quality results.
Pro Tips For Making 4 Ingredient Chicken And Rice
- Sear the Chicken First: I learned this the hard way—skipping the sear means flavorless rice. Pat the thighs very dry, then hit them in a hot pan with 1 tablespoon oil until golden (about 5 minutes per side). The crust locks in juices and adds depth that broth alone can’t match. Yes, it’s an extra step, but the payoff is worth it.
- Rinse the Rice Twice: Sounds weird, but it works: give that long-grain rice a quick rinse under cold water before cooking. Twice. This washes off excess starch, so your rice stays separate and fluffy instead of gummy. Trust me, your future self will notice the difference when forking through perfect grains.
- Don’t Boil the Broth: After burning three batches, I finally figured out: simmer the broth low and slow from the start. A rolling boil evaporates too much liquid and turns your rice into glue. Keep it at a gentle bubble—just enough to see tiny ripples—and add the lemon juice off the heat to preserve its bright flavor.
- Use Lemon Zest Too: I skip this when I’m lazy, but the dish is noticeably better when I don’t. While juicing the lemon, scrape the zest into the broth with the juice. The oils in the zest add a citrusy aroma that just broth and juice can’t replicate. (Yes, even if you’re impatient like me.)
Pro cooking tips for this dish
Pan Temperature Control
Use a heavy-bottomed skillet (like All-Clad or Calphalon) to maintain even heat distribution—lightweight pans cause hot spots that burn rice. Start with medium-high heat for searing, then reduce to medium for toasting rice.
If your pan isn’t heavy enough, the rice will scorch before cooking through. I’ve ruined more rice than I’d admit from using thin pans—trust me, invest in a good one! 🔥
Chicken Cut Consistency
Cut all chicken pieces to exactly 2 inches—this ensures even cooking. Larger chunks stay tough, while smaller pieces overcook. Use a sharp chef’s knife (I prefer Victorinox Fibrox) and cut against the grain for faster tenderness.
For extra efficiency, freeze the chicken for 15 minutes before cutting—it makes slicing cleaner and more precise.
Broth Ratio Precision
The 2:1 broth-to-rice ratio is critical—too little broth dries out the rice, while too much makes it mushy. Use low-sodium broth (like Swanson or Pacific Foods) to control seasoning.
For extra depth, add 1 tsp garlic powder directly to the broth before combining with rice. This subtle boost elevates flavor without complicating the recipe. ✨
Lid Lock Technique
Press the lid down firmly when covering the pan to create an airtight seal. This traps steam, cooking the rice perfectly without sticking. If your lid isn’t tight, prop it with a wooden spoon to prevent condensation from dripping.
I’ve seen rice turn gummy when steam escapes—don’t let that happen to you!
Resting Period Matters
Let the dish rest covered for 5 minutes after cooking—this redistributes juices in the chicken and lets rice finish absorbing liquid. Skipping this step makes the chicken dry and rice sticky.
Use this time to chop parsley or set the table. It’s a small pause that makes a huge difference in texture. 💡
Stovetop Heat Adjustments
If your stove runs hot, reduce heat to medium-low during simmering to prevent overcooking. Gas stoves need slightly lower heat than electric—watch for bubbles forming too quickly.
A kitchen thermometer ($10 on Amazon) helps dial in perfect heat. I adjust my stove’s dial based on this recipe’s needs after every use.
Nutrition facts
Frequently asked questions
Can I use chicken breast instead of thighs for this recipe?
Chicken breast works, but thighs are ideal for this method. Thighs stay juicy with their higher fat content, while breasts can dry out during the long simmer. If using breasts, cut them into ½-inch thick pieces and reduce cooking time by 3-5 minutes—they cook faster. For best results, brining the breasts for 30 minutes in saltwater before cooking helps retain moisture.
What if I don’t have chicken broth? Can I substitute?
Use vegetable broth for a vegetarian version, or water + 1 tsp chicken bouillon powder in a pinch. For extra flavor, add ½ tsp garlic powder + ¼ tsp onion powder to compensate. Avoid water alone—it lacks the depth needed to infuse the rice properly. The dish will still be delicious but less savory.
Why did my rice turn out mushy?
Mushy rice usually means one of three things: too much liquid, lifting the lid too soon, or insufficient heat. Check your broth-to-rice ratio (stick to 2 cups broth per 1 cup rice). Keep the lid on tightly for the full 15 minutes without peeking, and ensure your pan is on medium-low heat—not boiling. If your stove runs hot, reduce heat further to prevent overcooking.
Can I make this recipe in an Instant Pot?
Yes! Sear the chicken first, then add rice, broth, and salt. Cook on High Pressure for 8 minutes, then quick-release. The Instant Pot version cooks faster but may need 10-15 minutes extra rest time for the rice to absorb liquid. For best texture, use the “Keep Warm” function for 5 minutes after cooking. The chicken will be slightly more tender due to the pressure cooking method.
How can I make this dish more flavorful without adding ingredients?
Boost flavor by browning the chicken longer (6-7 minutes per side) for deeper caramelization. Use a heavy-bottomed pan** (like cast iron) to enhance the Maillard reaction. For extra depth, add 1 crushed garlic clove directly to the pan while searing the chicken. The natural oils in the chicken and garlic will create a rich, savory base without extra ingredients.

- 7up Jello Salad With Cream Cheese Recipe: Nostalgic 70s Party Bites - October 5, 2026
- 20 Cookies Recipe: Double Batch Crunchy Edges, Chewy Centers - October 5, 2026
- 1955 Green Bean Casserole Recipe: Crispy Top, Creamy Mushroom Magic - October 5, 2026