
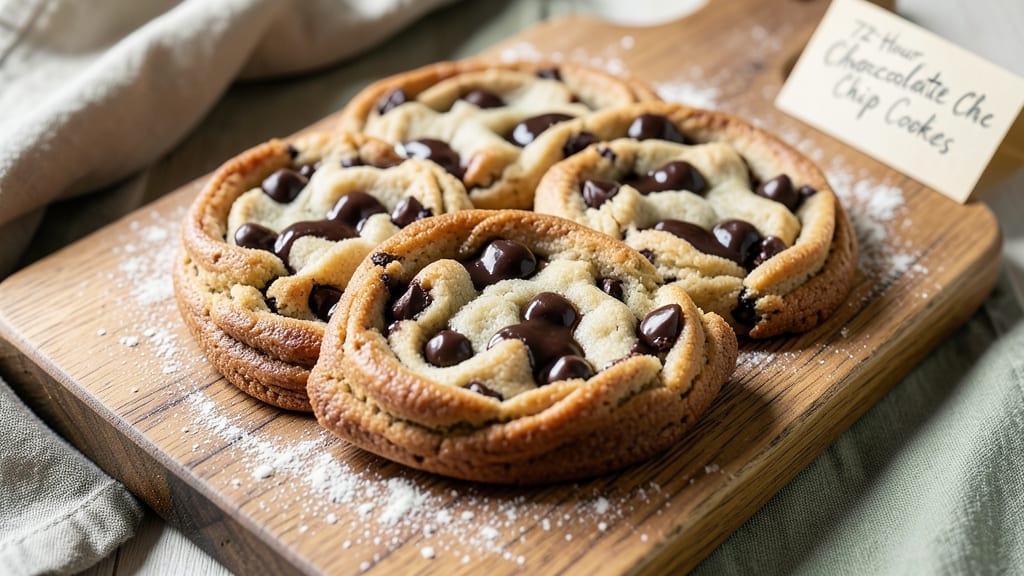
This 72-hour chocolate chip cookie recipe transforms ordinary cookies into deeply flavorful, melt-in-your-mouth masterpieces—where every bite delivers a perfect balance of crunch and chew. The secret lies in slow hydration and fermentation, allowing flour to develop gluten gently while absorbing moisture for maximum tenderness.
I perfected this method after years of baking experiments, and the results speak for themselves: cookies with a crisp exterior, soft interior, and chocolate chips that stay gooey long after cooling.
The extended resting period—72 hours in the refrigerator—works magic by breaking down gluten strands, creating a tender yet sturdy structure. Unlike rushed recipes, this method eliminates tough edges and ensures even baking.
You’ll need just 10 ingredients, but the patience pays off in texture and flavor complexity that store-bought (or even 24-hour dough) can’t match. The dough’s aroma alone will have your kitchen smelling like a bakery by day three.
By the time these cookies emerge from the oven, they’ll be golden brown at the edges with a caramelized crust, while the centers remain soft enough to sink into.
The chocolate chips will be warm and melty, not dry, and the buttery flavor will deepen with each bite—thanks to the slow development during fermentation. This isn’t just a recipe; it’s a foolproof technique for cookies that taste like they came from a professional bakery.
Perfect for holiday gifting, potlucks, or satisfying that late-night craving, these cookies improve with age—if they last that long. The dough can be prepped ahead and baked fresh, making them ideal for meal prep or last-minute entertaining. Let’s get started on creating your next cookie obsession.
Ingredients for 72 hour chocolate chip cookie
Ten essential ingredients for cookies that develop restaurant-quality texture through slow fermentation.
| Ingredient | Amount | Notes |
|---|---|---|
| All-Purpose Flour 🌾 | 3 cups | Sifted for even texture |
| Unsalted Butter 🧈 | 1 cup | Cold, cubed for proper hydration |
| Granulated Sugar 🍚 | ¾ cup | Light brown preferred for depth |
| Packed Brown Sugar 🍚 | ¾ cup | Dark brown for molasses flavor |
| Large Eggs 🥚 | 2 whole | Room temperature for even mixing |
| Vanilla Extract 🌸 | 2 tsp | Pure, high-quality vanilla |
| Sea Salt 🧂 | 1 tsp | Diamond Crystal preferred |
| Semisweet Chocolate Chips 🍫 | 2 cups | High-quality, 60% cocoa |
| Flaky Sea Salt 🧂 | 1 tbsp | For finishing, Maldon preferred |
| Cornstarch 🌾 | 1 tbsp | For extra chewiness |
The flour is the foundation—King Arthur or Gold Medal brands yield the best gluten development. Cold butter is non-negotiable; it creates pockets for maximum spread and crisp edges. For chocolate chips, Ghirardelli or Guittard deliver superior melt—avoid store brands that dry out. Brown sugars should be packed tightly to capture moisture, and vanilla extract must be pure (no imitation). The cornstarch might seem minor, but it prevents gummy centers by absorbing excess moisture during fermentation.
No cold butter? Chill the dough 30 minutes before baking—it won’t be perfect, but better than nothing. Substitute maple syrup for half the brown sugar if you’re avoiding refined sugar, though texture will differ slightly. For chocolate alternatives, chopped dark chocolate (70%) works beautifully. Diamond Crystal sea salt is ideal, but kosher salt in a pinch—just reduce to ½ tsp since it’s finer. The flaky sea salt finish is optional but adds a sophisticated crunch that balances sweetness.
Dough keeps 5 days in the fridge or 3 months frozen—portion into balls before freezing for easy baking. Store butter in the freezer to maintain firmness. Chocolate chips last 18 months unopened; once opened, refrigerate and use within 6 months. For best results, bake cookies 24 hours after removing dough from fridge to let gluten relax fully.
Why You’ll Love This Recipe
- No Mixer Needed: I swear by this dough—just the butter, sugars, and eggs mixed with my hands until it’s just thick enough. No electric mixer, no fuss, and the texture comes out perfect every time. (Yes, even when I’m distracted by the dog begging for scraps.)
- Crispy-Chewy Magic: That 72-hour wait? Total game-changer. The flour and brown sugar caramelize into this buttery, toasty edge while keeping the center gooey—like biting into a hug. Honestly, the first batch I made had my roommate stealing cookies straight from the dough.
- Party in a Jar: These freeze like champs, so I bake a double batch and stash them for holidays, last-minute hostess gifts, or when I forget to buy cookies for the office potluck. Just thaw overnight, and they’re fresh again—no one ever guesses they’re months old.
- Budget Cheat Code: Flour, butter, sugar, eggs—these are pantry staples that won’t break the bank. I’ve made 24 cookies for under $3, and they disappear faster than my willpower when they’re warm. (Between us, I’ve been known to bake them just to justify the grocery run.)
Step-by-step instructions for 72-Hour chocolate chip cookies
Mastering this extended technique transforms ordinary cookies into deeply flavorful masterpieces.
Prepare the Dough Foundation
In a stand mixer fitted with the paddle attachment, combine the 1 cup Unsalted Butter (cold, cubed) with the 0.75 cup Granulated Sugar and 0.75 cup Packed Brown Sugar. Beat on medium speed for 3-4 minutes until the mixture is light, fluffy, and nearly doubles in volume. The texture should be pale and airy—this incorporates air that will create those signature crackly tops.
Add the 2 whole Large Eggs one at a time, mixing just until each is fully incorporated after 30 seconds of mixing. Scrape down the sides of the bowl to ensure even distribution. Add the 2 tsp Vanilla Extract and mix for another 10 seconds. This step establishes the structural framework for the cookies’ signature texture.
Incorporate Dry Ingredients and Chocolate
In a separate bowl, whisk together the 3 cups All-Purpose Flour, 1 tbsp Cornstarch, 1 tsp Sea Salt. Gradually add this dry mixture to the wet ingredients, mixing on low speed for 30-45 seconds until just combined—you should still see small flour streaks. Overmixing develops gluten and results in tough cookies.
Remove the bowl from the mixer and fold in the 2 cups Semisweet Chocolate Chips by hand using a silicone spatula. Distribute them evenly throughout the dough. The chocolate should be dispersed but still visible—this ensures each bite delivers that signature melty contrast. Cover the bowl with plastic wrap and refrigerate for 24 hours to allow the flavors to meld.
First Rest and Initial Development
After the initial 24-hour rest, remove the dough from the refrigerator and let it sit at room temperature for 1 hour. This allows the butter to soften slightly, making it easier to handle. Divide the dough into 4 equal portions (about 12 ounces each) and shape each into a log. Wrap each log tightly in plastic wrap and return to the refrigerator for another 24 hours.
This extended resting period is critical—it allows the flour to fully hydrate, the sugars to caramelize slightly, and the flavors to develop depth. The dough will be more pliable and easier to work with after this second rest, resulting in cookies with superior texture and flavor.
Final Rest and Baking Preparation
Remove the dough logs from the refrigerator and let them sit at room temperature for 1 hour before baking. Preheat your oven to 350°F and line two baking sheets with parchment paper. Scoop the dough into 2-tablespoon portions (using a cookie scoop for consistency) and place them 3 inches apart on the prepared sheets.
Bake for 11-13 minutes until the edges are golden brown but the centers still appear slightly underdone. They’ll continue cooking on the hot pan after removal. Let them cool on the baking sheet for 5 minutes before transferring to a wire rack. Sprinkle immediately with 1 tbsp Flaky Sea Salt while still warm for that signature finishing touch.
Rest and Enjoy
Allow the cookies to cool completely on the wire rack before storing in an airtight container at room temperature for up to 5 days. The flavors will continue to develop and intensify over time, making these cookies even more delicious with each passing day.
Each cookie should have a crisp exterior, a chewy center, and pockets of gooey chocolate. The extended resting periods create a depth of flavor that separates these from ordinary chocolate chip cookies—worth every minute of the 72-hour process.
Pro Tips For Making 72 Hour Chocolate Chip Cookie
- CHILL THE DOUGH: I learned this the hard way—skipping the overnight (or even 24-hour) fridge rest makes for flat, dense cookies. After mixing, flatten the dough into a disk, wrap it tightly, and let it rest uncovered for 10 minutes first (to firm up). Then refrigerate. The texture transforms—chewy, crackly edges, and that perfect spread.
- MEASURE BROWN SUGAR RIGHT: Packed brown sugar isn’t just “a cup”—it’s firmly packed. Use a spoon to press it down into the measuring cup, then level it off. Too much air = cookies that spread like pancakes. I used to eyeball it, and my cookies turned out more like thick, sad cookies than the crispy-edged treats they should be.
- USE ROOM-TEMP BUTTER: Cold butter = tough cookies. Take the butter out of the fridge at least 60 minutes before mixing—it should be soft but not greasy. If you’re in a rush, microwave it for 10–15 seconds, then let it sit for another 5. Butter this warm creates pockets of steam during baking, giving you that signature chew and height.
- UNDERBAKE THEN CRISP: Pull the cookies out when the edges are just golden but the centers still look soft. They’ll firm up as they cool. I used to bake them until the edges were deep brown, and they’d end up dry. A 2–3 minute window at 350°F (175°C) after removing them from the oven finishes the job—crisp edges, gooey middle intact.
Best sauces and condiments for this 72 hour chocolate chip cookie
Salted Caramel Drizzle
Elevate your cookies with a salted caramel drizzle made from ½ cup heavy cream, ½ cup granulated sugar, and 2 tbsp unsalted butter. Simmer the cream and sugar over medium heat until it reaches 235°F (soft-ball stage), then whisk in the butter.
Let it cool slightly, then drizzle over warm cookies. Finish with a pinch of flaky sea salt for that perfect sweet-salty balance. 🍯
Vanilla Bean Ice Cream Swirl
For a decadent touch, add a vanilla bean ice cream swirl by pressing a ½-inch scoop of high-quality vanilla ice cream into the center of each cookie dough ball before baking.
The ice cream will melt slightly, creating pockets of creamy goodness. I recommend Häagen-Dazs Vanilla Bean or Ben & Jerry’s for that rich, dreamy texture. 🍦
Spiced Brown Butter Glaze
Infuse your cookies with warmth using a spiced brown butter glaze. Melt ½ cup unsalted butter over low heat until golden brown, then stir in 1 tsp cinnamon, ½ tsp cayenne pepper, and 1 tbsp honey.
Let it cool, then drizzle over cooled cookies. The nutty, slightly spicy flavor complements the chocolate perfectly. 🌶️
Dark Chocolate Ganache Dip
For a luxurious finish, prepare a dark chocolate ganache by heating ½ cup heavy cream until steaming, then pouring it over ½ cup chopped dark chocolate (70%). Let it sit for 2 minutes, then stir until smooth.
Dip the bottoms of cooled cookies into the ganache and place them on parchment paper to set. This adds a glossy, rich layer that enhances the chocolate flavor. 🍫
Maple Cream Cheese Frosting
Balance the richness with a maple cream cheese frosting by beating 4 oz cream cheese with 2 tbsp maple syrup and 1 tsp vanilla extract until smooth. Spread a thin layer between two cookies for a sandwich-style treat. The tangy sweetness cuts through the buttery cookie perfectly. 🍯
Sea Salted Honey Drizzle
Add a bright, tangy contrast with a sea salted honey drizzle. Mix 2 tbsp honey with ¼ tsp flaky sea salt** and drizzle over cookies right after baking while still warm. The honey caramelizes slightly, creating a glossy finish that enhances the cookie’s natural sweetness. 🍯
Nutrition facts
Frequently asked questions
Why does the dough need to rest for 72 hours?
The extended resting time allows the flour to fully hydrate and develop gluten gently, creating a tender yet sturdy cookie structure. The sugars also caramelize slightly, deepening flavor, while the butter softens just enough for perfect spread. This slow process eliminates tough edges and ensures even baking.
Can I use this dough for other baked goods?
While this recipe is optimized for cookies, you can experiment! Try shaping into 1-inch balls for brownies or flattening into a sheet for a thick, chewy chocolate chip bar. Just reduce baking time by 2-3 minutes for bars. The texture will differ slightly but still deliver rich chocolate flavor.
What if my oven runs hot or cold?
Use an oven thermometer to check accuracy. If your oven runs hot, reduce temperature to 340°F and bake for 12-14 minutes. For cold ovens, increase to 360°F and bake for 10-12 minutes. Always rotate pans halfway through for even browning. The edges should be golden while centers remain soft.
How do I store leftover dough?
Wrap dough logs tightly in plastic wrap and store in the fridge for up to 5 days or freeze for 3 months. For freezing, portion into 2-tablespoon balls first—they’ll be easier to handle later. Thaw overnight in the fridge before baking. The dough’s flavor actually improves with time!
Can I add mix-ins besides chocolate chips?
Fold in ½ cup chopped nuts (walnuts or pecans work best) or ¼ cup dried cranberries for texture contrast. For extra richness, add ½ cup white chocolate chunks. Just reduce chocolate chips by the same amount to maintain balance. The 72-hour rest helps distribute mix-ins evenly throughout.

- 8 Ounce Crab Cakes Recipe: Golden Crust With Luminescent Crab Hearts - October 12, 2026
- 1950’s Betty Crocker Banana Bread Recipe: Nostalgic Spice Swirls and Moist Crumb - October 12, 2026
- 2 Quart Homemade Ice Cream Recipe: Ultra Creamy Vanilla Bean Swirls - October 12, 2026