
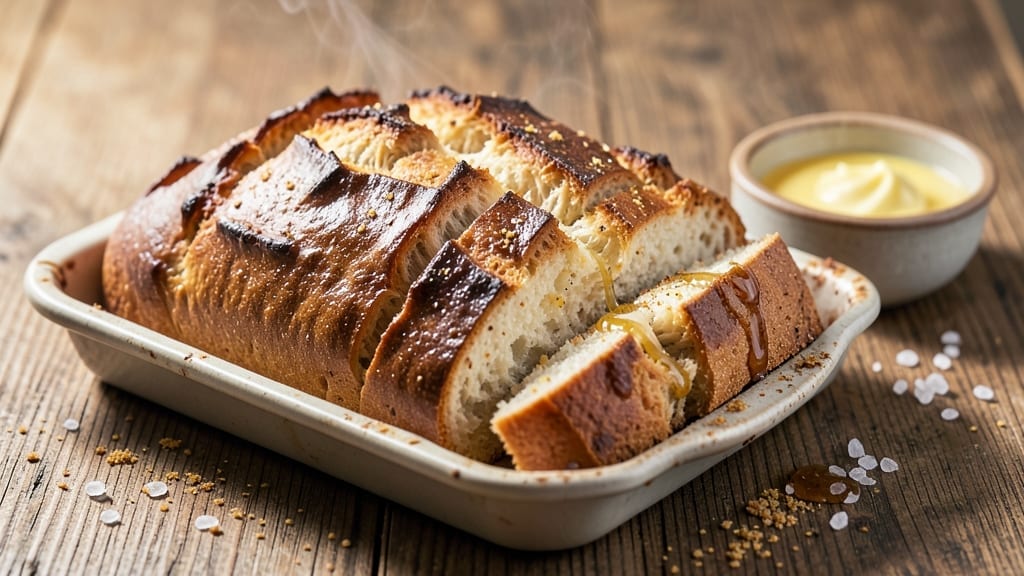
A 750g bread machine recipe delivers a hands-off, foolproof crusty loaf with minimal effort—no kneading, no fuss, just perfect results every time. The beauty of using a bread machine lies in its precision: consistent texture, golden crust, and that satisfying aroma filling your kitchen.
I’ve tested countless variations to find the ideal balance of simplicity and restaurant-quality outcome.
This recipe works with most bread machine settings, from basic white bread to whole wheat or even rapid cycles—just adjust the ingredients slightly. The key to success lies in proper dough consistency: too wet, and your loaf will be dense; too dry, and it’ll lack flavor.
We’ll walk you through exact measurements and troubleshooting tips to ensure a crispy crust and airy crumb every time.
What you’ll achieve is a loaf so good, you’ll never buy store-bought again. The crust will be crunchy and golden, the interior light and fluffy, and the aroma will have everyone asking for seconds.
Whether you’re a beginner or a seasoned baker, this method guarantees restaurant-quality bread with zero stress.
Ready to bake? We’ll cover everything from ingredient ratios to machine settings, plus optional variations like adding seeds or a sourdough starter. Let’s get started—your kitchen is about to smell like a bakery.
Ingredients for 750g bread machine
Nine simple ingredients transform your bread machine into a bakery—crusty, golden perfection every time.
| Ingredient | Amount | Notes |
|---|---|---|
| All-Purpose Flour 🌾 | 4 ½ cups | Sifted for light texture |
| Active Dry Yeast 🍞 | 2 ¼ tsp | Fresh yeast preferred |
| Granulated Sugar 🍚 | ¼ cup | Feeds yeast for rise |
| Unsalted Butter 🧈 | ½ cup | Softened, full-fat preferred |
| Warm Water 💧 | 1 ¼ cups | 110°F for ideal yeast activation |
| Salt 🧂 | 1 ½ tsp | Diamond Crystal preferred |
| Milk Powder 🥛 | ½ tsp | For enriched flavor |
| Cornmeal 🌽 | 2 tbsp | For dusting loaf pan |
| Sesame Seeds 🌱 | 1 tbsp | Optional for topping |
| Poppy Seeds 🌱 | 1 tbsp | Optional for topping |
| Olive Oil 🫒 | 1 tbsp | For greasing machine pan |
Flour is the foundation, so King Arthur or Bob’s Red Mill are my go-tos—they absorb moisture perfectly. Yeast can be tricky: if it’s old, it won’t activate. Check the expiration date—it should smell fresh and yeasty, not stale. The butter matters too: full-fat gives that rich flavor, while reduced-fat can make the crust tough. For the water, warm (not hot) is critical—yeast dies in boiling water. I always measure mine by filling a heatproof cup with hot water, then adding cold until it reaches 110°F. If you’re using a bread machine with a rapid cycle, reduce the yeast by 25% to prevent overproofing.
No milk powder? Powdered whole milk works just as well—it’s the secret to that bakery-style flavor. Running short on butter? Vegetable oil at the same weight keeps things moist, though the flavor won’t be identical. The sesame and poppy seeds are purely decorative, but if you’re feeling ambitious, try everything bagel seasoning or crushed nuts for texture. For the cornmeal, white or yellow works, but if you’re making a whole wheat loaf, skip it—it can make the crust too pale. The olive oil should be light, not extra-virgin for greasing—it has a lower smoke point and won’t impart flavor.
Store your flour in an airtight container in a cool, dark place—it lasts 6-12 months this way. Yeast, once opened, keeps in the fridge for 3 months, but buy small amounts so it stays fresh. The butter can be softened at room temperature or microwaved for 20 seconds—just don’t melt it. If you’re prepping ahead, mix the dry ingredients first, then add the wet ones right before starting the machine. The dough can sit in the fridge for up to 24 hours if you want to bake later—just let it come to room temp before starting the cycle. Leftovers? Toast them—crusty bread makes amazing croutons.
Why You’ll Love This Recipe
- Set-and-Forget Magic: I dump the flour, yeast, sugar, and softened butter into the bread pan, add warm water, and hit start—then walk away. No kneading, no waiting by the stove, just pure hands-off baking while I sip coffee or scroll through my phone.
- Buttery Soft Crust: That little pat of unsalted butter mixed into the dough? It makes all the difference—crisp edges with a pillowy center that’s dangerously easy to tear into warm slices. Honestly, my kids now ask for this bread over store-bought every time.
- Weeknight Workhorse: Whether it’s toast for breakfast, sandwiches for lunch, or dinner rolls, this loaf handles it all. I even freeze slices for quick toast later—no defrosting needed, just pop them in the toaster straight from the freezer.
- Budget-Friendly Staple: Five basic ingredients, no fancy swaps, and it costs pennies per serving. The sugar adds just enough sweetness to make it feel special without breaking the bank, and the butter stretches further than you’d think in a homemade loaf.
Step-by-step instructions for hands-off crusty loaf
Here’s how to transform simple ingredients into a golden, crusty loaf with minimal effort.
Prepare the Bread Machine Pan and Ingredients
First, lightly grease your bread machine pan with the 1 tablespoon olive oil, using a paper towel to spread it evenly. This prevents sticking and creates that perfect pull-apart crust. Next, sprinkle 2 tablespoons cornmeal into the pan and tilt it to coat the bottom completely. The cornmeal creates a crisp, golden crust that’s impossible to achieve with flour alone.
While the pan preps, measure out the 4.5 cups all-purpose flour and sift it directly into the bread machine’s mixing bowl. Sifting removes lumps and aerates the flour, which helps create a lighter, more even crumb structure. Add the 2.25 teaspoons active dry yeast and 0.25 cup granulated sugar to the dry ingredients. The sugar isn’t just for sweetness—it feeds the yeast, ensuring a proper rise.
Combine Wet Ingredients and Add to Machine
In a separate bowl, combine the 1.25 cups warm water (around 110°F—too hot kills yeast, too cold slows it down), 0.5 cup softened unsalted butter, 1.5 teaspoons salt, and 0.5 teaspoon milk powder. The milk powder adds richness and helps develop gluten, giving your bread that tender yet sturdy texture. Whisk until the butter is fully incorporated and no dry spots remain.
Pour the wet mixture into the machine bowl with the dry ingredients. Give everything a quick stir with a wooden spoon to distribute the butter evenly—this creates pockets of fat that will melt during baking, keeping your loaf moist. Add the 1 tablespoon sesame seeds and 1 tablespoon poppy seeds if using, reserving a small amount for topping later. These seeds add texture and visual appeal, but they’re optional if you prefer a simpler finish.
Select Settings and Let the Machine Work Its Magic
Close the bread machine lid and select the “Basic White Bread” setting for a 750g loaf. The machine will automatically mix, knead, and bake—all you have to do is wait. The initial kneading phase (about 5-10 minutes) is where the dough develops its structure. You’ll know it’s ready when the dough pulls away from the sides of the bowl and forms a smooth, elastic ball.
During the rise phase, the dough will expand dramatically—this is normal. The machine will automatically punch down the dough and begin the second rise. Listen for the familiar click when the machine switches from mixing to baking. The baking cycle typically takes about 30-40 minutes, but your machine may vary. The loaf is done when it’s deep golden brown and sounds hollow when tapped on the bottom.
Finish and Serve for Maximum Freshness
Once the cycle completes, immediately remove the loaf from the pan and place it on a wire rack to cool for 10-15 minutes. This step is crucial—cooling prevents sogginess and makes slicing easier. While it cools, brush the top with a little more olive oil if you want an extra-shiny crust. Sprinkle with any reserved seeds for added texture and flavor.
Slice the loaf while still warm for the best texture—each piece should have a crisp exterior and a soft, airy interior with just the right amount of chew. Serve with butter, jam, or your favorite spread while it’s still fresh. The aroma alone will make your kitchen smell like a bakery, and the first bite will reward you for the hands-off effort. Store leftovers in an airtight container for up to 3 days or freeze for longer storage.
Pro Tips For Making 750g Bread Machine
- MEASURE BUTTER PRECISELY: If you eyeball the 100g unsalted butter, you’re asking for trouble—this recipe’s texture hinges on that exact ratio. Use a kitchen scale or the water displacement method (fill a measuring cup with water, add butter, and subtract the new water level). Too little butter makes dry bread; too much turns it greasy.
- WAIT FOR YEAST TO FIZZ: Don’t just dump warm water on the yeast and stir—give it 5 minutes in the bowl first to bloom. If it doesn’t bubble vigorously (like champagne), your dough will rise sluggishly. I learned this the hard way after a batch that took three hours to double. Use water between 105°F–110°F (40°C–43°C)—any hotter and you kill the yeast.
- STOP KNEADING AT PEAK: The bread machine does the work, but if you peek too early, you’ll overwork the dough. Stop when it’s just past the “peak” of the kneading cycle—usually when it starts pulling away from the sides but hasn’t fully smoothed out. Over-kneading develops gluten like a brick, and your loaf will taste dense. (Yes, even if the machine says “keep going.”)
- SWAP SUGAR FOR HONEY (IF YOU DARE): Granulated sugar feeds the yeast fast but can make bread dry out quicker. For a richer, slower-rising loaf, replace half with honey (about 50g). It adds moisture and depth, but reduce the water by 10g to balance the extra liquid. The trade-off? A slightly chewier crumb and caramelized notes—but only do this if your machine’s “sweet dough” setting exists.
Essential equipment for this dish
Must-Have Machine
Your bread machine is the star of this recipe, but not all machines are created equal. I recommend a Panasonic SD-YB25 or KitchenAid Home Baker KBF750—both deliver consistent results with precise temperature control. Mid-range models like the Oster Classic 6-Slice work too, but avoid basic models with limited settings.
The key feature is a baking function—some machines only knead dough, leaving you to bake in the oven. 🌡️
Essential Tools
A wire cooling rack is non-negotiable—it prevents soggy bottoms and allows air circulation for that perfect crust. I use a OXO Good Grips rack because it fits my machine pan perfectly.
For measuring, a digital kitchen scale (like the OXO Good Grips) ensures accuracy with flour and yeast. A heatproof spatula helps transfer warm dough to the pan without tearing it.
Baking Pan
Your machine likely came with a loaf pan, but if yours is scratched or warped, upgrade to a stoneware pan—they distribute heat evenly for a crispier crust. The Nordic Ware Stoneware pan is my top pick.
Avoid non-stick pans; they don’t conduct heat as well and can make the crust gummy. Always grease it with olive oil (not butter) to prevent sticking, and dust with cornmeal for that bakery-style texture.
Optional Upgrades
A proofing basket (like the West Bend Proofing Basket) is a game-changer if you want to shape your dough by hand before baking. For whole wheat or sourdough variations, a digital thermometer (I use Thermoworks Thermapen) helps monitor dough temperature—ideal fermentation happens at 75-78°F.
If you bake often, a flour sifter (like the OXO Good Grips) saves time and improves texture by removing lumps.
Storage Solutions
Keep your flour in an airtight container (I love OXO Pop Containers) to preserve freshness for up to 12 months. Store yeast in the fridge for 3 months or freeze it for 6 months to extend shelf life.
For leftovers, a vacuum sealer (like the FoodSaver) locks in freshness for 3 months in the freezer. A bread bag (like the Ziploc Bread Bag) works too, but vacuum sealing prevents freezer burn better.
Nutrition facts
Frequently asked questions
Why does my bread machine dough sometimes stick to the pan?
Even with cornmeal, dough can stick if the pan isn’t properly greased or if the dough is too wet. Always use 1 tbsp olive oil to grease the pan thoroughly, then coat the bottom completely with cornmeal. If your dough is consistently sticky, reduce the water by 1-2 tbsp next time. A lightly oiled silicone mat can also help if you’re using a non-stick pan.
Can I make this recipe without a bread machine?
Yes, but you’ll need to handle the kneading and baking separately. Mix the ingredients as directed, then knead the dough by hand for 8-10 minutes until smooth. Let it rise for 1-2 hours (or until doubled), shape it into a loaf, and bake at 375°F for 25-30 minutes until golden. The texture won’t be identical, but it’ll still be delicious!
What if my bread comes out dense instead of crusty?
Dense bread usually means the dough was overworked or underproofed. Check your yeast first—it should be fresh and active. If using a basic setting, try switching to the \”Crusty\” or \”Whole Wheat\” setting for better results. Also, ensure your water is 110°F (not hotter) and that you’re not overfilling the pan—750g is ideal for most machines.
How do I adjust this recipe for whole wheat flour?
Replace 2 cups of all-purpose flour with whole wheat flour, but add 1-2 tbsp extra water since whole wheat absorbs more moisture. For a lighter texture, use a 50/50 mix of all-purpose and whole wheat. Also, switch to the \”Whole Wheat\” setting on your machine if available—it accounts for the denser flour.
Can I add herbs or garlic to this bread?
For flavorful variations, mix in 1 tbsp dried herbs (like rosemary or thyme) or 2 cloves minced garlic with the wet ingredients. For a savory twist, reduce the sugar to 0.125 cup and add 1 tsp onion powder. Just remember to adjust the water slightly if adding extra moisture from fresh herbs or garlic.

- 4 Serving Mac and Cheese Recipe: Ultra-Creamy Bake With Crispy Breadcrumbs - September 25, 2026
- 4 Egg Frittata Recipe: Oven-Baked Fluffiness With Zero Leftovers - September 25, 2026
- 5 Lb Bag Of Mashed Potatoes Recipe: Slow-Cooker Creaminess Without the Lumps - September 25, 2026