
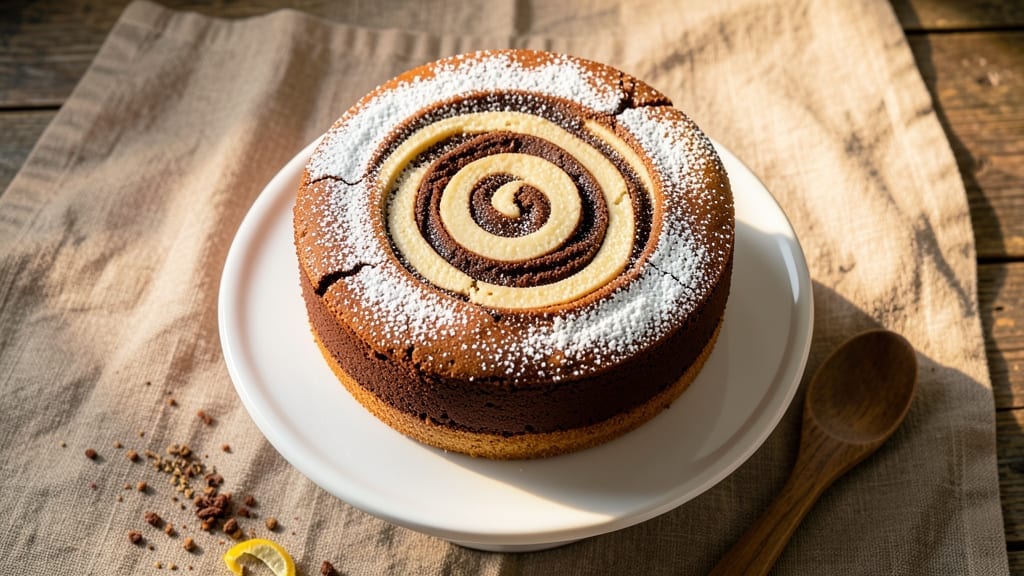
This 8-inch marble cake delivers the perfect balance of rich chocolate and delicate vanilla in every slice, all baked in a single pan for foolproof results. The secret lies in carefully folded batter that creates those iconic swirls without cracking—no fancy techniques required.
I’ve perfected this recipe over years of baking, ensuring moist layers and a tender crumb that disappears with each bite.
What sets this marble cake apart is the vanilla-chocolate contrast achieved through precise batter folding and gentle baking. The cake rises evenly in an 8-inch round pan, yielding generous slices perfect for celebrations or everyday indulgence.
No special equipment or advanced skills are needed—just patience and a steady hand for folding.
By the time it emerges from the oven, you’ll have a golden-domed cake with swirls so distinct they look like marble. The texture is light yet dense, with no dryness or heaviness, while the flavor is a perfect harmony of sweet vanilla and deep chocolate.
The best part? It stays moist for days, making it ideal for meal prep or gifting.
Whether you’re baking for a birthday, holiday gathering, or just treating yourself, this recipe delivers restaurant-quality results with minimal effort. The key is in the folding technique—done right, the swirls will be smooth and even. Let’s get started on creating your perfect marble cake.
Ingredients for 8 inch marble cake
Twelve essential ingredients transform into a stunning marble cake with perfect swirls every time.
| Ingredient | Amount | Notes |
|---|---|---|
| All-Purpose Flour 🌾 | 2 ½ cups | Sifted for light texture |
| Unsalted Butter 🧈 | 1 cup | Room temperature, softened |
| Granulated Sugar 🍚 | 2 cups | Superfine for smooth batter |
| Large Eggs 🥚 | 4 whole | Room temperature, separated |
| Pure Vanilla Extract 🌿 | 2 tsp | High-quality, Madagascar bourbon preferred |
| Baking Powder 🧂 | 2 tsp | Diamond Crystal preferred |
| Salt 🧂 | ½ tsp | Fine sea salt |
| Unsweetened Cocoa Powder 🍫 | ½ cup | Dutch-processed for smoothness |
| Whole Milk 🥛 | 1 cup | Room temperature |
| Vanilla Bean Paste 🌿 | 1 tbsp | For enhanced vanilla flavor |
| White Chocolate Chips 🍫 | ½ cup | For optional swirl enhancement |
| Powdered Sugar 🍚 | 1 cup | For dusting finished cake |
The flour and butter are your foundation—King Arthur or Gold Medal flour gives the best rise, while Plugrá butter (if you’re splurging) or any good European-style butter ensures rich flavor. The cocoa powder makes all the difference: Dutch-processed like Valrhona or Hershey’s Special Dark melts smoothly and avoids bitterness. Pre-sift your dry ingredients to eliminate lumps—use a fine-mesh sieve and tap gently to avoid compacting. For the vanilla, Madagascar bourbon extract is my go-to, but any pure extract works. Pro tip: If your butter isn’t softened enough, microwave it in 10-second bursts until just pliable—never melted.
No vanilla bean paste? Double the vanilla extract—just know the flavor will be subtler. Running low on baking powder? Use 1.5 tsp cream of tartar + 1.5 tsp cornstarch as a substitute, but measure carefully. The white chocolate chips are optional but worth the extra minute—fold them into the chocolate batter before combining for marbled flecks. For a deeper chocolate flavor, swap 0.25 cup of the milk for espresso powder (dissolved first). And if you’re worried about cracking, chill your batter 15 minutes before baking—this helps stabilize the swirls.
This cake keeps beautifully—wrap tightly in plastic wrap and store at room temperature for 3 days, or refrigerate for 5 days if you prefer. For longer storage, freeze slices wrapped individually for up to 3 months. The powdered sugar is best dusted right before serving—use a fine-mesh sieve for an even layer. Leftovers? Toast them lightly—350°F for 5-7 minutes—to revive the texture. And if you’re making ahead for a party, assemble the cake 24 hours early—the flavors meld beautifully overnight.
Why You’ll Love This Recipe
- No Fuss Layers: This marble cake comes together in one bowl—no fancy piping bags or stress. Just fold the batter, swirl the colors, and let the oven do the work while you sip your coffee.
- Butter-Sugar Magic: That rich, creamy butter and sugar combo? It melts in your mouth like a warm hug. The vanilla ties it all together—simple, but somehow always hits the spot.
- Birthday or Brunch: Slice it for a celebration cake or serve it plain with tea—it’s equally at home. Honestly, I’ve taken leftovers to potlucks and no one’s ever questioned why it’s not store-bought.
- Budget-Friendly Luxury: Uses pantry staples you already own, and the 8-inch size means you’re not baking a whole sheet cake for two people. My wallet (and my guests) thank me every time.
Step-by-step instructions for vanilla-chocolate marble cake
This method creates a perfectly moist, tender crumb with those iconic swirls—no special tools required!
Prepare the Dry Ingredients and Preheat the Oven
Preheat your oven to 350°F while you prepare the ingredients. In a medium bowl, whisk together the 2.5 cups all-purpose flour, 2 teaspoons baking powder, and 0.5 teaspoon salt. Sift the mixture once to aerate the flour and ensure a light, airy texture. Set aside—this dry blend will form the foundation of your cake’s structure.
Real talk: sifting isn’t just about aeration. It prevents dense pockets in the final cake. I like to press the mixture through a fine-mesh sieve directly into the bowl to eliminate any lumps completely. The cocoa powder will be mixed in later, so keep it separate for now.
Cream Butter and Sugar for Maximum Fluffiness
In a stand mixer fitted with the paddle attachment, beat the 1 cup softened unsalted butter and 2 cups granulated sugar on medium speed for 3-4 minutes. You’re looking for a light, pale, and fluffy mixture that nearly doubles in volume. This creaming process incorporates air, which creates those signature marble swirls and a tender crumb.
Here’s the thing—your butter should be truly softened, leaving a slight indent when pressed. If it’s too cold, the mixture will struggle to emulsify properly. If it’s too warm, you’ll end up with a greasy texture. Room temperature is key, and this step makes all the difference in the final texture.
Combine Wet Ingredients and Divide the Batter
Add the 4 whole large eggs one at a time, mixing on low speed after each addition until fully incorporated. Then stir in the 2 teaspoons pure vanilla extract and 1 tablespoon vanilla bean paste for that extra depth of flavor. Finally, add the 1 cup whole milk and mix until smooth.
Divide the batter evenly between two medium bowls. To one bowl, add 0.5 cup unsweetened cocoa powder and gently fold it in until just combined—no need to overmix. To the other bowl, add 0.5 cup white chocolate chips and fold them in. This division creates the classic vanilla-chocolate contrast while keeping the swirls distinct.
Create the Marble Swirl and Bake to Perfection
Pour the white batter into the prepared 8-inch round cake pan lined with parchment paper. Then, using a rubber spatula, gently drop spoonfuls of the chocolate batter onto the white layer. With the tip of the spatula, swirl the batters together in a circular motion until you achieve a marbled effect—think beautiful ribbons of both colors throughout.
Bake in the preheated oven for 30-35 minutes, or until a toothpick inserted into the center comes out clean. The cake should spring back slightly when pressed gently in the center. Here’s where patience pays off—don’t open the oven door early. The sudden temperature drop can cause the cake to sink.
Cool and Dust with Powdered Sugar
Remove the cake from the oven and let it cool in the pan for 10 minutes. Then transfer it to a wire rack to cool completely. Once fully cooled, dust the top generously with 1 cup powdered sugar using a fine-mesh sieve. This step adds that classic marble cake finish and balances the rich chocolate and vanilla flavors.
The cake will keep well at room temperature for 2-3 days in an airtight container, though I promise it won’t last that long. For the best texture, serve slices at room temperature—this lets the flavors meld and the crumb soften slightly. Each bite should deliver that perfect balance of moist vanilla and rich chocolate in every forkful.
Pro Tips For Making 8 Inch Marble Cake
- Cream Butter and Sugar Slowly: DESCRIPTION:
- Sift the Dry Ingredients: DESCRIPTION:
- Fold, Don’t Stir: DESCRIPTION:
- Bake Until Cool to Touch: DESCRIPTION:
Pro cooking tips for this dish
Batter Folding Mastery
This is where the magic happens—gentle folding creates those iconic marble swirls without cracking. Use a rubber spatula to drop spoonfuls of chocolate batter onto the white layer, then swirl with the tip in a circular motion for even distribution.
I recommend 3-4 swirls total, keeping strokes light to maintain air pockets. Overmixing here can deflate the batter, so work quickly but deliberately. 🌟
Temperature Control
Your oven should be preheated to 350°F and maintained at this temperature throughout baking. Use an oven thermometer to verify accuracy—many home ovens run hot or cold.
For even heat distribution, place your 8-inch cake pan on the middle rack and avoid opening the oven door during the first 20 minutes of baking. Sudden temperature drops cause cracks and uneven rising.
Butter Consistency Check
The butter’s temperature is critical—it should be soft but not melted, leaving a slight indent when pressed. If it’s too cold, your cake will be dense; if too warm, it’ll be greasy.
I test by pressing my finger into the butter: if it holds a shallow imprint for 10-15 seconds, it’s perfect. For extra insurance, microwave 10-second bursts if needed, but never let it reach room temperature completely. 🧈
Pan Prep Essentials
Line your 8-inch round pan with parchment paper before adding batter to prevent sticking and ensure easy removal. Grease the paper lightly with butter or baking spray for extra insurance.
I like using parchment circles cut to fit the pan exactly—this eliminates wrinkles that can trap moisture and cause uneven baking. Avoid nonstick pans for marble cakes; they can interfere with the swirl pattern.
Baking Time Precision
Bake for 30-35 minutes or until a toothpick inserted in the center comes out clean or with a few moist crumbs—never wet batter. Overbaking dries out the cake, while underbaking leaves it gummy.
I set a timer for 30 minutes and check at 5-minute intervals starting at minute 25. The cake should spring back slightly when pressed gently in the center. 🕒
Cooling Strategy
Let the cake cool in the pan for 10 minutes before transferring to a wire rack. This prevents structural collapse while the center sets. For faster cooling, place the pan on a rack over a cooling rack to circulate air.
Never refrigerate the cake immediately—temperature shock causes condensation, leading to a soggy crumb. Once fully cooled (about 1 hour total), dust with powdered sugar using a fine-mesh sieve for an even, professional finish.
Nutrition facts
Frequently asked questions
Why does my marble cake develop cracks?
Cracks usually appear from sudden temperature changes or overmixing. Always preheat your oven to 350°F and avoid opening the door during the first 20 minutes of baking. Also, fold the batters gently—overmixing deflates the air bubbles needed for smooth swirls. Chilling the batter for 15 minutes before baking can also help stabilize the structure.
Can I make this cake in a different-sized pan?
Yes, but adjust the baking time. For a 9-inch pan, bake 35-40 minutes and for a 6-inch pan, reduce to 25-30 minutes. The key is to check doneness with a toothpick—it should come out clean or with a few moist crumbs. Never rely solely on time, as oven temperatures vary.
How do I get the swirls to look more professional?
Use a rubber spatula to create clean, deliberate strokes when folding the batters. Start with 3-4 swirls and work quickly to maintain air pockets. For extra definition, drop spoonfuls of chocolate batter onto the white layer first, then swirl gently. Practice makes perfect—even pros get a few uneven spots!
Can I substitute the white chocolate chips?
Swap them for dark chocolate chunks or even chopped nuts like pecans for added texture. Just keep the total amount to 0.5 cup to maintain the right balance. For a fruity twist, try dried cranberries or raspberries—they add moisture and vibrant color.
Why is my cake dense instead of light and fluffy?
Dense cake usually means overmixing or butter that’s too cold. Make sure your butter is soft but not melted—it should leave a slight indent when pressed. Also, sift your dry ingredients and fold the batters gently. If you’ve already mixed everything, don’t worry—this cake is forgiving and still delicious!

- 12 Bean Chili Recipe: Hearty Slow-Cooked Depth With 12 Legumes - October 17, 2026
- 5 Seed Bread Recipe: Nutty Crunch and Artisan Flavor in One Loaf - October 17, 2026
- 1 Lb Macaroni Salad Recipe: Bold, Crunchy, and Crowd-Pleasing - October 17, 2026