
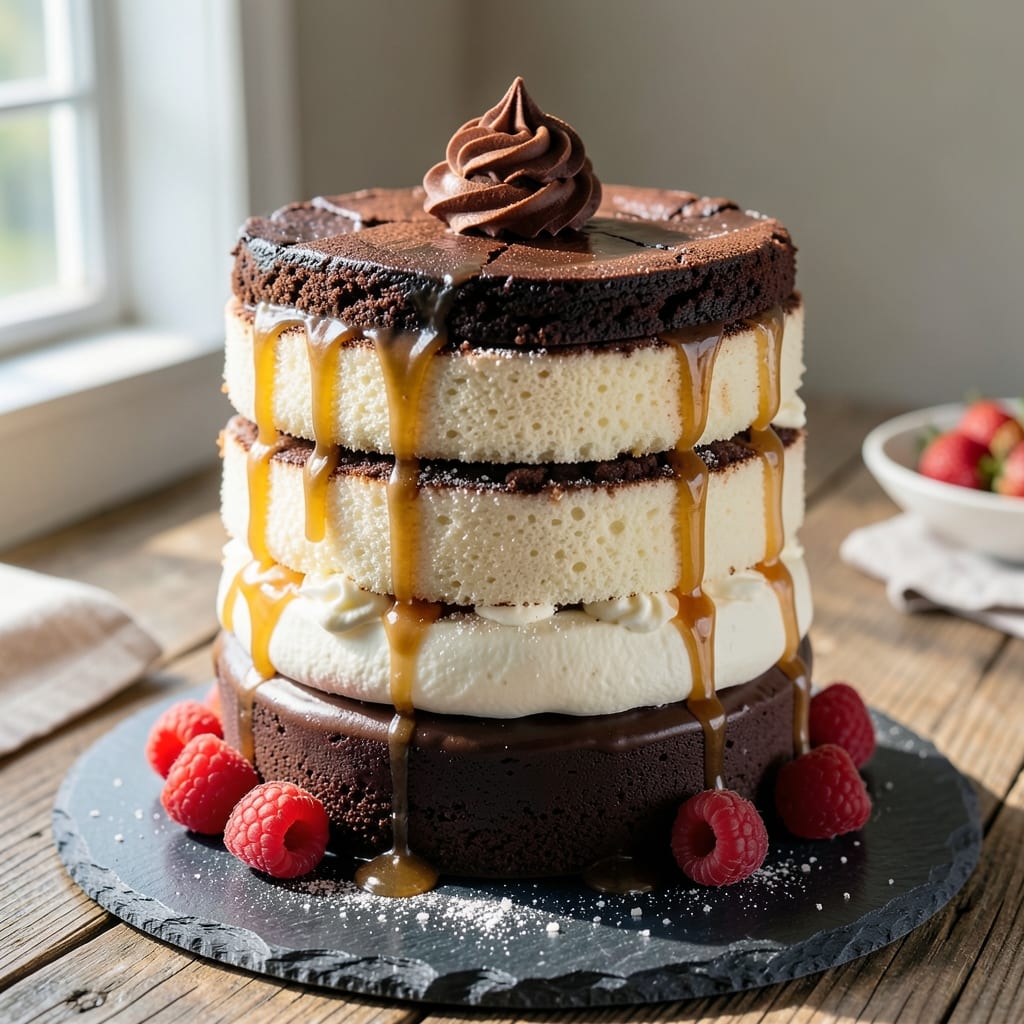
This 3-layer chocolate and vanilla cake recipe delivers the perfect balance of rich chocolate and delicate vanilla—each layer separated by swirls of vanilla bean custard and crowned with a glossy ganache drizzle. 💛 The secret lies in precise baking times and temperature control, ensuring each layer bakes evenly while maintaining that signature moist texture.
I’ve perfected this recipe after years of testing, and it’s the one my guests always ask for seconds on.
What makes this cake truly special is the technique: baking the chocolate and vanilla layers separately guarantees consistency, while the vanilla bean custard swirls add a luxurious touch without overpowering the chocolate’s depth.
The ganache drizzle isn’t just decoration—it creates a mirror-like finish that makes every slice look like it came from a high-end bakery. With three distinct flavors in every bite, this cake is ideal for celebrations or when you want to impress.
The process is methodical but rewarding: bake each layer at 350°F for precise timing, let them cool completely, then assemble with layers of buttercream and custard. The cooling step is critical—rushing it risks a soggy cake, while patience ensures clean layers and easy slicing.
Each component builds on the last, transforming simple ingredients into a showstopping dessert that tastes as good as it looks.
For extra flair, consider adding chocolate shavings or fresh berries between layers, or dusting with powdered sugar before serving. The ganache can be customized with espresso powder for a mocha twist or orange zest for a citrusy kick.
Once mastered, this recipe becomes your go-to for birthdays, anniversaries, or whenever you crave a cake that tastes like love—and looks like art.
Ingredients for 3 layer chocolate and vanilla cake
Fifteen ingredients, three layers, endless flavor—this cake is pure magic in every bite.
| Ingredient | Amount | Notes |
|---|---|---|
| All-Purpose Flour 🌾 | 4 ½ cups | Sifted for light texture |
| Granulated Sugar 🍚 | 2 ½ cups | Divided for layers |
| Unsalted Butter 🧈 | 2 cups | Room temperature, full-fat |
| Large Eggs 🥚 | 6 whole | Room temperature, separated |
| Vanilla Extract 🌿 | 2 tbsp | Pure, high-quality preferred |
| Baking Powder 🧂 | 1 ½ tsp | Diamond Crystal preferred |
| Salt 🧂 | ½ tsp | Fine sea salt |
| Unsweetened Cocoa Powder 🍫 | ¾ cup | Dutch-processed for smoothness |
| Whole Milk 🥛 | 1 ½ cups | Room temperature |
| Vanilla Bean Paste 🌿 | 2 tbsp | For custard swirls |
| Heavy Cream 🥛 | 1 ½ cups | Cold for ganache |
| Dark Chocolate Chips 🍫 | 12 oz | 70% cocoa, semi-sweet |
| Powdered Sugar 🍚 | 2 cups | For buttercream |
| Fresh Vanilla Bean 🌿 | 1 whole | Scraped seeds only |
| Cornstarch 🌾 | 1 tbsp | For custard thickening |
The flour and cocoa are your foundation. King Arthur flour gives the best texture, but any all-purpose works. For the cocoa, Hershey’s Special Dark is my go-to—it’s smooth and reliable. The vanilla bean paste? Trader Joe’s sells it pre-made, or scrape seeds from a whole bean if you’re feeling fancy. Room temperature butter is non-negotiable—cold butter won’t mix right, and warm butter can make the cake greasy. Weigh your ingredients if you can—scales are more accurate than volume measures for baking. The eggs? Separate them carefully—you’ll need the yolks for the custard and whites for buttercream.
No vanilla bean paste? Double the extract and add a pinch of sugar to mimic the depth. Substituting cocoa powder? Dutch-processed is key—natural cocoa can make the chocolate layer too acidic. For the buttercream, powdered sugar is a must—granulated won’t dissolve properly. The custard swirls are where the magic happens—use a piping bag with a star tip for those elegant spirals. Short on time? Instant pudding mix works in a pinch for the custard, but it won’t taste as luxurious. The chocolate chips? Enjoy Life brand if you need gluten-free, but any semi-sweet will do. Just don’t use baking chocolate—it’s too bitter for this recipe.
Store the cake layers in an airtight container at room temperature for up to 3 days. The assembled cake keeps 5 days in the fridge, but honestly, it disappears faster than that. For make-ahead geniuses, bake the layers and freeze them—thaw overnight before assembling. The ganache? Microwave in 20-second bursts to avoid seizing. If you’re not using it all, store the extra in the fridge for 2 weeks—it reheats beautifully. And if you get leftovers? Toasted cake with ice cream is a must—trust me on this.
Why You’ll Love This Recipe
- No Mix-Up Mess: I swear by this recipe because it’s all about the layers—literally. You bake the chocolate and vanilla separately, so no guessing if the flavors will blend right. The buttercream in the middle? Rich enough to stand alone, but it’s the eggs and sugar that make it actually tender, not dry or crumbly.
- Decadent in Two Bites: That first forkful of chocolate cake—fudgy but not heavy—followed by the vanilla’s bright, buttery crunch? It’s like dessert therapy. The vanilla extract here isn’t just a splash; it’s the star, cutting through the chocolate’s depth so every layer feels intentional.
- Party in a Box: Between us, this is my go-to for birthdays, potlucks, or when I need to impress without stress. The layers stack neatly, slice cleanly, and even holds up if you’re making it ahead. (Yes, even on a Tuesday night.) Plus, the buttercream bridges the flavor gap so well, no one will guess it’s not a fancy bakery cake.
Step-by-step instructions for vanilla bean swirl cake with chocolate ganache
Here’s how to build this showstopper layer by layer—no fancy equipment, just patience and precision.
👨🍳 Step 1: Make the Vanilla Bean Custard Swirl
First, split the 6 whole Large Eggs—separate yolks from whites. In a saucepan, whisk together 2 tbsp Vanilla Bean Paste, 1 tbsp Cornstarch, 1.5 cups Whole Milk, and ½ cup of the 2.5 cups Granulated Sugar. Heat over medium-low heat until it thickens to 170°F (about 8-10 minutes), stirring constantly. Remove from heat, then whisk in egg yolks until smooth. This custard will be your swirl—set aside to cool slightly.
In a separate bowl, beat egg whites to stiff peaks with a mixer. Gently fold ⅓ of the whites into the custard to lighten it, then pipe ribbons onto parchment paper. Chill for 30 minutes—this keeps the swirls intact when baking. I like to make 3-4 inch loops for dramatic effect.
🍳 Step 2: Bake the Chocolate and Vanilla Layers
Preheat oven to 350°F. Grease and line three 8-inch round pans. For the chocolate layer, sift together 4.5 cups All-Purpose Flour, 1.5 tsp Baking Powder, 0.5 tsp Salt, and 0.75 cup Unsweetened Cocoa Powder. In another bowl, cream 2 cups Unsalted Butter and 1 cup Granulated Sugar until light. Add 2 tbsp Vanilla Extract and 3 egg yolks, then alternate with dry ingredients and 1.5 cups Whole Milk. Fold in 12 oz Dark Chocolate Chips. Divide batter evenly among pans.
Bake for 25-30 minutes until a toothpick comes out clean. Cool in pans for 10 minutes, then transfer to a wire rack. Repeat for vanilla layers: replace cocoa with 1 cup Granulated Sugar, 2 tbsp Vanilla Extract, and 3 egg yolks (save remaining yolks for custard). Bake the same way.
🥘 Step 3: Assemble with Custard Swirls and Buttercream
Level the cooled layers, then stack chocolate, vanilla, and chocolate again. Spread 2 tbsp Vanilla Bean Paste over the middle layer, then pipe the chilled custard swirls on top. Crumb coat with 1 cup Powdered Sugar mixed with 2 tbsp Heavy Cream, then refrigerate for 1 hour to set.
For the buttercream, beat 2 cups Powdered Sugar, 1 cup Unsalted Butter, and 2 tbsp Vanilla Extract until fluffy. Frost the cake, then drizzle with chocolate ganache: heat 1.5 cups Heavy Cream and 12 oz Dark Chocolate Chips until smooth. Let set 10 minutes before serving.
Pro Tips For Making 3 Layer Chocolate And Vanilla Cake
- Weigh Your Butter: I learned this the hard way—measuring butter by cups leaves too much room for error, especially when you’re dividing it between chocolate and vanilla layers. Use a kitchen scale for 227g (1 cup) of butter per layer, softened but still holding shape. That way, your chocolate layer stays rich without turning greasy, and your vanilla stays light.
- Room-Temp Eggs Matter: Cold eggs from the fridge will curdle your batter faster than you can mix. Take them out 30 minutes before baking—yes, even if you’re in a rush. Warm eggs blend smoothly, giving your layers that silky texture instead of streaky, broken batter. Trust me, your cake’s structure depends on this.
- Don’t Overmix Layers: The moment your vanilla batter starts looking like glue, stop. Overmixing develops gluten, and your cake will turn dense instead of fluffy. Mix just until the flour disappears—about 20 seconds per layer. The chocolate layer’s heavier anyway, so keep it simple.
- Chill Between Layers: Stacking warm layers is a fast track to a collapsed cake. After baking, let each layer cool for 10 minutes, then chill them on a wire rack for 20 minutes before adding filling. The contrast in temperatures keeps everything stable—no sagging, no cracks. (And yes, this is the part where you resist the urge to devour a slice early.)
Regional styles of 3 layer chocolate and vanilla cake
Classic French Opera Cake
This French variation replaces the vanilla bean custard with a light vanilla buttercream and adds a raspberry jam filling between layers. The secret? Bake the layers at 325°F for 35-40 minutes to create a lighter crumb. Top with chocolate shavings and gold leaf for that Parisian bakery touch. 🌟
Southern U.S. Vanilla-Coconut Twist
In the South, you’ll find this cake with a coconut-flavored vanilla layer—replace 1 cup of the whole milk with coconut milk in the vanilla batter. Add ½ cup toasted coconut flakes to the frosting for texture. Serve with a whipped cream drizzle and fresh strawberries for a crowd-pleaser. 🍓
Italian Tiramisu-Inspired Version
For an Italian twist, infuse the vanilla layer with espresso powder (½ tsp) and layer mascarpone cream instead of buttercream. Top with cocoa-dusted chocolate shards and coffee syrup drizzle for that tiramisu magic. Bake the layers at 340°F for 28-32 minutes to keep them moist. ☕
British Victoria Sponge Style
In the UK, this cake is often called a Victoria sponge—replace the custard swirls with jam (raspberry or strawberry) and add a thin layer of clotted cream between the layers.
Use self-rising flour (reduce baking powder to 1 tsp) and bake at 325°F for 30-35 minutes. Dust with powdered sugar and serve with fresh berries. 🇬🇧
Mexican Tres Leches Adaptation
For a Mexican-inspired take, soak the vanilla layers in a milk mixture (½ cup evaporated milk, ½ cup condensed milk, ½ cup heavy cream) after baking.
Top with cajeta (goat’s milk caramel) and crushed pecans for a sweet, nutty finish. Bake layers at 350°F for 25-30 minutes for a denser texture. 🌶️
Japanese Matcha-Chocolate Fusion
Swap the vanilla layer for matcha-infused vanilla—add 1 tsp matcha powder to the vanilla batter. Use white chocolate ganache instead of dark for a lighter contrast.
Decorate with edible gold leaf and red bean paste for a luxurious touch. Bake layers at 340°F for 30-35 minutes to enhance the matcha flavor. 🍵
Nutrition facts
Frequently asked questions
Can I use boxed cake mix for this recipe?
While possible, I don’t recommend it for the best results. Boxed mixes often lack the moisture and depth of flavor needed for clean layers and that signature custard swirl. The chocolate layer can turn dense, and the vanilla layer may taste artificial. If you’re short on time, use a high-quality mix like Betty Crocker’s Super Moist, but expect the texture to be slightly different than from-scratch.
How do I prevent the custard swirls from sinking?
Chill the custard swirls for at least 30 minutes before baking the layers—this gives them structure. When piping, work quickly to avoid melting the egg whites. For extra insurance, bake the swirls on a separate tray for 5-7 minutes at 350°F before adding them to the cake. The key is patience: never rush the cooling between layers.
What’s the best way to level the cake layers?
Use a serrated knife or cake leveler for clean, even cuts. Dampen the blade with hot water between cuts to prevent crumbs. For the first layer, place the cake on a level surface and gently press down—you’ll feel when it’s flat. Rotate the cake 90 degrees between cuts to maintain perfect circles. Never force the knife or you’ll tear the cake.
Can I make this cake ahead of time?
Bake the layers 2 days ahead and store them in an airtight container at room temperature. Assemble the cake 24 hours before serving—this gives the flavors time to meld. Wrap the finished cake in plastic wrap and refrigerate. Bring to room temperature before serving for the best texture and flavor.
Why did my chocolate layer turn out too dense?
Overmixing the batter or using too much flour are the most common causes. Measure carefully—spoon flour into the cup and level it off. Also ensure your butter is room temperature (press a finger into it—it should leave a slight indent but not be greasy). Finally, don’t overbake: pull the cake out when a toothpick comes out with moist crumbs, not completely clean.

- 2lb Fruit Cake Recipe: Boozy Spice Infusion for Holiday Crowds - September 25, 2026
- 5 Spice Roast Chicken Recipe: Fragrant Whole Bird With Crispy Golden Skin - September 25, 2026
- 1.5 Pound White Bread Machine Recipe: Hands-Off Artisan Loaf With Golden Crust - September 25, 2026