
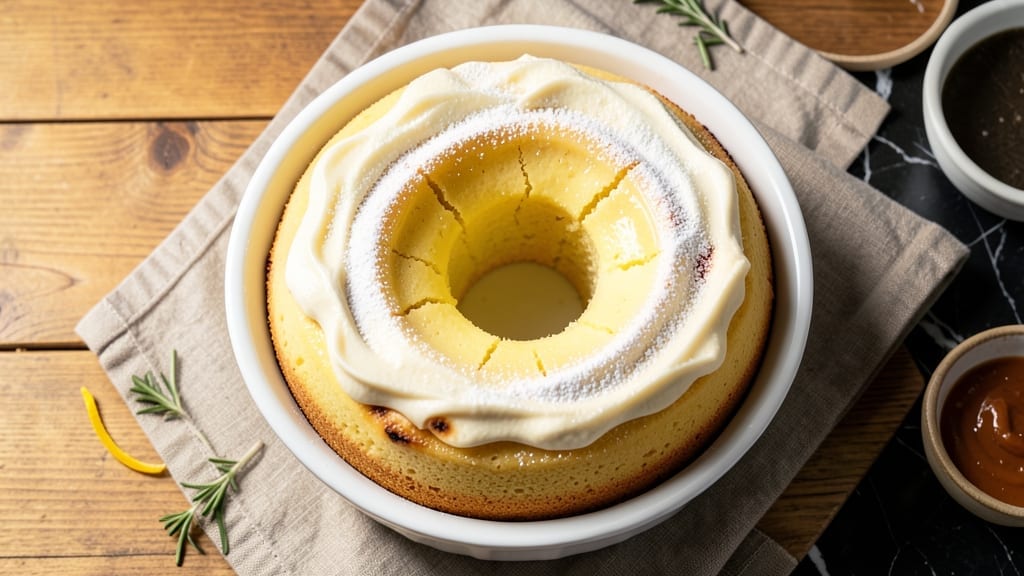
This 8-inch yellow cake recipe delivers perfectly moist layers with a tender crumb and that classic vanilla flavor we all love—no dry or crumbly results in sight. The secret lies in precise ingredient ratios and gentle folding that keeps air bubbles intact, ensuring each slice is light and fluffy.
I’ve baked this recipe countless times for birthdays, celebrations, and even weeknight treats, and it never fails to impress.
Baking at 350°F for 25–35 minutes guarantees an even rise with a golden top, while the buttercream frosting—rich, smooth, and perfectly sweet—ties everything together. This recipe is designed for foolproof success, whether you’re a beginner or a seasoned baker looking for a reliable classic.
The frosting can be customized with vanilla, lemon, or even chocolate for extra flair.
What you’ll end up with is a cake that’s moist, evenly baked, and perfectly proportioned for an 8-inch pan—ideal for layering with frosting or serving as a single-serving treat. The layers hold their shape beautifully, making it perfect for stacking or cutting into neat squares.
Every bite is a balance of tender cake and velvety frosting, guaranteed to satisfy.
For dietary flexibility, substitutions like Greek yogurt for sour cream or almond milk for dairy are easy to adapt, though the original recipe delivers the best texture. Whether you’re celebrating a special occasion or simply craving a classic dessert, this yellow cake is your go-to. Let’s get baking!
Ingredients for 8 inch yellow cake
Classic ingredients for a foolproof 8-inch yellow cake with velvety frosting—no shortcuts here.
| Ingredient | Amount | Notes |
|---|---|---|
| All-Purpose Flour 🌾 | 2 ½ cups | Sifted for lightness, spoons packed |
| Granulated Sugar 🍚 | 2 cups | White or light brown preferred |
| Unsalted Butter 🧈 | 1 cup | Room temperature, full-fat for richness |
| Large Eggs 🥚 | 4 whole | Room temperature for even baking |
| Pure Vanilla Extract 🌿 | 2 tsp | High-quality, no imitation |
| Baking Powder 🍃 | 2 tsp | Diamond Crystal preferred |
| Salt 🧂 | ½ tsp | Fine sea salt, kosher preferred |
| Milk 🥛 | 1 cup | Whole milk for moisture |
| Powdered Sugar 🍚 | 4 cups | For buttercream, sifted |
| Vanilla Buttercream Frosting 🧈 | 2 cups | Homemade or quality store-bought |
| Vanilla Extract 🌿 | 1 tsp | For frosting, same quality as cake |
| Heavy Whipping Cream 🥛 | ½ cup | Cold, full-fat for stability |
The butter and flour are non-negotiable for that classic yellow cake texture. Land O’Lakes unsalted butter works perfectly, but any full-fat brand will do—just make sure it’s room temperature. For flour, King Arthur all-purpose is my go-to because it’s finely milled and consistent, but any quality brand works. The baking powder matters too—Diamond Crystal is lighter than others, so if you use another brand, double-check the leavening power. Eggs should be at room temperature, so pull them out 30 minutes before baking. The vanilla extract? Spend the extra $5 for the good stuff—imitation vanilla will leave you disappointed.
No powdered sugar? Blend granulated sugar in a food processor for 30 seconds—it won’t be as fine, but it’ll work. Short on buttercream? Use half buttercream, half whipped cream for a lighter texture. The milk can be swapped for almond milk or Greek yogurt if you’re avoiding dairy, but the cake will be slightly denser. For the frosting, if you’re making it from scratch, chill the bowl and beaters for 10 minutes before whipping to get that perfect fluffy consistency. And trust me, the extra 5 minutes of beating makes all the difference—don’t skip it.
Store the cake layers wrapped tightly in plastic wrap at room temperature for 2 days, or in the fridge for 5 days. The frosting keeps well in an airtight container for 3 days—just bring it to room temperature before using. To assemble, I like to level the top of each layer with a serrated knife so the frosting looks perfect. The cake actually tastes better the next day once the flavors meld, so bake it a day ahead if you can. And if you’re making extra frosting, it freezes beautifully for up to 3 months—just thaw it in the fridge overnight.
Why You’ll Love This Recipe
- No Mixer Needed: I swear by this recipe when my kitchen gadget dies—just cream butter and sugar by hand until it’s light and fluffy. The eggs and vanilla fold in like a dream, and the cake turns out tender every time, even with minimal elbow grease.
- Classic Comfort in Every Bite: That perfect balance of buttery richness and just-sweet-enough vanilla? It’s the kind of cake that makes you sigh when you take the first forkful. The sugar and butter combo gives it that old-school bakery vibe without tasting “homemade” in a bad way.
- Birthday Party Ready: An 8-inch cake is the ideal size for small celebrations—no stress over cutting a huge sheet cake, and it’s easy to decorate with frosting or fruit. I’ve used it for kid birthdays, office treats, and even a last-minute anniversary dessert. (Yes, even when I forgot to plan ahead.)
- Budget-Friendly Staples: You’re already using pantry basics—flour, sugar, butter—that you probably have on hand. No fancy ingredients, no markup for “specialty” cakes. It’s the kind of recipe that stretches your grocery budget while still feeling like a treat.
Step-by-step instructions for vanilla-infused yellow cake layers
Here’s how to bake tender, moist layers with perfect rise and golden crumbs.
Prepare Your Cake Pans and Mix Dry Ingredients
Preheat your oven to 350°F and grease two 8-inch round cake pans thoroughly with butter, then dust with flour, tapping out any excess. Line the bottoms with parchment circles for easy removal. In a medium bowl, whisk together the 2.5 cups all-purpose flour, 2 tsp baking powder, and 0.5 tsp salt. Sift this mixture directly into a large mixing bowl to aerate it – this creates lighter cake layers. Set aside.
I like to use parchment circles because they prevent sticking without absorbing moisture from the batter. The sifting step is crucial – it prevents dense pockets in your cake. Make sure your pans are evenly coated with butter and flour so the cake releases cleanly later.
Cream Butter and Sugar Until Light and Fluffy
In your large mixing bowl with the dry ingredients, add the 1 cup room-temperature butter and 2 cups granulated sugar. Using an electric mixer on medium-high speed, beat for 3-5 minutes until the mixture is pale yellow and fluffy. You’ll see ribbons form when you lift the beaters – this indicates proper aeration.
The butter should be completely incorporated with no graininess remaining. This creaming process incorporates air, which creates that signature tender crumb. If your butter is too cold, it won’t cream properly – press it between your fingers to check for softness before starting.
Add Eggs and Vanilla, Alternating with Milk
Add the 4 room-temperature eggs, one at a time, mixing well after each addition. After the last egg, add the 2 tsp pure vanilla extract and mix until combined. With the mixer on low speed, gradually add the 1 cup milk, mixing just until incorporated after each addition.
This alternating method ensures even distribution of ingredients and prevents dense cake. The vanilla extract should be high-quality – imitation versions lack that authentic depth of flavor. Mix just until combined after adding each ingredient to maintain proper aeration.
Combine Wet and Dry Ingredients for Smooth Batter
With the mixer on low speed, gradually add the dry ingredients to the wet mixture, mixing just until combined. Be careful not to overmix – stop as soon as the flour disappears. The batter should be smooth and slightly thick, like heavy pudding.
Overmixing develops gluten, which makes cake tough. You’ll know you’ve mixed enough when the batter coats the beaters evenly and no flour streaks remain. If the batter looks too thick, you can gently fold in 1-2 tablespoons additional milk to achieve proper consistency.
Bake to Perfect Doneness and Cool Properly
Divide the batter evenly between the prepared pans. Bake for 25-30 minutes, or until a toothpick inserted in the center comes out clean. The edges should be golden brown while the top springs back when gently touched.
Don’t open the oven during baking – the temperature fluctuation can cause the cakes to sink. Let the cakes cool in their pans for 10 minutes, then transfer to a wire rack to cool completely. This gradual cooling prevents cracking and ensures even layers for frosting.
Pro Tips For Making 8 Inch Yellow Cake
- Weigh Your Butter: I learned this the hard way—measuring butter by volume (that “packed” cup method) throws off your cake’s structure. Use a kitchen scale for 225g (1 cup) of unsalted butter; it’s the only way to guarantee the right ratio of fat to flour, which keeps that crumb tender and even.
- Mix Dry Ingredients First: Skip the “add everything at once” approach. Whisk flour, baking powder, and salt together before creaming butter and sugar—this prevents lumps and ensures your cake rises smoothly. I was skeptical until I tried it; now I never go back.
- Check Doneness at 325°F: Your oven runs hotter than it says. Test your cake at 325°F (163°C) by inserting a toothpick—if it comes out clean but the edges are just pulling away, that’s your cue. Overbaking dries out the crumb, and no one wants a cake that’s more brick than dessert.
- Use Room-Temp Eggs: Cold eggs sink like stones in your batter, and warm ones blend in silky. Pop them in a bowl of warm water for 10 minutes before cracking—this ensures they emulsify properly, giving your cake that classic moist, velvety texture. (Yes, even if you’re impatient like me.)
Common mistakes when making this dish
Overmixing the Batter
I can’t stress this enough—overmixing is the #1 culprit for dense, tough yellow cake. Once you’ve combined all the wet and dry ingredients, stop mixing the second the flour disappears. Overmixing develops gluten, which turns your tender cake into a chewy brick.
I’ve seen beginners beat the batter for an extra minute or two, thinking it’ll make the cake fluffier—it does the opposite. Aim for a smooth, slightly thick batter that coats the beaters evenly but still looks silky. 💫
Skipping Room Temperature Ingredients
Cold butter, eggs, or milk are a recipe for disaster. If your butter has lumps or your eggs are straight from the fridge, your cake will turn out unevenly baked with greasy spots. Let your butter sit out for 1 hour and eggs for 30 minutes before starting.
I test butter by pressing it between my fingers—if it leaves a slight imprint but holds its shape, it’s perfect. Room-temperature ingredients blend smoothly, ensuring even distribution and proper rise.
Incorrect Oven Temperature
Your oven might say 350°F, but it could actually be running hotter or cooler—this is called “oven variance,” and it’s a sneaky problem. To avoid underbaked or burnt cake, always use an oven thermometer (I swear by the Thermoworks Oven Thermometer).
If your oven runs hot, reduce the temperature by 25°F and check for doneness 5 minutes early. A cake baked at the wrong temp will either collapse or stay raw in the center.
Not Greasing Pans Properly
Greasing pans with just butter or flour alone often leaves sticky spots. For flawless release, I use a combination method: first brush the pans with melted butter, then dust with flour, and finally tap out the excess.
Add parchment circles at the bottom for extra insurance. I’ve had cakes stick so badly they tore when trying to remove them—don’t skip this step! A well-greased pan ensures clean layers for frosting.
Opening the Oven Too Soon
Resist the urge to peek! Every time you open the oven door, cool air rushes in, causing the cakes to sink or develop a dome. The only exception is if you see smoke or an obvious issue.
Instead, trust your toothpick test—insert it into the center when the edges look golden. If it comes out with a few moist crumbs (not wet batter), the cake is done. Patience here = perfect rise. 🔥
Using Old or Improper Leavening Agents
Baking powder loses its potency over time—if your container is older than 6 months, toss it. Always check the label for freshness. Also, measure accurately: 1 teaspoon baking powder ≠ 1 teaspoon Diamond Crystal (it’s actually 1.5 teaspoons of regular baking powder).
I’ve ruined cakes by eyeballing measurements—use a scale or measuring spoons for precision. A properly leavened cake rises evenly; under-leavened cake flattens like a pancake.
Nutrition facts
Frequently asked questions
Can I make this yellow cake recipe in a 9-inch pan instead?
Yes, but you’ll need to adjust the baking time and portion sizes. For a 9-inch pan, reduce the batter by about 20% (use 2 cups flour instead of 2.5 cups) and bake for 20-25 minutes at 350°F. The cake will be slightly thinner, so it’s perfect for single-serving slices or as a base for cupcakes. The flavor and texture will remain the same!
How do I store leftover cake layers?
Wrap each layer tightly in plastic wrap and store at room temperature for up to 2 days, or refrigerate for 5 days. For longer storage, freeze layers (unfrosted) for 3 months—thaw overnight in the fridge before assembling. The frosting can be stored separately in an airtight container for 3 days at room temperature or 1 month in the freezer.
Can I substitute Greek yogurt for the milk?
Replace the 1 cup milk with 1 cup plain Greek yogurt for a tangier flavor and even moister texture. The yogurt adds protein and fat that mimic the richness of milk, but the cake may have a slightly denser crumb. For best results, use full-fat yogurt and reduce the milk by 2 tablespoons to balance moisture.
Why did my cake sink in the middle?
This usually happens from opening the oven too soon or overmixing the batter. Cool air rushing in causes the center to collapse, while overmixing develops gluten, making the cake tough and dense. Next time, let the cake bake undisturbed and stop mixing as soon as the flour disappears. An oven thermometer also helps—many ovens run 25°F hotter than set!
What’s the best way to frost an 8-inch cake?
For a smooth finish, let the layers cool completely, then level the tops with a serrated knife. Spread a thin layer of frosting (“crumb coat”) to seal in moisture, chill for 15 minutes, then add the final layer. Use an offset spatula to create clean edges. For extra flair, pipe swirls or add sprinkles before the frosting sets. The buttercream should be at room temperature for easy spreading.

- 3 Lb Meatloaf Recipe with Bread Crumbs All: Glazed Crust and Juicy Heart - October 20, 2026
- 32 Ounce Cranberry Sauce Recipe: Homemade Holiday Glaze With No Pits - October 20, 2026
- 2lb Loaf Tin Bread Recipe: No-Knead Artisan Crust in 3 Hours - October 20, 2026