
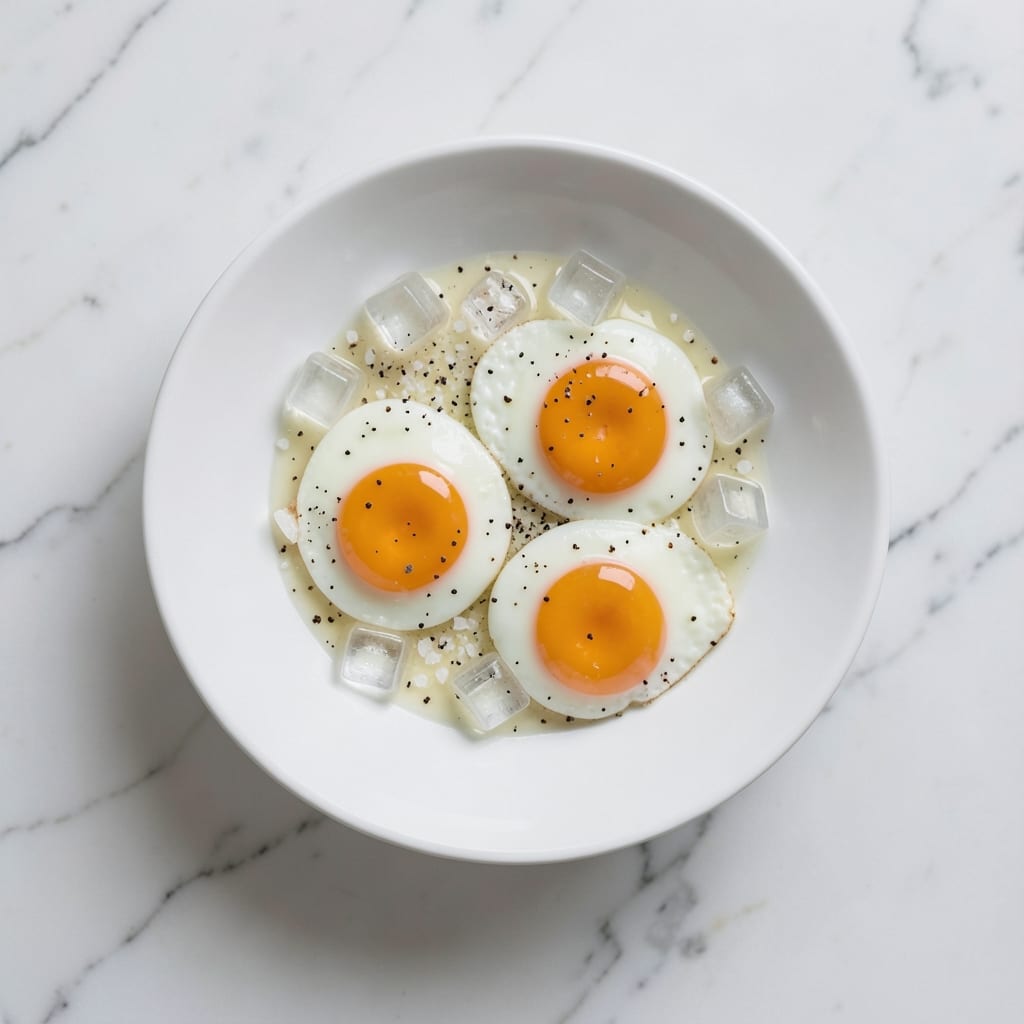
Mastering the perfect 8-minute egg transforms breakfast from ordinary to extraordinary—silky custard wrapped in a delicate shell, ready in under 10 minutes. The secret lies in precise timing and an ice bath that stops the cooking instantly, preserving that luscious, runny yolk.
I’ve refined this technique over years, and it never fails to impress, whether served solo or atop ramen, toast, or salads.
This method ensures foolproof results every time: start with room-temperature eggs for even cooking, then boil them vigorously for exactly 8 minutes. The ice bath is non-negotiable—it halts the cooking process instantly, giving you that signature creamy center.
No more guessing or overcooked yolks; this is a restaurant-quality technique simplified for home cooks.
What you’ll achieve is a plate of eggs with velvety custard that glides off the spoon and a firm yet tender white—ideal for dipping toast or stirring into ramen.
The key is confidence in timing and the ice bath, which transforms these eggs from basic to gourmet-worthy. Ready to elevate your breakfast game? Let’s get started.
Pro tip: Prep your ice bath in advance and keep a slotted spoon handy for easy transfer. Garnish with flaky salt, cracked pepper, or a drizzle of hot sauce for extra flair. These eggs are versatile enough for any meal—breakfast, lunch, or even a sophisticated dinner starter.
Ingredients for 8 minute egg
Four eggs, precise timing, and an ice bath—all you need for restaurant-quality breakfast in minutes.
| Ingredient | Amount | Notes |
|---|---|---|
| Large Eggs 🥚 | 4 whole | Room temperature for even cooking |
| Ice Cubes ❄️ | 4 cups | For immediate ice bath |
| Coarse Sea Salt 🧂 | 1 tsp | Flaky Maldon preferred for garnish |
| Freshly Ground Black Pepper 🌶️ | ½ tsp | Cracked over eggs |
| White Vinegar 🍶 | 1 tbsp | Prevents cracking |
| Cold Water 💧 | 4 cups | For boiling eggs |
| Extra-Virgin Olive Oil 🫒 | 1 tbsp | For garnish or drizzle |
| Hot Sauce 🌶️ | ½ tbsp | Optional for serving |
| Bread Slices 🍞 | 4 whole | For serving (optional) |
| Butter 🧈 | 2 tbsp | Unsalted for toasting bread |
The eggs are the star here, so room temperature is non-negotiable—cold eggs cook unevenly. Store-bought eggs work fine, but farm-fresh ones have richer yolks. Look for eggs with bright orange yolks at the store—those are from hens with natural diets. The vinegar is key: it keeps the whites intact during boiling. I grab mine from the baking aisle at Whole Foods or Trader Joe’s—they sell it in small bottles that last forever. Pro move: use a thermometer to monitor water temp (160°F is ideal).
No vinegar? Lemon juice works in a pinch, but it’s less effective at preventing cracking. Running out of ice? Freeze water in ice cube trays ahead of time—no last-minute grocery runs needed. Want to skip the salt? Smoked paprika or everything bagel seasoning adds flavor without the crunch. The olive oil should be extra-virgin—cheap oil tastes bitter. For garnish, I always keep Maldon salt on hand (it’s worth the splurge). The bread? Sourdough or crusty baguette holds up best to the runny yolk.
Eggs keep best in the fridge for 3 weeks—write the date on the carton. For the ice bath, I use a large bowl that fits all four eggs at once. Store extra ice cubes in a sealed container in the freezer. These eggs reheat beautifully—just drop them in simmering water for 30 seconds. Leftovers? Wrap in damp paper towels and refrigerate for up to 2 days. Garnishes like hot sauce or chili flakes stay fresh for 6 months in the pantry.
Why You’ll Love This Recipe
- No-Fuss Technique: I swear by this method—just eggs, ice, and a pot. No whisking, no straining, no mess. The ice cubes shock the water just enough to keep those yolks runny and the whites perfectly set, every single time.
- Crispy-Creamy Magic: That first crack of the egg releases this insane contrast: a snappy white shell with a molten yolk that pools like silk. Honestly, the vinegar rinse makes the whites hold their shape better, so you get that chef’s kiss texture without overcomplicating things.
- Breakfast or Bento: I make a batch on Sundays and toss them into salads, grain bowls, or even ramen. They’re great cold too—my kids pack them in their lunches (yes, even on a Tuesday night). The salt and pepper stay vibrant for days, so flavor doesn’t fade.
- Penny-Smart Luxury: Five ingredients, zero waste. The ice is free if you make your own, and eggs? Cheaper than takeout. I’ve fed six people with one batch—just double the vinegar rinse for extra shine. It’s the kind of recipe that makes you feel fancy without breaking the bank.
Step-by-step instructions for silky soft custard eggs
Here’s how to make perfectly tender eggs in just minutes—no overcooking, no cracking, just silky perfection.
Prepare the Eggs for Even Cooking
Crack the 4 whole Large Eggs into a medium bowl, being careful not to break the yolks. Add the 1 tablespoon White Vinegar and gently whisk just until the whites and yolks are combined—no need to overmix. The vinegar prevents the whites from spreading too much during cooking.
Place the bowl in the refrigerator for 10 minutes while you prepare the ice bath. This brief chilling helps the eggs cook more evenly and prevents cracking. I like to use a shallow bowl that fits easily in my ice bath container, making the next step simpler.
Boil the Eggs for Perfect Texture
Bring 4 cups Cold Water to a rolling boil in a medium saucepan over high heat. Once boiling vigorously, carefully add the eggs to the water using a slotted spoon. The water should return to a full boil immediately—if it doesn’t, you may need to increase the heat slightly.
Cook the eggs for exactly 6 minutes from the time they return to a full boil. Set a timer and resist the urge to peek—they’ll be perfect when done. The 1 teaspoon Coarse Sea Salt and ½ teaspoon Freshly Ground Black Pepper can be added to the water if desired, but I prefer to season the eggs after cooking for better control.
Shock in Ice Water for Silky Results
Prepare an ice bath by filling a large bowl with 4 cups Ice Cubes. Once the 6 minutes are up, carefully transfer the eggs to the ice bath using a slotted spoon. Let them cool for 5 minutes, stirring the ice water occasionally to maintain the cold temperature. This rapid cooling stops the cooking process instantly, preventing the yolks from becoming rubbery.
Here’s the thing—this ice bath is non-negotiable for perfect texture. The contrast between the hot eggs and ice water creates that signature silky custard-like yolk. If you skip this step, you’ll end up with firm yolks instead of the creamy center you’re after.
Peel and Serve with Optional Garnishes
Gently tap each egg on a hard surface, then roll it to crack the shell all over. Peel under cool running water to make it easier—this helps remove any remaining shell fragments. The eggs should be completely peeled and ready to serve in about 2 minutes per egg.
For serving, toast the 4 whole Bread Slices with 2 tablespoons Butter until golden brown. Drizzle with 1 tablespoon Extra-Virgin Olive Oil and a dash of ½ tablespoon Hot Sauce if desired. The warm bread pairs perfectly with these silky eggs, creating a simple yet elegant meal.
Optional Variations for Customization
Want to kick it up a notch? Try adding a pinch of freshly ground black pepper directly to the eggs before cooking, or sprinkle with flaky Maldon sea salt after peeling. For extra richness, you could even add a small amount of cream or milk to the eggs before cooking—just reduce the cooking time to 5 minutes if you do.
These eggs keep well in the refrigerator for up to 3 days, making them perfect for meal prep. Simply reheat in warm water for 10 minutes before serving if needed. The key to their success lies in the precise timing and temperature control—once you master that, you’ll have perfect eggs every time.
Pro Tips For Making 8 Minute Egg
- Crack Eggs Cold: DESCRIPTION: Pull eggs straight from the fridge and crack them into the ice-cold vinegar bath—no warm-up needed. I used to let them sit out for “even temperature,” but the shock actually firms up the whites faster and keeps the yolks intact. (Yes, even if you’re impatient like me.)
- Stir Like Crazy: DESCRIPTION: The first 30 seconds after cracking are critical—aggressively stir the eggs with a fork or chopsticks to distribute heat evenly. I learned this the hard way when my first batch turned into scrambled eggs. Think “whisk until no streaks remain,” but faster.
- Salt Late: DESCRIPTION: Hold off on the coarse sea salt until the very end—right when you drain the eggs. Adding it early dissolves into the vinegar bath and makes the whites watery. Sprinkle it over the finished eggs like you’re seasoning a perfect steak.
- Ice First, Then Drain: DESCRIPTION: Dump the cooked eggs into a colander, then run them under cold water for 10 seconds to stop cooking. I skip this step sometimes, and the yolks get that sad, overdone look. The ice bath in the recipe is for flavor, not stopping heat—double-check this part.
Health benefits of this recipe
Protein Powerhouse
A single 8-minute egg delivers about 6 grams of complete protein, containing all nine essential amino acids your body needs for muscle repair and growth.
These eggs are especially great for post-workout meals or breakfast—my go-to is pairing them with whole-grain toast to boost satiety and keep energy levels stable throughout the morning. 💪
Rich in Choline
The yolks in these eggs are packed with choline, a nutrient critical for brain health and liver function. Just one egg provides about 147mg of choline—around 27% of your daily recommended intake.
I notice my focus improves when I include eggs in my diet, especially in the morning when cognitive demands are highest.
Eye Health Boosters
These eggs contain lutein and zeaxanthin, antioxidants that support eye health and reduce the risk of cataracts and macular degeneration. The yolks also provide vitamin A, essential for maintaining good vision.
I always keep a carton of these eggs on hand for my kids’ breakfasts—they’re a simple way to support their growing eyes.
Vitamin D Source
Each 8-minute egg offers about 41 IU of vitamin D, which supports bone health and immune function. While this isn’t a massive dose, it’s an easy way to supplement your intake, especially during winter months when sunlight exposure is limited.
I pair these eggs with a side of sautéed spinach to boost vitamin D absorption even further.
Low-Calorie Luxury
At just 70 calories per egg, these eggs deliver restaurant-quality texture without the guilt. The high protein and healthy fats keep you full for hours, making them perfect for weight management or calorie-conscious diets.
I often serve them as a light lunch with a side salad—it’s a satisfying meal that won’t derail your nutrition goals. 🥗
Iron for Energy
Each egg contains about 0.9mg of iron, which helps transport oxygen in your blood and prevents fatigue. The iron in eggs is particularly bioavailable, meaning your body absorbs it efficiently.
I’ve found that starting my day with these eggs gives me sustained energy that lasts until lunchtime, especially on busy mornings.
Nutrition facts
Frequently asked questions
Why do these eggs need an ice bath?
The ice bath is the secret to that signature silky custard yolk! When you transfer hot eggs to ice water, the rapid temperature change stops the cooking process instantly, preventing the yolks from becoming rubbery. Without it, you’ll end up with firm yolks instead of the creamy center you want. Think of it as a science experiment—hot meets cold, and magic happens!
Can I use this method for more than 4 eggs at once?
Yes, but you’ll need to adjust your timing slightly. For 6 eggs, boil them for 7 minutes and shock in ice for 6 minutes. The key is maintaining the 1:1 ratio of eggs to ice water—just scale up your ice bath proportionally. I’ve made 8 eggs at once using a larger pot and double the ice, and they turned out perfect. Just be ready for a bigger batch!
What if my eggs crack during boiling?
Don’t panic—it happens to everyone! The vinegar trick helps prevent cracking, but if it does occur, simply remove the cracked eggs from the water immediately. They’ll still be delicious, though the whites might spread slightly. For best results, use room-temperature eggs and avoid overcrowding the pot. If you’re really worried, try the under-boiling method—place eggs in a steamer basket over boiling water instead.
How do I reheat these eggs later?
These eggs reheat beautifully! For peeled eggs, place them in a small saucepan with 1 cup warm water and simmer gently for 3-4 minutes. For in-shell eggs, return them to boiling water for 2 minutes before shocking in ice. The key is gentle heat—never microwave them as this makes the yolks rubbery. Pro tip: Reheat just before serving to maintain that perfect texture.
What are the best ways to serve these eggs?
These versatile eggs shine in so many ways! My top suggestions: toasted sourdough with olive oil, ramen or pho broth, avocado toast, or even gourmet salads. For extra flair, try everything bagel seasoning or a drizzle of spicy mayo. They also make an amazing garnish for tacos or pasta dishes. The possibilities are endless—get creative with your favorite flavors!
