
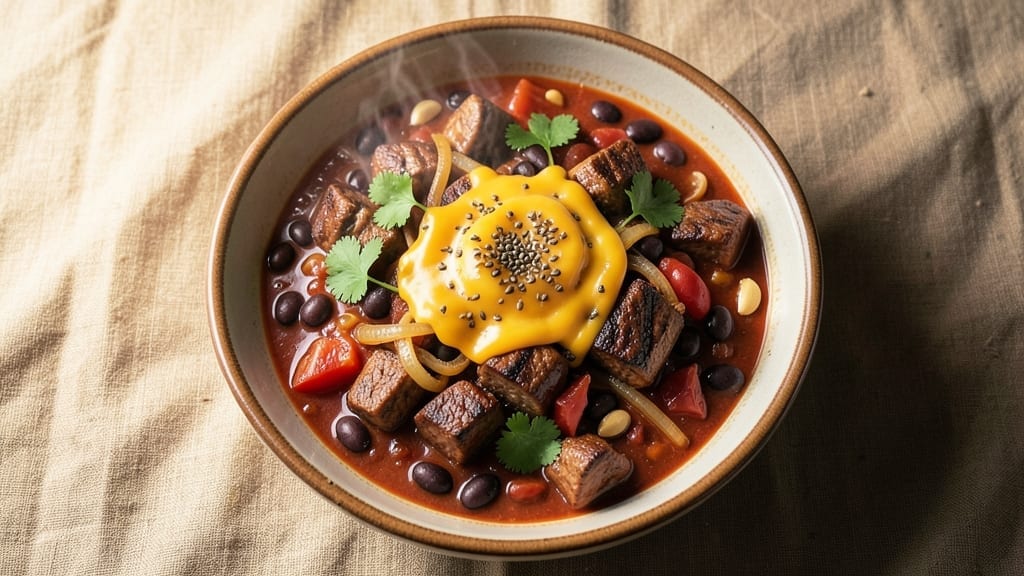
This 8-quart Instant Pot chili recipe delivers restaurant-quality depth with minimal effort—perfect for feeding a crowd while keeping your kitchen clean. The key lies in proper browning of the meat and layering ingredients for maximum flavor development during pressure cooking. I’ve perfected this method after years of testing, ensuring the chili emerges tender, rich, and ready to serve in just 30 minutes of active time.
The beauty of this recipe is its versatility—it works equally well as a weeknight dinner or a game-day centerpiece. Using a trivet in your Instant Pot prevents burning while allowing the chili to develop its signature smoky, hearty character.
The recipe yields eight generous servings, making it ideal for meal prep or large gatherings where one-pot convenience is essential.
What sets this chili apart is the balance of textures and flavors: tender beef, caramelized onions, and beans that hold their shape, all bound together by a rich, slightly thickened sauce. The natural release after pressure cooking ensures the meat stays fork-tender while the flavors meld perfectly.
Serve with cornbread or crusty rolls to soak up every last bit of that smoky goodness.
For those who prefer a thicker chili, simply increase the cornstarch slightly or let it reduce longer after pressure cooking. The recipe scales easily, so you can make it in batches if needed.
This is the kind of chili that improves overnight—if there are leftovers, they’ll be even better the next day.
Ingredients for 8 quart instant pot chili
Eight hearty servings of smoky, rich chili start with these quality ingredients—perfect for crowd feeding.
| Ingredient | Amount | Notes |
|---|---|---|
| Chuck Roast 🥩 | 2 ½ lb | Cut into 1-inch cubes |
| Yellow Onions 🧅 | 3 whole | Diced, medium size |
| Garlic Cloves 🧄 | 6 cloves | Minced, fresh preferred |
| Canned Kidney Beans 🌱 | 15 oz | Drained, rinsed |
| Canned Black Beans 🌱 | 15 oz | Drained, rinsed |
| Diced Tomatoes 🍅 | 28 oz | San Marzano preferred |
| Tomato Paste 🍅 | 2 tbsp | Squeeze tube preferred |
| Chili Powder 🌶️ | 2 tbsp | Smoked preferred |
| Ground Cumin 🌿 | 1 ½ tbsp | Toasted for depth |
| Dried Oregano 🍃 | 1 tbsp | Mexican preferred |
| Salt 🧂 | 1 ½ tsp | Diamond Crystal preferred |
| Black Pepper 🌶️ | 1 tsp | Freshly ground |
| Cornstarch 🌾 | 1 tbsp | For thickening |
| Beef Broth 💧 | 2 cups | Low-sodium preferred |
| Olive Oil 🫒 | 2 tbsp | Extra-virgin for browning |
The chuck roast is non-negotiable here—it delivers that signature tender, fall-apart texture. Costco or Walmart often have it pre-cubed, which saves time, but if you’re buying a whole roast, ask the butcher to cut it into 1-inch pieces. Look for good marbling to ensure flavor. For the beans, Bush’s or Libby’s are reliable brands, but any canned beans in water will work. The San Marzano tomatoes make a noticeable difference in flavor depth—Trader Joe’s carries them affordably. If you can’t find them, any high-quality diced tomatoes will do, just drain them well to avoid excess liquid in your chili.
No chuck roast? Ground beef or stew meat works in a pinch, but expect slightly different texture. The tomato paste can be swapped for extra tomato sauce (about 1 cup) if you prefer. For spices, Penzeys or bulk bins at natural food stores offer the best quality, but the regular grocery store spices are fine if they’re fresh. If you’re short on cornstarch, all-purpose flour at half the amount will thicken it, though it may make the chili slightly cloudier. The beef broth can be substituted with water plus 1 extra tbsp soy sauce or Worcestershire for umami depth.
This chili tastes even better the next day as flavors meld. Store in an airtight container in the fridge for up to 5 days, or freeze portions for 3 months. I like to portion it into 4-quart containers for easy meal prep. The natural release after pressure cooking helps thicken it, but if it’s too thin, simmer uncovered for 10-15 minutes to reduce. For serving, top with sour cream or shredded cheese if you’re not keeping it strictly vegetarian—though this recipe is already packed with flavor.
Why You’ll Love This Recipe
- Ditch the Chopping: I swear by the Instant Pot for this—just toss in one chopped onion and a few garlic cloves, then let the pressure do the work. No knife skills required, and the meat practically falls apart on its own.
- Deep, Smoky Magic: That chuck roast? It turns tender and rich, while the beans soak up all the flavors like a sponge. Honestly, the first bite makes you forget it’s a weeknight meal.
- Game for Any Day: Double batch for game day, meal prep for the week, or serve it at a potluck—it’s hearty enough for a crowd but simple enough for a lazy Sunday. My kids even ask for it on school nights.
- Budget-Friendly Powerhouse: A single chuck roast and two cans of beans stretch to feed six, and the leftovers? Even better the next day. Here’s what sold me—it’s the kind of meal that makes grocery money stretch without sacrificing taste.
Step-by-step instructions for Instant Pot chili
This method delivers a rich, flavorful chili using only one pot and minimal hands-on time.
Sear the Chuck Roast for Deep Flavor
Set your Instant Pot to the “Sauté” function and add the 2 tablespoons olive oil. Once shimmering, add the 2.5 lb chuck roast cut into 1-inch cubes. Sear for 5 minutes, stirring occasionally, until the meat develops a deep brown crust. This step builds the foundation for your chili’s rich flavor—don’t rush it.
Real talk: If your Instant Pot gets crowded, work in batches. The key is browning the meat thoroughly before adding liquids. Once properly seared, transfer the meat to a plate and set aside temporarily. You’ll add it back later after building the chili base.
Build the Chili Base with Onions and Aromatics
In the same pot, add the 3 whole yellow onions (pre-diced) and cook for 3-4 minutes until softened and translucent. Add the 6 cloves minced garlic and cook for 30 seconds until fragrant—this prevents the garlic from burning, which would make your chili bitter.
Next, stir in the 2 tablespoons tomato paste and cook for 1 minute to develop its flavor. This step creates a rich, concentrated base that thickens your chili naturally. If you notice the onions sticking, add a splash of beef broth to deglaze and lift any browned bits from the bottom of the pot.
Combine All Ingredients for Cooking
Return the seared chuck roast to the pot. Add the 28 oz diced tomatoes, 2 cups beef broth, 2 tablespoons chili powder, 1.5 tablespoons ground cumin, 1 tablespoon dried oregano, 1.5 teaspoons salt, and 1 teaspoon black pepper. Stir everything together until well combined.
Add the 15 oz drained kidney beans and 15 oz drained black beans, giving the mixture one final stir. The beans will soak up the flavors as the chili simmers. Here’s the thing—don’t skip the stirring. Even distribution of spices ensures every bite is perfectly seasoned.
Pressure Cook Until Tender and Thick
Secure the lid on your Instant Pot and set it to “High Pressure” for 25 minutes. This cooking time ensures the chuck roast becomes fork-tender while keeping the beans intact. When the cooking cycle completes, allow a 10-minute natural release before carefully releasing any remaining pressure.
During this time, the chili will thicken naturally as the cornstarch (which you’ll add next) absorbs moisture. The natural release is crucial—it prevents the beans from becoming mushy and helps the chili develop a better texture.
Thicken and Serve the Perfect Chili
After the pressure release, open the lid and stir in the 1 tablespoon cornstarch. Let the chili simmer on “Sauté” mode for 2-3 minutes, stirring constantly, until it reaches your desired thickness. The cornstarch acts as a natural thickener without altering the chili’s flavor profile.
Taste and adjust seasoning if needed—this is your final chance to perfect the balance of flavors. Serve immediately with toppings like shredded cheese, sour cream, or chopped green onions. The chili should be thick enough to coat the back of a spoon but still have a spoonful of liquid when you scoop it up.
Pro Tips For Making 8 Quart Instant Pot Chili
- SEAR THE ROAST FIRST: Chuck roast loves a good crust, and skipping this step means flavor hiding in plain sight. Brown the meat in batches—yes, even if it means two rounds in your Instant Pot—before adding anything else. The Maillard reaction here makes all the difference, especially when you’re dealing with 8 quarts of chili that’ll dilute everything else.
- CHOP ONIONS SMALL: I used to slice onions in big chunks for speed, but they turn to mush in that long cook time. Dice them into ¼-inch pieces—small enough to disappear but big enough to stay intact. Same goes for garlic: mince it finely so it blends in smoothly instead of floating like little flavor islands.
- DRAIN AND RINSE BEANS: Canned beans taste like the brine they’re swimming in, and that’s the last thing you want in an 8-quart batch. Drain them, then rinse under cold water to cut the saltiness and any funk. Trust me, your chili won’t taste like a science experiment if you skip this—it’ll taste like actual food.
- PRESSURE COOK LOW: High pressure can turn your chuck roast into shoe leather, especially in a big batch. Stick to low pressure for 45 minutes, then natural release for 15. The meat stays tender, the beans hold their shape, and you won’t end up with a pot of gluey mystery stew. Patience here saves cleanup later.
Serving suggestions for 8 quart instant pot chili
Classic Toppings
Freshly shredded sharp cheddar cheese (about ½ cup) melts beautifully into the chili while adding a creamy contrast. I like to sprinkle it on just before serving so it stays warm and gooey.
For a tangy kick, dollop sour cream or Mexican crema around the edges—about ¼ cup per bowl. A pinch of smoked paprika or crushed red pepper flakes adds a smoky finish without overpowering the chili’s natural depth. 🧀
Bread Pairings
Warm cornbread is a must—its slight sweetness complements the smoky chili perfectly. I recommend making a batch using Jiffy corn muffin mix (just add eggs and milk) or a simple stone-ground cornmeal recipe.
For a heartier option, serve with crusty sourdough bread or focaccia to soak up every last drop of chili. A side of warm tortilla chips works great too, especially if you’re serving this as a dip-style chili. 🍞
Vegetable Sides
Bright charro beans (pinto beans cooked with bacon and jalapeños) add a smoky, spicy contrast. For a lighter option, serve with roasted bell pepper strips (tossed in olive oil and roasted at 400°F for 20 minutes).
A simple cabbage slaw (shredded cabbage, carrot, and a tangy apple cider vinegar dressing) cuts through the richness. I often roast zucchini and bell peppers together for a quick, colorful side. 🥕
Drink Pairings
A cold Mexican lager like Modelo Especial or Pacifico cleanses the palate between bites. For a non-alcoholic option, sparkling limeade (mix sparkling water, lime juice, and a touch of honey) adds a refreshing zing.
A bold red wine like Cabernet Sauvignon or Zinfandel pairs beautifully with the rich, meaty flavors—just let it breathe for 10 minutes before serving. 🍺
Meal Prep Serving
For meal prep, portion the chili into glass storage containers with airtight lids and store in the fridge for up to 5 days. When reheating, add 2 tablespoons of water or broth per quart to prevent drying out.
Serve with pre-portioned toppings in small containers on the side—this keeps everything fresh and organized. I like to freeze individual servings in ziplock bags with a slice of bread tucked inside for easy reheating. ❄️
Nutrition facts
Frequently asked questions
Can I make this chili without ground meat?
For a heartier texture, use 2.5 lb chuck roast cut into 1-inch cubes as the recipe suggests. If you prefer ground meat, substitute with 2 lb lean ground beef or 1.5 lb ground beef + 1 lb ground pork for extra richness. The key is browning the meat thoroughly to develop deep flavor before pressure cooking.
How do I adjust the thickness of my chili?
If your chili is too thin, simmer uncovered on “Sauté” mode for 10-15 minutes to reduce the liquid. For extra thickness, stir in 1 additional tablespoon cornstarch after pressure cooking. If it’s too thick, add ¼ cup beef broth and stir well. The recipe’s 10-minute natural release helps thicken naturally, but adjustments may be needed based on your Instant Pot model.
Can I use frozen beans instead of canned?
Yes, but thaw and drain them thoroughly first. Use 1.5 cups frozen kidney beans and 1.5 cups frozen black beans (about 9 oz each) to match the canned amounts. Add them during the 25-minute high-pressure cook time—they’ll soften perfectly. Frozen beans work best when fully defrosted to prevent excess moisture in your chili.
Why does my chili taste bland after pressure cooking?
Bland chili usually means insufficient browning or under-seasoning. First, ensure you seared the meat until deeply browned. Then, taste and adjust with extra chili powder or smoked paprika before serving. A splash of Worcestershire sauce or soy sauce (1 tsp) can add umami depth. The natural release helps flavors meld—never quick-release if you want maximum flavor development.
How long can I store leftovers?
Store in an airtight container in the fridge for up to 5 days—it actually tastes better the next day! For freezing, portion into quart-sized containers and freeze for up to 3 months. Thaw overnight in the fridge, then reheat with 2 tbsp broth per quart to maintain moisture. The chili reheats beautifully on “Sauté” mode or in a saucepan.

- 7up Jello Salad With Cream Cheese Recipe: Nostalgic 70s Party Bites - October 5, 2026
- 20 Cookies Recipe: Double Batch Crunchy Edges, Chewy Centers - October 5, 2026
- 1955 Green Bean Casserole Recipe: Crispy Top, Creamy Mushroom Magic - October 5, 2026