
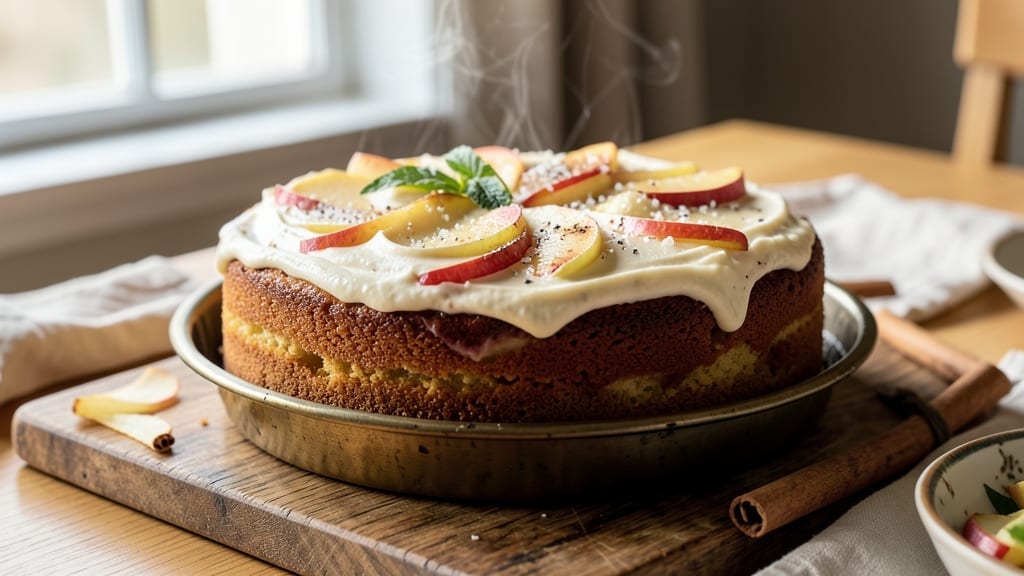
An 8×8 apple cake recipe that delivers spiced moistness and vanilla bean swirls is the perfect way to transform fresh apples into a dessert that feels like a warm hug.
This recipe balances tender crumb with fragrant cinnamon and nutmeg, while the vanilla swirl adds a luxurious touch that makes it feel special. The secret? A simple buttermilk batter and a quick baking time that ensures the apples stay juicy and the edges stay golden.
What sets this cake apart is the foolproof technique that guarantees success—no overmixing, no guesswork. You’ll start with a basic vanilla cake base, then fold in diced apples and spices for that classic apple cake flavor.
The real magic happens when you swirl in a vanilla bean paste before baking, creating those beautiful marbled patterns that make every slice look like it belongs in a bakery display case.
By the time it emerges from the oven, you’ll have a perfectly moist cake with tender apples that practically melt in your mouth. The warm spices infuse every bite with cozy comfort, while the vanilla swirl adds a sophisticated touch.
This cake is ideal for fall gatherings, holiday desserts, or a simple treat to enjoy with afternoon tea.
The best part? This recipe yields a single 8×8-inch cake that serves 8-12, making it perfect for small gatherings or when you want to avoid leftovers. Serve it warm with vanilla ice cream or whipped cream, or let it cool slightly for clean slices.
Here’s everything you need to create this crowd-pleasing dessert.
Ingredients for 8 x 8 apple cake
Simple pantry staples and fresh apples transform into this luxurious 8×8 vanilla swirl cake.
| Ingredient | Amount | Notes |
|---|---|---|
| All-Purpose Flour 🌾 | 2 cups | Sifted for lighter texture |
| Granulated Sugar 🍚 | 1 ½ cups | White or light brown |
| Light Brown Sugar 🍚 | ½ cup | Packed firmly |
| Unsalted Butter 🧈 | 1 cup | Room temperature, cubed |
| Large Eggs 🥚 | 2 whole | Room temperature |
| Buttermilk 🥛 | 1 cup | Fresh or cultured |
| Vanilla Extract 🌿 | 2 tsp | Pure vanilla preferred |
| Baking Powder 🍞 | 2 tsp | Diamond Crystal preferred |
| Ground Cinnamon 🌶️ | 2 tsp | Freshly ground preferred |
| Ground Nutmeg 🌶️ | ½ tsp | Freshly grated preferred |
| Salt 🧂 | ½ tsp | Fine sea salt |
| Medium Apples 🍎 | 4 whole | Honeycrisp or Granny Smith |
| Vanilla Bean Paste 🌿 | 1 tbsp | For swirls and flavor |
| Powdered Sugar 🍚 | ¼ cup | For dusting |
The flour and sugar are your foundation—King Arthur or Bob’s Red Mill flour gives the best texture, but anything all-purpose works. For the apples, Honeycrisp or Granny Smith are ideal—they hold their shape but stay tender. If you’re using Granny Smith, toss them in a bit of lemon juice to keep them from browning while you prep. The vanilla bean paste is non-negotiable for that real vanilla flavor (the kind in tubes just won’t cut it). I grab mine from Williams Sonoma or Trader Joe’s—both have good quality. For the butter, Plugrá or Land O’Lakes work perfectly, just make sure it’s unsalted and room temperature—no cold chunks in your batter!
No vanilla bean paste? Double the vanilla extract and add a pinch of xanthan gum to thicken it. Swapping apples? Pears or peaches work beautifully—just adjust the baking time by 5-10 minutes. The buttermilk can be a DIY mix of 1 cup milk + 1 tbsp vinegar if you’re out, but let it sit for 5 minutes to curdle. For the spices, if you don’t have ground nutmeg, a pinch of cinnamon plus a dash of allspice gives a similar warmth. And if you’re feeling fancy, add a pinch of cardamom—it pairs surprisingly well with apple. The baking powder matters here: Diamond Crystal rises higher
This cake keeps beautifully—3 days at room temperature wrapped in foil, or 1 week in the fridge. For leftovers, slice and freeze individual portions between parchment paper for up to 3 months. The best part? It reheats perfectly—wrap a slice in foil and warm it in the oven at 300°F for 5 minutes. Trust me, the second day is even better once the flavors meld. And if you’re serving it warm, a quick dusting of powdered sugar makes it look like you spent hours decorating. No one will ever guess it was this easy!
Why You’ll Love This Recipe
- Minimal Mixing Required: I swear, this cake comes together in one bowl with a whisk—no stand mixer, no complicated folding. The butter and sugars get creamed in seconds, and the flour just folds right in without a fight. (Yes, even on a Tuesday night.)
- Butter-Sugar Magic: That combo of granulated and light brown sugar? It’s the secret weapon—crisp edges, tender crumb, and just enough caramelized sweetness to make you want to cut a second slice before it even cools. The butter keeps it rich without being greasy.
- Weekend or Weeknight: Serve it warm with ice cream for a weekend treat, or pack slices for lunchboxes—it’s that versatile. Honestly, I’ve even turned leftover pieces into breakfast toast with a sprinkle of cinnamon. (Don’t judge.)
- Budget-Friendly Staples: Flour, sugar, butter, eggs—these are pantry basics that won’t break the bank. The recipe stretches easily for a crowd, and the leftovers? They disappear faster than I can say “second helping.” My go-to for potlucks, birthdays, or just because.
Step-by-step instructions for spiced apple cake with vanilla swirls
Here’s how to bake a tender, spiced apple cake with those gorgeous vanilla bean swirls.
Prepare the Apples and Vanilla Swirl
Start by peeling and coring the 4 whole medium apples – I like to use Honeycrisp or Granny Smith for that perfect balance of sweet and tart. Cut them into ¼-inch thick slices and toss with 1 tablespoon vanilla bean paste. This gives the apples their signature flavor boost while keeping them moist during baking.
In a small bowl, mix 1 tablespoon vanilla bean paste with 2 tablespoons of the light brown sugar. This creates our rich vanilla swirl that’ll melt beautifully into the cake. Set aside – we’ll use this in the next step. The vanilla bean paste adds depth that regular extract can’t match, making this cake truly special.
Cream Butter and Sugars Together
In a large mixing bowl, beat the 1 cup unsalted butter (room temperature) with the 1.5 cups granulated sugar and 0.5 cup light brown sugar on medium speed for 3-4 minutes. You’re looking for a light, fluffy texture that nearly doubles in volume. This creaming process incorporates air, which gives our cake that perfect tender crumb.
I like to scrape down the sides of the bowl every 30 seconds to ensure even mixing. The butter should be completely smooth with no graininess remaining. If it looks too thick, let it sit at room temperature for another 5 minutes – we want it to be soft but not melted.
Add Eggs and Buttermilk
Add the 2 whole large eggs one at a time, mixing well after each addition. Then stir in the 1 cup buttermilk and 2 teaspoons vanilla extract. The buttermilk adds moisture while keeping the cake tender, and the vanilla extract enhances the apple flavor. Mix just until combined – overmixing develops gluten and makes the cake tough.
At this point, you’ll notice the batter is thick and slightly curdled-looking. That’s normal! The baking powder and buttermilk will work together during baking to create a light, airy texture. Give everything one final stir to make sure all ingredients are evenly distributed.
Combine Dry Ingredients and Fold in Apples
In a separate bowl, whisk together the 2 cups all-purpose flour, 2 teaspoons baking powder, 2 teaspoons ground cinnamon, 0.5 teaspoon ground nutmeg, and 0.5 teaspoon salt. Sift the flour mixture over the wet ingredients and gently fold together using a spatula until just combined – you should still see some flour streaks.
Now fold in the prepared apple slices and the vanilla swirl mixture. Be gentle here to avoid deflating the batter too much. The apples should be evenly distributed throughout. The cake batter will be thick and slightly chunky – that’s exactly what we want for maximum moistness and apple flavor in every bite.
Bake to Golden Perfection
Pour the batter into a greased 8×8-inch baking pan and smooth the top with a spatula. Bake in a preheated 350°F oven for 45-50 minutes, until a toothpick inserted in the center comes out clean. The edges should be golden brown while the center remains slightly springy to the touch.
I like to tent the pan with foil after the first 30 minutes of baking to prevent the top from browning too quickly. The cake is done when it pulls away slightly from the edges of the pan and has a beautiful golden hue. Let it cool in the pan for 15 minutes before transferring to a wire rack.
Pro Tips For Making 8 X 8 Apple Cake
- Cream Butter Properly: Use a stand mixer or wooden spoon to beat the butter and sugars until it’s light and fluffy—about 3-4 minutes. I used to rush this, and the cake turned dense; now I know this step actually incorporates air, making the crumb tender. (Yes, even if you’re impatient like me, resist the urge to skip.)
- Measure Brown Sugar Right: Pack the brown sugar into the measuring cup firmly—no air gaps. After burning three batches with overly dry cake, I finally realized the molasses content matters. A damp spoon helps press it down evenly. (Your future self will notice the difference.)
- Don’t Overmix the Batter: Mix the wet and dry ingredients just until combined—lumpy is fine. I learned this the hard way when my cake turned tough; overworking the gluten in the flour makes it dense. Fold in apples gently after mixing.
- Test for Doneness Early: Check the cake at 45 minutes with a toothpick—it should come out with moist crumbs, not wet batter. Oven temps vary, so don’t rely on the recipe’s time. If the edges are brown but the center’s still jiggly, tent with foil and wait. (Sounds weird, but it works.)
Essential equipment for 8 x 8 apple cake
Must-Have Baking Pan
An 8×8-inch baking pan is absolutely essential for this recipe—it’s designed specifically for this size. I recommend using a light-colored metal pan (like Wilton Perfect Results or Nordic Ware Natural Aluminum) to ensure even baking.
The light color reflects heat better, preventing the bottom from over-browning while the center stays moist. Avoid dark pans unless you reduce your baking time by 5 minutes—they absorb more heat and can dry out the cake.
Mixing Tools
A stand mixer with a paddle attachment makes this recipe effortless, but a hand mixer works just fine if you don’t have one. I use my KitchenAid Artisan Series for the creaming stage, but even a basic Black+Decker stand mixer handles the job.
For folding in the apples, a rubber spatula (like OXO Good Grips) is a game-changer—it helps keep the batter’s airiness while incorporating the fruit evenly.
Measuring Essentials
Precision matters in baking, so invest in a digital kitchen scale (like OXO Good Grips) for accurate measurements of flour and sugar. For liquids, a liquid measuring cup with clear markings (I love Pyrex) ensures you don’t overfill the buttermilk or vanilla extract.
A microplane (like MikroMatic) is perfect for freshly grating nutmeg—it makes all the difference in flavor compared to pre-ground spices.
Apple Prep Tools
Peeling and slicing apples efficiently requires a sharp chef’s knife and a mandoline (like Benriner) for uniform ¼-inch slices. If you’re not comfortable with a mandoline, a potato peeler works for the skin, and a sharp knife with steady hands does the trick.
Toss the sliced apples in a bowl with the vanilla bean paste before folding them into the batter—this ensures even flavor distribution.
Baking Gear
A wire cooling rack (like Amazon Basics) is non-negotiable for letting the cake cool properly without soggy bottoms. For the baking process, a digital oven thermometer (like Thermoworks) ensures your oven is actually at 350°F—home ovens can vary by 25°F!
I also keep a small bowl of water on the oven rack during baking to add moisture to the air, which helps keep the cake tender.
Serving Extras
While not essential, a duster bag (like Wilton) makes dusting powdered sugar effortlessly elegant. For serving, I love using a wooden cake board (like West Elm) to elevate the cake and make it look restaurant-worthy.
A sharp serrated knife (like Mercer Culinary Genesis) ensures clean slices without crushing the cake. These tools aren’t required, but they elevate the final presentation to the next level. ✨
Nutrition facts
Frequently asked questions
Can I use any type of apple for this cake?
While any apple will work, Honeycrisp or Granny Smith are ideal—they hold their shape while staying tender. For sweeter flavor, try Gala or Fuji, but they’ll break down faster during baking. If using tart apples like Granny Smith, toss them with 1 teaspoon lemon juice to prevent browning while prepping.
Why does your recipe call for vanilla bean paste instead of extract?
The vanilla bean paste creates those beautiful swirls and adds 3x more flavor than regular extract. It contains real vanilla seeds that infuse the cake with depth. If you’re missing it, double the vanilla extract and add ½ teaspoon xanthan gum to thicken it for swirling.
How do I know when the cake is fully baked?
Insert a toothpick into the center—it should come out clean with moist crumbs (not wet batter). The edges should be golden brown while the middle remains slightly springy. If your oven runs hot, check at 40 minutes instead of the full 45-50 minutes.
Can I make this cake ahead of time?
This cake keeps for 3 days at room temperature wrapped tightly in foil, or 1 week in the fridge. For longer storage, freeze individual slices between parchment paper for up to 3 months. Reheat slices wrapped in foil at 300°F for 5 minutes for maximum freshness.
What’s the best way to serve this cake?
Warm slices with vanilla ice cream or whipped cream are classic choices, but it’s also perfect for breakfast with a dollop of yogurt. For a restaurant touch, dust with powdered sugar and add a sprig of fresh mint. The warm spices make it especially cozy during fall and winter gatherings.

- 12 Bean Chili Recipe: Hearty Slow-Cooked Depth With 12 Legumes - October 17, 2026
- 5 Seed Bread Recipe: Nutty Crunch and Artisan Flavor in One Loaf - October 17, 2026
- 1 Lb Macaroni Salad Recipe: Bold, Crunchy, and Crowd-Pleasing - October 17, 2026