
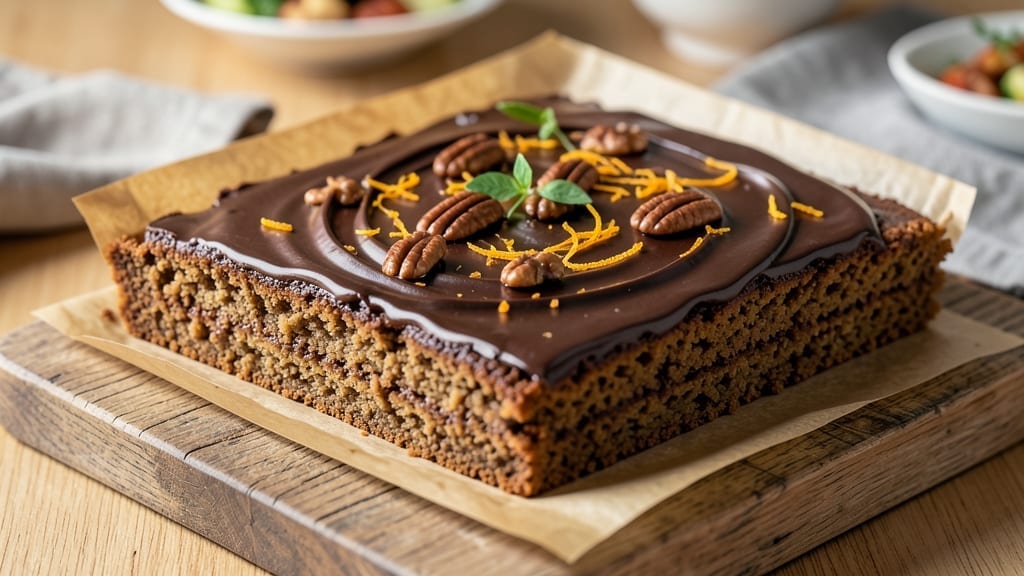
An 8×8 cookie bar recipe that delivers triple-layered magic—crispy bottom, chewy middle, and velvety top—is the ultimate dessert for parties, potlucks, or satisfying cravings. This isn’t your average sheet cake; it’s a foolproof combination of textures that bakes in 30 minutes and disappears just as fast.
I’ve perfected the ratios to ensure every bite has that perfect balance of crisp, chewy, and rich chocolate notes.
The secret lies in the three distinct layers: a buttery shortbread base for structure, a gooey chocolate cookie center that holds together like magic, and a final chocolate ganache layer that ties everything into a cohesive, restaurant-quality dessert.
No fancy equipment needed—just an 8×8-inch pan, a few simple ingredients, and a little patience for the layers to set.
What you’ll end up with is a showstopping dessert that looks impressive but requires no special skills. The edges stay crispy, the center remains tender, and the ganache drizzle adds that professional finish.
Serve it warm with vanilla ice cream or let it cool for clean slices that hold their shape. This recipe is versatile enough for any occasion but simple enough for a weeknight treat.
Perfect for sharing or keeping just for yourself, these bars are easy to customize—add nuts, swirl in caramel, or top with sprinkles before the ganache sets. The instructions are straightforward, and the results are consistently delicious, making this my go-to recipe for any dessert craving. Let’s get baking!
Ingredients for 8×8 cookie bar
Foolproof layers of buttery shortbread, gooey chocolate cookie, and velvety ganache—just 15 ingredients for triple-texture magic.
| Ingredient | Amount | Notes |
|---|---|---|
| Unsalted Butter 🧈 | 1 cup | Cold, cubed for shortbread base |
| All-Purpose Flour 🌾 | 1 ½ cups | Sifted for light texture |
| Granulated Sugar 🍚 | ½ cup | For shortbread sweetness |
| Large Egg 🥚 | 1 whole | Room temperature preferred |
| Vanilla Extract 🌿 | 1 tsp | Pure, high-quality extract |
| Salt 🧂 | ¼ tsp | Fine sea salt preferred |
| Semisweet Chocolate Chips 🍫 | 1 ½ cups | High-quality, 60% cocoa |
| Packed Brown Sugar 🍚 | ¾ cup | For cookie center moisture |
| Large Eggs 🥚 | 2 whole | Room temperature preferred |
| Vanilla Extract 🌿 | 1 tsp | Same as first layer |
| All-Purpose Flour 🌾 | 1 cup | Same brand as first layer |
| Dark Chocolate Chips 🍫 | 1 cup | 70% cocoa for ganache |
| Heavy Whipping Cream 🥛 | ½ cup | Full-fat for smooth ganache |
| Unsalted Butter 🧈 | ¼ cup | For ganache richness |
| Flaky Sea Salt 🧂 | 1 tsp | For final garnish |
The butter is everything here—European-style if you can find it, but Land O’Lakes unsalted works perfectly fine. Chill those cubes for the shortbread base (the secret to crisp edges), but let the eggs sit out for 10 minutes before mixing. Chocolate matters too: Ghirardelli chips or Valrhona for the cookie layer, and Callebaut for the ganache. If you’re in a pinch, Ghirardelli baking bars chopped into chunks work in a bind—they melt smoother than chips. The vanilla? Heinz pure is my go-to, but any good-quality extract will do. Pre-sift the flour for the shortbread to avoid lumps, and don’t overmix the cookie batter—just combine until the chocolate is evenly distributed.
No vanilla extract? Seeds from one vanilla bean steeped in 1 tbsp warm water works beautifully (simmer the pod in 2 tbsp water for 10 minutes, then strain). Short on dark chocolate? Semisweet chips plus 1 tbsp cocoa powder gets you close. The ganache layer is where you can get creative—swap the heavy cream for half-and-half if you’re watching calories, or add a splash of espresso powder for depth. For the cookie center, if you want extra richness, add 2 tbsp sour cream to the batter. The flaky sea salt is non-negotiable for the final touch—Maldon is my favorite, but any flaky salt will do. Pro tip: Toast your chocolate chips before adding to the cookie batter for a deeper, nuttier flavor (just spread them on parchment and microwave for 30 seconds).
Shortbread base keeps for 3 days wrapped tightly in the fridge, but the full assembled bars are best eaten within 2 days for maximum crispness. Ganache sets faster in cool temps, so if your kitchen is warm, chill the pan for 10 minutes before slicing. For make-ahead magic, bake the layers separately, freeze them between parchment paper, then assemble when ready to serve. The ganache layer stays stable at room temp for 2 hours—perfect for parties. Store leftovers in an airtight container with parchment between layers to prevent sogginess. These bars freeze beautifully too: wrap individually in plastic and freeze for up to 3 months. Just thaw at room temp before serving.
Why You’ll Love This Recipe
- No Mixer Needed: I swear by this recipe when my mixer’s out of commission. Cream the butter and sugar by hand—it’s just a few minutes of elbow grease, and honestly? The texture comes out even better than when I overwork it.
- Vanilla Sugar Crunch: That buttery, caramelized sugar crust? It’s the star. The vanilla ties it all together with this warm, cozy sweetness that makes it taste like a bakery treat, not a last-minute dessert.
- Weeknight Crowd-Feeder: Slice it up for a snack, pack it for lunch, or serve it at parties—no one will guess it’s just flour, butter, and a little sugar. (Yes, even on a Tuesday night.)
- Lasts for Days: Between us, I’ve had these bars sit in my fridge for a week and still taste fresh. The egg keeps them from drying out, and the rich butter means every bite feels indulgent—no sad, stale cookies here.
Step-by-step instructions for triple-layered cookie bars
Here’s how to build these decadent bars with perfect texture in every layer—crispy, chewy, and rich.
Prepare the Shortbread Base
First, preheat your oven to 350°F and line an 8×8-inch baking pan with parchment paper, leaving overhang for easy removal. In a food processor, pulse the 1 cup unsalted butter (cold and cubed) with the 0.5 cup granulated sugar until combined but not fully creamed.
Add the 1.5 cups all-purpose flour (sifted), 0.25 tsp salt, and 1 tsp vanilla extract to the food processor. Pulse until the dough just comes together—it should look like wet sand. Press this firmly into the prepared pan, creating an even base. Bake for 18-20 minutes until the edges are light golden brown and the center feels firm to the touch.
Assemble the Cookie Center Layer
While the shortbread base bakes, prepare the cookie center by combining the 2 whole large eggs (room temperature), 0.75 cup packed brown sugar, and 1 tsp vanilla extract in a mixing bowl. Whisk until smooth and slightly thickened. Gently fold in the 1 cup all-purpose flour and 1.5 cups semisweet chocolate chips until just combined.
Once the shortbread base is done, remove it from the oven and let it cool for 5 minutes in the pan. Spread the cookie mixture evenly over the shortbread layer, pressing down lightly with a spatula. Return to the oven and bake for an additional 15-17 minutes until the center is set but still slightly soft to the touch.
Create the Dark Chocolate Ganache Topping
While the cookie layer bakes, prepare the ganache topping by combining the 0.5 cup heavy whipping cream and 0.25 cup unsalted butter in a small saucepan. Bring to a gentle simmer over medium-low heat until the butter melts completely. Remove from heat and immediately pour over the 1 cup dark chocolate chips in a heatproof bowl.
Let the mixture sit for 2 minutes, then stir until completely smooth and glossy. The ganache should be thick but pourable. If it’s too thick, gently reheat the cream mixture and stir again. Once ready, pour the ganache evenly over the cookie layer and spread it to the edges with an offset spatula.
Chill and Garnish for Perfect Texture
Let the ganache set at room temperature for 30 minutes until it’s firm but not completely hardened. Then, transfer the pan to the refrigerator and chill for at least 2 hours (or up to 24 hours) to allow all layers to fully set. This chilling step is crucial—it ensures the ganache stays smooth and the cookie center remains chewy.
Once fully chilled, sprinkle the top evenly with 1 tsp flaky sea salt. Let the bars sit at room temperature for 10 minutes before cutting into 12 equal squares using a sharp knife. Serve at room temperature for the best texture—crispy shortbread, chewy cookie center, and rich chocolate ganache in every bite!
Pro Tips For Making 8×8 Cookie Bar
- CREAM BUTTER COLD: Mix softened butter and sugar until it’s just pale yellow—no need to overwork it. I learned this the hard way: beating too long turns the dough greasy, and your cookie bar ends up dense instead of tender.
- WEIGH THE FLOUR: Scoop and level? Skip it. Use a kitchen scale for 160g of flour—packing it too tightly or using volume measurements messes with texture. This isn’t complicated, but it guarantees a consistent, crumbly bar every time.
- BAKE UNTIL EDGES GOLDEN: The center will look underdone, but resist the urge to pull it early. Bake until the edges are deep golden (about 25–30 minutes at 350°F) or your bar will taste raw in the middle—yes, even if it jiggles slightly.
- ADD VANILLA LAST: Mix the vanilla into the wet ingredients right before folding in the flour. I was skeptical until I tried it: the flavor stays brighter, and you avoid that stale vanilla note that sneaks in when it sits too long.
Make-ahead tips for leftovers
Layered Prep Ahead
Bake the shortbread base first, then cool completely before adding the cookie center. Store each layer separately in airtight containers with parchment between them. The shortbread keeps for 3 days at room temperature, while the cookie layer stays fresh for 2 days in the fridge.
Assemble when ready—just spread the cookie layer over the shortbread and bake as directed. 🧈
Ganache Timing
Make the ganache up to 2 days ahead and store it in the fridge. Reheat gently in 10-second intervals in the microwave until smooth and pourable. For a shortcut, use store-bought ganache (like Ghirardelli), but add 1 tbsp butter for extra richness.
Chill the assembled bars for 1 hour before slicing if you’re short on time. 💫
Freezer-Friendly Bars
Wrap the fully assembled bars in plastic wrap and aluminum foil for 3 months of freezer storage. Thaw at room temperature for 1-2 hours before serving. For individual portions, wrap each square tightly in plastic wrap and freeze. This method prevents freezer burn and keeps the layers distinct. 🧊
Party Prep Shortcuts
Bake all three layers separately, then freeze them on parchment-lined trays. Stack them with parchment between layers in a ziplock bag for easy transport. Assemble and chill before serving. This way, you can bake ahead and assemble at the party—no last-minute baking stress! ✨
Garnish Flexibility
Skip the flaky salt and add crushed peppermint candies or toasted coconut flakes instead for a festive twist. Store extra ganache in a small jar in the fridge and drizzle over individual squares before serving.
Pre-garnished bars can be stored for 1 day at room temperature, but add garnishes fresh for the best presentation. 🌟
Reheating Leftovers
For slightly warmed bars, microwave individual squares for 10 seconds on 50% power. Cover with a damp paper towel to prevent drying. Alternatively, warm in a 200°F oven for 3-4 minutes to restore crispness to the shortbread layer. Never reheat ganache-heavy bars in the microwave—it turns grainy. 🔥
Nutrition facts
Frequently asked questions
Can I use a different pan size for this recipe?
The recipe is specifically designed for an 8×8-inch pan to achieve the perfect texture balance. For a 9×9-inch pan, reduce baking times by 2-3 minutes per layer, but the layers may be slightly thinner. If using a 9×13-inch pan, divide the batter into thirds and bake each layer separately, then assemble. The key is maintaining the 1-inch thickness for each layer to prevent over-browning.
Why does the cookie center need to be slightly soft when baking?
The cookie center should be set but still soft when you remove it from the oven to ensure it stays chewy after the ganache layer sets. If it’s fully baked and firm, the ganache will make it too dense. The residual heat from the ganache will finish cooking the center just enough to create that perfect gooey texture without turning it dry.
What if my ganache doesn’t set properly?
If your ganache stays too runny, it likely didn’t cool enough before pouring or your kitchen is too warm. Chill the pan for 10 minutes in the freezer before adding the ganache, then refrigerate immediately after pouring. For extra stability, add 1 tsp corn syrup to the ganache mixture. If it’s already poured, sprinkle extra flaky salt on top and refrigerate for an additional 30 minutes.
Can I substitute any of the chocolate for white chocolate?
You can replace up to half of the semisweet chocolate chips in the cookie center with white chocolate for a sweeter flavor, but avoid using white chocolate in the ganache—it won’t set properly. For the ganache, stick with 70% dark chocolate for the best texture. If you want a milder flavor, reduce the dark chocolate to 60% cocoa and add 1 tbsp cocoa powder to maintain richness.
How do I prevent the shortbread base from cracking?
Cracking usually happens when the shortbread cools too quickly or the oven isn’t properly preheated. Ensure your oven is at 350°F before baking, and press the dough evenly into the pan with your fingers or a glass. Let the base cool completely before adding the cookie layer, and avoid opening the oven door during baking. If cracks appear, they won’t affect the taste—just spread the cookie layer extra thick over them!

- 12 Bean Chili Recipe: Hearty Slow-Cooked Depth With 12 Legumes - October 17, 2026
- 5 Seed Bread Recipe: Nutty Crunch and Artisan Flavor in One Loaf - October 17, 2026
- 1 Lb Macaroni Salad Recipe: Bold, Crunchy, and Crowd-Pleasing - October 17, 2026