
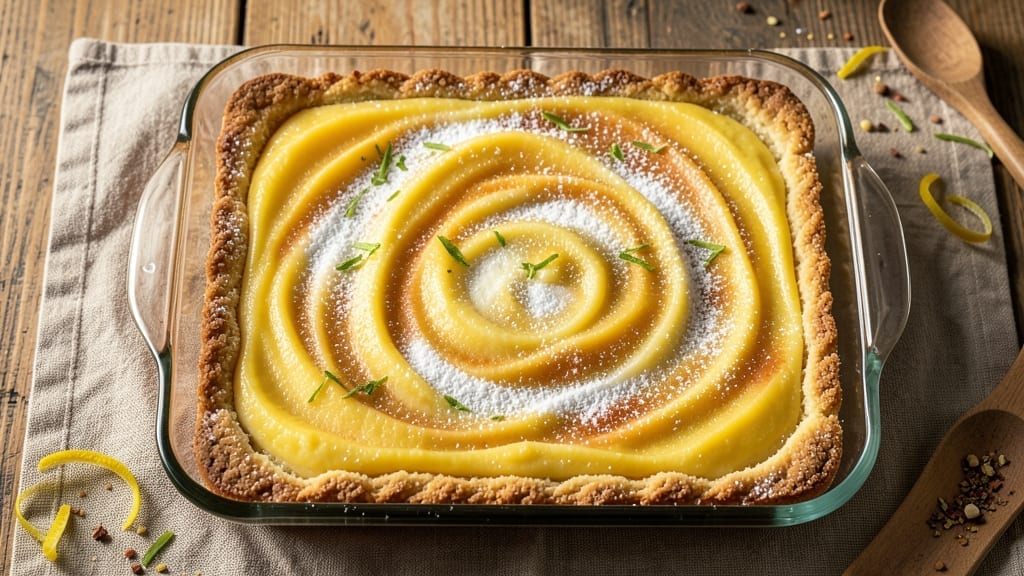
This 8×8 lemon bar recipe delivers the perfect balance of buttery shortbread crust and bright, tangy lemon curd that’ll have everyone asking for seconds. The secret lies in a crisp, golden crust that holds up to the velvety filling—no soggy bottoms here.
I’ve baked these for holiday gatherings and family dinners, and they’ve never failed to disappear faster than the plate hits the table.
What sets this recipe apart is the foolproof technique for achieving a smooth, crack-free filling that’s neither too runny nor too thick. The crust gets pre-baked to ensure it stays sturdy, while the lemon mixture bakes just long enough to set without losing its signature zing.
A light dusting of powdered sugar transforms these into a showstopper dessert that’s as easy to make as it is to devour.
By the time you pull these from the oven, you’ll have a golden, glossy lemon bar with a texture that’s crisp at the edges and creamy in the center.
The aroma alone—bright citrus with a hint of vanilla—will have your kitchen smelling like a bakery. Serve warm or at room temperature, and watch them vanish in minutes.
Perfect for potlucks, holidays, or a simple dessert night in, these bars scale effortlessly. The 8×8 pan ensures even baking, and the recipe doubles easily for larger crowds. Here’s how to make them—no fancy equipment required.
Ingredients for 8×8 lemon bar
Buttery crust meets tangy lemon filling—these 16 bars deliver bakery-quality results every time.
| Ingredient | Amount | Notes |
|---|---|---|
| All-Purpose Flour 🌾 | 2 cups | Sifted for smooth texture |
| Unsalted Butter 🧈 | 1 cup | Cold, cubed for crust |
| Granulated Sugar 🍚 | 1 cup | Plus 1/4 cup for filling |
| Powdered Sugar 🍚 | 2 cups | For dusting, sifted |
| Fresh Lemon Juice 🍋 | 1 cup | From 4-5 lemons, freshly squeezed |
| Large Egg Yolks 🥚 | 2 whole | Pasture-raised preferred |
| Vanilla Extract 🌿 | 1 tsp | Pure vanilla for aroma |
| Salt 🧂 | ½ tsp | Fine sea salt |
| Cream Cheese 🧈 | 8 oz | Full-fat, room temperature |
| Zest of 2 Lemons 🍋 | 2 whole | Finely grated, no pith |
The crust starts with cold butter—cut it into the flour until it resembles coarse crumbs, not a paste. King Arthur or Bob’s Red Mill flour work best for a tender texture. For the lemons, organic Meyer lemons from Trader Joe’s pack the most flavor, but regular lemons work too. Zest the outer layer only—no bitter pith. The cream cheese should be room temperature (30 minutes out of the fridge) to blend smoothly with the sugar and yolks. If it’s too cold, the filling will be lumpy.
No fresh lemons? Bottled lemon juice works in a pinch, but add a pinch of citric acid for brightness. Substitute the cream cheese with 8 oz mascarpone for a lighter texture. For a dairy-free option, use vegan cream cheese (like Kite Hill) and coconut oil instead of butter. The vanilla extract can be swapped for 1 tsp vanilla bean paste if you want extra depth. If your kitchen runs hot, reduce the oven temperature by 25°F to prevent over-browning.
Store the assembled bars in an airtight container at room temperature for up to 3 days—the crust stays crisp. For longer storage, freeze the unfrosted bars (wrapped in plastic) for up to 3 months. Refrigerate the powdered sugar in a sealed jar to prevent clumping. The filling firms up as it cools, so let them sit at least 2 hours before slicing. These bars reheat beautifully—10 seconds in the microwave softens the filling without drying the crust.
Why You’ll Love This Recipe
- No-Fuss Baking: I swear by this recipe because it’s the kind of dessert that doesn’t demand perfection—just a 9×13 pan, a few minutes of mixing, and a 30-minute bake. The crust turns out buttery and tender every time, even if I forget to chill the dough. Honestly, that’s half the battle won.
- Zesty Magic: That bright, fresh lemon juice? It’s the star. The filling is silky smooth, with just the right balance of sweetness and tartness—no bitterness, no cloying sugar overload. And when you cut into it, that contrast of crisp crust and creamy filling? It’s the kind of bite that makes people pause mid-sip.
- Party in a Pan: Between us, this is my go-to for potlucks, brunch spread, or when I need a showstopper that’s actually easy. Slice it into squares, and suddenly you’ve got a dessert that’s fancy enough for guests but simple enough that no one suspects how little effort it took. (Yes, even on a Tuesday night.)
- Leftovers That Don’t Let You Down: The best part? These stay fresh for days—no sad, dry edges or weird textures. I’ll make a full pan and have half gone by morning, whether it’s for breakfast with coffee or a snack at 3 PM. And because it’s just flour, butter, and sugar (plus lemons), it’s cheap enough to bake twice in a week without guilt.
Step-by-step instructions for 8×8 lemon bars
Here’s how to create a perfectly balanced lemon bar with a buttery crust and tangy filling.
Prepare the Crust Mixture
In a medium bowl, combine the 2 cups All-Purpose Flour and 0.5 tsp Salt. Sift the mixture through a fine-mesh sieve directly into a large mixing bowl to aerate the flour. This ensures a lighter, flakier crust. Cut in the 1 cup Unsalted Butter (cold and cubed) using a pastry cutter or your fingers until the mixture resembles coarse crumbs with pea-sized butter pieces remaining.
Gradually add the 1 cup Granulated Sugar while mixing with a fork or your fingers. The goal is to create a uniform mixture that holds together when pressed. Press the dough evenly into an 8×8-inch baking pan, using the back of a spoon or your fingers to create an even, thin layer along the bottom and up the sides about ½ inch. This creates the signature high edges that make lemon bars so appealing.
Bake the Crust to Golden Perfection
Preheat your oven to 350°F. Bake the crust for 18-20 minutes until the edges are light golden brown and the center looks just slightly underdone. This ensures the crust is fully set but still tender. Remove the pan from the oven and let the crust cool for 5 minutes—this prevents it from becoming soggy when you add the filling.
While the crust bakes, prepare the filling by whisking together the 2 whole Large Egg Yolks, 1 cup Fresh Lemon Juice, 1 tsp Vanilla Extract, and 2 whole Zest of 2 Lemons in a medium bowl. This mixture should be smooth and well combined. The lemon zest adds that bright, citrusy aroma that makes lemon bars so special.
Create the Lemon Filling
In a separate bowl, beat the 8 oz Cream Cheese until smooth and creamy. Gradually add the 2 cups Powdered Sugar while mixing on low speed until fully incorporated. This prevents the powdered sugar from clumping and ensures a silky-smooth filling. Add the egg yolk mixture to the cream cheese mixture and whisk until fully combined. The filling should be thick but pourable.
Pour the lemon filling over the cooled crust, spreading it evenly to the edges. The filling should cover the entire crust but not overflow the sides. Return the pan to the oven and bake for 20-25 minutes until the filling is set but still slightly jiggly in the center. This ensures a perfect balance between a firm top and a creamy interior.
Chill and Dust for Serving
Remove the lemon bars from the oven and let them cool completely on a wire rack for 1 hour. This allows the filling to fully set and the flavors to meld. Once cooled, dust the top generously with the remaining ¼ cup Granulated Sugar (from the ingredients list) for a beautiful, sparkling finish. The sugar also adds a subtle crunch that contrasts with the creamy filling.
Cut the lemon bars into 16 equal squares using a sharp knife or pizza cutter. Serve at room temperature for the best texture and flavor. The crust should be crisp and buttery, while the filling remains tangy, sweet, and perfectly balanced. Store any leftovers in an airtight container in the refrigerator for up to 5 days or freeze for up to 3 months.
Pro Tips For Making 8×8 Lemon Bar
- Preheat Pan First: Your 8×8 pan should hit 350°F before the dough goes in—no exceptions. I learned this the hard way when my crust turned into a sad, pale blob because the pan was cold. A hot pan guarantees a crispy, golden bottom that holds up when you cut those squares.
- Use Cold Butter: Cut that unsalted butter into tiny cubes and chill it for 20 minutes before mixing. Warm butter = greasy crust. Cold butter creates flaky layers, and trust me, you’ll notice the difference when your lemon bars slice cleanly instead of falling apart at the seams.
- Strain the Lemon Juice: Skip the pulp—it makes the filling grainy and bitter. Strain your fresh lemon juice through a fine-mesh sieve, then measure it. Yes, it’s an extra step, but your filling will be silky smooth, not like you’re eating lemon-flavored sand.
- Press Dough Evenly: Don’t just dump the dough and hope for the best. Press it into the pan firmly and evenly—no thick spots, no thin edges. Use a glass to smooth it out, then bake until the edges are just starting to turn golden. Uneven pressing = uneven baking = sad corners.
Troubleshooting perfect results
Crust Too Crumbly
If your crust falls apart when pressing it into the pan, the butter was likely too warm. Chill the dough for 30 minutes before pressing—this helps it hold together better. I also recommend using a 9-inch pie dish as a makeshift mold to press the dough evenly into the pan.
If the dough still crumbles, add 1-2 tablespoons ice water and mix until it just comes together. 🧈
Filling Too Runny
A runny filling usually means the egg yolks weren’t fully incorporated or the oven temperature was too high. Whisk the yolks into the cream cheese mixture until completely smooth, then let the filling rest for 10 minutes before baking.
If it’s still too thin, bake at 325°F instead of 350°F for a longer time. For extra stability, add 1 teaspoon cornstarch to the filling mixture.
Cracked or Sunken Top
Cracks or a sunken center often happen when the filling isn’t thick enough or the oven temperature fluctuates. To fix this, make sure your filling is thick but pourable—it should leave a trail when drizzled.
Place a water bath tray in the lower oven rack to create steam, which helps set the filling evenly. If cracks appear, dust with extra powdered sugar immediately after baking to hide them.
Soggy Crust
A soggy crust usually means the filling wasn’t fully set before cooling. Always let the crust cool for 5 minutes after baking before adding the filling. If you’re in a hurry, chill the assembled pan in the fridge for 15 minutes before baking the filling.
For extra insurance, brush the cooled crust lightly with melted butter before adding the filling—this creates a moisture barrier.
Lemon Flavor Too Weak
If your lemon bars taste bland, the lemons likely weren’t fresh enough. Use freshly squeezed juice from 4-5 lemons and make sure to zest the outer layer only—no bitter pith.
For an extra zing, add ½ teaspoon citric acid to the filling. I also recommend using Meyer lemons if available—they’re sweeter and more aromatic than regular lemons. 🍋
Bars Stick to Pan
If your lemon bars stick to the pan, the crust wasn’t fully baked or the pan wasn’t properly greased. Always grease your 8×8-inch baking pan with butter or baking spray before pressing the dough. For extra insurance, line the pan with parchment paper, pressing it into the corners.
If they still stick, let the bars cool completely in the pan before attempting to remove them—this makes them easier to slice and serve.
Nutrition facts
Frequently asked questions
Can I use a different pan size?
This recipe is designed for an 8×8-inch pan, but you can adapt it to a 9×9-inch pan by reducing baking time by 2-3 minutes to prevent over-browning. For a 9×13-inch pan, divide the dough and filling into thirds, baking each section separately. The key is maintaining the same crust-to-filling ratio for even texture.
How do I make these bars gluten-free?
Replace the all-purpose flour with a 1:1 gluten-free baking flour blend (like Bob’s Red Mill or King Arthur) and add ½ teaspoon xanthan gum to the crust mixture. For the filling, use a gluten-free powdered sugar substitute. The texture will be slightly denser, but the tangy lemon flavor remains bright and delicious.
Can I make the filling ahead of time?
Yes! Prepare the filling up to 24 hours ahead and store it in an airtight container in the refrigerator. Stir well before using to redistribute the cream cheese. For the crust, you can press it into the pan and refrigerate it overnight—just bake it for 2 extra minutes before adding the filling to ensure it’s fully set.
Why does my filling get watery?
Watery filling usually happens when egg yolks aren’t fully incorporated or the oven runs hot. Whisk the yolks into the cream cheese mixture until completely smooth, then let the filling rest for 10 minutes before baking. If it’s still too thin, reduce the oven temperature to 325°F and bake for 5 extra minutes.
What’s the best way to store leftovers?
Store unfrosted bars in an airtight container at room temperature for up to 3 days—the crust stays crisp. For longer storage, freeze the entire pan (wrapped tightly) for up to 3 months. Thaw overnight in the fridge before slicing. Refrigerated bars are best served at room temperature for 30 minutes to restore the filling’s creamy texture.

- 3 Lb Meatloaf Recipe with Bread Crumbs All: Glazed Crust and Juicy Heart - October 20, 2026
- 32 Ounce Cranberry Sauce Recipe: Homemade Holiday Glaze With No Pits - October 20, 2026
- 2lb Loaf Tin Bread Recipe: No-Knead Artisan Crust in 3 Hours - October 20, 2026