
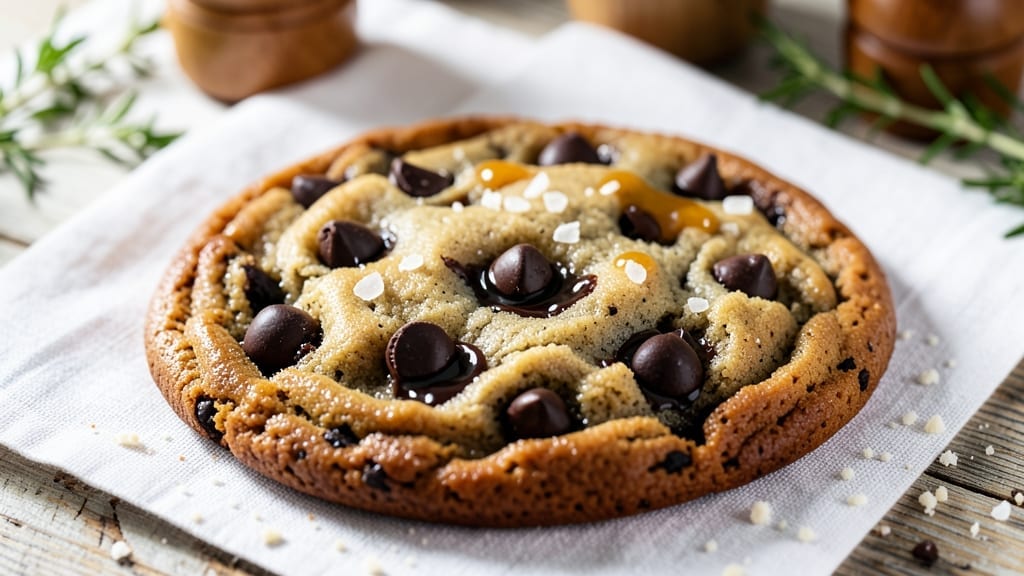
This 9-inch chocolate chip cookie recipe delivers the perfect balance of buttery crunch and warm, gooey centers—every time. 🔥 The secret lies in precise ingredient ratios and proper dough chilling, which creates that signature texture we all crave.
I’ve baked hundreds of these, and this method never fails to impress, whether you’re feeding a crowd or treating yourself to a single indulgence.
What makes this recipe stand out is the combination of brown and white sugar, which creates caramel notes while maintaining that classic cookie texture. High-quality chocolate chips (I recommend semi-sweet or dark) melt into perfect pools, and a touch of vanilla enhances the flavor without overpowering.
The dough rests for 30 minutes—this critical step ensures even baking and prevents cracking.
By the time you pull them from the oven, you’ll have cookies with golden edges, crispy yet tender centers, and chocolate chips that stay melty even after cooling.
The aroma alone will have everyone gathering in the kitchen, and the first bite delivers that perfect balance of sweetness and texture. These cookies are ideal for holidays, potlucks, or simply satisfying a chocolate craving.
For extra flair, sprinkle a pinch of flaky sea salt on top before baking, or add chopped nuts for texture. Store in an airtight container for up to 5 days, though they rarely last that long. Let’s get baking!
Ingredients for 9 inch chocolate chip cookie
Buttery, crispy edges and gooey centers start with these 10 perfect ingredients.
| Ingredient | Amount | Notes |
|---|---|---|
| Unsalted Butter 🧈 | 1 cup | Cold, cubed for even baking |
| Granulated White Sugar 🍚 | ¾ cup | Superfine preferred for smooth texture |
| Packed Brown Sugar 🍚 | ¾ cup | Light or dark, packed tightly |
| Large Eggs 🥚 | 2 whole | Room temperature for even mixing |
| Pure Vanilla Extract 🌿 | 2 tsp | High-quality, no alcohol needed |
| All-Purpose Flour 🌾 | 3 ½ cups | Sifted for light texture |
| Baking Soda 🧂 | ½ tsp | Freshly measured for lift |
| Diamond Crystal Kosher Salt 🧂 | ½ tsp | Fine grain preferred |
| Semi-Sweet Chocolate Chips 🍫 | 2 ½ cups | High-quality, 60% cacao ideal |
| Flaky Sea Salt 🧂 | 1 tsp | For finishing before baking |
The butter is non-negotiable—use European-style or high-fat American butter (like Land O’Lakes or Plugrah). I always grab mine from Whole Foods or Trader Joe’s when it’s on sale—it’s worth the splurge for that rich flavor. The sugars? Superfine sugar dissolves faster, but regular works too if you pulse it in a food processor. For chocolate chips, Ghirardelli or Enjoy Life brands melt beautifully, but any quality brand will do. Pro tip: keep your butter cold—cut it into cubes and refrigerate until you’re ready to mix.
No vanilla extract? Vanilla bean paste works too, or even a scraped vanilla bean. Short on chocolate chips? Chopped chocolate bars (dark, semi-sweet, or milk) give you more chunks. The flour matters—King Arthur or Gold Medal brands are my go-tos, but any all-purpose will work. For extra richness, swap half the white sugar for maple syrup—just reduce other liquids slightly. And if you’re feeling fancy, add 1/2 cup chopped walnuts or pecans for texture. Just don’t skip the baking soda—it’s what gives these cookies that perfect rise!
This dough needs 30 minutes of chilling—no exceptions. Pop it in the fridge while you prep your baking sheet. Cookies keep in an airtight container for 5 days, though they’ll disappear faster than that. For longer storage, freeze portions of dough on a tray, then transfer to a bag. Bake straight from frozen—just add 2-3 extra minutes. And if you’re making these ahead for a party? Warm them in the oven for 5 minutes before serving—they’ll taste fresh-baked!
Why You’ll Love This Recipe
- The secret’s in that perfect 1: 1 ratio of white and brown sugar—crisp edges, chewy centers, and pockets of gooey chocolate that make you close your eyes while biting. (Yes, even on a Tuesday night.)
- No Mixer Needed: I swear by this recipe when my hands are too full—just cream the butter and sugars with a wooden spoon until it’s just smooth. The dough comes together faster than you can say “chocolate chip,” and honestly? That’s the magic.
- Buttery Caramel Crunch: The secret’s in that perfect 1:1 ratio of white and brown sugar—crisp edges, chewy centers, and pockets of gooey chocolate that make you close your eyes while biting. (Yes, even on a Tuesday night.)
- Party in a Pan: One 9-inch pan means you’re not drowning in a cookie sheet disaster, and these bake up in 12-15 minutes. Freeze extras for last-minute guests or a midnight snack—no one will guess they’re not fresh from the oven.
Step-by-step instructions for 9 inch chocolate chip cookies
Here’s how to make giant, gooey cookies that’ll wow your guests—crisp edges and warm centers guaranteed!
👨🍳 Step 1: Cream the Butter and Sugars to Fluffy Perfection
In a stand mixer fitted with the paddle attachment, beat the 1 cup Unsalted Butter (cold and cubed) on medium speed until smooth and creamy, about 1 minute. Add the 0.75 cup Granulated White Sugar and 0.75 cup Packed Brown Sugar and beat for another 3-4 minutes until light and fluffy.
You’ll know it’s ready when the mixture nearly doubles in volume and looks pale and airy. This creaming step is crucial—it incorporates air that creates those beautiful crackly tops. If your butter isn’t cold enough, the cookies will spread too much. I like to press a cube—if it leaves a slight indent, it’s perfect.
👨🍳 Step 2: Add Eggs and Vanilla for Rich Flavor
Add the 2 whole Large Eggs one at a time, mixing on low speed for 30 seconds after each addition until fully incorporated. Scrape down the sides of the bowl to ensure even mixing, then add the 2 tsp Pure Vanilla Extract and mix for another 10 seconds.
The mixture will look slightly curdled at first, but don’t worry—it’ll come together when we add the dry ingredients. This is where the magic happens: the eggs add moisture and richness, while the vanilla infuses that warm, sweet aroma. If your eggs are cold, let them sit at room temperature for 10 minutes first for best results.
👨🍳 Step 3: Fold in Dry Ingredients and Chocolate
In a separate bowl, whisk together the 3.5 cups All-Purpose Flour, 0.5 tsp Baking Soda, and 0.5 tsp Diamond Crystal Kosher Salt. Add this mixture to the wet ingredients and mix on low speed for 30-45 seconds until just combined—you should still see a few flour streaks. Remove the bowl from the mixer and fold in the 2.5 cups Semi-Sweet Chocolate Chips by hand using a silicone spatula.
Here’s the thing—over-mixing develops gluten and makes cookies tough. We want a tender, chewy texture, so we stop mixing as soon as the flour disappears. The chocolate chips should be evenly distributed, with some larger chunks visible for that classic cookie look. If you’re using a mix of semi-sweet and dark chocolate chips, fold them in separately for deeper flavor layers.
⏰ Step 4: Chill the Dough (This Makes All the Difference!)
Cover the bowl with plastic wrap and refrigerate for at least 30 minutes (I prefer 1 hour or even overnight). Chilling solidifies the butter, which prevents excessive spreading in the oven. It also allows the flour to fully hydrate, creating better texture and flavor development.
Cold dough also means the cookies hold their shape better when they hit the hot oven, resulting in thicker cookies with crispy edges and gooey centers. This step is non-negotiable—I learned the hard way that skipping it leads to flat, cakey cookies. If you’re in a hurry, pop the dough in the freezer for 20 minutes instead.
🔥 Step 5: Bake to Golden, Gooey Perfection
Preheat your oven to 350°F and line a 9-inch round baking pan with parchment paper. Press the chilled dough into the pan, spreading it evenly to the edges. Sprinkle the 1 tsp Flaky Sea Salt evenly over the top—this enhances the chocolate flavor and adds a delightful contrast.
Bake for 25-30 minutes until the edges are golden brown and the center still looks slightly underdone. The cookies will continue cooking on the hot pan after you remove them from the oven. Let them cool in the pan for 10 minutes before transferring to a wire rack. For the ultimate experience, serve them warm with a glass of cold milk!
Pro Tips For Making 9 Inch Chocolate Chip Cookie
- USE COLD BUTTER: I learned this the hard way—soft butter makes these cookies spread like pancakes. Take the butter straight from the fridge, cut it into 1-inch cubes, and let it sit at room temp for exactly 30 minutes before mixing. No more, no less. You want it soft enough to cream easily, but still holding its shape when you scoop.
- MEASURE BROWN SUGAR RIGHT: Pack that brown sugar like you’re stuffing a Thanksgiving turkey. Use the back of a spoon to press it firmly into the measuring cup—don’t tap, don’t shake, just pack it down. Too much air means your cookies will be dry and crumbly, and nobody wants that. (Yes, even if you’re impatient like me.)
- BAKE TWO AT A TIME: Your oven’s hot spots are real, and ignoring them guarantees uneven cookies. Slide one 9-inch pan on the middle rack, the other on the upper rack, and swap their positions halfway through baking. This isn’t the prettiest method, but it’s the tastiest—golden edges, soft centers, no sad underbaked corners.
- REST THE DOUGH: Skip this, and your cookies will spread like wildfire. After mixing, cover the dough in the bowl and let it chill for at least 2 hours (overnight is better). The flour absorbs the liquid, the butter firms up, and you’ll end up with thick, chewy cookies that hold their shape. I know, I know—it’s tempting to bake right away. But trust the process.
Make-ahead tips for this 9 inch chocolate chip cookie
Dough Prep Ahead
Make the dough 1-2 days ahead and store it in an airtight container in the fridge. This gives the flavors time to meld beautifully, and the butter will firm up perfectly for thick cookies.
I like to press the dough into a 9-inch round shape before refrigerating—it makes baking easier later. Just let it sit at room temperature for 20-30 minutes before pressing into your pan. 🥮
Freezer-Friendly Dough
For even longer prep, freeze the dough in 1-inch-thick disks on a parchment-lined tray. Once firm (about 1 hour), transfer to a ziplock bag with parchment between layers. Thaw overnight in the fridge before baking.
I’ve found this method keeps the dough fresh for up to 3 months without losing texture. Just add 1-2 extra minutes to baking time when using frozen dough. ❄️
Baked Cookies Storage
Let cookies cool completely before storing in stackable airtight containers with parchment between layers. They’ll stay fresh for 5 days at room temperature. For longer storage, freeze individual cookies in a single layer on a tray, then transfer to a bag.
Reheat in the oven at 300°F for 5 minutes to restore that warm, gooey magic. 🔥
Make-Ahead Baking Hack
Pre-bake the cookies 1 day ahead and store them at room temperature. When ready to serve, warm them in the oven for 3-5 minutes at 350°F—this reactivates the chocolate and makes them taste freshly baked.
I love this trick for parties; guests won’t believe they’re not brand new! Pro tip: Sprinkle with flaky salt right before serving for extra flavor pop. 💫
Portion Control
Divide the dough into 12 equal portions (about 4 oz each) before chilling. This ensures consistent baking and prevents overcrowding in your pan. I use a kitchen scale for accuracy, but you can also eyeball it by rolling into 1.5-inch balls.
Keep portions covered in the fridge until ready to bake—this prevents them from drying out. 📏
Double Batch Tips
If doubling the recipe, use two 9-inch pans or a 13×9-inch pan for even baking. The dough will be thicker, so reduce baking time by 2-3 minutes.
For extra-large batches, freeze half the dough immediately after mixing—this saves fridge space and keeps your kitchen cool. Just remember to thaw completely before baking. 🍪
Nutrition facts
Frequently asked questions
Why does the recipe call for both white and brown sugar?
The combination creates the perfect balance of flavors and textures. The white sugar provides crispy edges and a cleaner sweetness, while the brown sugar adds moisture and caramel notes that keep the centers chewy. This classic pairing is what makes these cookies taste so irresistible—like a perfect hug of sweetness in every bite!
Can I use a different size pan for this recipe?
Yes, but you’ll need to adjust baking times. A 9-inch round pan gives the classic shape, but you can use a 9×13-inch pan for a sheet of cookies. Divide the dough into 12 equal portions and flatten them into 3-inch circles—they’ll bake faster, so watch closely after 12-15 minutes for golden edges.
What if my cookies spread too much?
This usually happens when the butter isn’t cold enough or the dough isn’t chilled properly. To fix it, make sure your butter is cold and cubed before creaming, and always chill the dough for at least 30 minutes. If you’re in a rush, freeze the dough for 20 minutes before baking. Preheating your oven thoroughly also helps!
Should I bake these cookies at a higher temperature?
Higher heat (375°F+) can cause the edges to burn before the centers set. Stick with 350°F for even baking—this ensures crispy edges and gooey centers. If you’re worried about browning too quickly, cover the pan loosely with foil after 15 minutes and check frequently.
Can I add mix-ins like nuts or dried fruit?
Fold in ½ cup chopped walnuts, pecans, or dried cranberries with the chocolate chips. For best results, toast nuts first to enhance their flavor. Just remember to reduce the chocolate chips by ¼ cup to maintain the right balance. Pro tip: Use dark chocolate chunks for extra richness!

- Baked Potatoes in Crock Pot Recipe: Buttery Interiors and Crispy Top Magic - November 1, 2026
- Braised Beef Short Ribs Recipe: Crock Pot Fall-Off-Bone Magic in 6 Hours - November 1, 2026
- Crock Pot Cocoa Recipe: Velvety Warmth With Hidden Spice Magic - November 1, 2026