
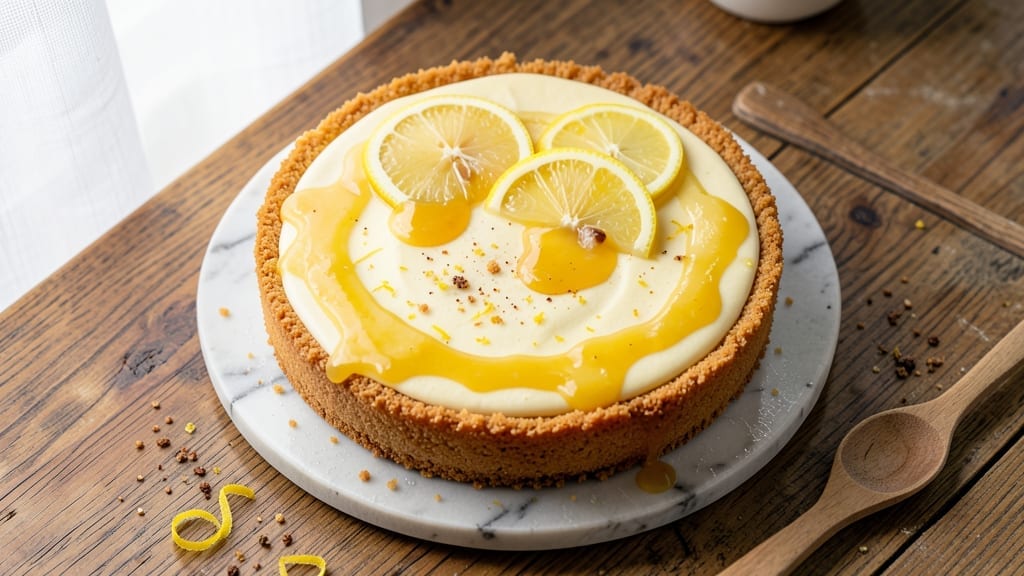
Mastering a 9-inch lemon cheesecake recipe with a zesty crust and silky filling is the ultimate dessert project—one that delivers restaurant-quality results in your own kitchen. The secret lies in balancing tart lemon curd with creamy cheesecake, creating a texture that’s both rich and refreshing.
This recipe combines a buttery graham cracker crust with a perfectly set lemon filling that’s light yet dense, topped with a glossy lemon glaze for that professional finish.
The baking process uses a water bath to prevent cracks, while precise ingredient ratios ensure a smooth, jiggle-free center every time. With just 30 minutes of prep and 1 hour 15 minutes of baking, you’ll have a showstopping dessert that’s perfect for holidays, dinner parties, or treating yourself.
The lemon flavor shines through without overpowering, making it universally appealing—even to those who think they don’t like citrus desserts.
What sets this recipe apart is the foolproof technique for avoiding common cheesecake pitfalls like cracks or a sunken center. The crust gets pre-baked to perfection, the filling bakes in a water bath for even heat distribution, and the cooling process is carefully timed.
By the time you slice into it, you’ll have a dessert with a crisp crust, velvety filling, and a bright lemon tang that keeps every bite exciting.
Serve with fresh berries, whipped cream, or a sprinkle of toasted nuts for added texture. This cheesecake keeps well in the fridge for up to 5 days, making it ideal for meal prep or gifting.
Whether you’re a baking novice or a seasoned pro, this recipe delivers consistent, impressive results with minimal fuss.
Ingredients for 9 inch lemon cheesecake
Restaurant-quality lemon cheesecake starts with these precise ingredients for a zesty crust and velvety filling.
| Ingredient | Amount | Notes |
|---|---|---|
| Graham Crackers 🍪 | 2 ½ cups | Crushed into fine crumbs |
| Unsalted Butter 🧈 | ½ cup | Melted, full-fat preferred |
| Granulated Sugar 🍚 | ½ cup | For crust sweetness |
| Large Eggs 🥚 | 4 whole | Room temperature for blending |
| Cream Cheese 🧀 | 32 oz | Full-fat, room temperature |
| Sour Cream 🥛 | ½ cup | Full-fat for creaminess |
| Lemon Juice 🍋 | ¾ cup | Freshly squeezed, strained |
| Lemon Zest 🍋 | ½ cup | Fine, from 2-3 lemons |
| Granulated Sugar 🍚 | 1 ½ cups | For filling sweetness |
| Cornstarch 🌾 | 2 tbsp | For smooth texture |
| Salt 🧂 | ½ tsp | Fine sea salt |
| Powdered Sugar 🍚 | 1 cup | For lemon glaze |
| Heavy Cream 🥛 | ¼ cup | For glaze consistency |
| Lemon Extract 🍋 | 1 tsp | Optional for extra lemon flavor |
The graham crackers set the foundation—Honey Maid or Keebler Original work best for that buttery flavor. Butter should be melted just until liquid (microwave 40 seconds), not fully cooked. For the crust, pulse the crackers in a food processor until they’re fine crumbs, but not powder. The cream cheese must be room temperature (about 1 hour out of the fridge) to blend smoothly. If you’re in a rush, microwave it for 30 seconds in 10-second bursts. The lemon juice should come from fresh lemons—bottled juice lacks the bright acidity that balances the richness.
No graham crackers? Digestive biscuits or vanilla wafers work in a pinch, but the flavor won’t be identical. Substituting low-fat cream cheese or sour cream will make the filling less luscious, but it’s doable if that’s what you have. For the lemon juice, bottled lemon juice with no added sugar is better than skipping it entirely, but fresh is non-negotiable for that professional tang. The powdered sugar in the glaze can be swapped for confectioners’ sugar if you don’t have it, but sift it first for a smoother finish. If you’re avoiding dairy, vegan cream cheese and heavy cream alternatives exist, but texture will differ significantly.
Prevent cracks by baking the crust for 10 minutes before adding the filling. The water bath is critical—fill a deep baking dish with hot water halfway up the springform pan. Cool the cheesecake in the oven with the door slightly ajar for 1 hour after baking to prevent sudden temperature shifts. Store in an airtight container in the fridge for up to 5 days. The glaze can be made a day ahead and reheated gently before drizzling. For gifting, wrap individual slices in parchment paper and secure with twine—looks elegant and keeps fresh for 3 days at room temperature.
Why You’ll Love This Recipe
- No Crust Fuss: I crush the graham crackers right in the pan with melted butter—no food processor, no stress. Just 10 minutes of hands-on time, and the crunchy bottom layer handles itself.
- Zesty Creamy Magic: That tangy lemon curd swirled into the cream cheese? It’s the kind of flavor that makes you pause mid-bite. The eggs and sugar blend so smoothly, you’d never guess it’s foolproof.
- Party in a Pan: Slice it for potlucks, serve it at brunch, or pack it for a picnic—this single 9-inch cake feeds 8 to 10 without leftovers feeling like a chore. (Honestly, it disappears fast.)
- Budget-Friendly Luxury: Cream cheese and eggs stretch further than you’d think, and graham crackers? Always in my pantry. For under $10, I get a dessert that tastes like it cost twice as much.
Step-by-step instructions for lemon cheesecake
Here’s the method—crisp crust, silky filling, and vibrant lemon flavor every time.
Prepare the Crust
Preheat your oven to 325°F and grease a 9-inch springform pan thoroughly with butter. This prevents sticking and makes removal easier later. In a food processor, pulse the 2.5 cups graham crackers until you achieve fine crumbs—no flour should remain. Transfer these to a bowl and mix with the 0.5 cup melted unsalted butter and 0.5 cup granulated sugar.
Press the mixture evenly into the bottom of your prepared pan, creating a firm base. Use a glass to compact it fully, pressing down until the crust is about ¼-inch thick. Bake for 10 minutes—this pre-baking step ensures the crust stays crispy rather than soggy. Remove from the oven and let it cool while you prepare the filling.
Mix the Filling Ingredients
While the crust cools, take the 32 oz cream cheese out of the refrigerator and let it soften at room temperature for 30 minutes. This prevents lumps in your batter. In a large mixing bowl, beat the cream cheese with an electric mixer until completely smooth and creamy—no streaks should remain. Add the 4 whole large eggs, one at a time, mixing well after each addition to ensure proper incorporation.
In a separate bowl, whisk together the 0.5 cup sour cream, 0.75 cup lemon juice, 0.5 cup lemon zest, 1.5 cups granulated sugar, 2 tbsp cornstarch, and 0.5 tsp salt. Gradually pour this mixture into the cream cheese while mixing on low speed. Finally, add the 1 tsp lemon extract (if using) and mix until fully combined. The batter should be smooth with a bright yellow hue.
Bake the Cheesecake
Pour the filling over the cooled crust, spreading it evenly with a spatula. Tap the pan gently on the counter to release any air bubbles that may have formed. Place the pan in a water bath—this means setting it inside a larger roasting pan filled with hot water (about halfway up the sides of the springform pan). Bake at 325°F for 50-55 minutes.
The cheesecake is done when the edges are set but the center still has a slight wobble—it will continue to firm up as it cools. Avoid opening the oven door during baking to prevent temperature fluctuations that could cause cracking. Once baked, turn off the oven, crack the door open, and let the cheesecake cool inside for 30 minutes before removing it completely.
Prepare the Lemon Glaze
While the cheesecake cools, prepare the glaze by whisking together the 1 cup powdered sugar, 0.25 cup heavy cream, and 1 tbsp lemon juice (from the remaining lemon juice) in a small bowl. The glaze should be smooth and pourable—add a splash more cream if needed to achieve the right consistency. This glaze adds a bright, tangy finish that complements the rich filling.
Let the cheesecake cool completely at room temperature before removing the springform ring. Once fully cooled, spread the glaze evenly over the top using the back of a spoon. Chill in the refrigerator for at least 4 hours or overnight to allow the flavors to meld and the texture to set properly. Serve slices at room temperature for the best texture and flavor balance.
Pro Tips For Making 9 Inch Lemon Cheesecake
- Chill the Cream Cheese: Take your cream cheese out of the fridge at least 2 hours before mixing—no, not “room temp,” but soft enough to press with a finger. I learned this the hard way when my first batch turned out grainy because I rushed it. (Yes, even if you’re impatient like me.)
- Pulse the Crumbs: Pulse your graham crackers in a food processor until they’re fine but not powder—think sand, not flour. Over-processing turns them into glue, and under-processing means a crumbly crust. A quick 8-10 seconds does the trick.
- Water Bath, No Foil: Wrap your springform pan in heavy-duty foil before adding the water bath—no foil touching the pan. The foil prevents leaks and makes cleanup a breeze. (Your future self will thank you when you’re not scrubbing cheesecake off the oven floor.)
- Whip Eggs Last: Add the eggs after the cream cheese and sugar are fully blended—this keeps the batter smooth. Beat them in slowly at low speed to avoid air pockets. I was skeptical until I tried it; the texture is noticeably lighter.
Health benefits of these flavors
Lemon’s Vitamin Boost
This cheesecake packs a surprising nutritional punch from its lemon juice and zest, which are rich in vitamin C—a powerful antioxidant that supports your immune system and skin health.
A single slice delivers about 15% of your daily vitamin C needs, helping with collagen production and iron absorption. The lemon zest also contains small amounts of vitamin A and potassium, making this dessert more than just a sweet treat. 💛
Protein Powerhouse
While cheesecake isn’t typically known for its protein content, this recipe includes cream cheese, sour cream, and eggs, providing a solid 10-12 grams of protein per slice.
The eggs contribute all nine essential amino acids, while the cream cheese adds a satisfying richness without the heaviness of traditional cheesecakes. It’s a great way to add protein to your dessert without sacrificing flavor.
Healthy Fat Balance
The unsalted butter and cream cheese in this recipe offer heart-healthy fats, including monounsaturated and polyunsaturated fats, which support brain function and reduce inflammation. The sour cream adds probiotic benefits, aiding digestion.
While this dessert is indulgent, the fats are balanced with the lemon’s natural acidity, preventing blood sugar spikes better than many other sweets. 🥛
Low-Calorie Brightness
Compared to traditional cheesecakes, this lemon version is lighter due to the lemon juice and zest replacing some of the sugar. The cornstarch in the filling helps create a smooth texture without excessive heaviness, while the glaze adds just enough sweetness without overpowering.
A single slice clocks in at around 350-400 calories, making it a guilt-free treat when enjoyed in moderation.
Digestive Aid
The lemon juice in this cheesecake acts as a natural digestive aid, stimulating stomach acid production and promoting healthy digestion. The sour cream also contains lactic acid, which can help with nutrient absorption.
While this dessert is rich, the citrus elements work together to create a lighter, easier-to-digest option compared to many other baked goods. 🌟
Antioxidant Richness
The lemon zest is packed with flavonoids and polyphenols, antioxidants that combat oxidative stress in your body. These compounds are linked to reduced inflammation and improved heart health.
The cornstarch also adds a subtle nutritional benefit by helping stabilize blood sugar levels after consumption, making this dessert a slightly healthier choice than many others. 💪
Nutrition facts
Frequently asked questions
Why does my lemon cheesecake crack on top?
Cracking usually happens from sudden temperature changes or overbaking. To prevent it, let the cheesecake cool slowly in the oven with the door slightly open after baking. Also, avoid opening the oven door during the 50-55 minute baking time. The water bath helps, but rapid cooling is the main culprit.
Can I make this cheesecake in a different pan size?
Yes, but you’ll need to adjust baking time. For a 6-inch pan, bake for 35-40 minutes (water bath still required), while an 8-inch pan needs 45-50 minutes. The crust-to-filling ratio should stay the same—just scale ingredients proportionally. Always check doneness by looking for set edges with a slight jiggle in the center.
How do I store leftovers without drying out the crust?
Keep it in an airtight container in the fridge for up to 5 days. For serving, let slices sit at room temperature for 10-15 minutes before eating—the crust stays crispy this way. To reheat, microwave individual slices for 10-15 seconds (though texture will be slightly softer).
What’s the best way to serve this lemon cheesecake?
Garnish with fresh berries (raspberries or blueberries work beautifully) and a dollop of whipped cream for contrast. For extra flair, add toasted almond slices or a sprinkle of powdered sugar. Serve chilled for the best texture, and consider pairing with a glass of sparkling water with lemon or a light white wine.
Can I make this recipe dairy-free?
You can substitute with dairy-free cream cheese and sour cream, but texture will differ. Use vegan butter for the crust and coconut cream for the glaze. The lemon flavor will still shine, but expect a slightly denser filling. Test with a small batch first to adjust sweetness—dairy-free versions often need extra sugar.

- 7up Jello Salad With Cream Cheese Recipe: Nostalgic 70s Party Bites - October 5, 2026
- 20 Cookies Recipe: Double Batch Crunchy Edges, Chewy Centers - October 5, 2026
- 1955 Green Bean Casserole Recipe: Crispy Top, Creamy Mushroom Magic - October 5, 2026