
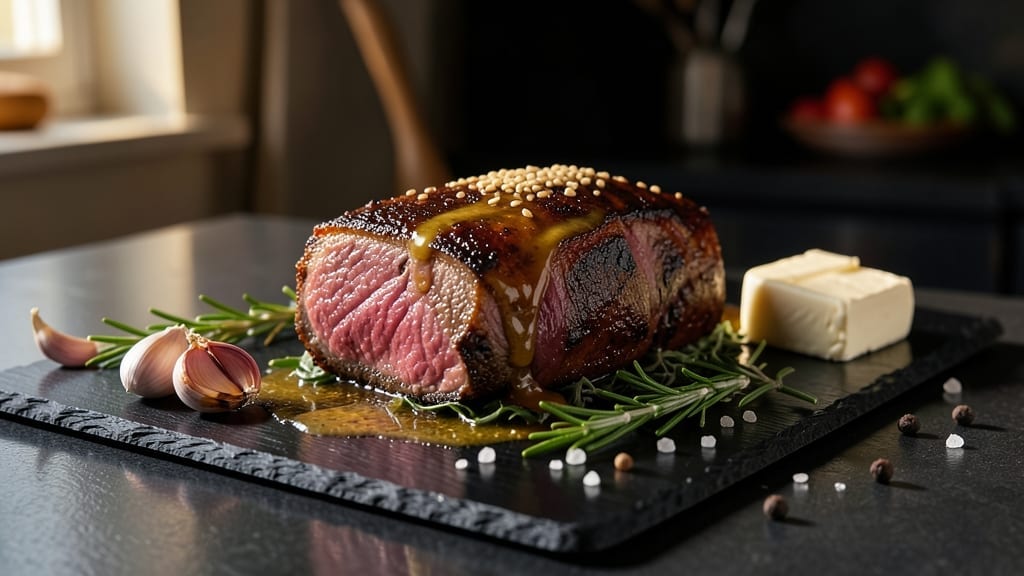
Cooking a 9-lb beef tenderloin to perfection requires precision—this recipe delivers a juicy pink heart every time, guaranteed. The secret lies in careful preparation, controlled heat, and proper resting, ensuring a tender, restaurant-quality result without drying out the center.
For a crowd or special occasion, this method transforms a simple cut into an unforgettable centerpiece.
Start with a dry brine (salt the tenderloin 24 hours ahead) to enhance tenderness, then sear it in a 400°F oven for a flavorful crust before finishing at 250°F to reach 125–130°F internal for medium-rare.
A meat thermometer is non-negotiable—insert it into the thickest part to avoid overcooking. The key is patience: slow cooking ensures even doneness, while resting for 20–30 minutes locks in juices.
Once sliced, the tenderloin reveals a perfectly pink center with a caramelized exterior, ready to be served with classic sides like garlic mashed potatoes or a red wine reduction sauce.
The presentation is elegant yet approachable, making it ideal for gatherings where technique matters as much as taste. This isn’t just a recipe—it’s a foolproof method for mastering a large cut.
For extra confidence, truss the tenderloin with kitchen twine to maintain shape, and let it rest on a wire rack to avoid soggy slices. Pair with roasted asparagus or a balsamic glaze for a complete, high-end meal. The result? A tender, juicy masterpiece that impresses even the most discerning guests.
Ingredients for 9 lb beef tenderloin
Twelve essential components for a restaurant-quality 9-lb beef tenderloin centerpiece.
| Ingredient | Amount | Notes |
|---|---|---|
| Beef Tenderloin 🥩 | 9 lb | Center-cut, trimmed of silver skin |
| Kosher Salt 🧂 | 2 tbsp | Diamond Crystal preferred for precision |
| Freshly Ground Black Pepper 🌶️ | 1 tbsp | Coarsely cracked for texture |
| Unsalted Butter 🧈 | ½ cup | Cold, cut into 1-inch cubes |
| Garlic Cloves 🧄 | 8 cloves | Smashed, skin-on for flavor |
| Fresh Rosemary 🌿 | ½ cup | Needle leaves only, finely chopped |
| Fresh Thyme 🌿 | ¼ cup | Leaves only, stems removed |
| Extra-Virgin Olive Oil 🫒 | ¼ cup | High-quality, fruity variety |
| Kitchen Twine 🧵 | 1 package | Butcher's twine, 18-inch length |
| Meat Thermometer 🌡️ | 1 whole | Instant-read, probe-style |
| Wire Rack 🍳 | 1 whole | For elevated resting |
| Red Wine Reduction Sauce 🍷 | 2 cups | Homemade or high-quality store-bought |
The beef tenderloin demands premium quality—center-cut with visible marbling is non-negotiable. Source from a trusted butcher or specialty market like D’Artagnan or Snake River Farms for guaranteed tenderness. Look for a roast with even grain and minimal connective tissue. Trim the silver skin thoroughly before cooking, as it can dry out the exterior. The 9-pound size is ideal for a crowd, yielding about 12 generous servings. If your butcher doesn’t carry this exact weight, opt for the closest available—just adjust your oven time accordingly.
Salt is your first defense against dryness—Diamond Crystal kosher salt dissolves cleanly and enhances flavor without overpowering. For the butter compound, use European-style unsalted butter (like Plugrá) for higher fat content. Fresh herbs are critical: organic rosemary and thyme from the grocery store’s produce section work, but avoid wilting stems. No fresh herbs? Dried thyme at one-third the amount is acceptable, but fresh delivers superior aroma. The olive oil should be extra-virgin with a peppery finish—avoid mild supermarket brands. For the wine reduction, Cabernet Sauvignon or Merlot works best, but any bold red will suffice.
Prep the tenderloin 24 hours ahead by applying the dry brine—this ensures maximum tenderness. Store the raw roast on a wire rack in the fridge to prevent sogginess. The butter compound can be made 1 day ahead and refrigerated. When ready to cook, bring the meat and butter mixture to room temperature (30 minutes out of the fridge) for even cooking. Leftovers? Slice and refrigerate in an airtight container for 3 days maximum—the texture changes after that. For longer storage, vacuum-seal portions and freeze for up to 3 months.
Why You’ll Love This Recipe
- Foolproof Roast: I swear by this method—just salt, pepper, butter, and garlic. No fancy rubs, no stress. The tenderloin practically cooks itself while you sip wine and pretend you’re a chef.
- Butter-Garlic Magic: That melted butter basting? It turns every bite into pure, melt-in-your-mouth luxury. The garlic cloves sizzling in the pan? Instant aroma that makes your whole house smell like a steakhouse.
- Leftovers for Days: A 9 lb roast means dinner for tonight and lunches next week. Slice it thin, toss with a little pan sauce, and suddenly you’ve got effortless, restaurant-quality meals without the takeout cost.
- Weekend Showstopper: This is the roast I pull out for birthdays, holidays, or when my in-laws visit. It’s impressive enough to feel special, but simple enough that I’m not sweating over it. (Yes, even on a Tuesday night.)
Step-by-step instructions for perfectly cooked 9-Lb beef tenderloin
Master this method and you’ll achieve a juicy pink center with a beautifully seared exterior every time.
Prepare the Beef Tenderloin for Even Cooking
Begin by removing the beef tenderloin from the refrigerator and patting it dry completely with paper towels. This step is critical for achieving that perfect crust later—any moisture left on the surface will create steam instead of browning. I like to work in a cool room to prevent the meat from warming too quickly, which can lead to uneven cooking.
Next, position the tenderloin on a cutting board with the fat cap facing up. Using the kitchen twine, tie the meat in 3-inch sections along its length. This prevents the tenderloin from curling during cooking and ensures even doneness throughout. I find that tying at these intervals creates uniform sections that cook at the same rate, eliminating any potential for dry spots.
Create the Herb Butter Rub
In a medium bowl, combine the 0.5 cup unsalted butter, 0.5 cup fresh rosemary, 0.25 cup fresh thyme, 8 smashed garlic cloves, 2 tbsp kosher salt, and 1 tbsp freshly ground black pepper. Using your hands, work the mixture together until the butter softens slightly and the herbs are evenly distributed. The butter should take on a vibrant green hue from the herbs and a rich aroma that fills your kitchen.
Once the herb butter is well incorporated, rub it generously over the entire surface of the tenderloin, pressing firmly to ensure the mixture adheres. Don’t be shy—this is what will create that incredible flavor crust. I like to let the seasoned tenderloin rest at room temperature for 30 minutes before cooking, allowing the seasonings to penetrate the outer layer of meat.
Sear the Tenderloin for Maximum Flavor
Preheat your oven to 450°F and heat a large oven-safe skillet over medium-high heat. Add 0.25 cup extra-virgin olive oil to the skillet and let it get very hot—you should see gentle smoke begin to rise. Place the tenderloin in the skillet and sear it on all sides until you achieve a deep golden brown color, about 4-5 minutes per side. This step is crucial for developing that beautiful crust that locks in juices.
Once the tenderloin is well-seared, transfer the skillet to the preheated oven. Roast the beef for 15 minutes to begin cooking the outer layers. This initial high-heat roasting creates a flavorful crust while jumpstarting the cooking process. After 15 minutes, reduce the oven temperature to 325°F for the remainder of the cooking time.
Cook to Perfect Medium-Rare Doneness
Continue roasting the tenderloin in the 325°F oven until the internal temperature reaches 125°F at its thickest point, measured with your meat thermometer. This should take approximately 1 hour to 1 hour 15 minutes, depending on your oven’s accuracy. I recommend checking the temperature after 45 minutes of cooking, as ovens can vary significantly in heat distribution.
During this time, resist the urge to open the oven door. Each time you do, you lose valuable heat and moisture, potentially extending your cook time. The tenderloin is done when it reaches 125°F internally—this gives you that perfect medium-rare doneness with a juicy pink center that’s guaranteed to impress.
Rest and Serve with Red Wine Reduction
Once the tenderloin reaches 125°F, remove it from the oven and transfer it to a wire rack set over a baking sheet. Let it rest for 15-20 minutes before slicing. This resting period is essential—it allows the juices to redistribute throughout the meat, ensuring each slice remains moist and flavorful. I know it’s tempting to cut into it immediately, but patience here makes all the difference.
While the tenderloin rests, warm the 2 cups red wine reduction sauce in a saucepan over low heat. Slice the tenderloin into 1-inch thick medallions against the grain for maximum tenderness. Serve immediately with the warm red wine reduction sauce spooned generously over each slice. The combination of the herb-crusted exterior, juicy pink center, and rich wine sauce creates a dining experience that’s truly memorable.
Pro Tips For Making 9 Lb Beef Tenderloin
- SEAR UNTIL BROWN: That first sear isn’t just for looks—it’s the flavor foundation. For a 9-pound tenderloin, work in batches if your pan isn’t big enough, but don’t rush. Three minutes per side with a screaming-hot pan and a heavy skillet guarantees that crust. (Yes, even if you’re impatient like me.)
- SALT THE GARLIC: I used to just minced garlic and butter into the roast, but seasoning the garlic first makes a real difference. Toss those cloves with a pinch of kosher salt and a crack of black pepper before melting the butter—it amplifies their flavor and prevents them from disappearing into the meat.
- DON’T OVERCOOK THE CORE: Tenderloin’s forgiving, but a 9-pounder needs precision. Use a meat thermometer and pull it at 120°F for rare, 125°F for medium-rare—no guessing. The center will rise another 5°F while resting, so resist the urge to check it early. (I’ve ruined a roast by peeking too soon.)
- REST IT RIGHT: Tent loosely with foil and let it rest for at least 45 minutes—no cutting into it early, no rushing to slice. The juices redistribute, and the meat firms up enough to slice cleanly. (Trust me, your knife will thank you.)
Make-ahead tips for this recipe
Prep Ahead Strategy
Start your dry brine 24 hours ahead—this is the secret to tender, juicy meat. Pat the 9-lb tenderloin dry, then generously coat it with 2 tbsp kosher salt and refrigerate uncovered on a wire rack.
This step transforms the texture, making slicing effortless later. Store the seasoned meat in the fridge until ready to cook—no need to rinse before searing. 💪
Herb Butter Prep
Make the herb butter compound 1 day ahead and refrigerate in an airtight container. Combine 0.5 cup cold butter, 0.5 cup chopped rosemary, 0.25 cup thyme, 8 smashed garlic cloves, 2 tbsp salt, and 1 tbsp pepper.
The flavors meld beautifully overnight, intensifying the crust. Let the mixture sit at room temperature for 30 minutes before applying to the tenderloin for best results.
Sauce Prep
Prepare your red wine reduction sauce the day before and store it in the fridge. This allows the flavors to deepen and simplifies your cooking day. Reheat gently in a saucepan over low heat before serving—never boil, or it may curdle.
I like to add a splash of beef broth if it thickens too much during storage. 🍷
Oven Prep
Preheat your oven to 450°F 30 minutes before cooking to ensure even heat distribution. Place your oven rack in the middle position—this prevents hot spots that can dry out the meat.
If using an oven thermometer, verify the actual temperature matches the setting. Most home ovens run 25°F hotter than displayed, so adjust accordingly.
Resting Timeline
Plan your serving schedule around the 20-30 minute rest—this is non-negotiable for juicy slices.
Set a timer when you remove the tenderloin from the oven and use this time to: – Warm dinner plates – Reheat side dishes – Prepare garnishes (like fresh thyme sprigs) – Pour wine for guests This ensures everything’s ready when you slice into that perfect pink center. ⏰
Make-Ahead Slices
For parties where timing is tricky, slice the tenderloin after resting and store in an airtight container for up to 2 days. Reheat slices in a 350°F oven for 10-12 minutes on a wire rack to maintain crispness.
For freezing, vacuum-seal portions and thaw overnight in the fridge—never at room temperature. This method preserves texture far better than plastic wrap.
Nutrition facts
Frequently asked questions
How do I know if my 9-lb tenderloin is cooked to medium-rare?
Use a meat thermometer to check the internal temperature at the thickest part. For medium-rare, aim for 125–130°F. The center should feel slightly springy when pressed gently with your finger—like pressing a firm mattress. Never rely on color alone, as ovens vary widely in heat distribution.
Can I cook a 9-lb tenderloin without trussing it?
Technically yes, but trussing ensures even cooking and prevents curling. Without twine, the ends may cook faster, leaving the center underdone. If skipping twine, rotate the tenderloin halfway through cooking to promote even heat penetration. For best results, always use kitchen twine in 3-inch intervals.
What’s the best way to reheat leftover tenderloin slices?
Reheat slices in a 350°F oven for 10–12 minutes on a wire rack to maintain crispness. Never microwave—it turns the exterior soggy. For extra flavor, brush slices with melted butter and a pinch of salt before reheating. Slices can be stored in an airtight container for 2–3 days post-cooking.
Why does my tenderloin turn out dry even when cooked to 125°F?
Overworking the meat or not resting properly are common culprits. Always let the tenderloin rest 20–30 minutes before slicing—this redistributes juices. Also, avoid cutting into the meat immediately after cooking. If your oven runs hot, reduce the temperature by 25°F and use an oven thermometer to verify accuracy.
How much red wine reduction sauce should I make for 12 servings?
Start with 2 cups of sauce—this yields about 2 tablespoons per serving. For a richer flavor, reduce the sauce to 1 cup (simmering until thickened) and serve alongside. If you prefer a lighter touch, double the sauce to 4 cups and drizzle lightly over each slice. Always taste and adjust seasoning before serving.

- 2 Large Banana Bread Recipe: Double Batch With Moist Crumb and Walnut Streusel - September 30, 2026
- 7 Organ Soup Recipe: Hearty Immune-Boosting Elixir in One Pot - September 30, 2026
- 321 Sauce Recipe: Smoky Tomato Base With Spice-Layered Depth - September 30, 2026