
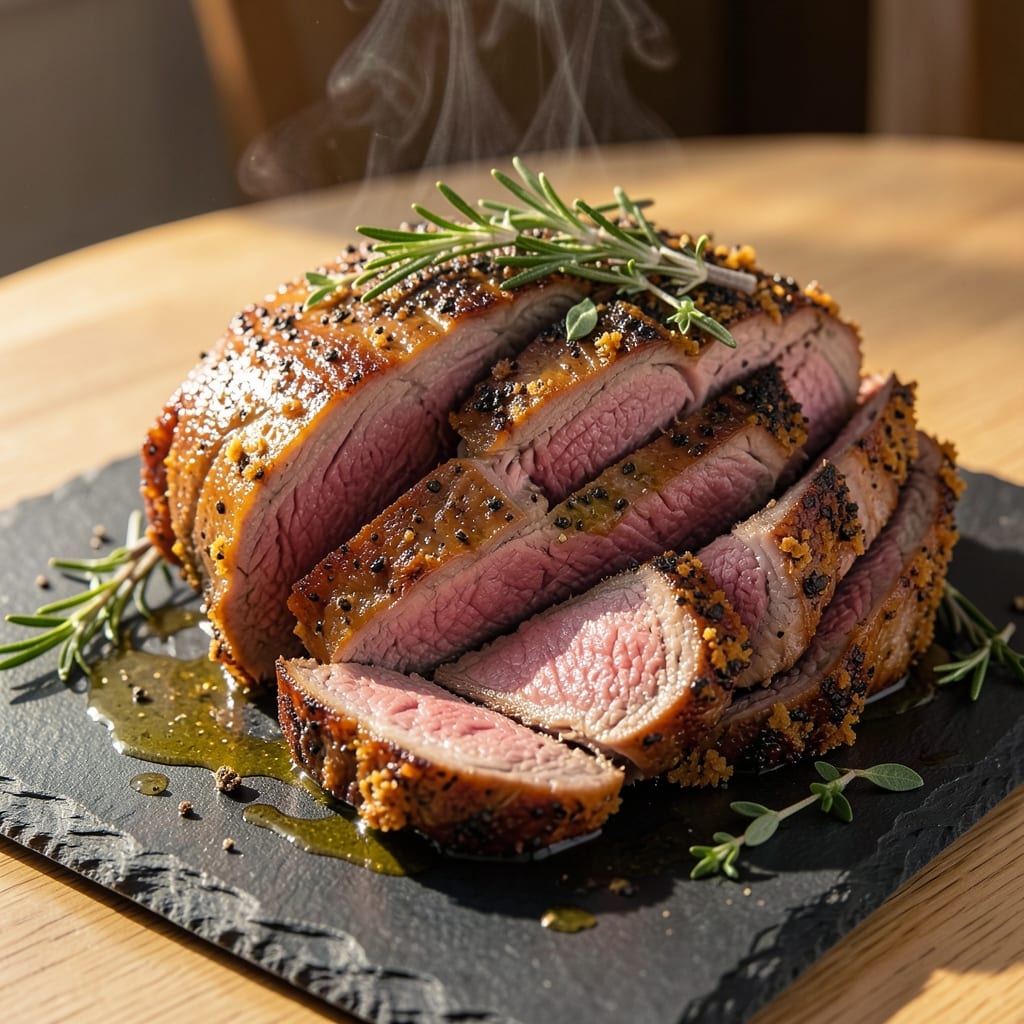
A 9-lb ribeye roast cooked to perfection delivers melt-in-your-mouth tenderness that turns every dinner into a special occasion. This reverse-sear method ensures a juicy core while creating a flavorful crust, transforming a simple roast into a showstopper.
The secret lies in precise temperature control and resting techniques that keep the meat tender from edge to edge.
Professional chefs rely on this method because it eliminates guesswork—no more dry edges or overcooked centers. Start by seasoning generously with kosher salt and black pepper, then let the roast rest uncovered in the fridge overnight.
This step enhances flavor penetration and ensures even cooking. The reverse-sear process (low oven first, high heat finish) guarantees a perfect internal temperature of 125°F before searing.
What you’ll achieve is a roast with a caramelized crust that locks in juices while maintaining a tender, pink center. The reverse-sear technique creates depth of flavor and texture that’s impossible with traditional methods. Serve with classic sides like roasted garlic mashed potatoes or grilled asparagus to complete the meal.
This recipe is designed for large gatherings or holiday feasts, where every slice delivers restaurant-quality results. The key to success is patience—letting the roast rest before carving ensures juices redistribute for maximum tenderness. Once you master this method, you’ll never buy pre-cooked roasts again.
Ingredients for 9 lb ribeye roast
Precision-cut ribeye, aromatic herbs, and careful seasoning unlock this restaurant-quality roast’s juicy secrets.
| Ingredient | Amount | Notes |
|---|---|---|
| Ribeye Roast (Bone-In) 🥩 | 9 lb | Center-cut, 1.5-inch thickness preferred |
| Kosher Salt 🧂 | ½ cup | Diamond Crystal preferred, freshly ground |
| Freshly Ground Black Pepper 🌶️ | 2 tbsp | Coarse grind for texture |
| Extra-Virgin Olive Oil 🫒 | 2 tbsp | High-quality, fruity variety |
| Fresh Rosemary 🌿 | ¼ cup | Finely chopped, stems removed |
| Fresh Thyme 🌿 | ⅛ cup | Leaves only, finely chopped |
| Garlic Cloves 🧄 | 8 cloves | Smash flat for even seasoning |
| Butter (Unsalted) 🧈 | ½ cup | Cold, cubed for searing |
| Beef Tallow or Duck Fat 🥩 | ¼ cup | For high-heat sear, optional |
| Vegetable Oil 🫒 | ½ cup | High smoke point for searing |
| Red Wine (Optional) 🍷 | 1 cup | Bold variety like Cabernet Sauvignon |
| Beef Bone Broth 🥄 | 1 cup | Homemade preferred, low-sodium |
| Balsamic Vinegar 🍶 | 1 tbsp | For deglazing, aged variety |
The ribeye roast is non-negotiable here—center-cut with 1.5-inch thickness ensures even cooking. Source from a reputable butcher or Whole Foods for optimal marbling. Look for vibrant color and avoid any with grayish edges. The 9-lb size is perfect for 12 servings, but adjust oven time if your roast varies. Fresh herbs elevate flavor, so Trader Joe’s or local farmers markets are ideal for rosemary and thyme. If using frozen herbs, thaw and pat dry before chopping. The garlic cloves should be fresh and plump, not shriveled or sprouting.
No extra-virgin olive oil? Avocado oil works equally well for searing. Substitute beef tallow with duck fat or bacon fat for added richness. Running out of red wine? Beef broth with a splash of balsamic creates depth without alcohol. Fresh rosemary unavailable? Dried rosemary at one-third the amount suffices, but toast it first in a dry pan for 30 seconds to intensify flavor. The kosher salt should be Diamond Crystal if possible—it dissolves more cleanly than table salt. For a vegetarian-friendly version, replace beef tallow with coconut oil and use vegetable broth instead of beef broth.
The roast must rest uncovered on a wire rack for 30-45 minutes after cooking to maintain temperature and tenderness. Store leftovers in an airtight container for up to 5 days in the fridge, or freeze for 3 months for future meals. Portion slices into single servings before freezing for easy reheating. The crust is delicate—reheat gently in the oven at 200°F to preserve texture. For large gatherings, prepare the roast 2 days ahead and reheat slowly to maintain moisture. Always bring the roast to room temperature before cooking for even results.
Why You’ll Love This Recipe
- Let’s be real: most roasts turn to shoe leather by day three. Not this one. The fat keeps it juicy, and the rosemary stays bright. I’ve reheated slices in a skillet with a splash of broth—instant restaurant-quality steak. Plus, it stretches across meals so you’re not staring at an empty fridge after dinner.
- Five-Ingredient Magic: I swear, this roast only needs salt, pepper, oil, and rosemary—plus the beef. That’s it. No fancy blends, no stressing over herbs you don’t own. Just slap those five things on that gorgeous bone-in ribeye, and let it do its thing. Honestly, the simplicity is what makes it foolproof every time.
- Crispy-Perfect Outside: Between us, that bone-in cut is a game-changer. The bone renders fat that bastes the meat while the crust gets glorious—deep caramelized edges with a rosemary-kissed aroma that hits you before you even slice. It’s the kind of flavor that makes people ask, “What’d you do to this?”
- Sunday Dinner Hero: This isn’t just a roast—it’s the centerpiece for game day, holiday leftovers, or when your in-laws show up unannounced. (Yes, even on a Tuesday night.) Slice it thin for sandwiches, dice it for tacos, or serve it whole with mashed potatoes. It’s the one dish that always feels special without trying too hard.
Step-by-step instructions for 9-Lb ribeye roast with reverse-sear technique
Master this professional method for a roast with a perfectly seared crust and a juicy, tender core.
Prepare the Roast with Dry Brine for Maximum Flavor
Remove the 9 lb ribeye roast from packaging and pat it completely dry with paper towels. This step is critical—any moisture on the surface will prevent proper browning. Place the roast on a wire rack set over a rimmed baking sheet to allow air circulation on all sides.
In a small bowl, combine the 0.5 cup kosher salt and 2 tbsp freshly ground black pepper. Rub this mixture all over the roast, pressing firmly to create a crust. Then, in another bowl, mix the 0.25 cup finely chopped fresh rosemary, 0.125 cup fresh thyme leaves, and the 8 smashed garlic cloves. Spread this herb mixture evenly over the salted surface, pressing gently so it adheres. Place the roast uncovered in the refrigerator for 24 hours. This dry brine process ensures deep flavor penetration and proper moisture distribution.
Low-Temperature Roast to Perfect Internal Temperature
Preheat your oven to 275°F using convection if available. Remove the roast from the refrigerator and let it sit at room temperature for 30 minutes before roasting. Place the roast on the wire rack in the preheated oven and roast for 4 to 4.5 hours, until the internal temperature reaches 115°F at the thickest part of the roast (use a meat thermometer). The roast should feel slightly springy when pressed gently with a finger.
During this time, the roast will develop a beautiful pink center while the exterior remains pale. This low-temperature cooking method is the secret to maintaining juiciness in the core while preparing for the final sear. Avoid opening the oven door during this process—each time you do, you add valuable time to the cooking process.
Prepare the Searing Station for Maximum Crust Development
While the roast cooks, prepare your searing station. In a large oven-safe skillet or cast-iron pan, combine the 0.5 cup vegetable oil, 0.25 cup beef tallow or duck fat, and the 0.5 cup cold cubed unsalted butter. Heat this mixture over high heat until the butter melts and the mixture begins to shimmer but isn’t smoking. This should take about 5 minutes. The high smoke point of the oil and fat combination ensures a proper sear without burning.
In a small bowl, mix the 1 cup red wine (if using) with the 1 cup beef bone broth and 1 tbsp balsamic vinegar. Keep this mixture nearby—it will be used to deglaze the pan after searing. The acidity in the balsamic vinegar helps break down any browned bits, creating a rich pan sauce.
Reverse-Sear for Perfect Crust and Juiciness
Remove the roast from the oven and let it rest for 10 minutes while you prepare the final sear. Increase your oven temperature to 450°F for the finishing step. Carefully transfer the roast to the prepared skillet, placing it fat-side down. Cook undisturbed for 5 minutes until a deep golden-brown crust forms. Flip the roast and sear the other side for another 5 minutes. The high heat will create a beautiful crust while the interior remains perfectly pink and juicy.
After searing, transfer the skillet to the preheated 450°F oven and roast for an additional 10 minutes. This final step ensures the crust sets properly and the internal temperature reaches 120°F at the thickest part. Remove the roast from the oven and let it rest for 20 minutes before carving. This resting period allows the juices to redistribute throughout the meat.
Create Pan Sauce and Serve
After removing the roast, place the skillet back on the stovetop over medium heat. Pour in the wine-broth-balsamic mixture and scrape up all the browned bits from the bottom of the pan using a wooden spoon. Let the sauce simmer for 3 to 5 minutes, stirring occasionally, until it thickens slightly. Strain the sauce through a fine-mesh sieve if you prefer a smooth texture.
Slice the roast against the grain into 1-inch thick portions and serve immediately with the pan sauce spooned over the top. The result should be a roast with a beautifully seared crust and a juicy, tender core that practically melts in your mouth. Each slice should be rich with flavor from the dry brine and complemented by the rich pan sauce.
Pro Tips For Making 9 Lb Ribeye Roast
- SEAR THE FAT CAP: That thick layer of fat on a bone-in ribeye isn’t just for looks—it renders into flavor gold. Hit it with a screaming-hot pan (or cast iron) until it’s deep golden brown before transferring to the oven. I used to rush this, and the crust would turn out pale and mealy. Take your time—this is where the magic starts.
- SALT THE NIGHT BEFORE: Ribeye soaks up salt like a sponge, but dry-seasoning it 12–24 hours ahead locks in moisture and lets the crust form better. Skip the fancy salt blends—just kosher salt, generously. I learned this the hard way after a roast turned out dry because I salted it right before cooking.
- DON’T PUNCH THE MEAT: Once you pull that roast from the oven, resist the urge to stab it with a knife to check doneness. The meat will keep cooking as it rests, and every puncture lets precious juices escape. Let it sit 15–20 minutes under foil—yes, even if you’re impatient like me—then slice against the grain.
- ROSEMARY NEEDS TIME: Fresh rosemary sprigs won’t release their aroma instantly—tuck them under the roast and on top, then roast them until they’re fragrant and slightly crisp. I was skeptical until I tried it: the flavor is deeper, and the sprigs add texture. No need to chop them; just trim the woody ends.
Essential equipment for this recipe
Precision Thermometer
Invest in a laser thermometer like the Thermoworks Smoke or Meater Plus—these tools are game-changers for monitoring internal temperatures with pinpoint accuracy. I use mine to track the roast’s progress at the thickest part, ensuring it hits 115°F before searing.
A standard oven thermometer won’t cut it here; you need instant-read precision to avoid overcooking. 🌡️
Cast-Iron Skillet
A 12-inch cast-iron skillet (like Lodge) is essential for the final sear—its heat retention and even distribution create the perfect crust. Preheat it thoroughly before adding the roast to ensure a deep golden-brown finish.
If you don’t have cast iron, a heavy stainless steel pan works, but it won’t hold heat as effectively. Season your skillet well beforehand to prevent sticking.
Wire Rack Setup
Use a wire rack placed over a rimmed baking sheet to elevate the roast during both the low-temperature cook and resting phases. This setup ensures even air circulation, preventing steam buildup that can turn your crust soggy.
I recommend a Viking brand rack for durability—it holds up to the weight of a 9-lb roast without bending. 💪
High-Quality Fat Blend
The beef tallow or duck fat in the searing mixture adds richness and helps create a crisp, flavorful crust. I avoid butter alone because it burns too easily—this blend gives you a high smoke point while keeping the sauce velvety.
For a budget-friendly swap, avocado oil works, but tallow adds that unmistakable beefy depth. Store your fats in the freezer to preserve freshness.
Oven Thermometer
Even if your oven claims to be calibrated, an oven thermometer (like the Thermopro TP19) is a must. Ovens run hot or cold, and this ensures your 275°F low-and-slow phase stays accurate.
Place it near the roast during cooking—temperature fluctuations can turn a perfect roast into a dry one. I keep mine in the oven at all times for peace of mind. ⚡
Carving Tools
A sharp carving knife (like the Dexter-Russell 12-inch) and a meat fork are non-negotiable for slicing. The knife should glide through the roast effortlessly, and the fork stabilizes it.
I also keep a small offset spatula handy for lifting slices onto plates. Dull tools tear meat fibers, leading to dry, stringy results—always hone your blade before carving. 🔪
Nutrition facts
Frequently asked questions
Why does this recipe use a dry brine instead of a wet brine?
The dry brine method creates a better crust and more concentrated flavor because the salt draws moisture to the surface, which evaporates during cooking. This leaves behind a flavorful crust while keeping the interior juicy. Plus, it’s mess-free and works perfectly with the reverse-sear technique!
Can I cook this roast in a smoker instead of the oven?
For a smoked version, use 225°F with indirect heat until the internal temp reaches 115°F (about 6-8 hours). Finish with the same high-heat sear in a skillet to develop the crust. Just avoid adding wood chips during the sear to prevent smoke interference.
What if my oven doesn’t go below 250°F for the low-temperature phase?
No problem! Use your oven’s lowest setting (even if it’s 250°F) and adjust the cooking time accordingly—it may take 5-6 hours instead of 4.5. For even more control, consider using a slow cooker on “low” with a meat thermometer to monitor progress.
How do I adjust this recipe for a smaller roast (like 5 lbs)?
Reduce all cooking times by about 30-40%—a 5-lb roast should cook for roughly 2.5-3 hours at 275°F before searing. Keep the same seasoning ratios and sear time, but use a smaller skillet if needed. The key is maintaining the same internal temperature before the final sear.
What’s the best way to reheat leftovers without drying them out?
Slice leftovers into 1-inch portions and reheat in a 350°F oven for 10-15 minutes with a splash of beef broth to keep them moist. Never microwave—it turns meat rubbery. For extra flavor, add a pat of butter during reheating. Store in an airtight container for up to 5 days**.

- 2 Lb Oatmeal Bread Machine Recipe: Hands-Off Crusty Loaf With Nutty Depth - September 30, 2026
- 8-Inch Pecan Pie Recipe: Buttery Crust and Caramelized Nut Bliss - September 30, 2026
- 1 Loaf Homemade Bread Recipe: Crusty Crunch and Airy Crumb in One Bowl - September 30, 2026