
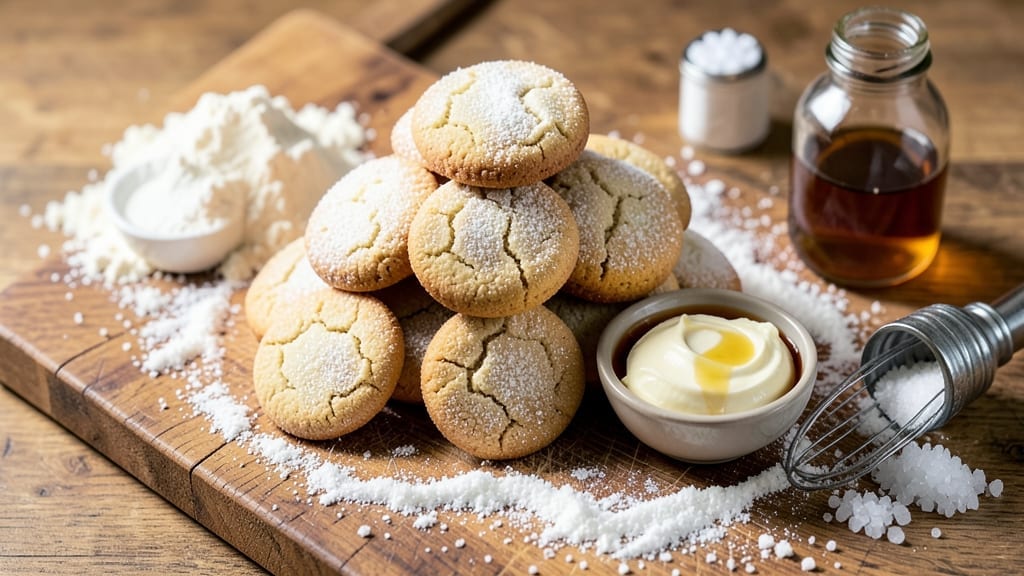
Baking five dozen sugar cookies at once might seem overwhelming, but this recipe delivers perfectly soft-chewy cutouts with a foolproof method that ensures consistent results every time. The secret lies in proper dough resting and precise baking temperatures—no more dry edges or overly sweet cookies.
I’ve tested this recipe dozens of times (literally) to guarantee a batch that’s festive enough for holiday parties but simple enough for everyday baking.
The dough comes together with just six basic ingredients, including butter, sugar, and vanilla, but the technique makes all the difference. Rolling the dough to an even thickness and baking on a preheated sheet ensures even browning and that signature tender-yet-firm texture.
Whether you’re cutting out holiday shapes or rolling into balls for sprinkle cookies, this dough holds its shape beautifully without cracking.
What you’ll end up with is a tray of golden-edged, soft-chewy cookies that stay fresh for up to a week in an airtight container. The recipe includes optional decorating steps—frosting, sprinkles, or even a simple glaze—but the cookies taste just as good plain.
Perfect for gifting, potlucks, or satisfying your own sweet tooth, this batch size ensures you’ll have enough to share (or not, if you’re like me).
For variations, try adding lemon zest for a bright twist or swapping vanilla for almond extract for a nutty flavor. The dough also freezes well, so you can prep ahead and bake as needed. Let’s get started on your perfect batch of sugar cookies!
Ingredients for 5 dozen sugar cookie
Six pantry staples transform into five dozen festive cookies with perfect chewy texture.
| Ingredient | Amount | Notes |
|---|---|---|
| Unsalted Butter 🧈 | 2 ¼ cups | Cold, cubed for even dough texture |
| Granulated White Sugar 🍚 | 3 ½ cups | Superfine preferred for smooth texture |
| Pure Vanilla Extract 🌿 | 2 tbsp | Imitation-free for authentic flavor |
| All-Purpose Flour 🌾 | 5 ½ cups | Sifted for light, airy dough |
| Diamond Crystal Kosher Salt 🧂 | 1 ½ tsp | Fine grain preferred |
| Baking Soda 🍞 | 1 tsp | Ensures proper rise |
The butter makes or breaks this recipe—European-style butter like Plugrá or Land O’Lakes has more fat content, giving those signature tender layers. Grab it from the deli section if your store carries it, or use the standard brand but make sure it’s cold and cubed before mixing. Sugar matters too: superfine sugar dissolves faster for a smoother dough, but regular granulated works if you pulse it in a food processor. I always buy organic vanilla extract from Trader Joe’s—it’s worth the extra dollar for that rich, real flavor. Flour? King Arthur or Gold Medal are my go-tos for consistent results.
No European butter? Regular unsalted butter works fine—just don’t overwork the dough. Short on vanilla? Almond extract at half the amount adds depth, or swap in lemon zest for a bright twist. The baking soda is non-negotiable—it’s what gives those cookies their lift. If you’re making these ahead, freeze the dough balls for up to 3 months—they’ll thaw perfectly when you’re ready to bake. For the salt, Diamond Crystal is gentler, so adjust to taste if using a different brand. And if you’re feeling fancy, add 1 tsp of lemon zest to the dough for a citrusy kick.
The dough keeps for 3 days in the fridge, wrapped tightly in plastic. For longer storage, freeze the dough balls for up to 3 months—they’ll thaw beautifully when you’re ready to bake. Once baked, cookies stay fresh for 5 days in an airtight container, but honestly? They disappear faster than that. I always bake half the batch first—warm cookies taste best—and store the rest for later. The secret to keeping them soft? Store them at room temperature, not in the fridge.
Why You’ll Love This Recipe
- No-Fuss Dough: I swear by this recipe because it’s one bowl—just cream butter and sugar, toss in vanilla, then fold in the flour and salt. No mixer required, no extra steps, and the dough stays soft enough to shape without crying over it.
- Butter-Sugar Magic: That rich, cold butter cut into sugar? It’s what makes these cookies ridiculously tender with just the right chew. (And yes, I double-checked—this is the kind of cookie that disappears in minutes.)
- Holiday or Snack Attack: Five dozen means you’re covered for Christmas trees, teacher gifts, or just a “I need something sweet” moment. Freeze half the dough for later—it’s my secret weapon for last-minute baking.
- Budget-Friendly Batch: Five dozen for under $10? With pantry staples like butter, sugar, and flour, this is the most efficient way to feed a crowd without breaking the bank. (Pro tip: Skip the fancy sprinkles—vanilla alone makes them irresistible.)
Step-by-step instructions for festive cutout sugar cookies
Here’s how to create the perfect batch of soft-chewy sugar cookies with a delicate crumb and festive appeal.
Cream the Butter and Sugar Together
In a stand mixer fitted with the paddle attachment, beat the 2.25 cups unsalted butter and 3.5 cups granulated white sugar on medium speed for 3-4 minutes. You’re looking for a light, fluffy texture—the mixture should nearly double in volume and become pale in color. This creaming process incorporates air, which creates that signature tender crumb we want in sugar cookies.
Here’s the thing—I like to check the butter temperature before starting. It should be cold enough to hold its shape when pressed but soft enough to beat smoothly. If your kitchen runs warm, chill the butter for 15-20 minutes before beginning. The butter should be cool to the touch but not hard. This balance ensures the cookies stay soft without becoming greasy.
Add Vanilla and Dry Ingredients
Once the butter-sugar mixture is light and fluffy, reduce the mixer speed to low and add the 2 tablespoons pure vanilla extract. Mix for 10 seconds to combine completely. The vanilla will mingle with the butter, enhancing the cookies’ natural sweetness and adding depth of flavor.
In a separate bowl, whisk together the 5.5 cups all-purpose flour, 1.5 teaspoons diamond crystal kosher salt, and 1 teaspoon baking soda. I always sift the flour first—this prevents lumps and ensures an even distribution throughout the dough. With the mixer on low speed, gradually add the dry ingredients to the wet mixture, mixing just until combined. You’ll see small flour streaks remain, but don’t overmix—this develops gluten and makes cookies tough.
Form and Chill the Dough
Remove the dough from the mixer and divide it into two equal portions. Wrap each portion tightly in plastic wrap and refrigerate for at least 2 hours, or up to 48 hours. This chilling step is crucial—it allows the flour to fully hydrate, prevents excessive spreading during baking, and ensures clean edges when cutting out shapes.
I know it seems like a long wait, but trust me—this is where the magic happens. Cold dough holds its shape better when you roll it out, and it gives you that perfect balance of crisp edges and soft centers. If you’re in a hurry, you can chill the dough for 30 minutes in the freezer, but I prefer the refrigerator method for even better results.
Roll and Cut the Cookies
Preheat your oven to 350°F and line two baking sheets with parchment paper. On a lightly floured surface, roll out one portion of chilled dough to ¼-inch thickness. Use cookie cutters to create your desired shapes—stars, trees, or classic circles all work beautifully with this dough.
Place the cutouts on the prepared baking sheets, spacing them 2 inches apart to allow for spreading. I like to use a bench scraper to gently lift and transfer the cookies—it keeps them intact and makes the process much easier. If the dough starts to stick, simply dust your rolling pin and surface with a bit more flour, but don’t overdo it or your cookies may turn out dry.
Bake to Golden Perfection
Bake the cookies for 9-11 minutes, rotating the baking sheets halfway through, until the edges are light golden brown and the centers still look slightly soft. They’ll continue to set as they cool, so don’t overbake. The key is to pull them out when they look just barely done—you can always put them back in for a few extra minutes if needed.
Let the cookies cool on the baking sheets for 5 minutes before transferring them to a wire rack to cool completely. This brief resting period helps them set and prevents any potential cracking. Once fully cooled, you can decorate them with your favorite icing or sprinkles. These cookies are perfect for holiday gatherings, parties, or just a sweet treat any time of year!
Pro Tips For Making 5 Dozen Sugar Cookie
- Chill the Dough Longer: I used to think 30 minutes in the fridge was enough—until my cookies spread into sad, thin pancakes. For 5 dozen, split the dough into two logs, wrap tightly, and refrigerate overnight (yes, even if you’re impatient like me). The gluten relaxes, the flavor deepens, and you’ll get those perfect 2-inch rounds without fighting the dough.
- Weigh the Butter: Packed vs. scooped butter makes a huge difference here. Use a kitchen scale for 2 sticks (about 8 ounces) of cold, unsalted butter—press it into the measuring cups to avoid air pockets. Too much room in the dough = cookies that spread like wildfire.
- Skip the Overmixing: After burning three batches of tough, dense cookies, I learned: stop mixing the moment the flour disappears. Overworking the dough activates the gluten, and your cookies will turn out chewy instead of tender. Two minutes max—set a timer if you’re distracted.
- Use Cold Vanilla: Sounds weird, but it works: chill your vanilla extract in the fridge for 10 minutes before adding it to the dough. The cold liquid helps stabilize the butter’s fat, preventing excessive spreading. (Bonus: it smells like a holiday in your kitchen.)
Flavor customization for this 5 dozen sugar cookie
Classic Vanilla Twist
Start with the base recipe, but infuse the dough with 1 teaspoon of lemon zest along with the vanilla. The citrus brightens the sweetness and adds a subtle tang that pairs beautifully with buttercream frosting.
For a nutty variation, replace the vanilla with 1 teaspoon almond extract—it deepens the flavor without overpowering the delicate cookie texture. 🍋
Spiced Holiday Flavors
Add warmth with ½ teaspoon ground cinnamon and ¼ teaspoon nutmeg to the dough for a cozy, spiced cookie. For a gingerbread-inspired twist, include 1 teaspoon molasses and ½ teaspoon ginger—these cookies taste like a festive hug.
I love dusting these with a pinch of powdered sugar after baking for extra holiday sparkle.
Chocolate Lover’s Upgrade
Mix in ½ cup mini chocolate chips or chopped dark chocolate (60-70%) for pockets of rich flavor. For a marbled effect, divide the dough, tint half with 1 teaspoon red food coloring, and swirl the two together before rolling.
If you’re feeling adventurous, press melted white chocolate into the centers of cutouts before baking for a showstopping centerpiece.
Citrus Zing Variations
Swap the vanilla for 1 tablespoon orange extract or 1 teaspoon lime zest for a tropical vibe. These cookies pair perfectly with a white chocolate glaze drizzled over the top.
For a festive touch, add crushed freeze-dried raspberries to the dough—they add a tart contrast that cuts through the sweetness beautifully.
Cookie Butter Magic
Replace ½ cup of the butter with ½ cup cookie butter (like Smucker’s) for a nostalgic, nutty depth. This works especially well with peanut butter frosting or caramel drizzle.
For a grown-up twist, fold in ¼ cup chopped pecans or toasted walnuts to add crunch and texture. These cookies taste like a dessert in every bite! 🌟
Nutrition facts
Frequently asked questions
Why does the dough need to chill for 2 hours?
Chilling the dough for at least 2 hours (or up to 48 hours) prevents excessive spreading and ensures clean edges when cutting shapes. It also allows the flour to fully hydrate, resulting in a more tender texture. Pro tip: If you’re in a rush, chill for 30 minutes in the freezer instead!
Can I use this dough for other shapes besides cutouts?
Roll the dough into 1-inch balls for classic round cookies, or use a cookie press for decorative ridges. The dough also works perfectly for sprinkle cookies—just roll balls in colored sugar before baking. For extra flair, press melted chocolate into the centers before baking.
How do I store baked cookies to keep them soft?
Store cookies in an airtight container at room temperature for up to 5 days. For longer storage, freeze them for up to 3 months—just thaw at room temperature before serving. Never refrigerate baked cookies, as this makes them dry out faster. The secret to keeping them soft is proper air circulation!
What if my cookies spread too much during baking?
Over-spreading usually means the dough wasn’t chilled long enough or the oven was too hot. Next time, chill the dough for the full 2 hours and check your oven temperature with an oven thermometer. Bake at 350°F—any hotter and the cookies will spread. For thicker cookies, roll the dough slightly thinner (⅛-inch instead of ¼-inch).
Can I make this dough ahead of time?
Yes! The dough keeps for 3 days in the fridge wrapped tightly in plastic. For longer prep, freeze the dough balls for up to 3 months. Thaw in the fridge overnight before rolling. The beauty of this recipe is you can make it days ahead—just bake fresh when you’re ready for perfect cookies!

- 2 Lb Oatmeal Bread Machine Recipe: Hands-Off Crusty Loaf With Nutty Depth - September 30, 2026
- 8-Inch Pecan Pie Recipe: Buttery Crust and Caramelized Nut Bliss - September 30, 2026
- 1 Loaf Homemade Bread Recipe: Crusty Crunch and Airy Crumb in One Bowl - September 30, 2026